Device Pre-Provisioning via the Netmore Platform
Overview
Device pre-provisioning via the Netmore platform aims to establish a standardized access process for projects using Netmore LoRaWAN network services. The core purpose is to complete the legal registration of devices in the network, achieve parsing and decoding of device raw data, and ultimately reliably connect the formatted data to the Neuron data platform through the MQTT protocol.
This method is mainly suitable for scenarios relying on the Netmore network, where device data formats are non-standard and require specialized decoding, and there is a desire to coordinate devices with upper-layer applications through a standardized process.
Access Method & Prerequisites
How to access
Use the account credentials provided by the Neuron technical support team to log in to the Netmore device management platform for operations.
Before You Start
Prepare the unique identifiers (e.g., DevEUI) of the devices to be accessed and gateway information in advance. Confirm that the devices are physically installed, powered on, and in a connectable state.
- Flowchart

Netmore Platform Operations
Step 1. Register Device in Netmore Device Management Platform
1.1. Log in to Netmore Device Management Platform
- Access Link: https://portal.blink.services/home
- Authenticate using credentials provided by Neuron Technical Support
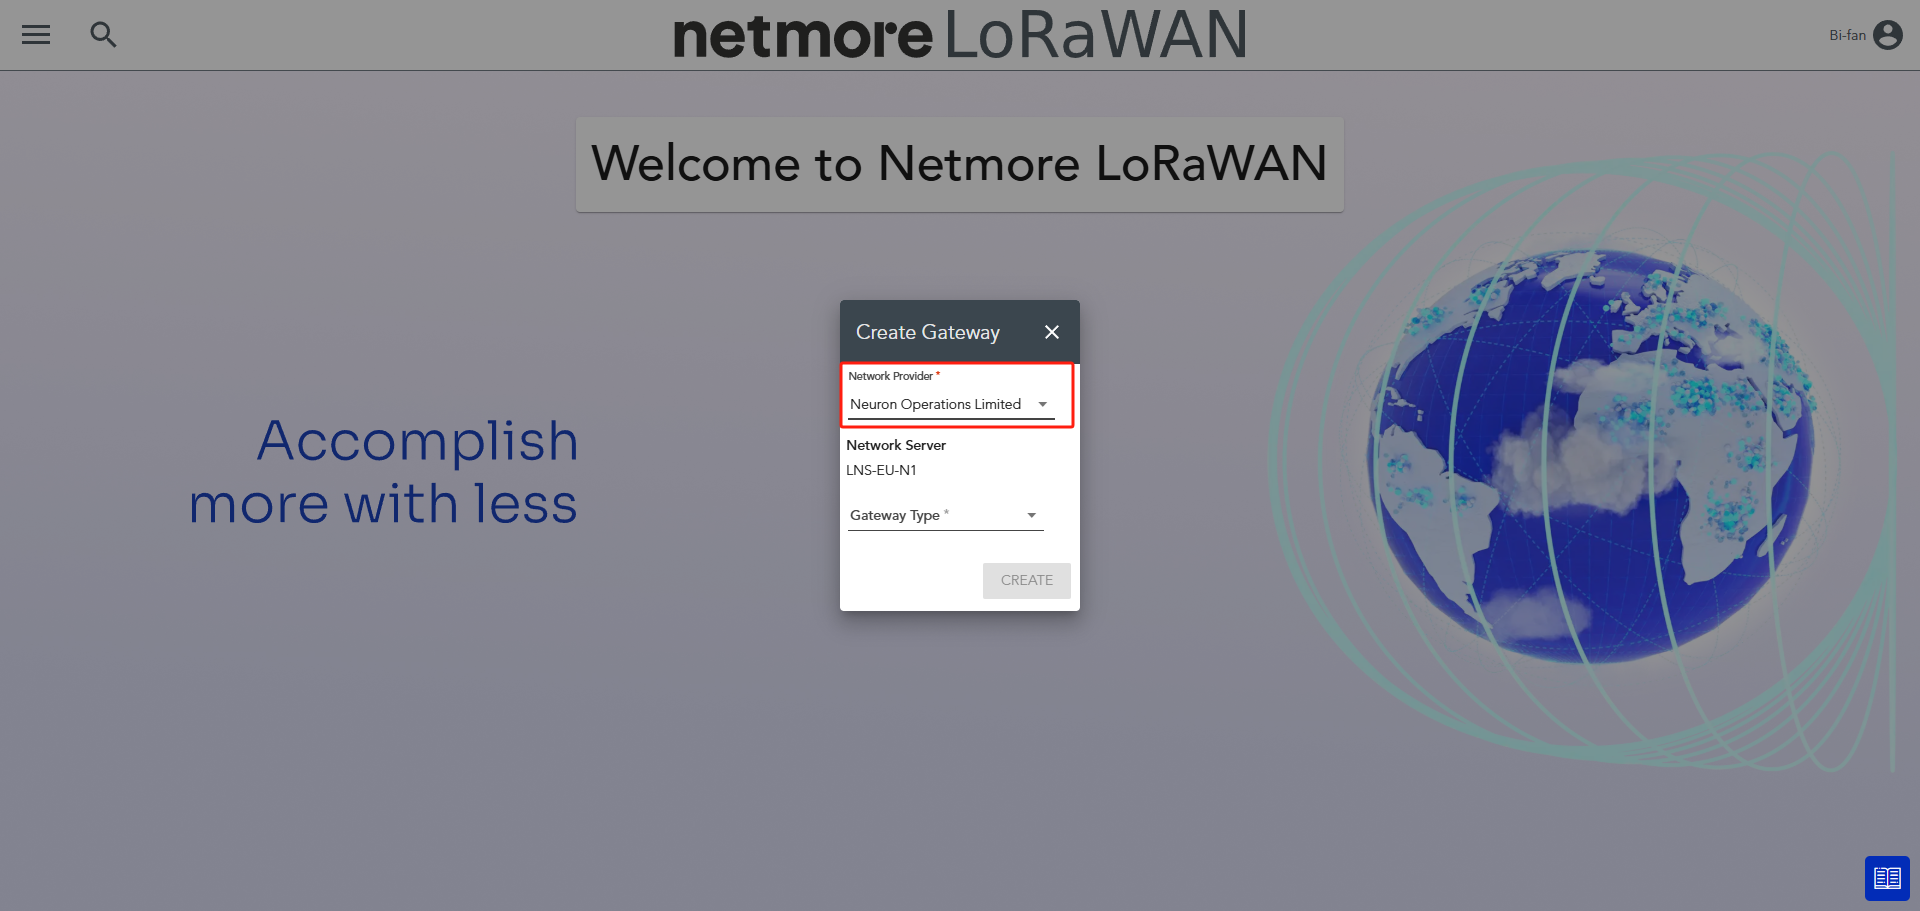
1.2. Create Gateway
- Navigate via the left main menu
- Add a new Gateway in the platform, select "Create Gateway" from the menu bar
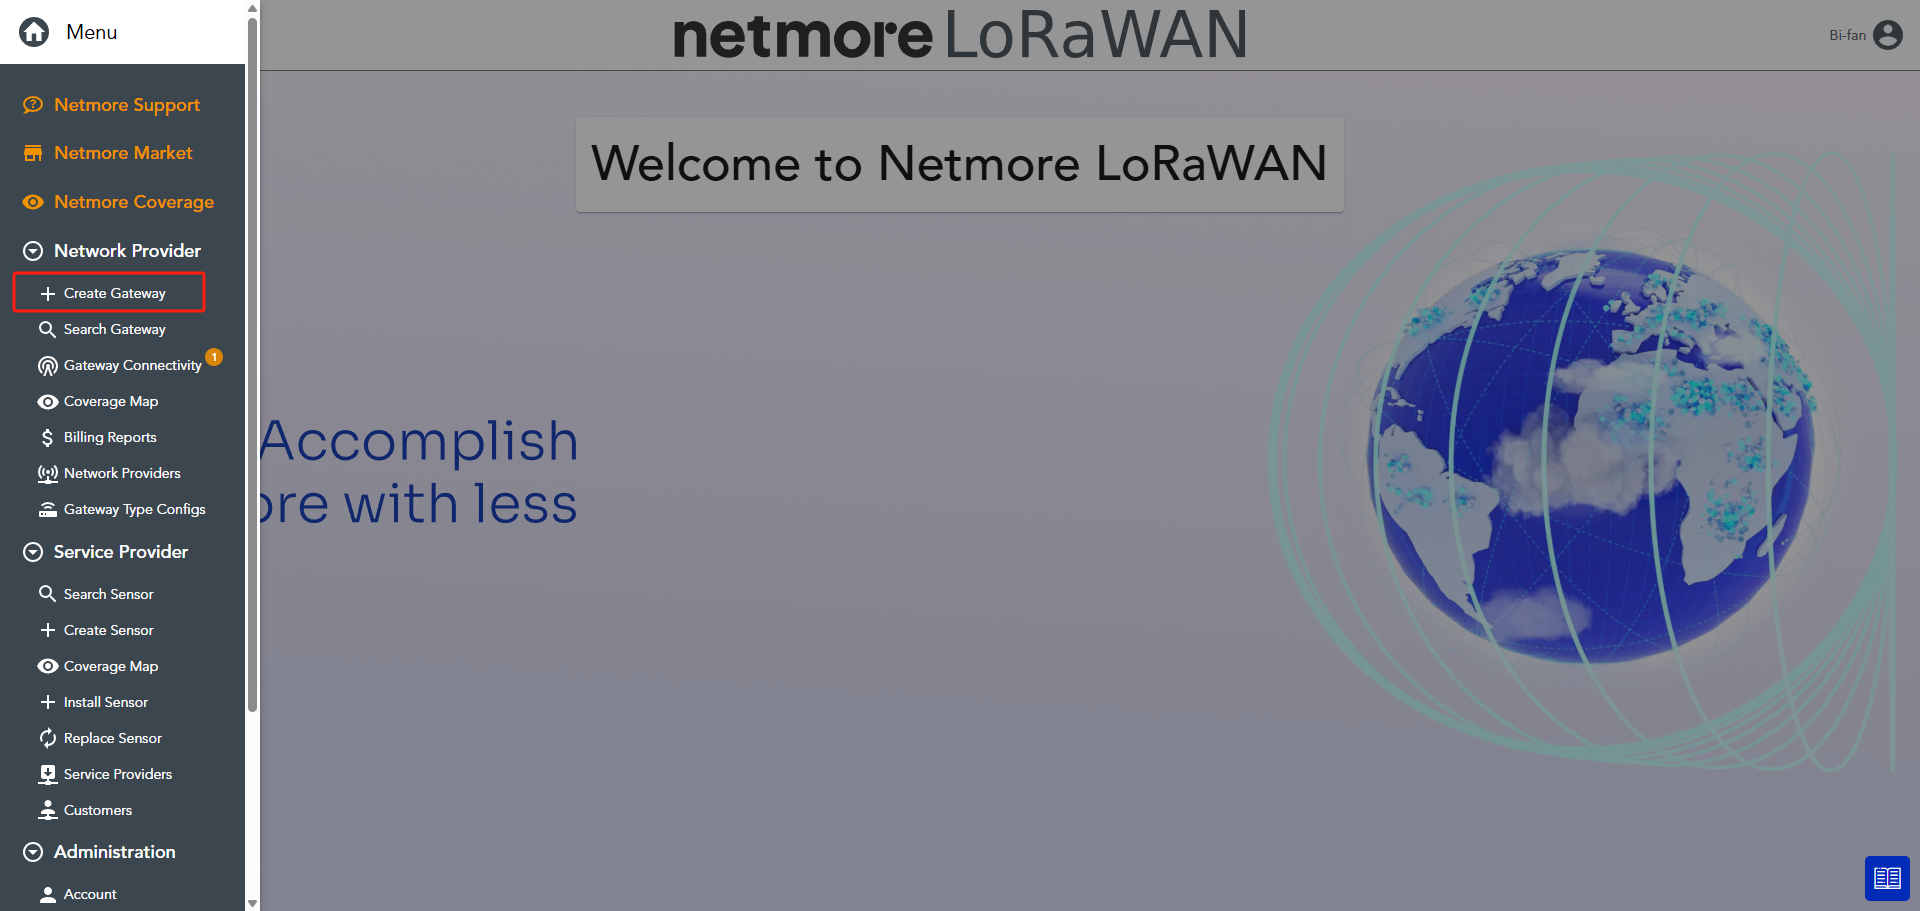
- In the pop-up window:
- Network Provider : Select the project name from the dropdown menu
- Gateway Model: Select the correct device model
- Click "Create" to complete this step
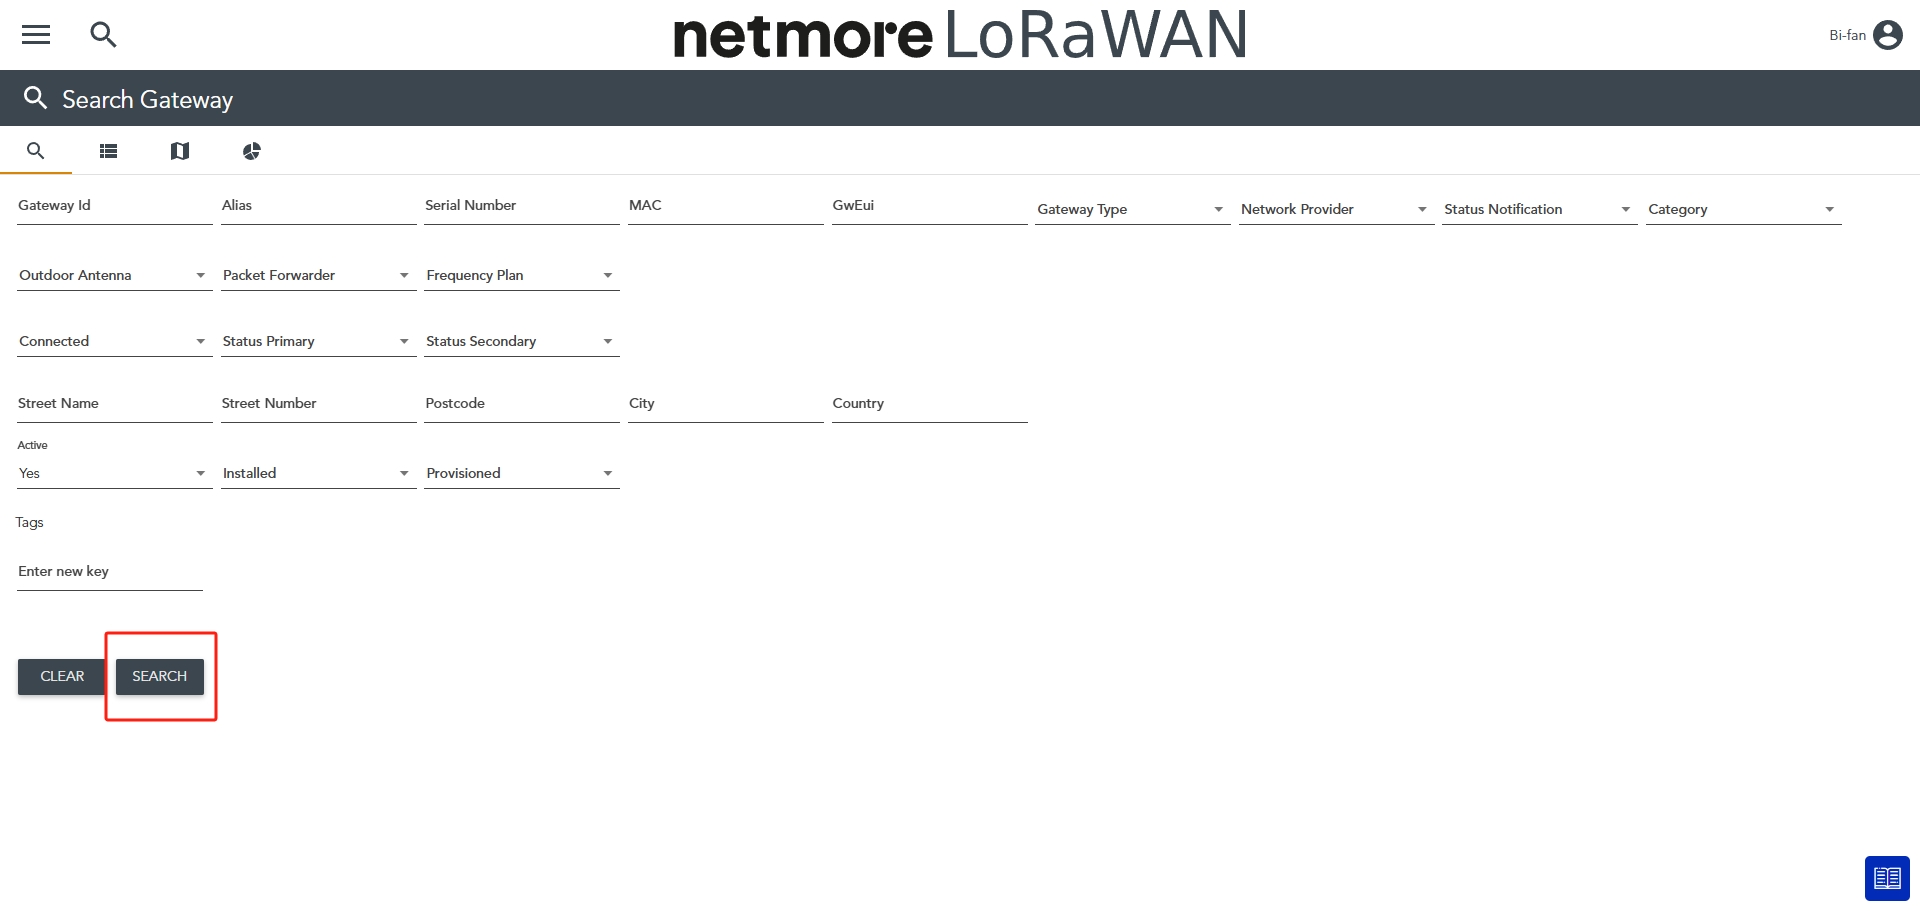
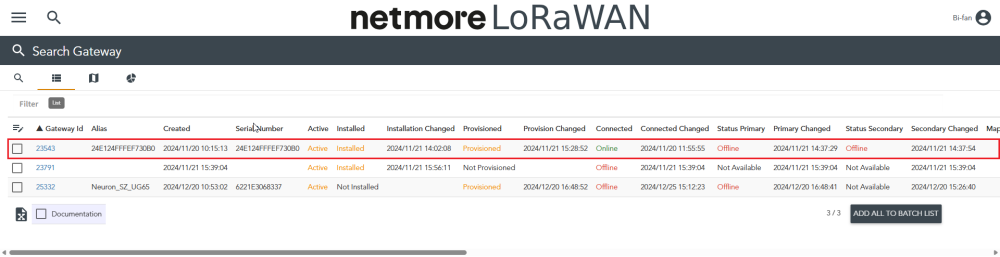
Tip: View Gateway List
- Click "Search Gateway"
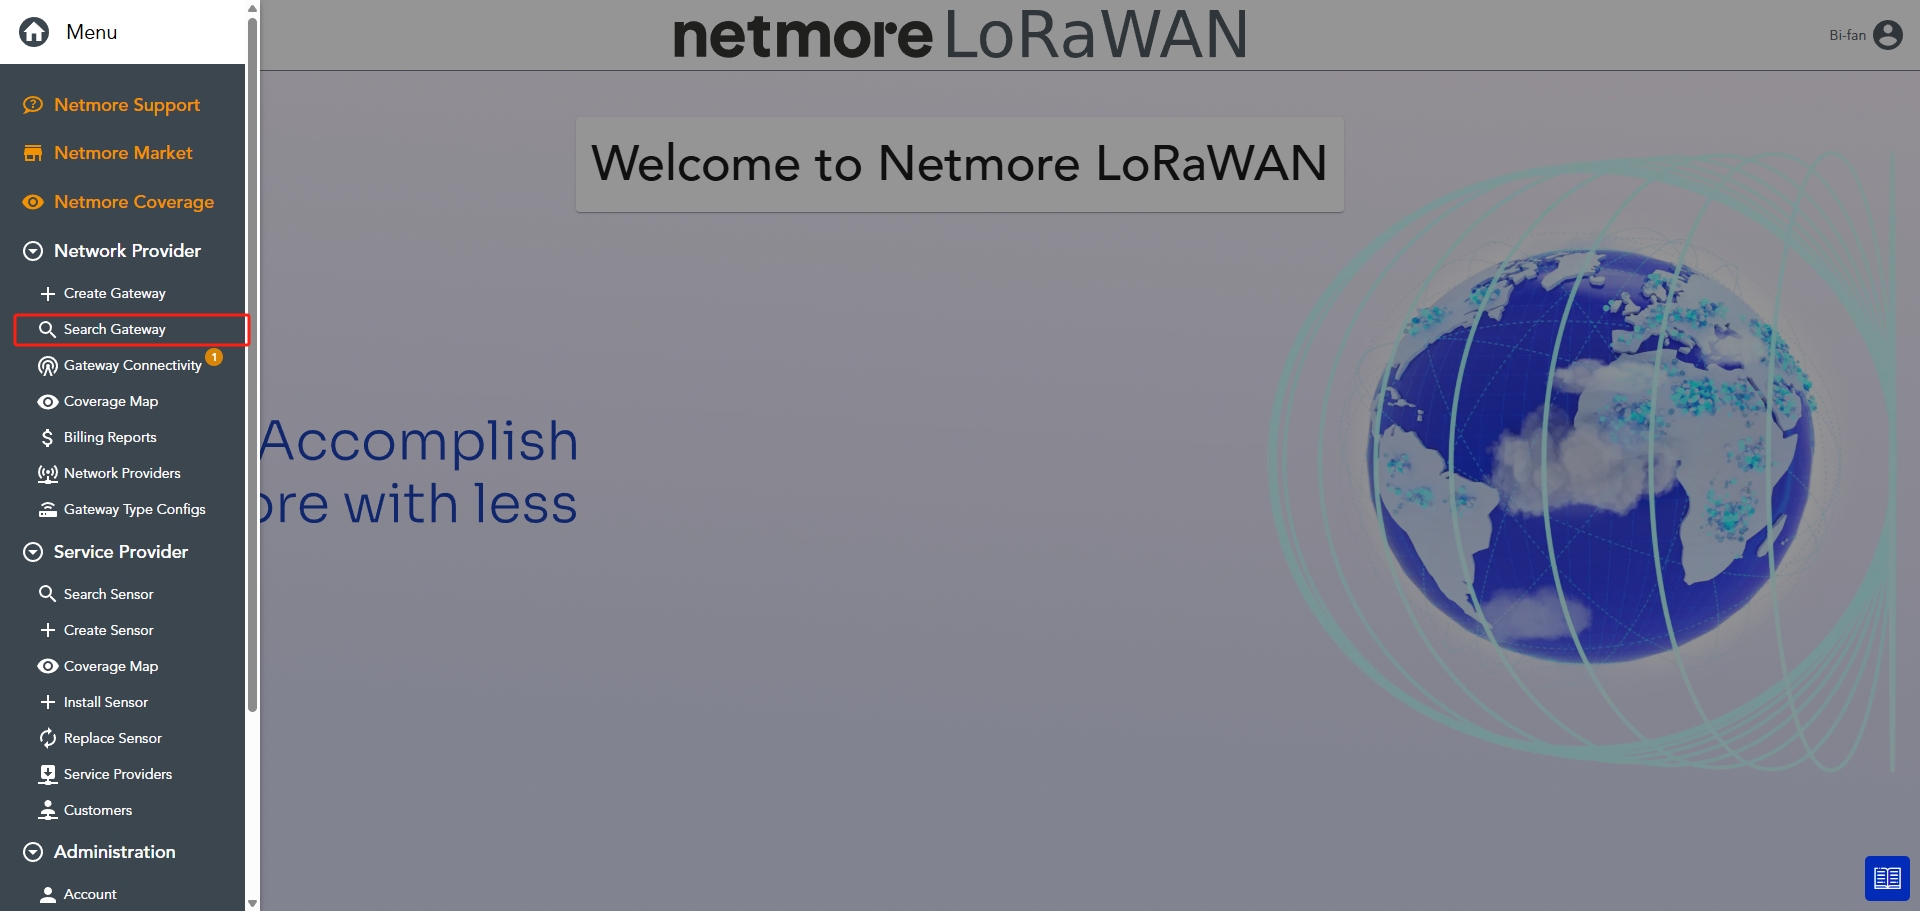
- Keep filter conditions empty and click "Search" to display all gateways
1.3. Create Sensor
- Select "Create Sensor" from the left menu

- Fill in the sensor details, refer to Netmore Official Documentation
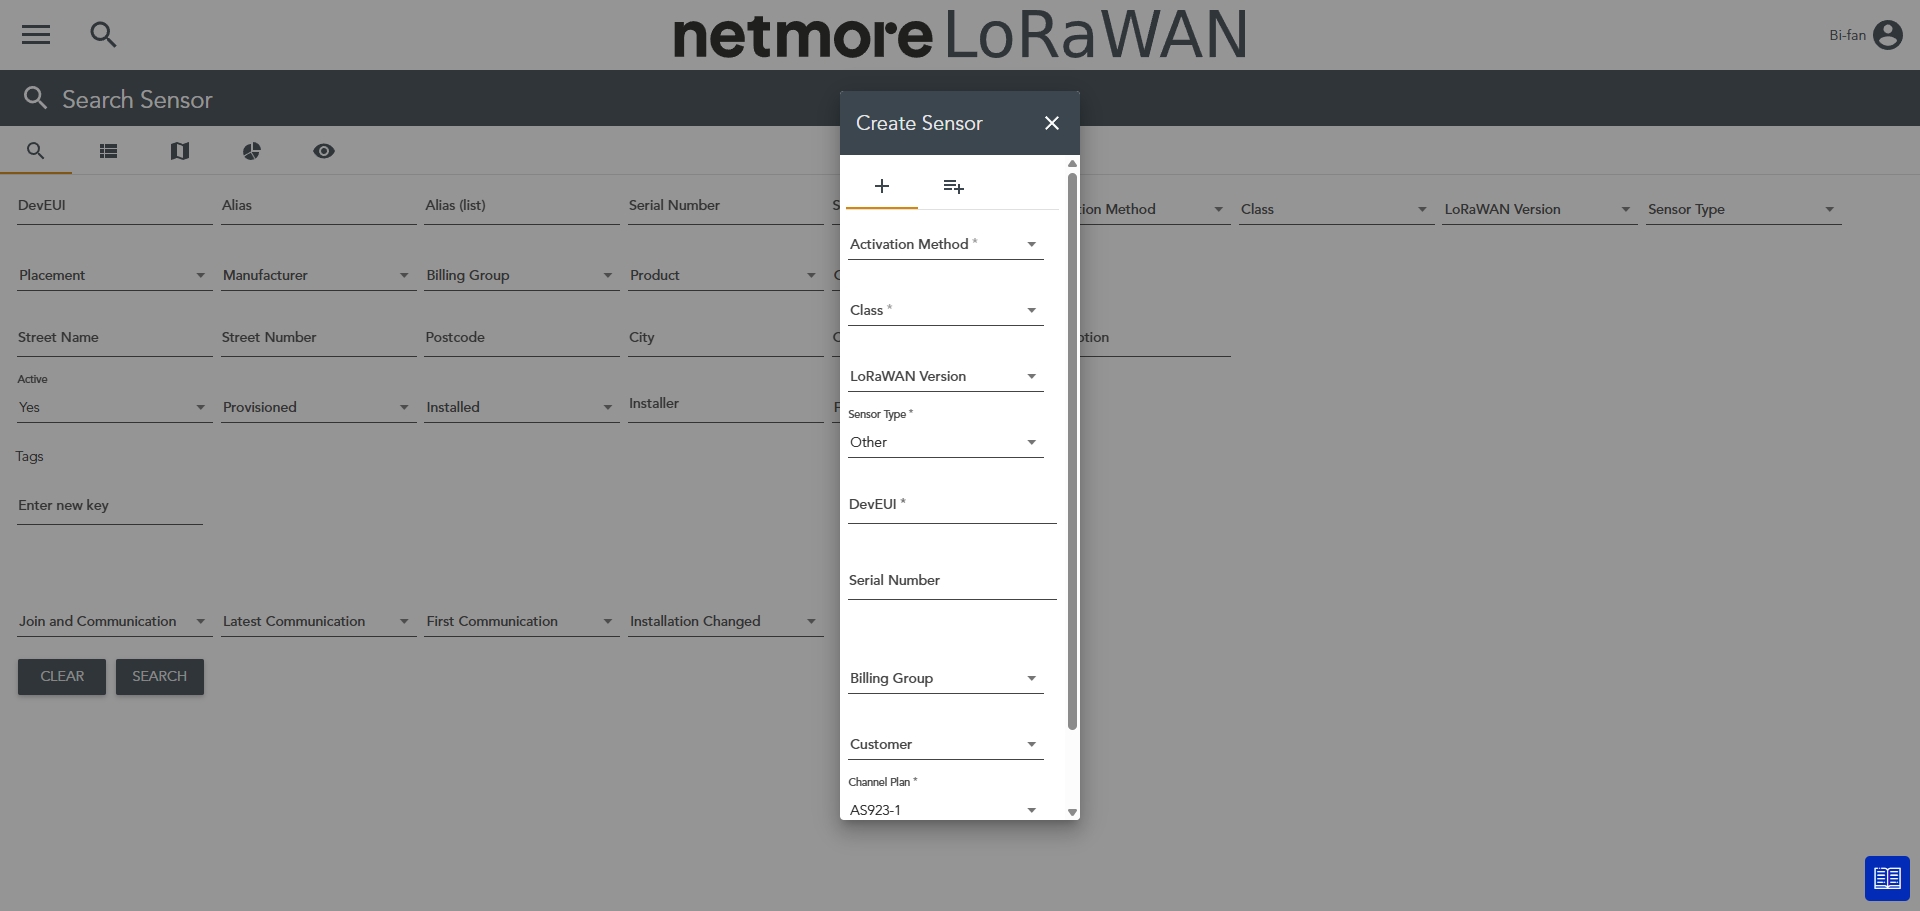
- Submit to complete sensor registration
Tip: View Created Sensors
- Use the "Search Sensor" function (operation similar to gateway search)
Step 2. Device Decoding
2.1. Apply for Device Decoding
- Contact Neuron Technical Support and provide the Device Identifier
2.2. Confirm Successful Decoding
- Neuron Technical Support will notify you upon successful device decoding
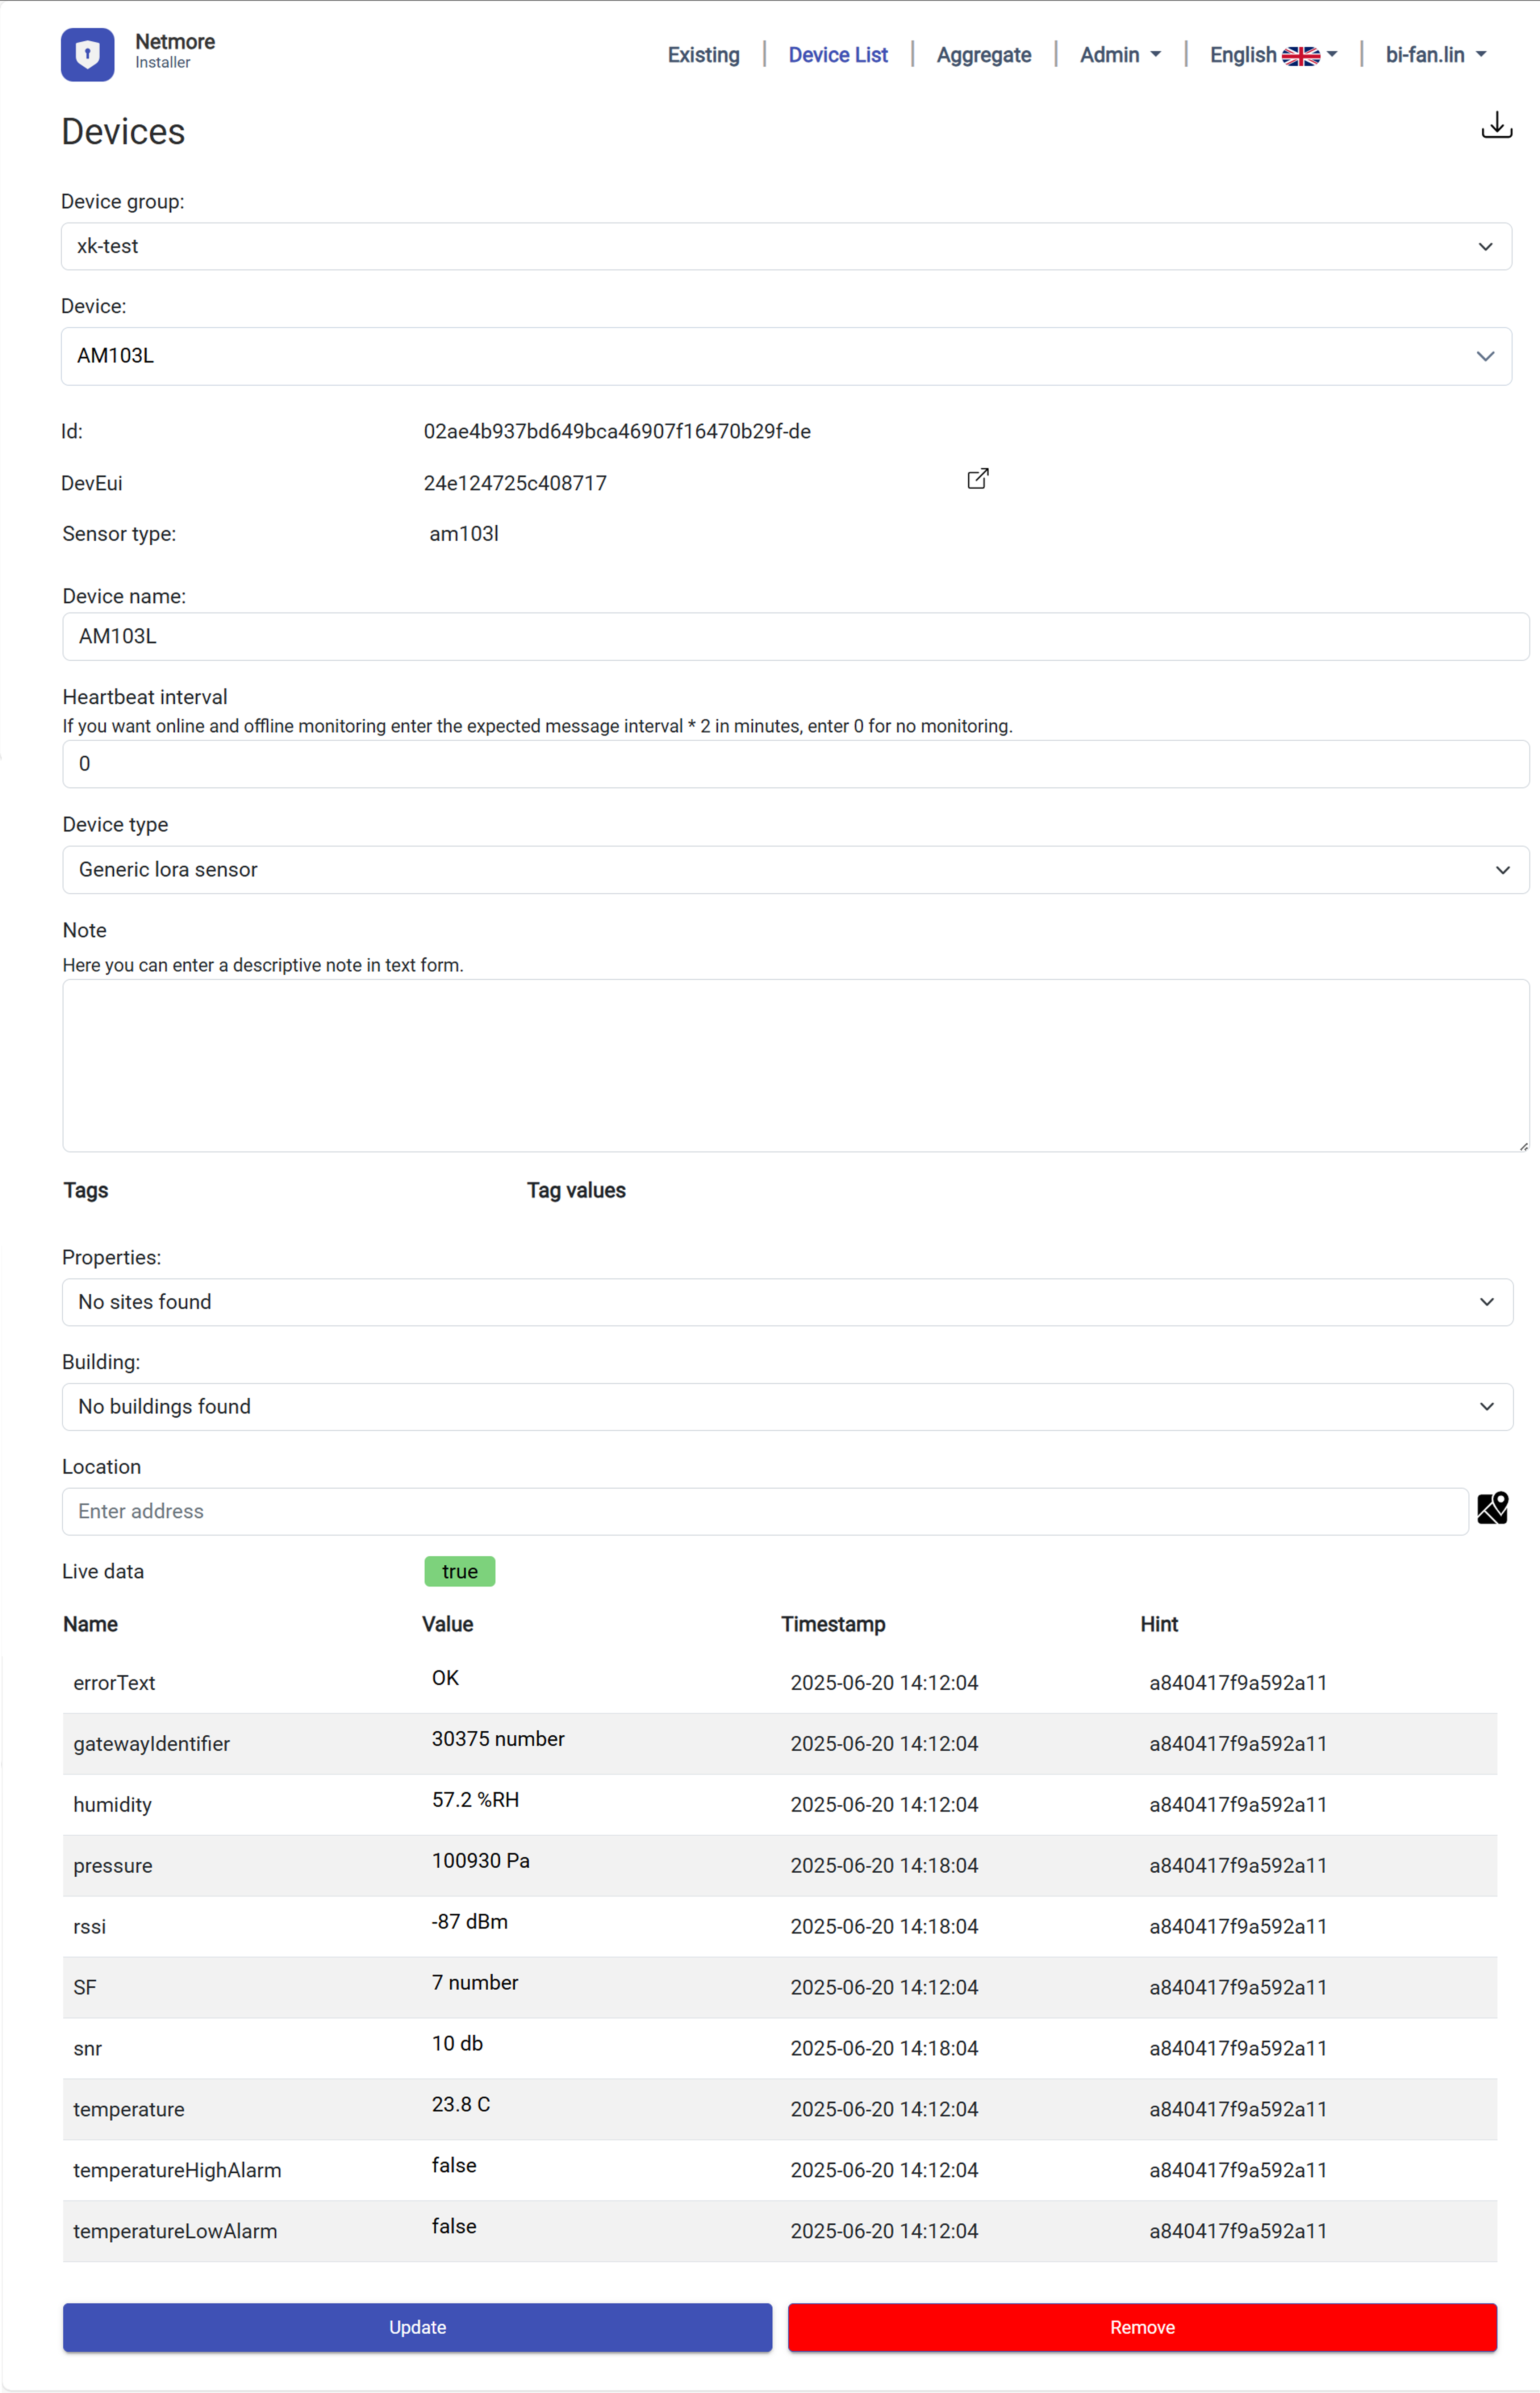
- Visit the Netmore Decoding Platform to confirm device status
- Access the Device List via the top navigation bar
- Select the correct device group and device from the dropdown menus
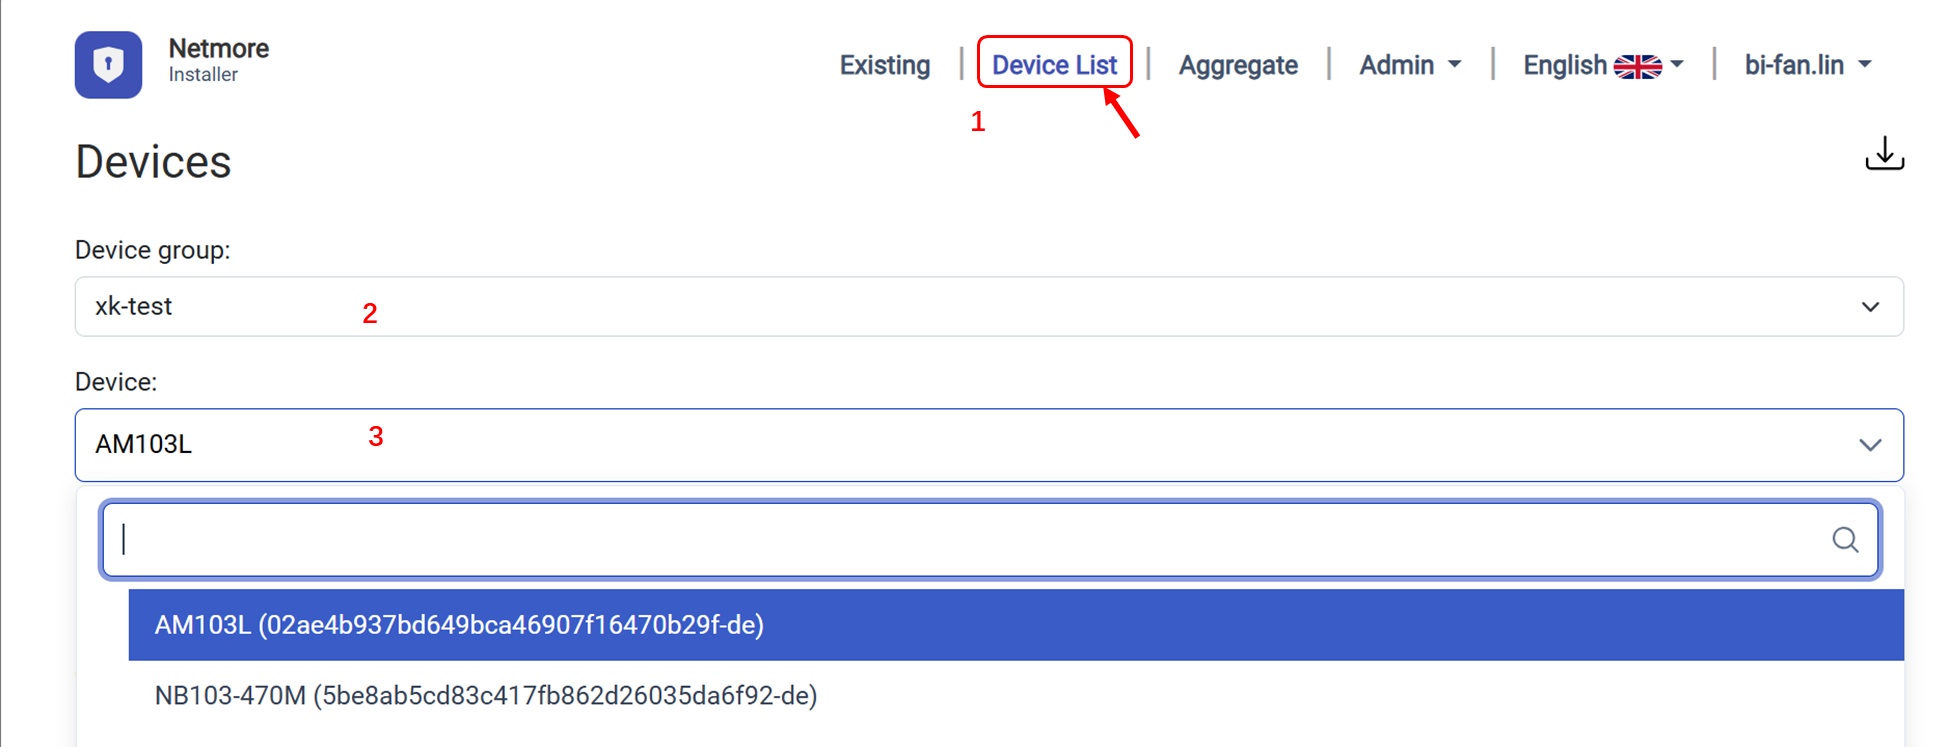
- If data is flowing continuously, it indicates decoding is complete
Step 3. Obtain MQTT Connection Certificate
3.1. Export Certificate from Netmore Decoding Platform
- Go to Administrator → Customers → [Your Project Name]
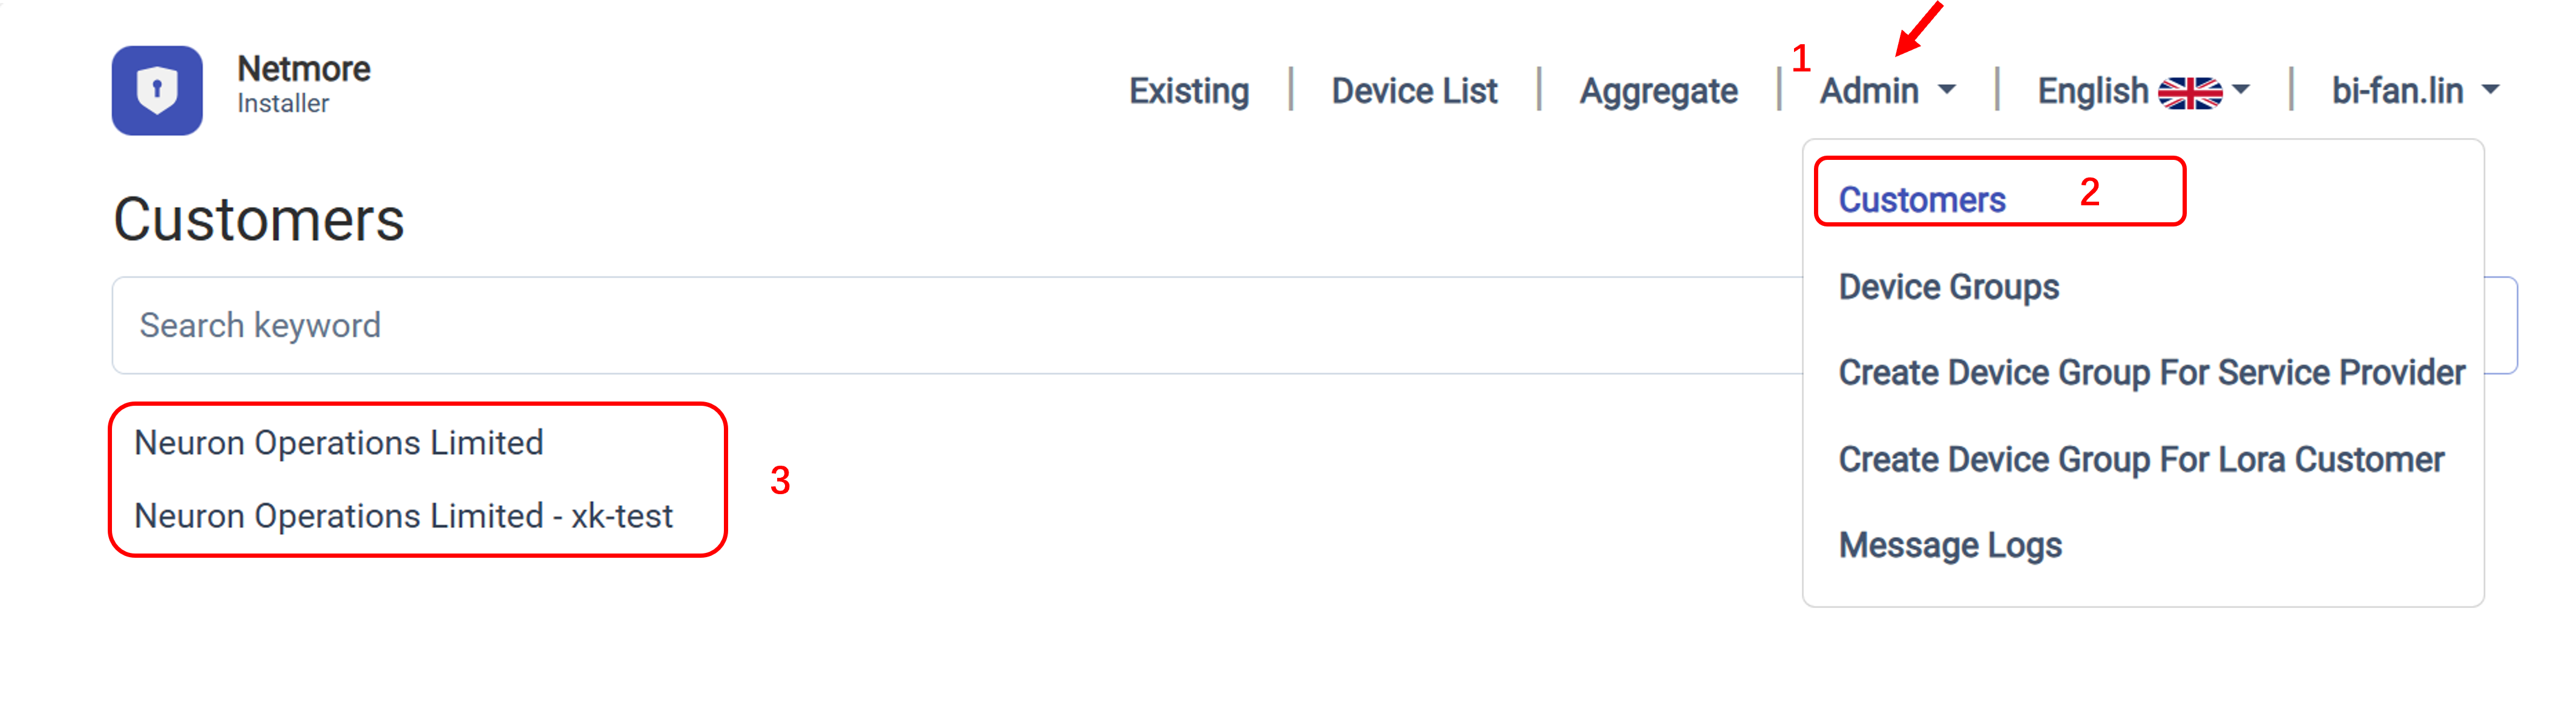
- Check the correctly configured format (usually select MQTT Decoded V2 (Always)) → Click Export Certificate in the upper right corner

Device Access to Neuron Data Platform
Refer to LoRaWAN Device Access to register devices on the Neuron platform.
When selecting a LoRaWAN NS, you can choose an existing NS or create your own. Note that regardless of which option, the LoRaWAN NS type must be selected as Netmore.
LoRaWAN NS (Network Server): The core component of a LoRaWAN network, responsible for managing LoRaWAN devices and forwarding device data. Mainstream platforms include ChirpStack (open source), Netmore (commercial), etc.
Create Your Own LoRaWAN NS
After first-time device pre-configuration using the Netmore platform, you need to add a LoRaWAN NS when accessing the Neuron Data Middle Platform.
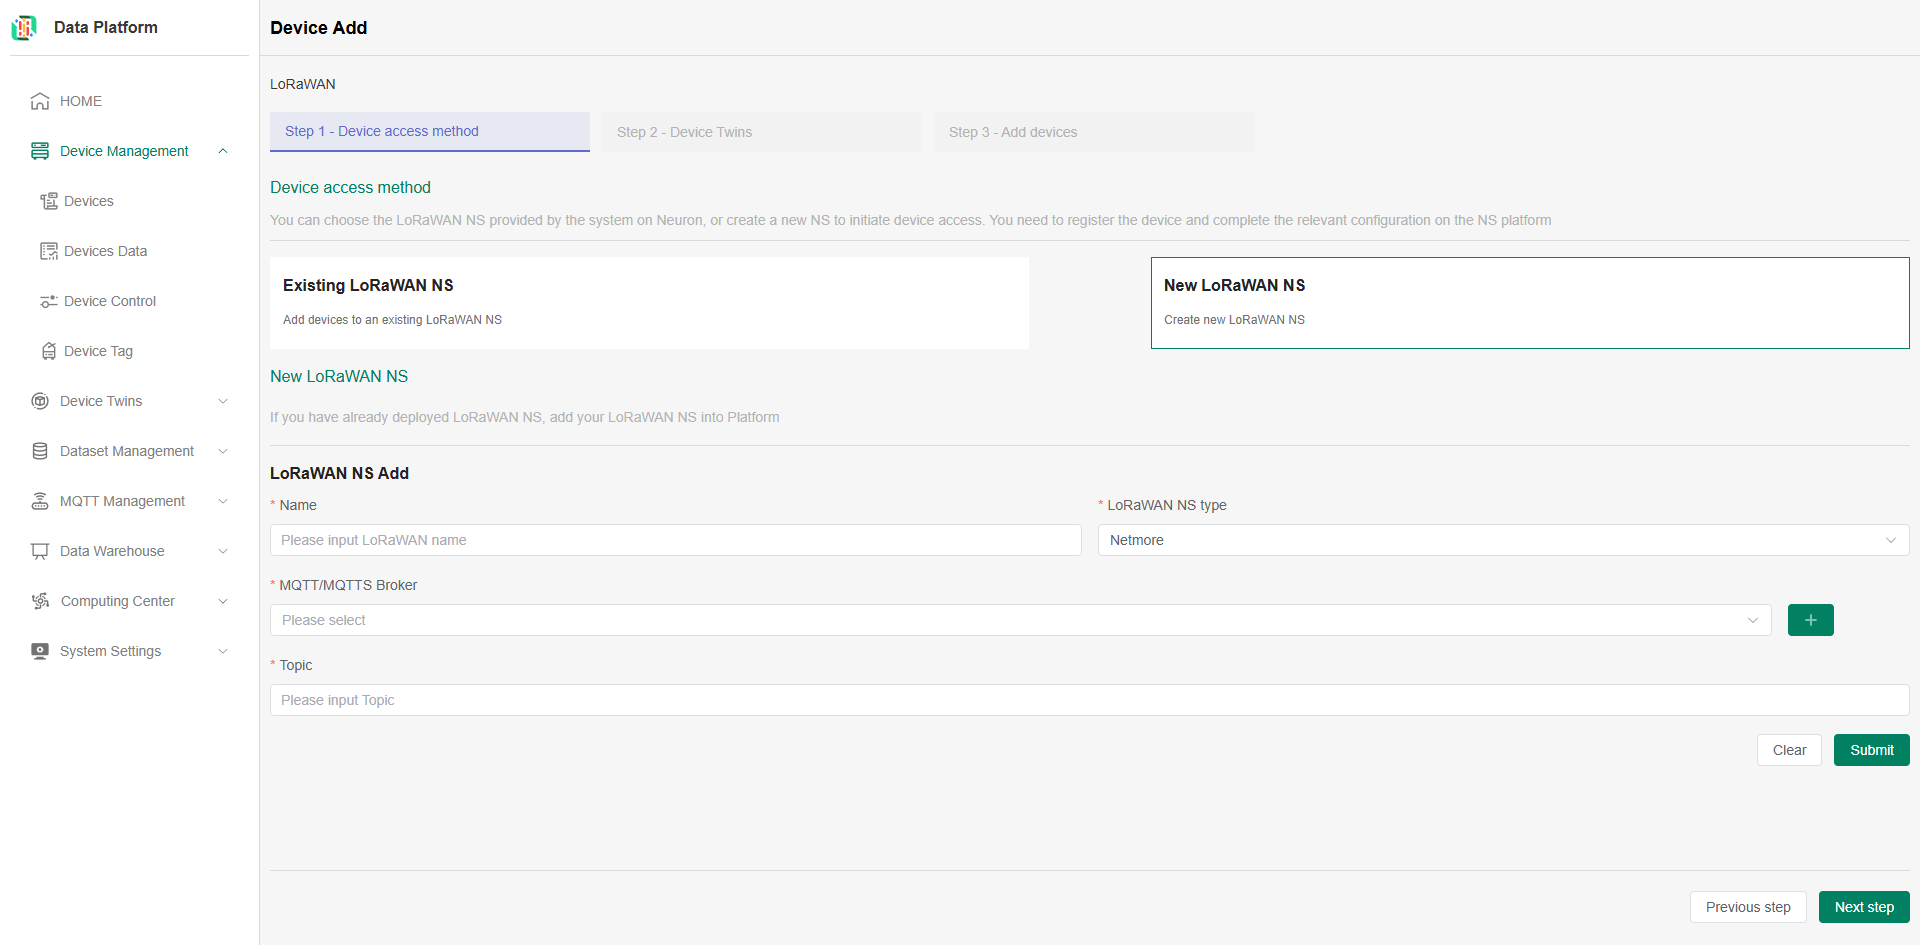
-
LoRaWAN NS Name: Must be unique, required.
-
LoRaWAN NS Type: Select Netmore, required.
-
MQTT Broker (Server): Click "+" to add a new MQTT Broker.
- Enter MQTT Server name;
- Broker URL (proxy address): mqtts://mqtt.netmoregroup.com;
- Port: 8883;
- MQTT username and password: Optional, fill in if available;
- SSL/TLS: Enable;
- Certificate: Select "CA or Self signed certificates", and upload the certificate downloaded from the previous section Step 3: Obtain MQTT Connection Certificate.


-
Topic: Required. The device reporting format from the Netmore platform is fixed as client/clientid/#
- The clientid is obtained from the certificate (e.g., client/user1-example/#)

After completing the LoRaWAN NS information, click the Submit button. The system will verify whether the MQTT connection is normal; if abnormal, the addition will fail. After successful connection, click Next to proceed to the configuration of the thing model.
Note:
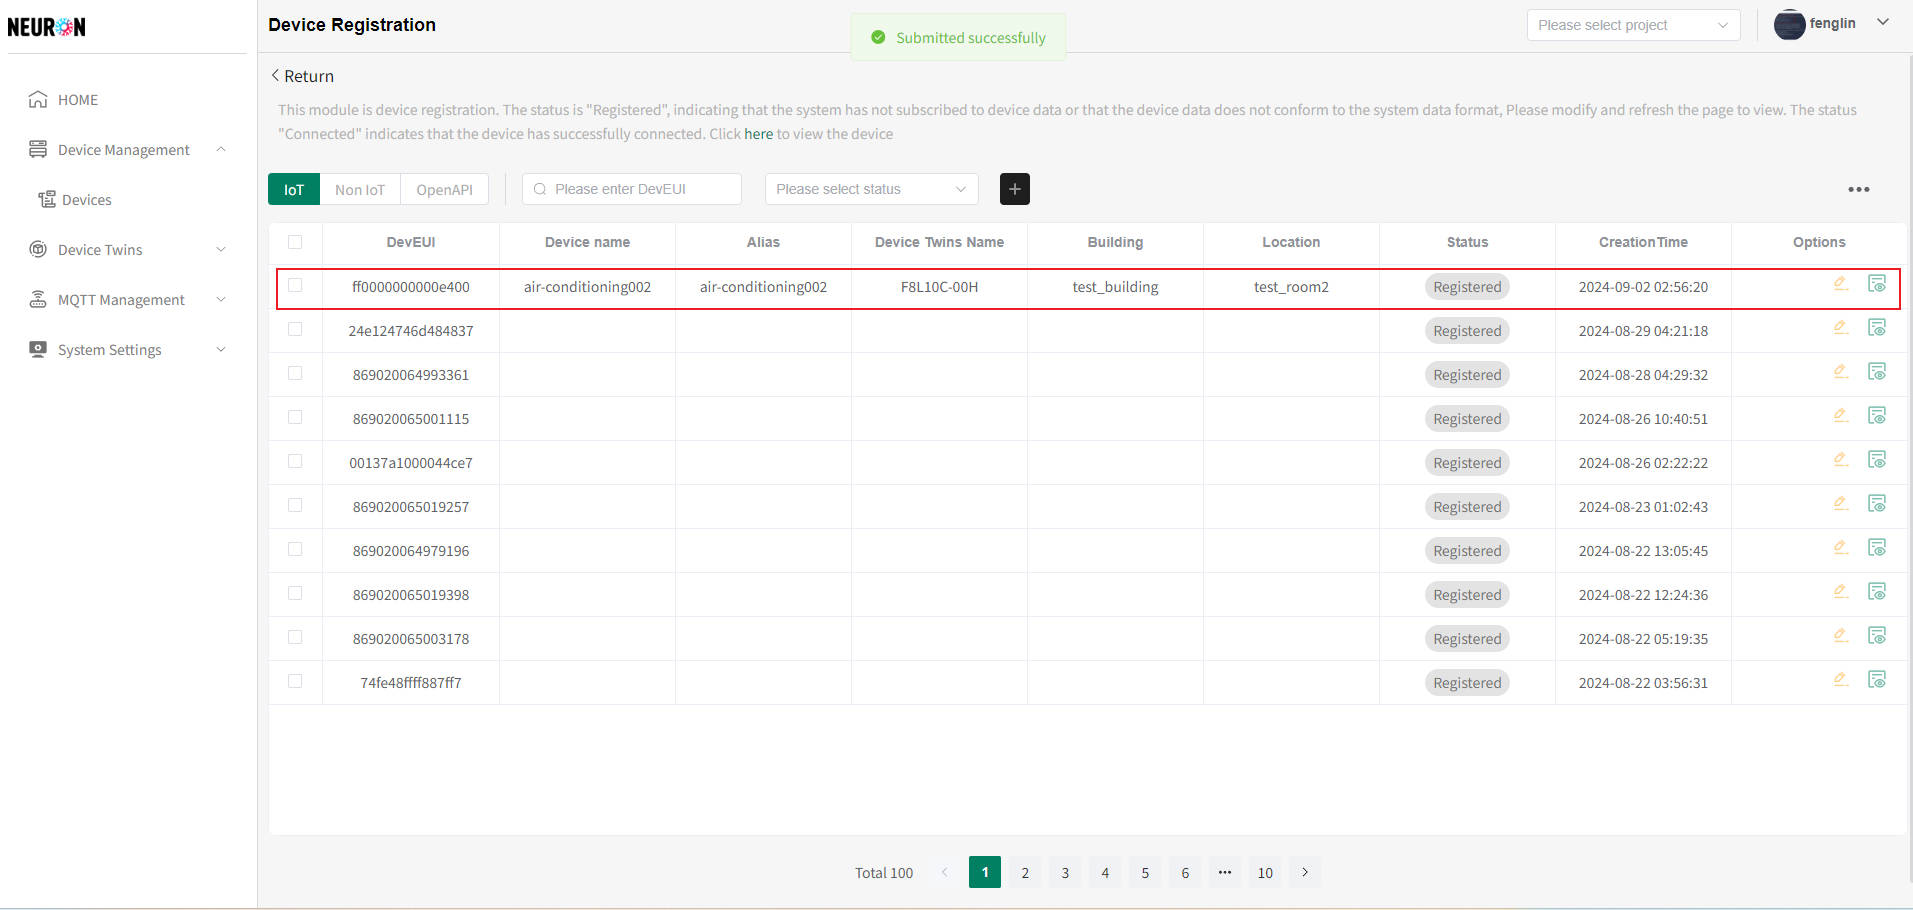
- Successful device registration only indicates that the platform has recorded the device information and displays an "Registered" status; real-time data connectivity is not yet established. The system will subscribe to reported data based on the configured parameters. After completing data cleaning and storage, the device status will change to "Connected" and appear in the device list.