Device Pre-Provisioning via the ChirpStack Platform
Overview
Use this document when you have IoT devices or gateways using LoRA communication that you wish to use with the Neuron platform, and there are no specific standards preventing you from using this method (e.g., using an existing legacy system or devices that don't support alternative integration methods).
This is a necessary step for all LoRA devices and gateways using the recommended Neuron setup, which employs a verified solution known to work well with the Neuron platform. By following this document, you will complete the device setup so its data and functions become available to the Neuron platform.
Access Method & Prerequisites
How to access
You need to request account credentials from the Neuron technical support team to log in to the ChirpStack platform. The specific ChirpStack instance should be the one pre-configured by Neuron technical support for your platform account.
Before You Start
You should have already configured your LoRA devices and gateway. Additionally, you need to know the device's frequency band and channel. For example, the Hong Kong region defaults to AS923; Mainland China defaults to CN470.
ChirpStack Platform Operations
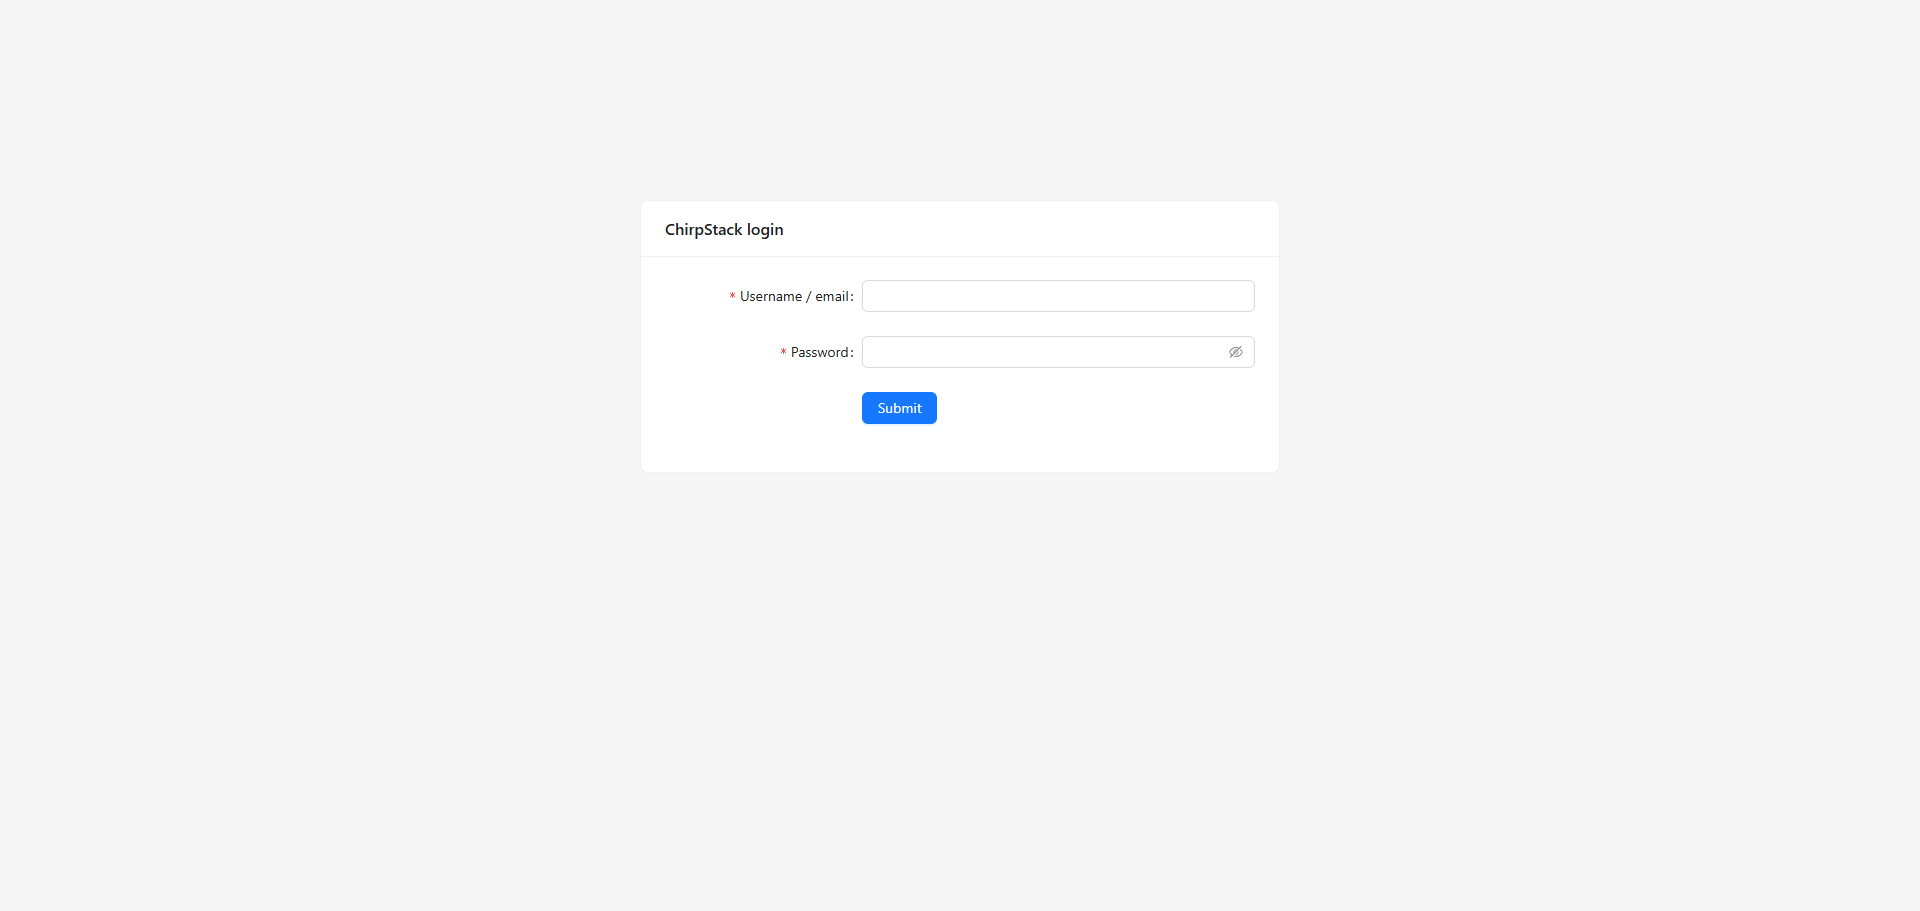
Step 1. Log in to the ChirpStack Platform
Log in to the ChirpStack platform to view/register devices (request account credentials from Neuron technical support).
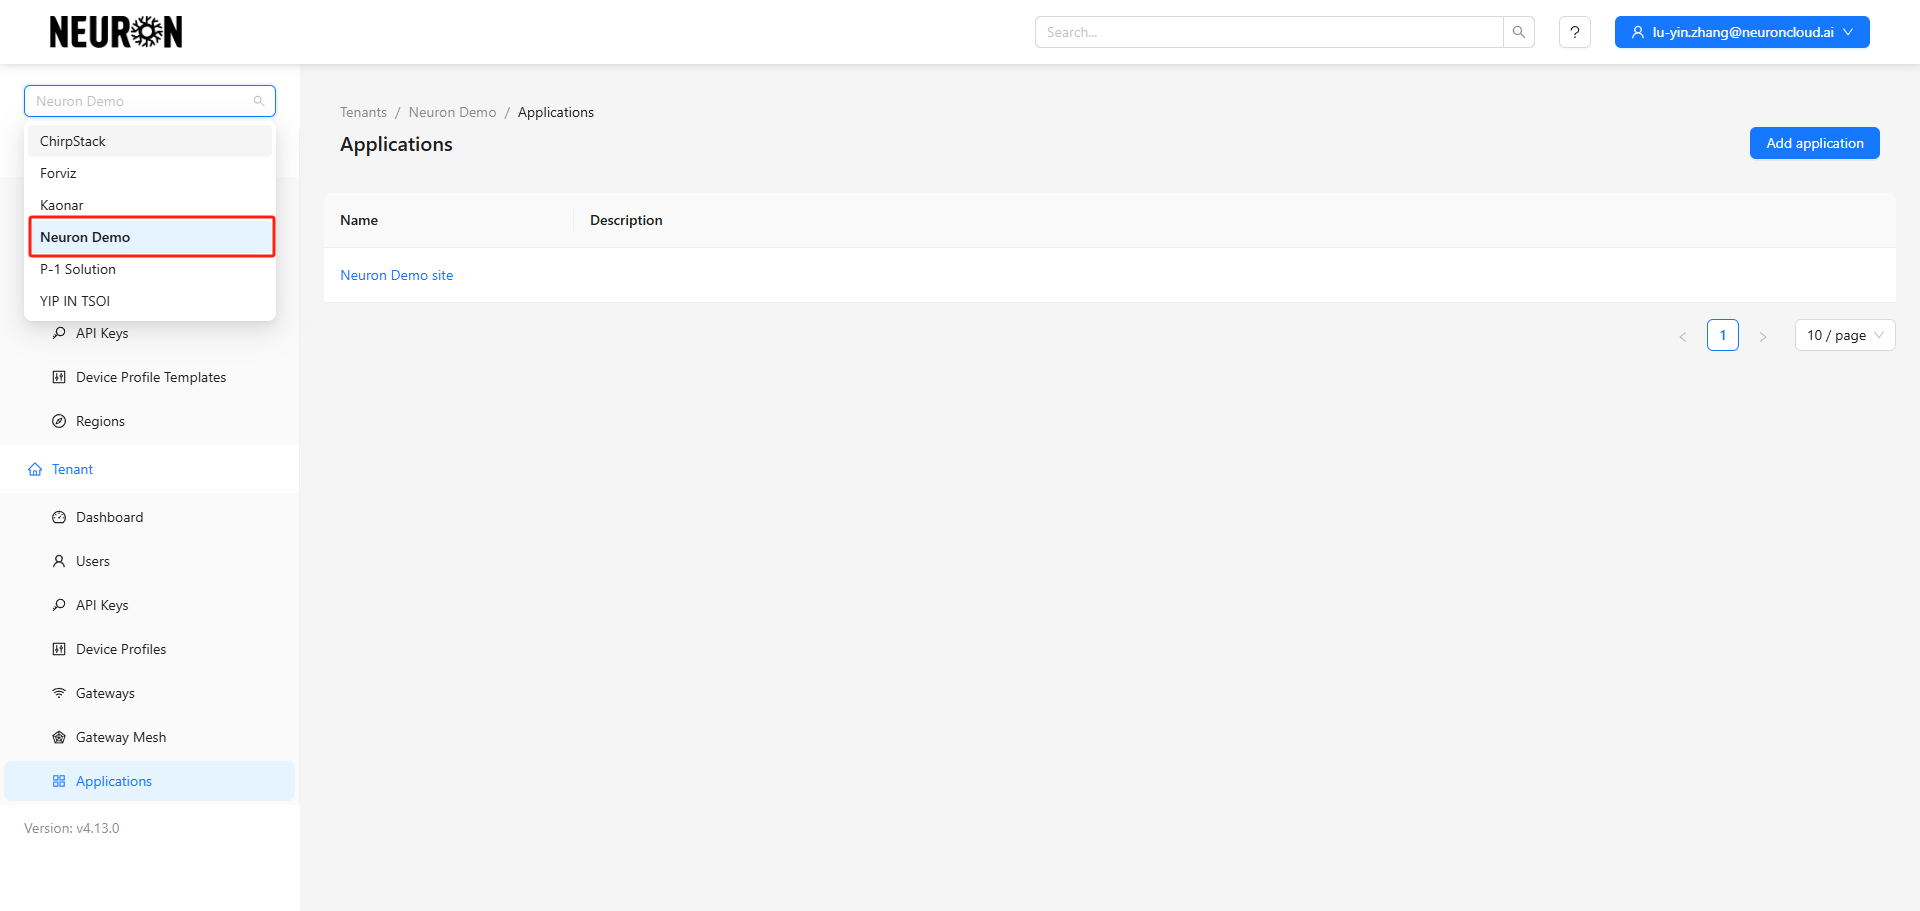
Select the tenant under which you need to add devices.
Neuron Demo is used as an example here. The specific tenant should be the one pre-configured by Neuron technical support for your platform account.
Step 2. Configure Device Profile
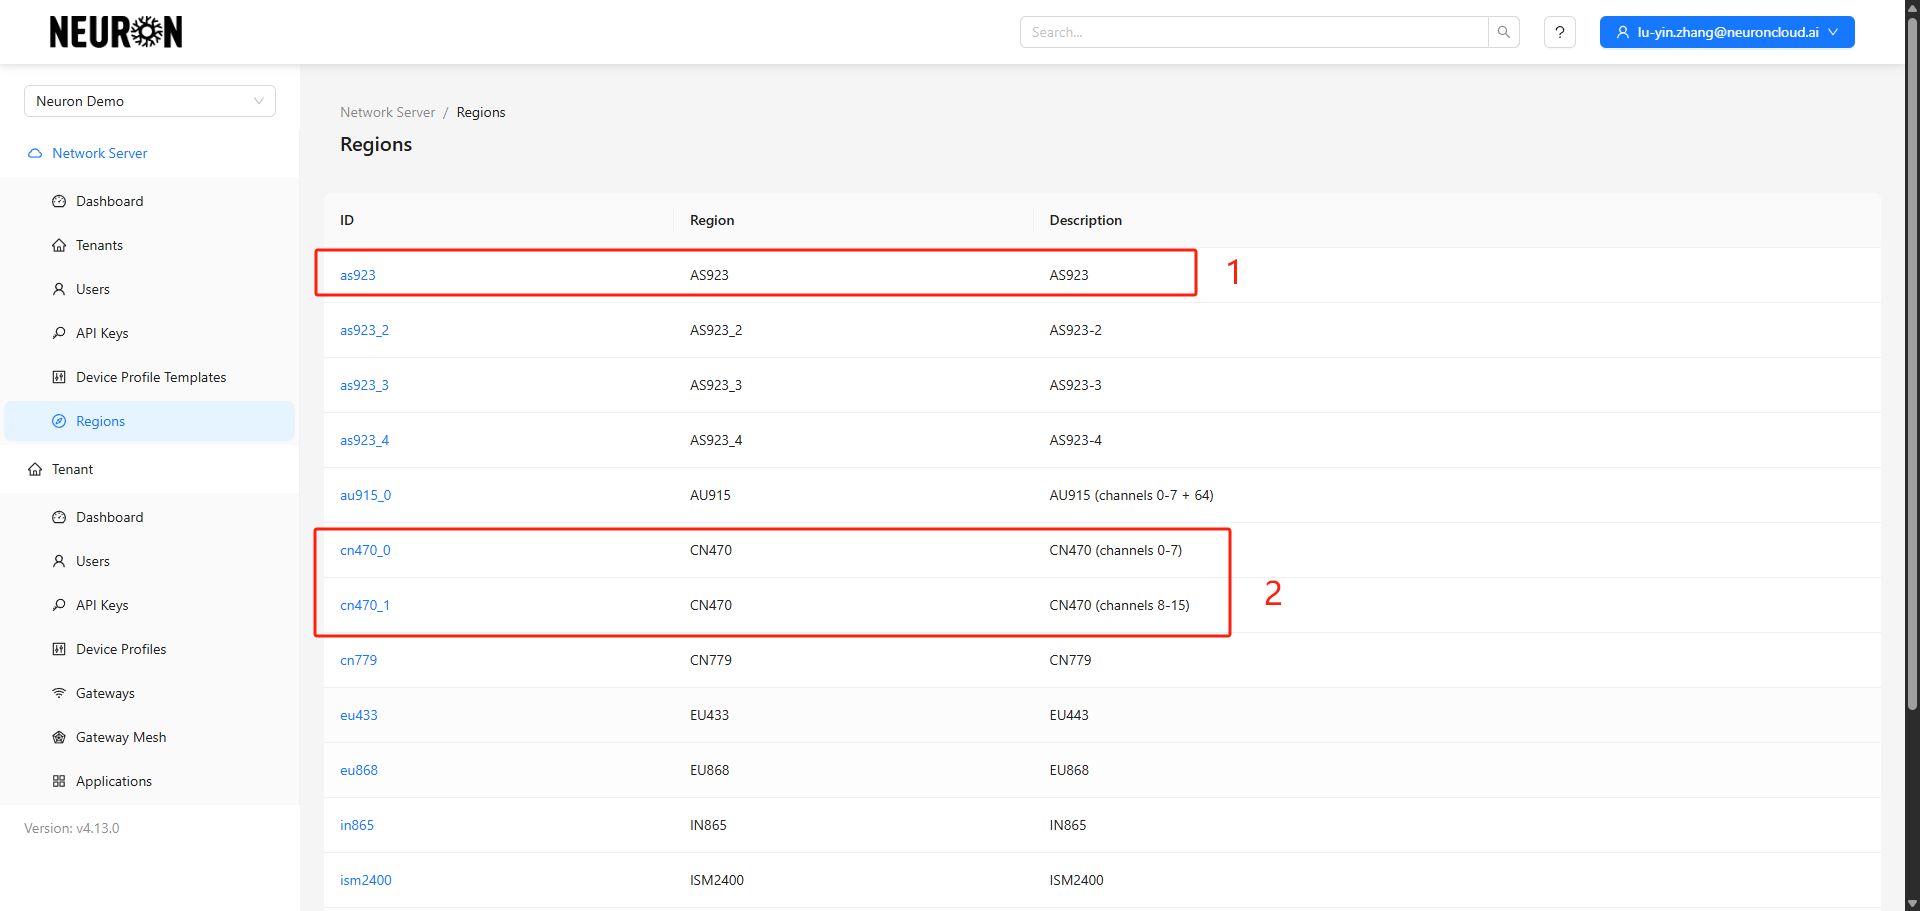
Before adding device configurations, you need to know the device's frequency band and channel.
- The Hong Kong region defaults to AS923.
- Mainland China defaults to CN470.
Note the band difference: Milesight's 470 band gateways and devices are default configured to 470_1, i.e., channels 8-15 of CN470.
2.1 Navigate to the Profile Configuration Page
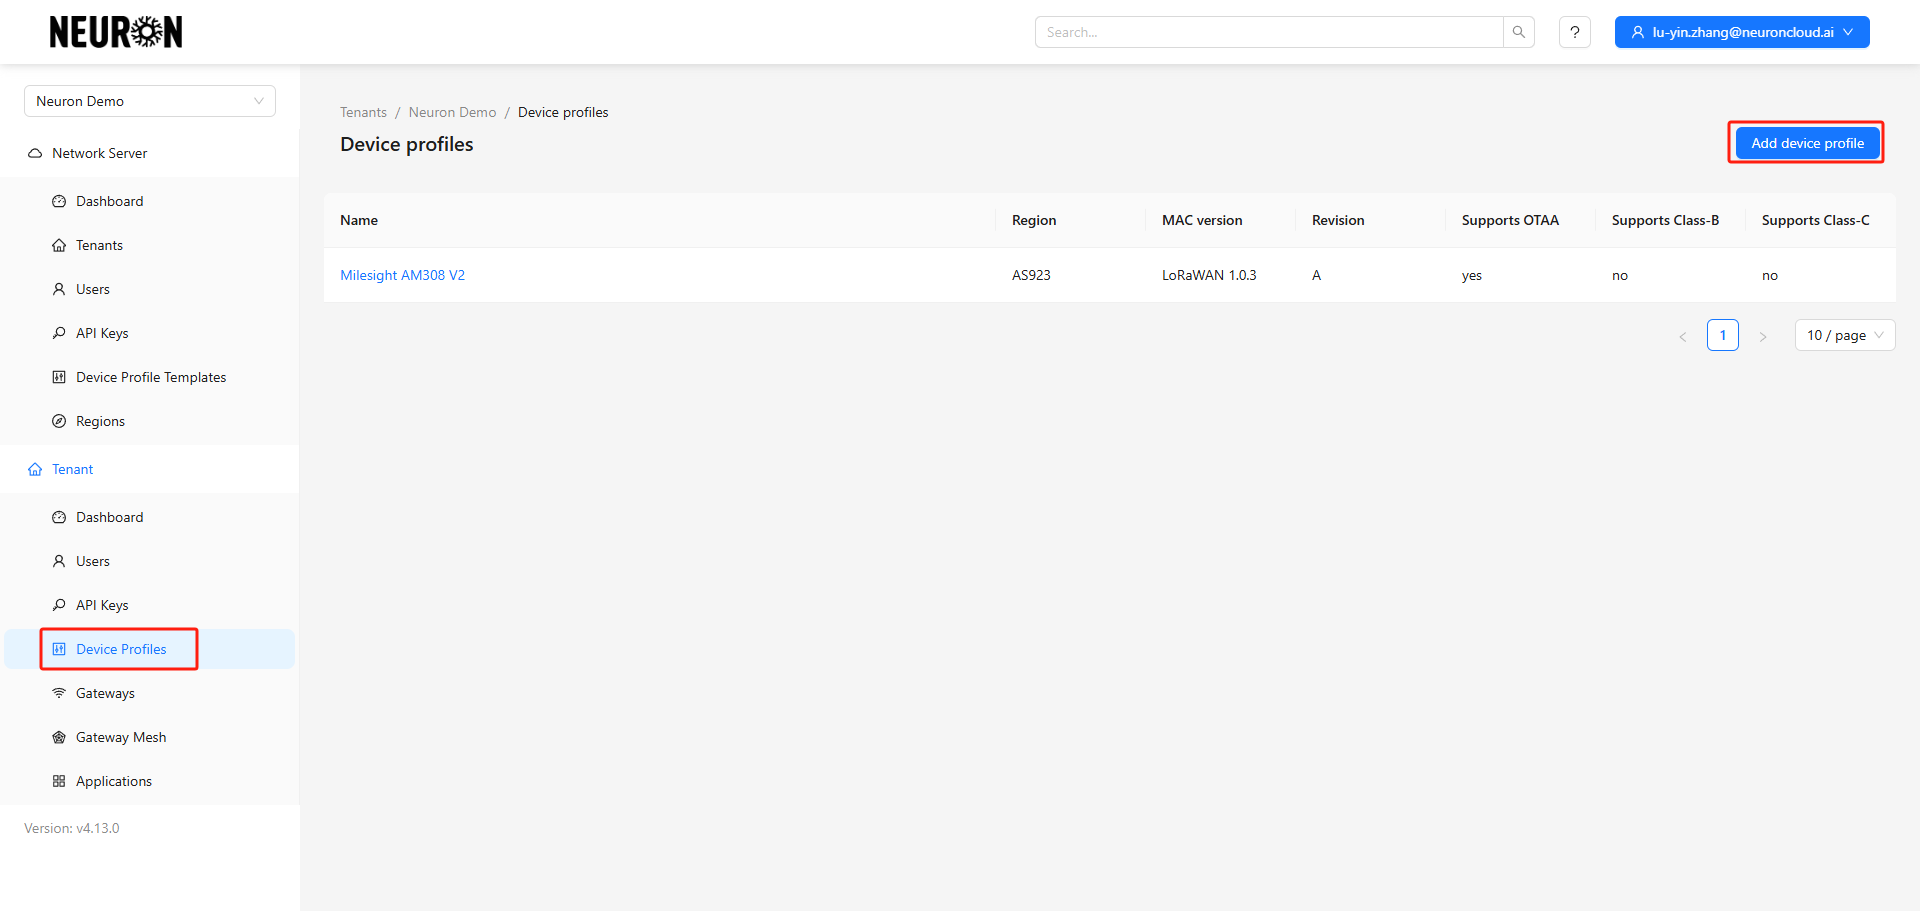
2.2 Add Profile Information
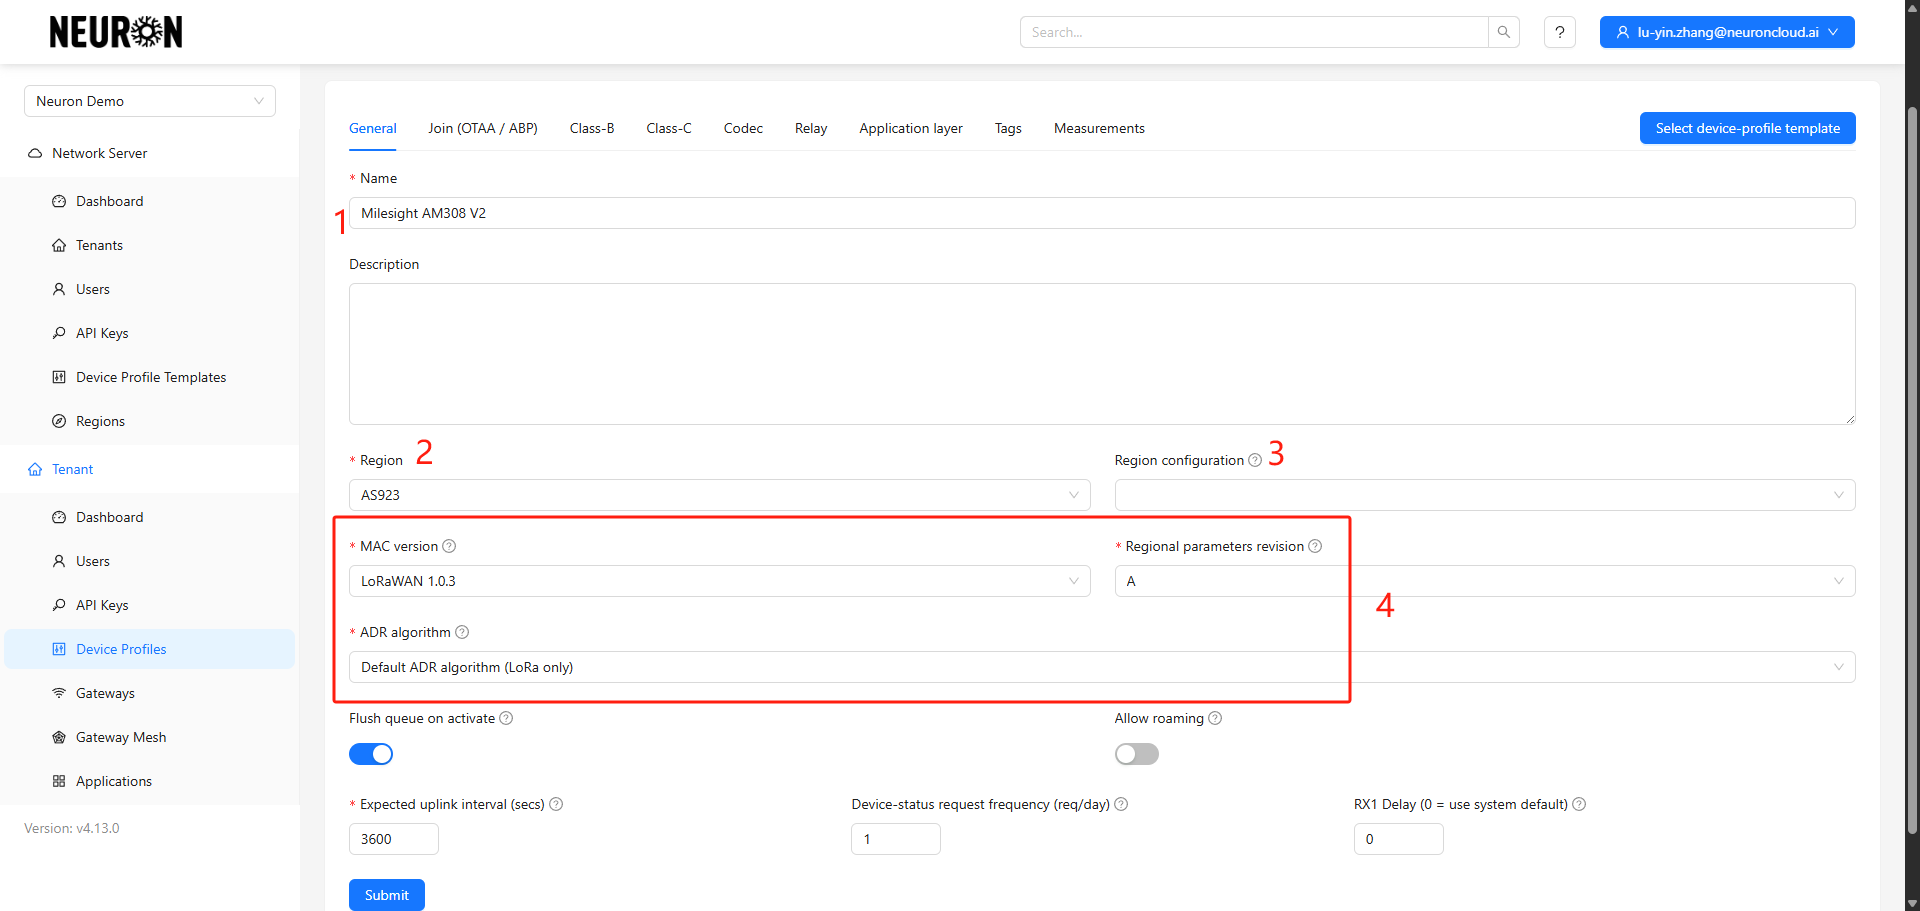
- Device Profile Name and Description
- Device Frequency Band
- Device Channel (This item can be ignored for the Hong Kong band)
- Use default configurations for other parameters
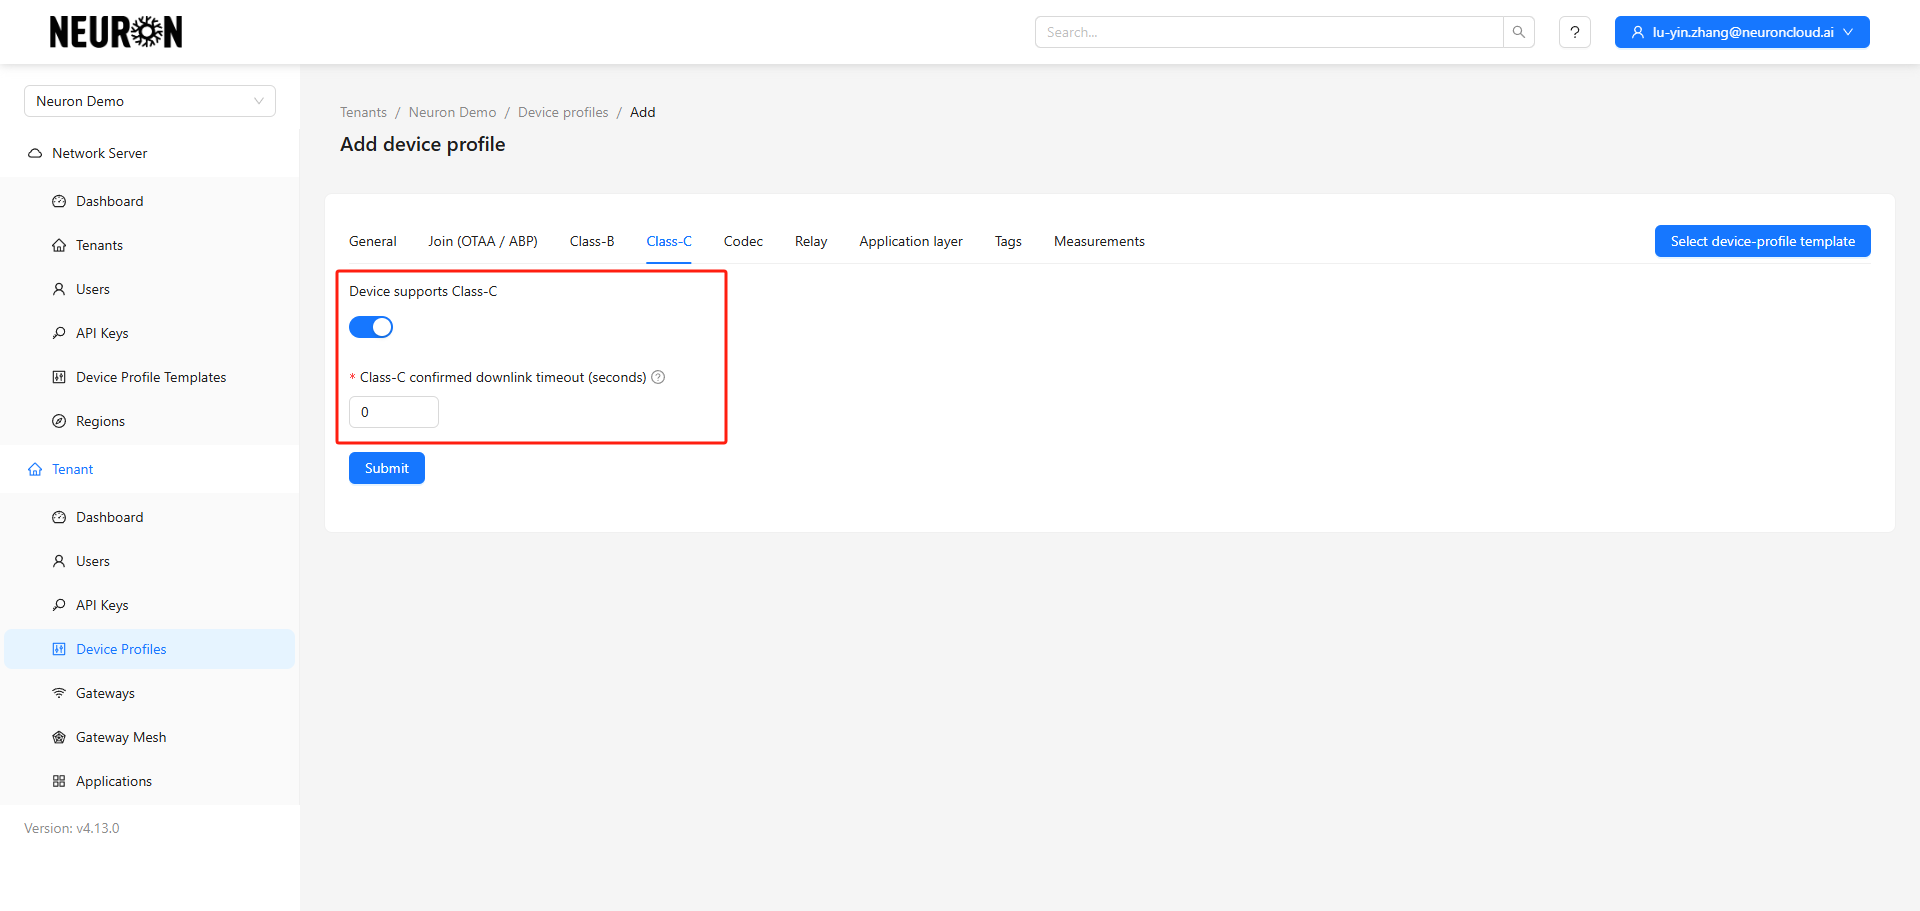
2.3 Enable Class A or Class C
Class A devices automatically enter sleep mode outside reporting cycles; if supporting downlink control, they only respond to command issuance during the reporting window. Class C devices do not sleep outside reporting times and support real-time command issuance.
Class A is enabled by default. Typically, battery-powered devices only require Class A.
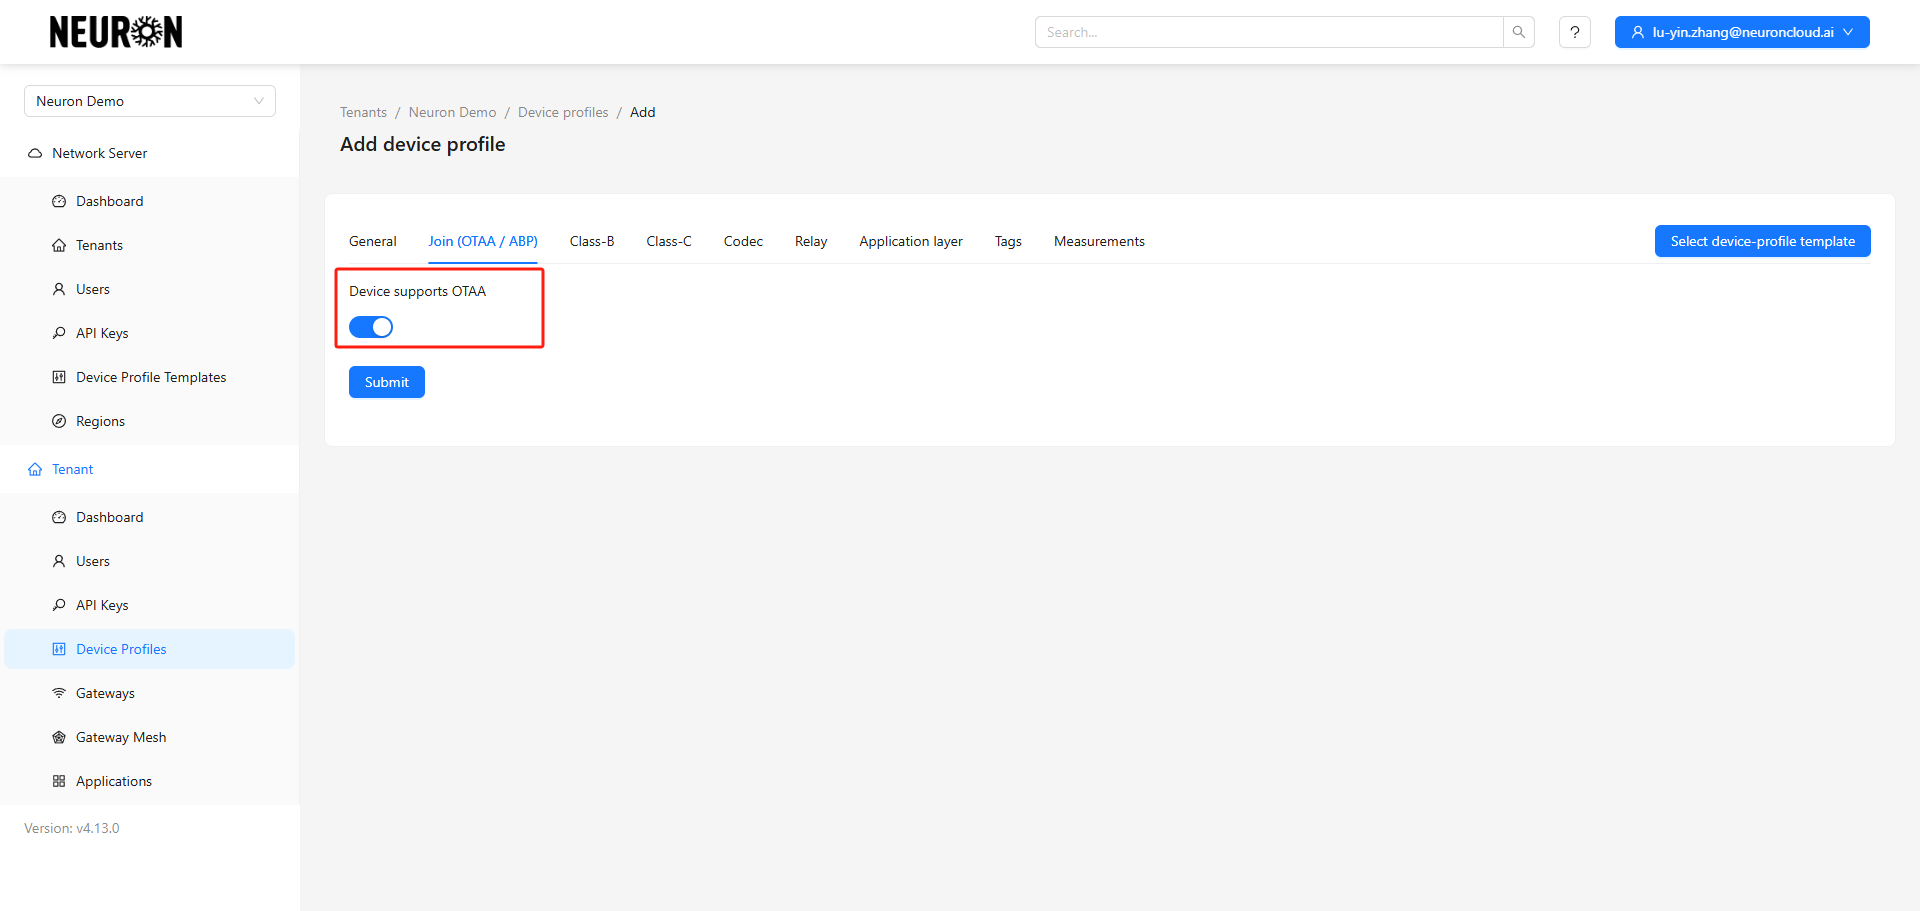
DC-powered devices require enabling Class C.
2.4 Configure Codec
This is a critical step. You also need to pay attention to this to ensure the correct fields are mapped for the device in the Neuron platform.
Obtain the correct decoder file from your manufacturer.
a. Examples can be found here: https://github.com/Milesight-IoT/SensorDecoders/tree/main/am-series/am308.
b. Navigate to the "Device Profile" section.
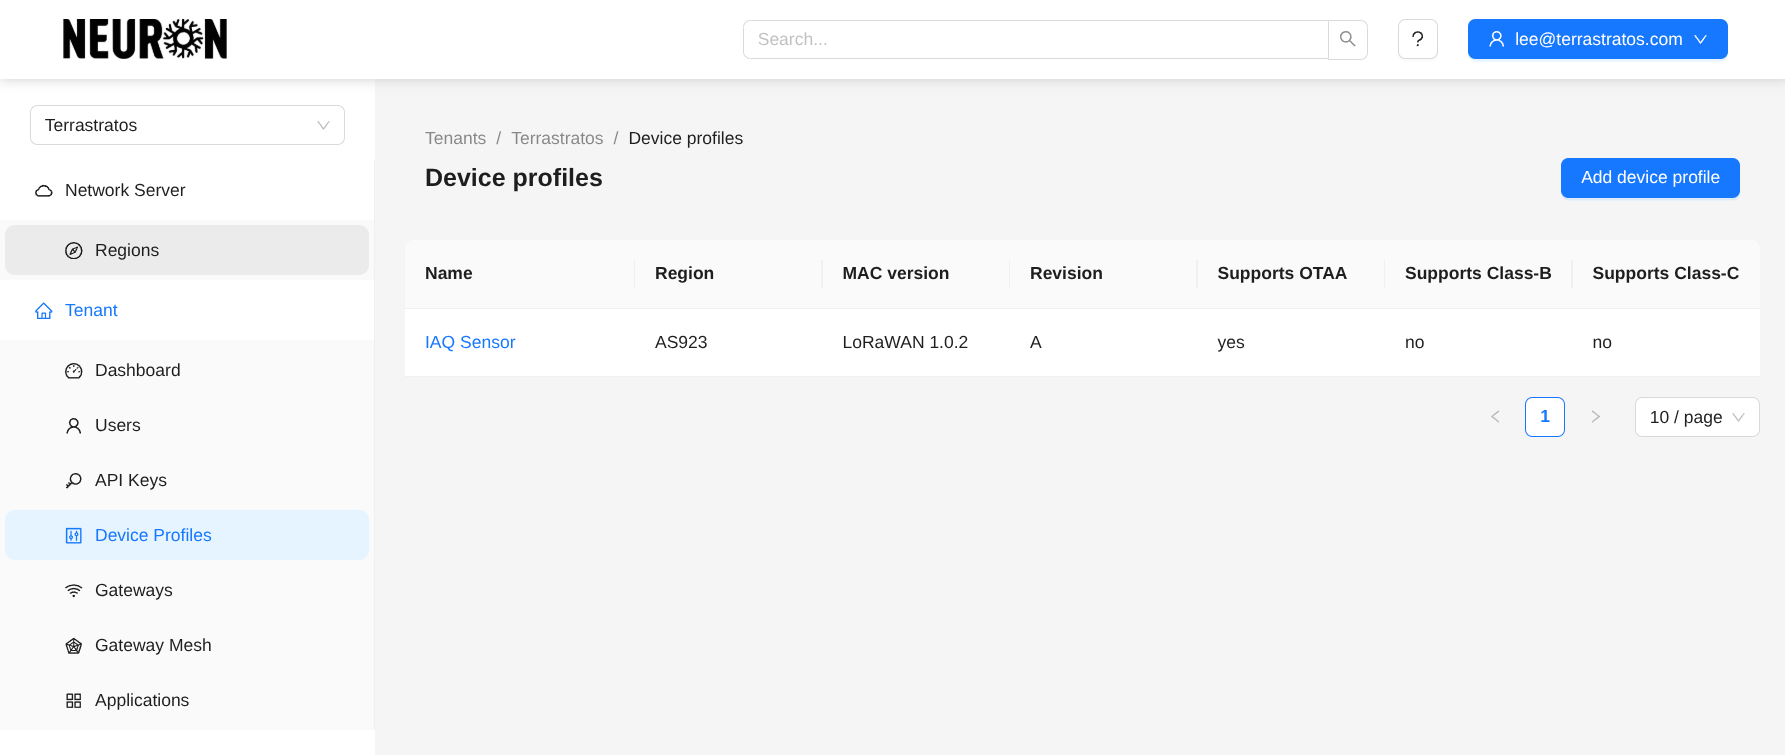
c. Select your device from the list.
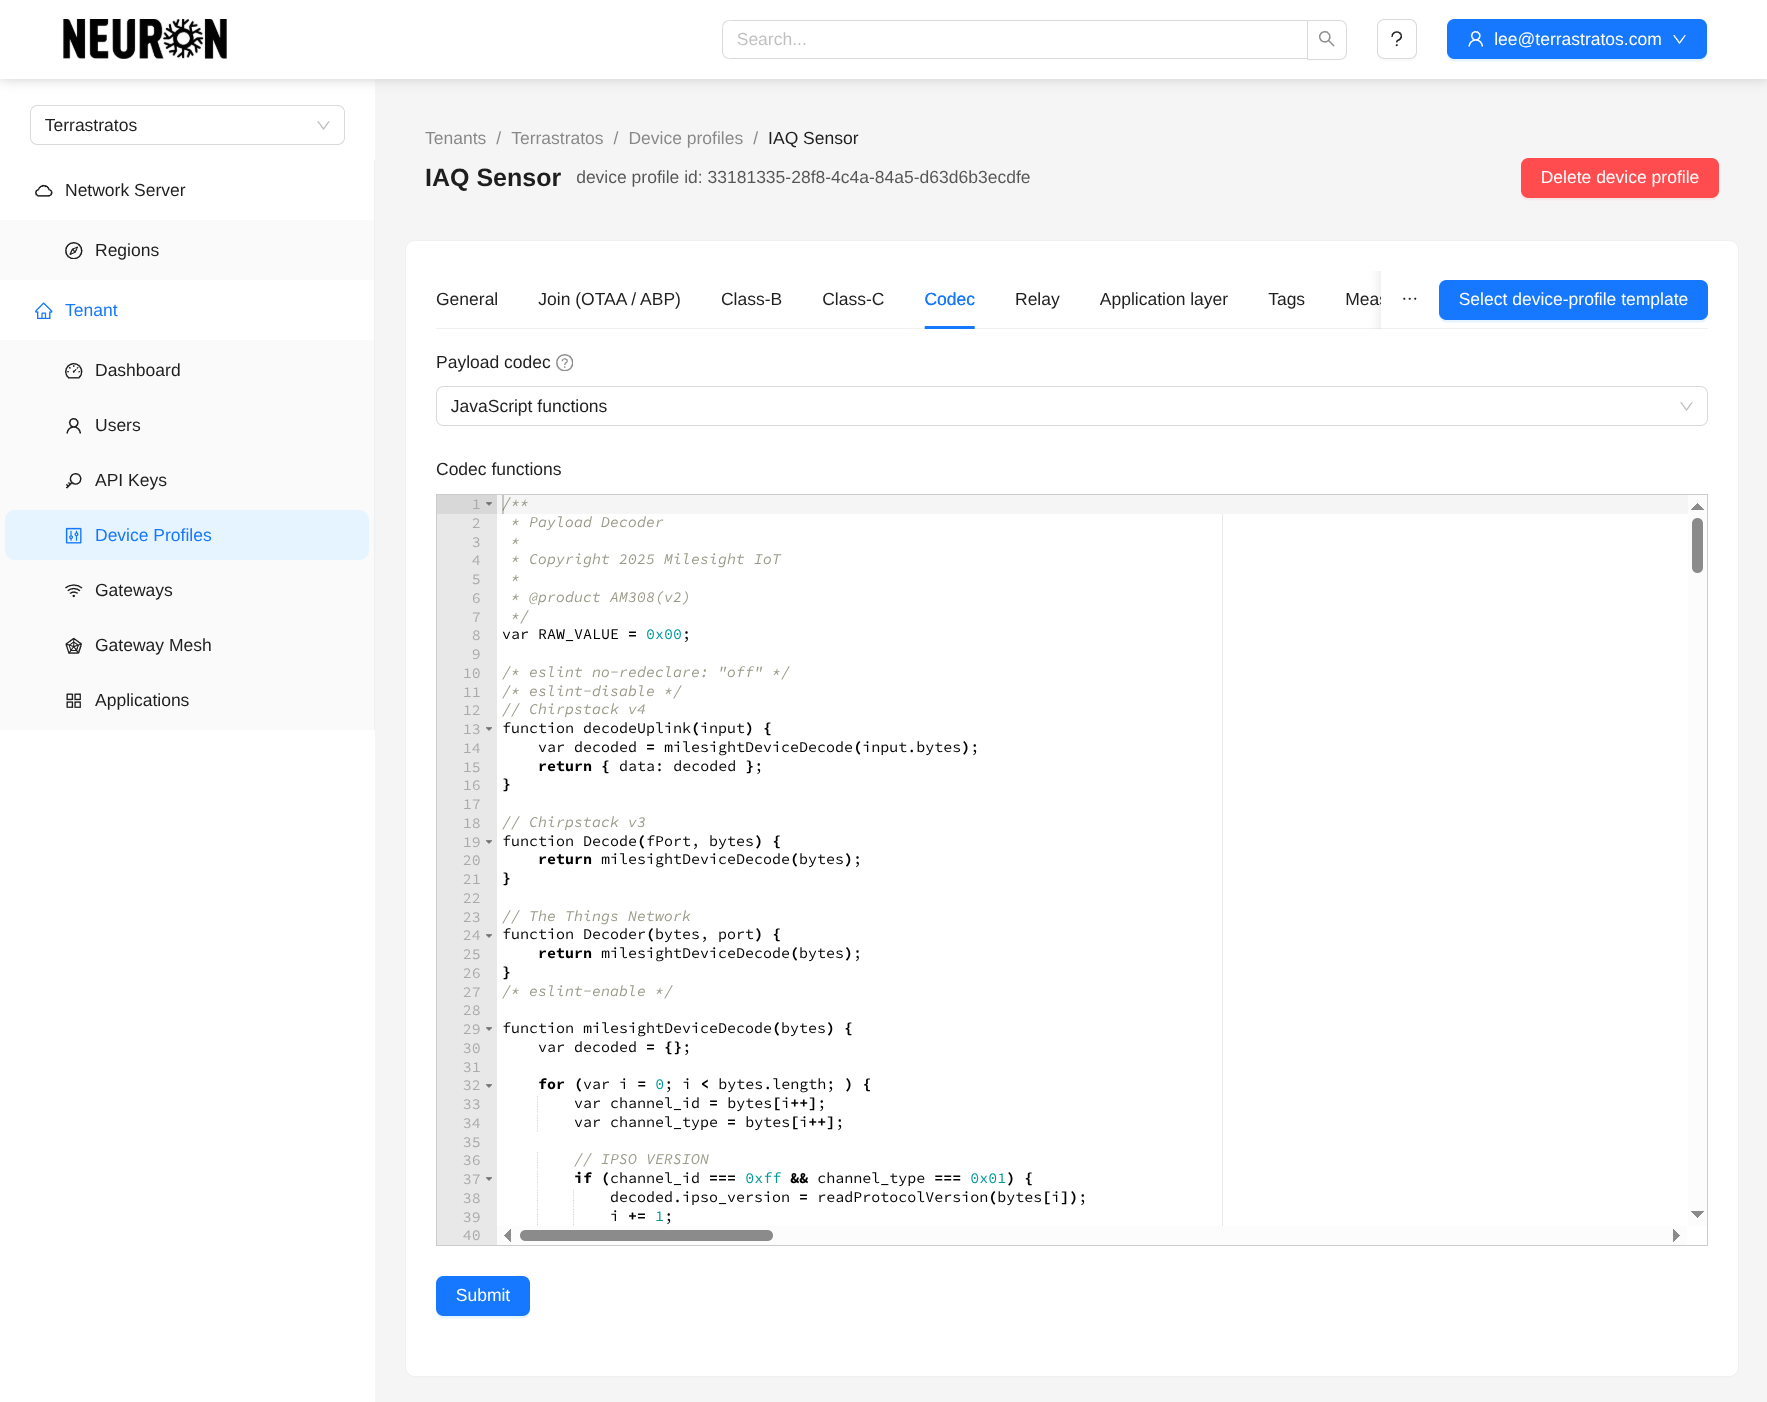
d. Select the "Codec" option.
e. You should then paste the encoding and decoding JavaScript files here (referencing the Milesight example, these would be the am308-decoder.js and am308-encoder.js files).
i. Ensure to paste both files sequentially so that we have both encoding and decoding methods!
ii. Please note that if your device is supported, you can directly select it using the "Select Device Profile Template" button in the upper right corner.
f. Press the "Submit" button to save your changes.
Step 3. Create Device
3.1 Navigate to Applications under the Tenant
This section displays all applications created by the user under this tenant.
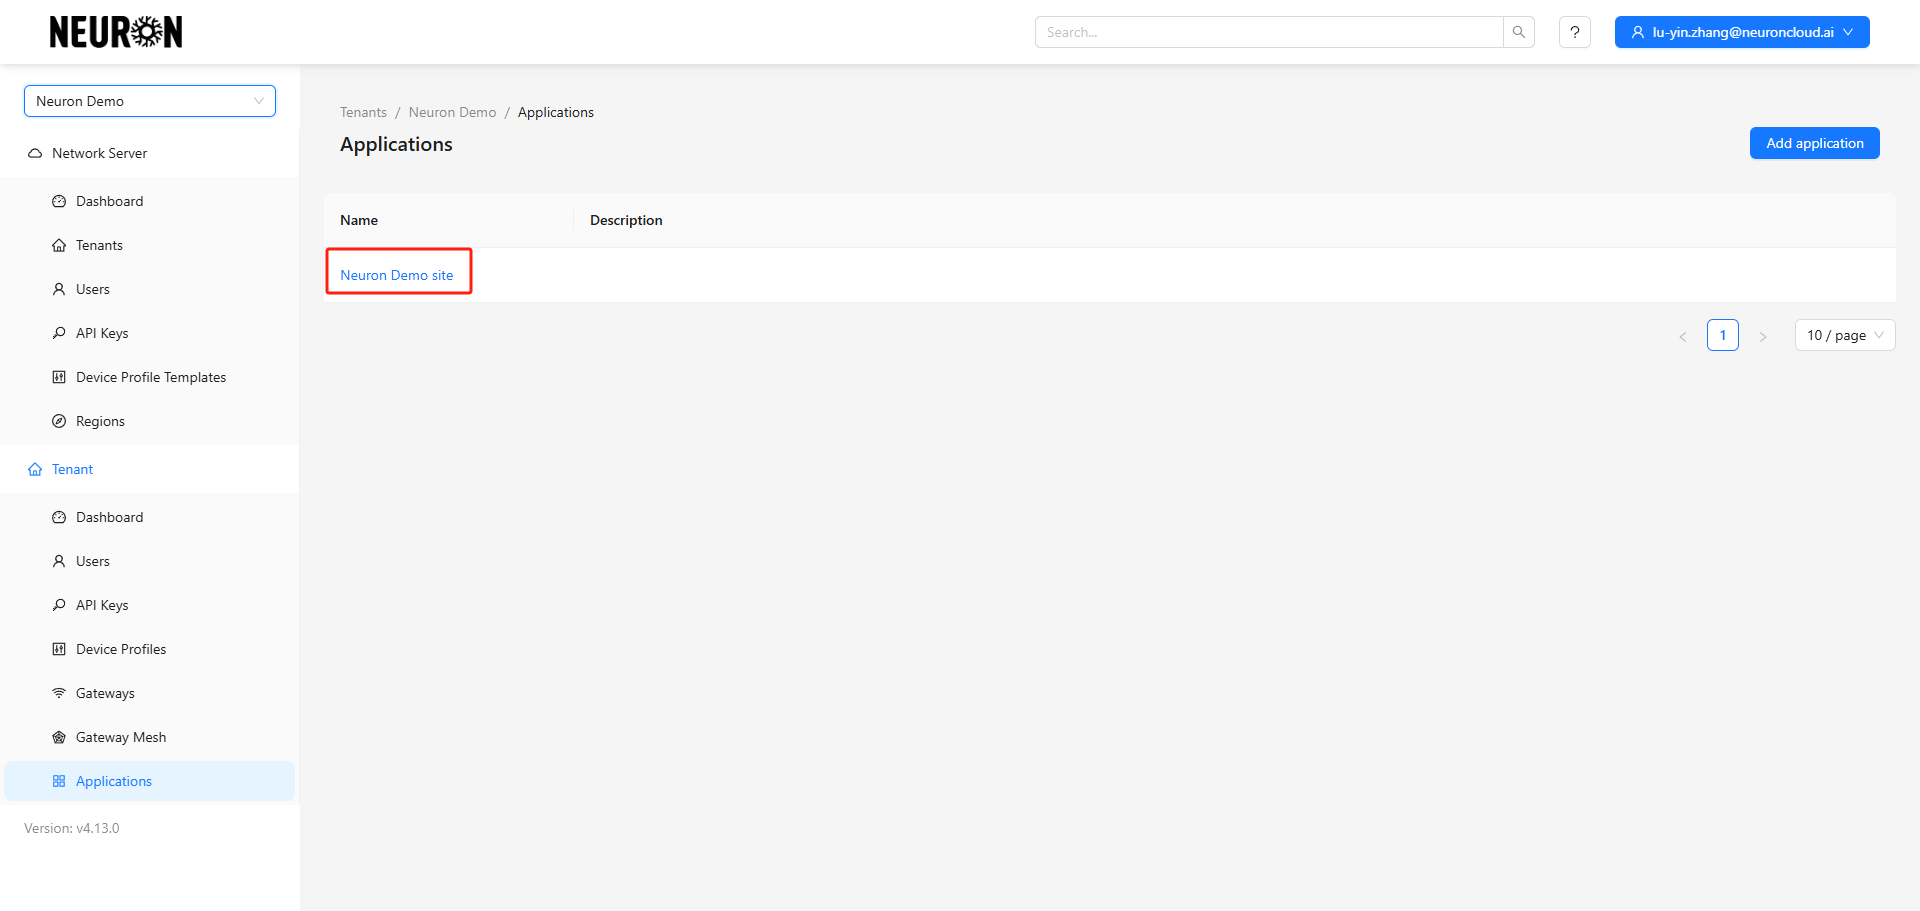
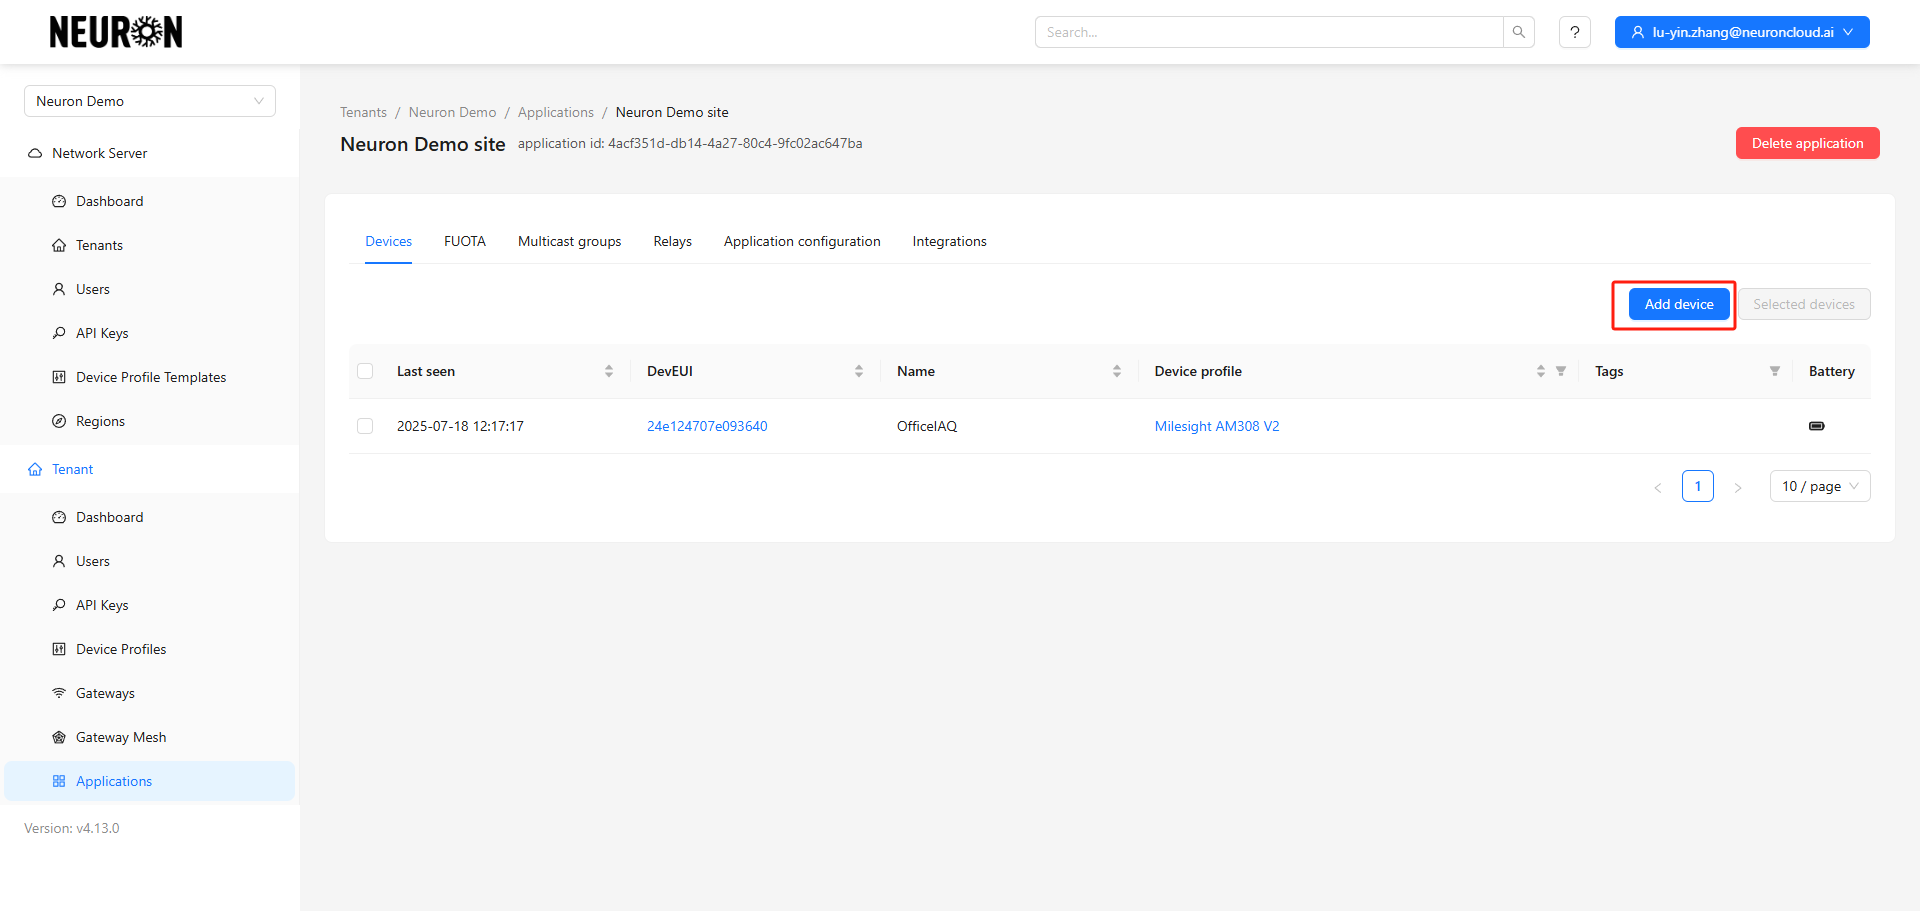
3.2 Enter the Application Sub-item
This section displays all devices registered by the user under this application sub-item.
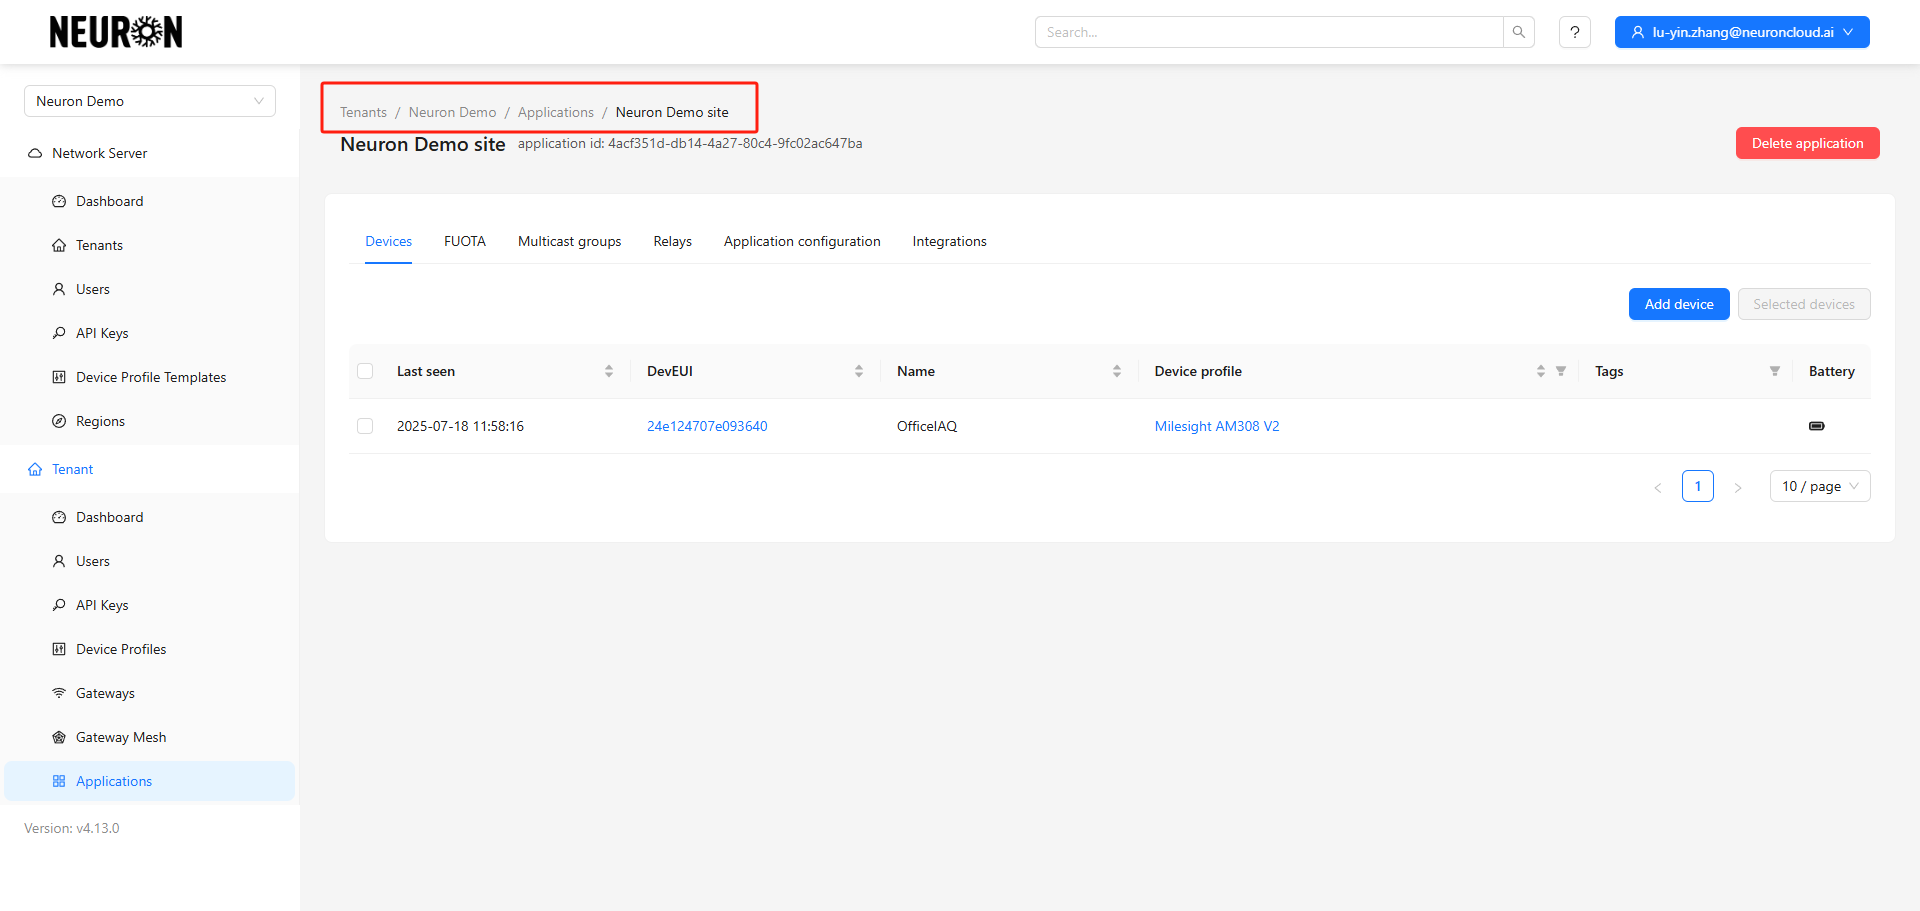
3.3 Add Device
Enter the device addition page.
Fill in the device information.
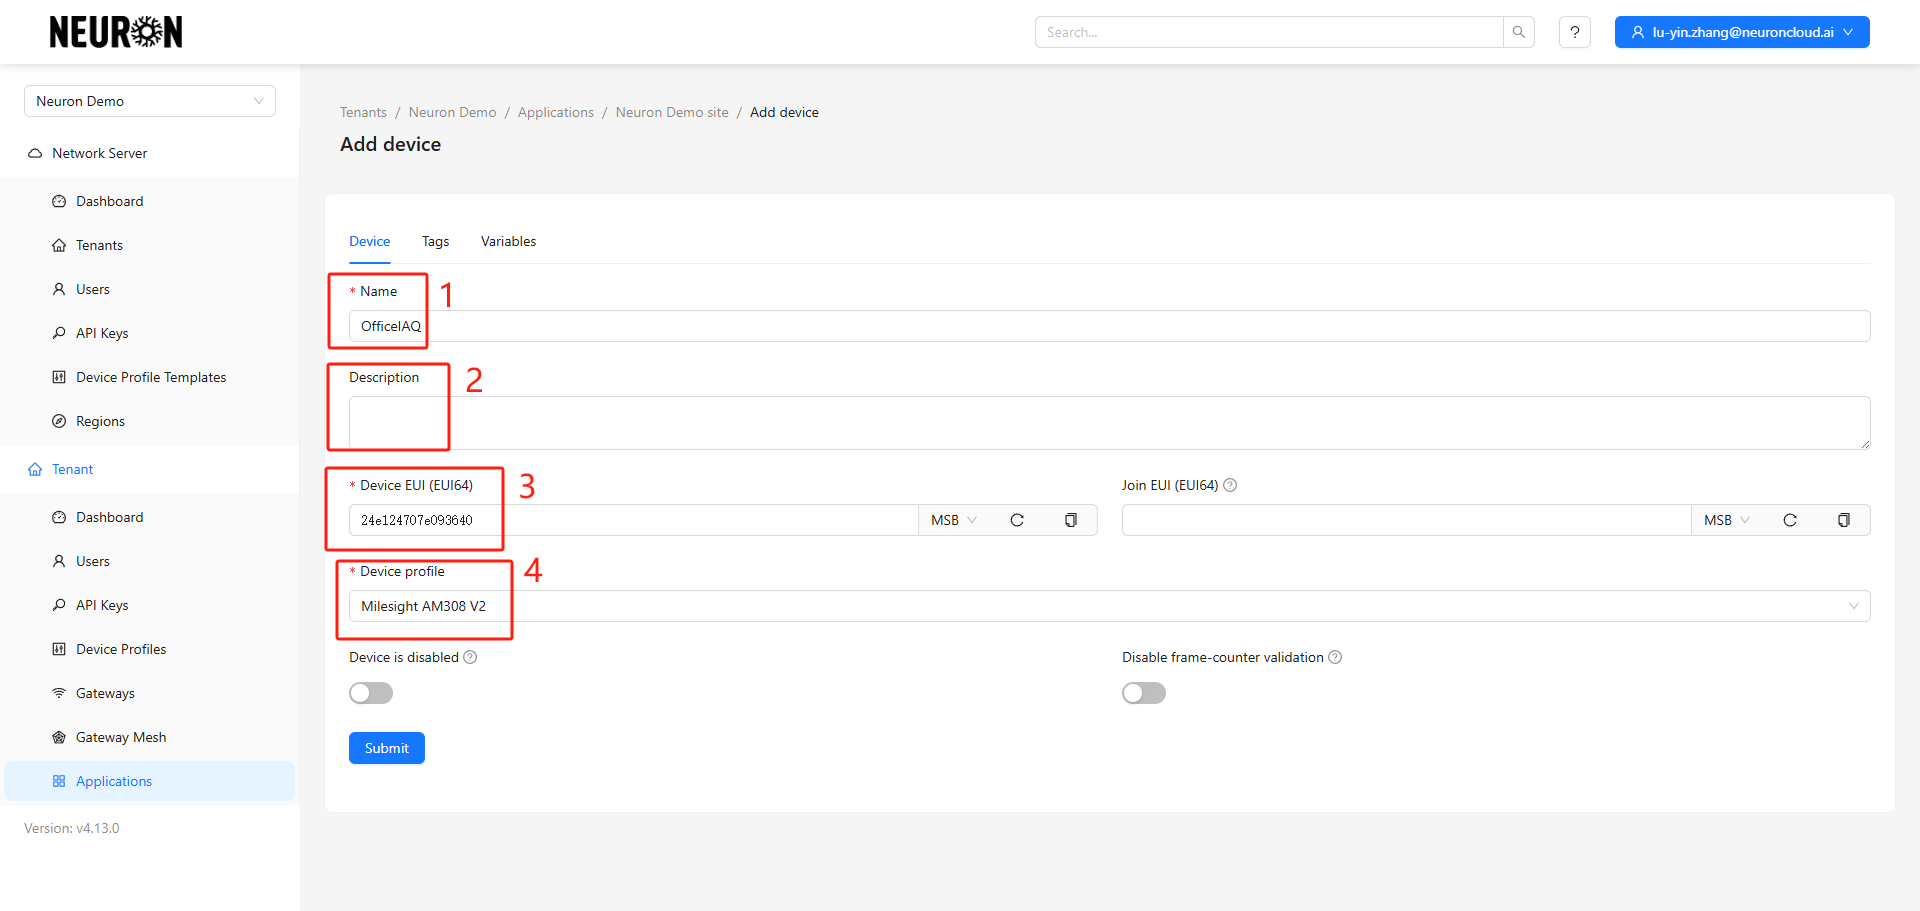
- Device Name
- Device Description
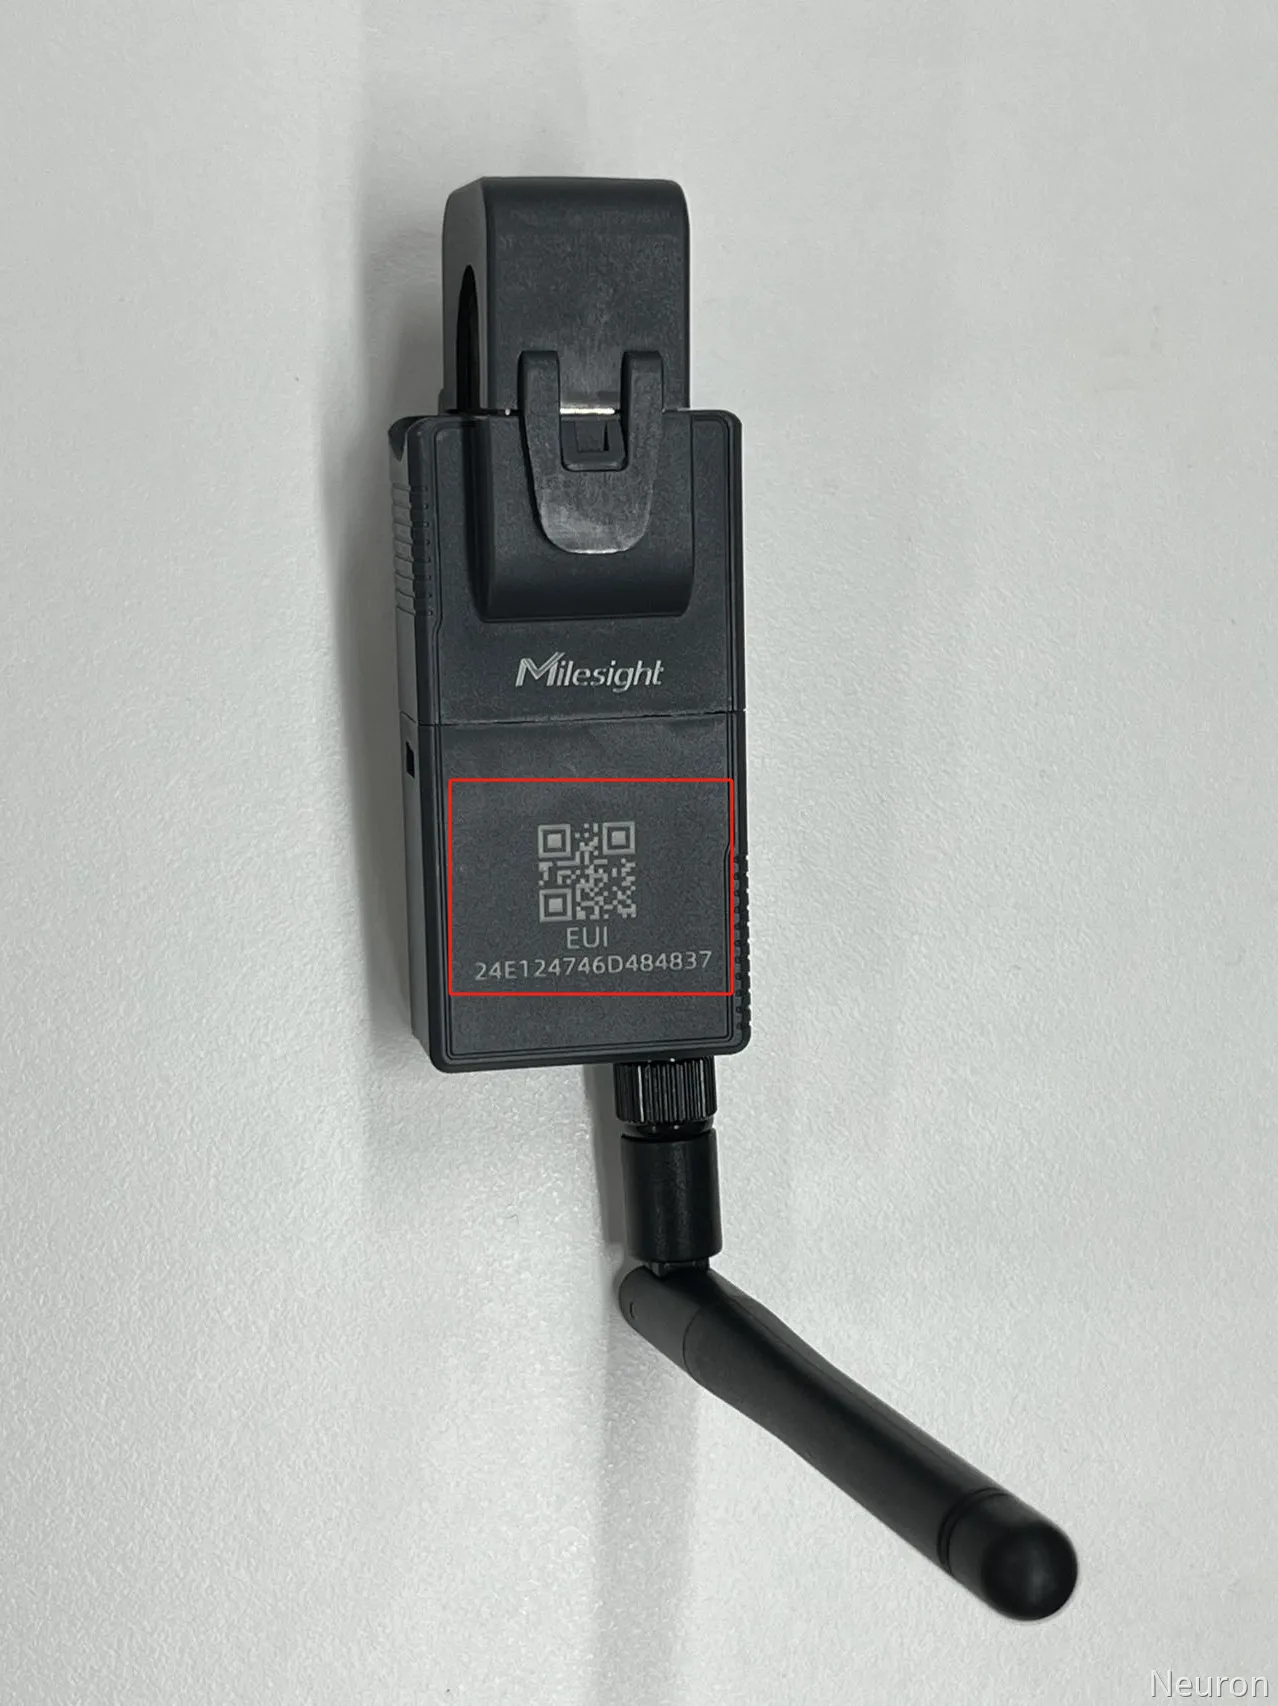
- Device DevEui: Usually printed on the device, it is the unique identifier.
- Device Profile
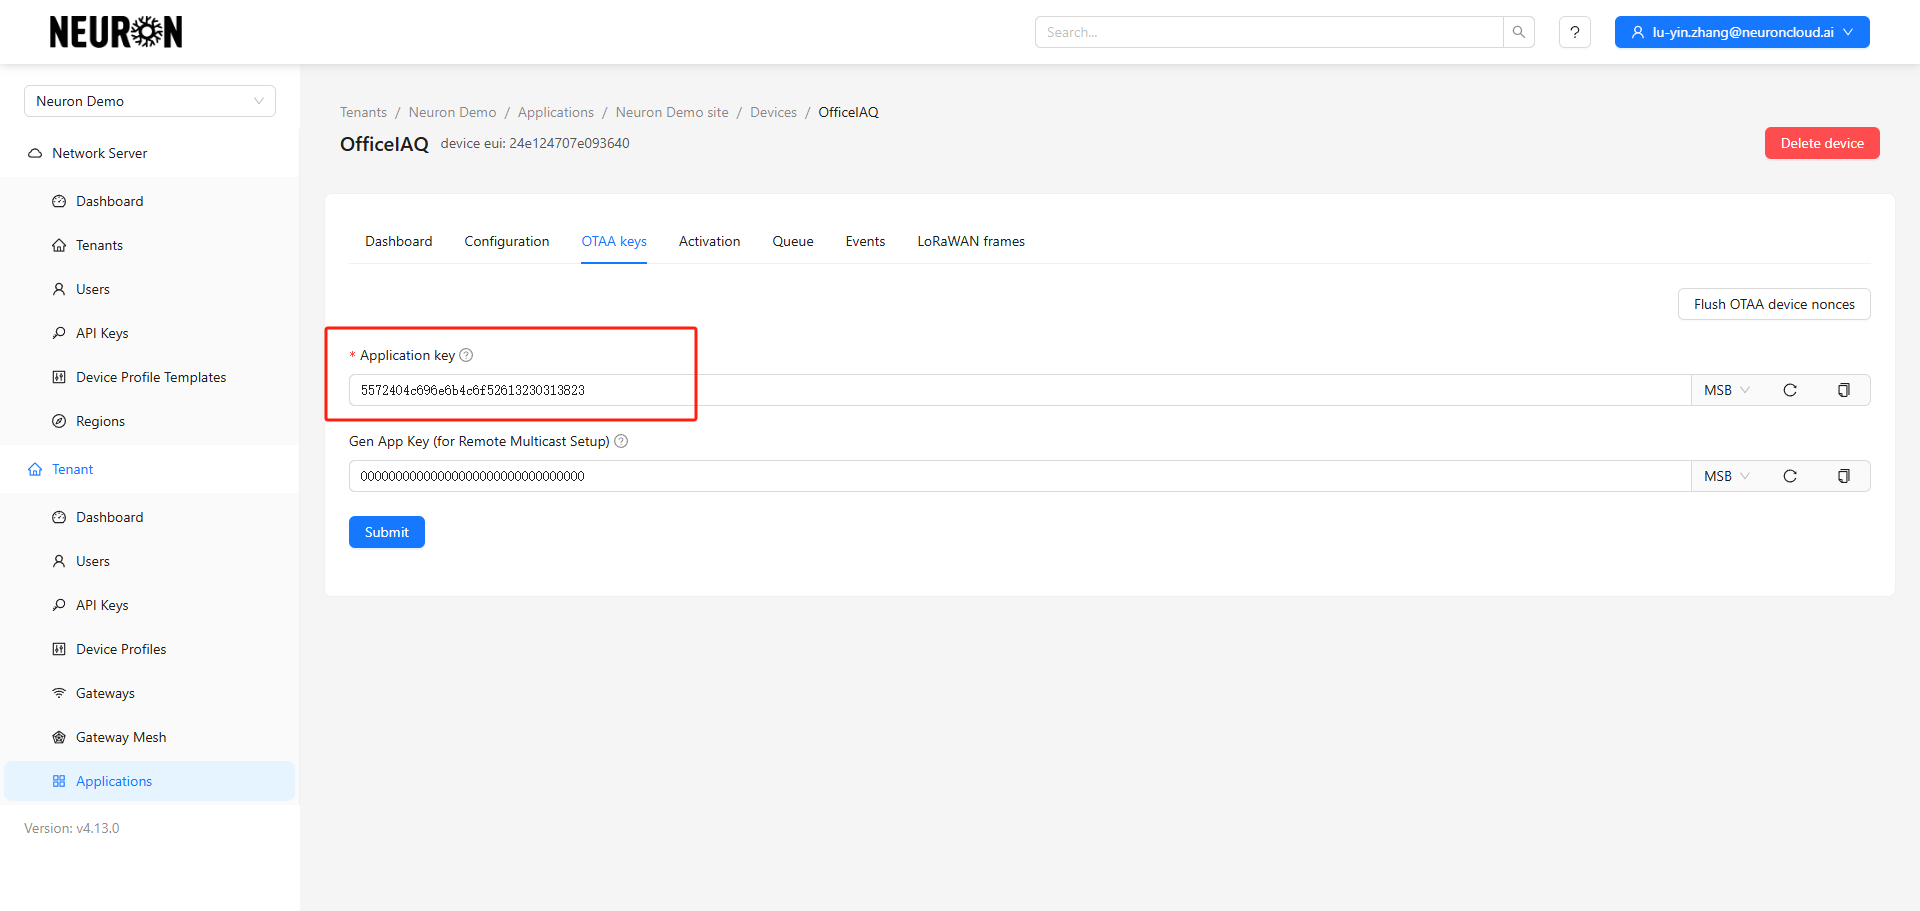
Add the Application Key.
The Application Key is the credential for the device to join the gateway, provided by the manufacturer. The default Application Key for Milesight devices is shown below.
Create the device after confirming the information is correct.
Note: The DevEui cannot be incorrect and cannot be modified after saving. Other parameters support editing.
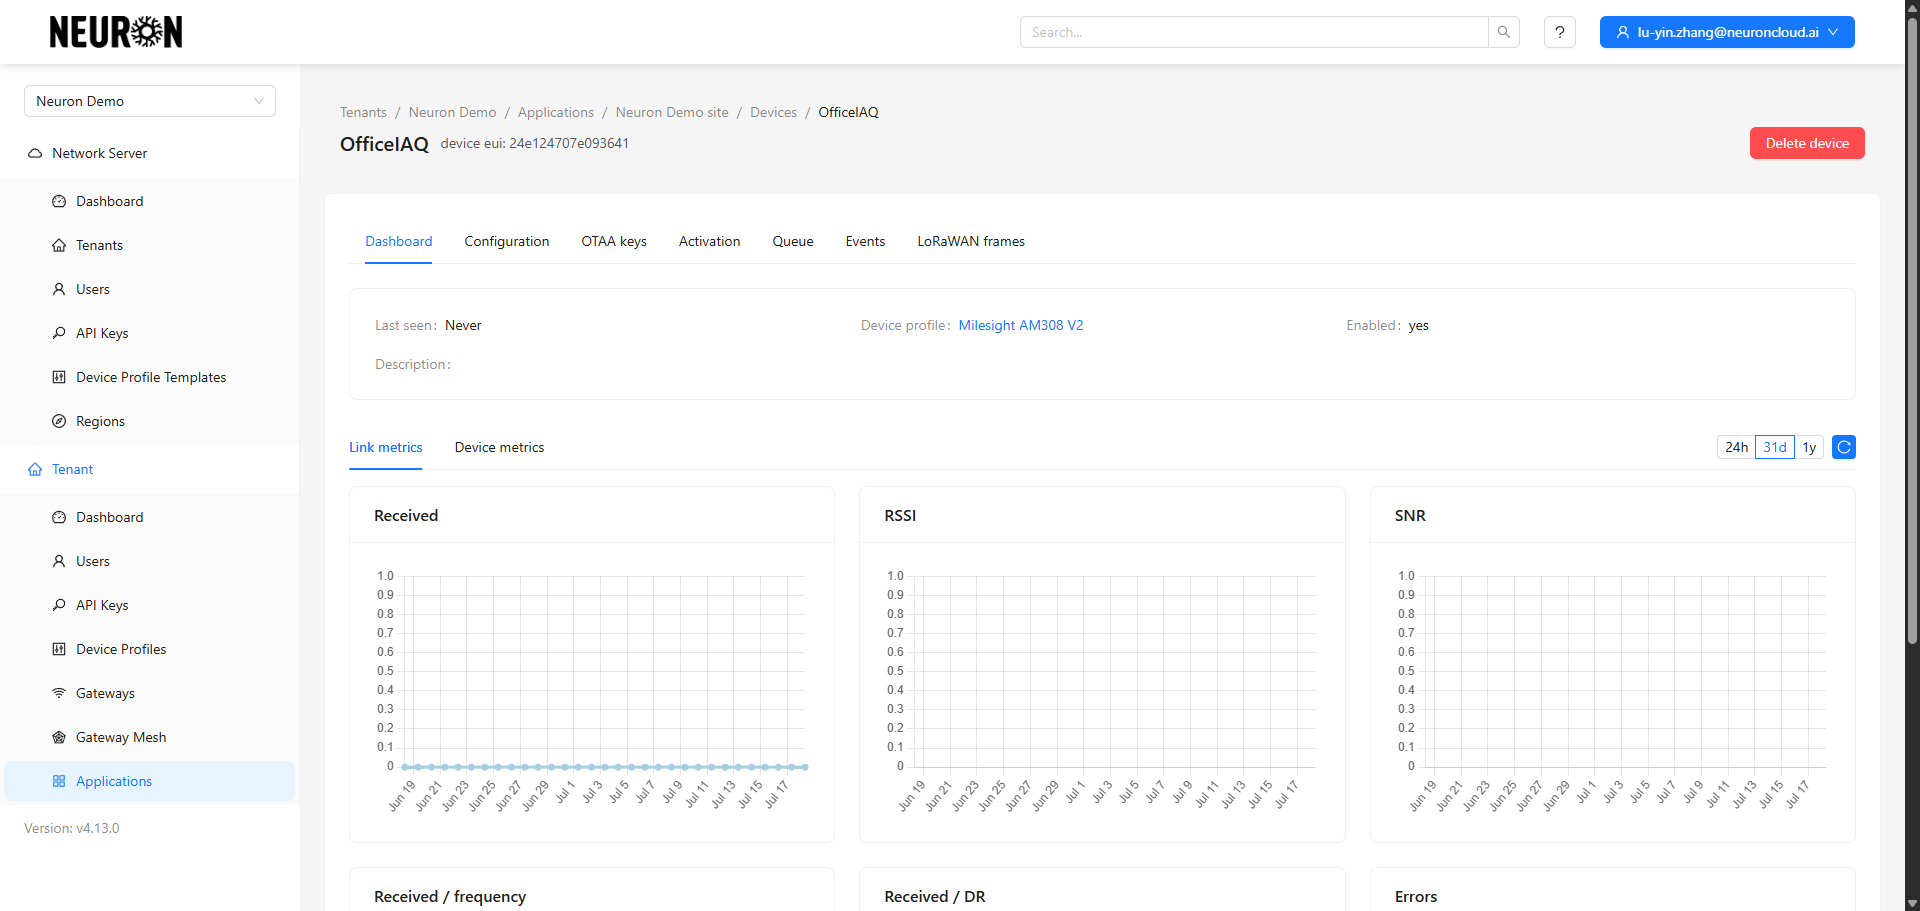
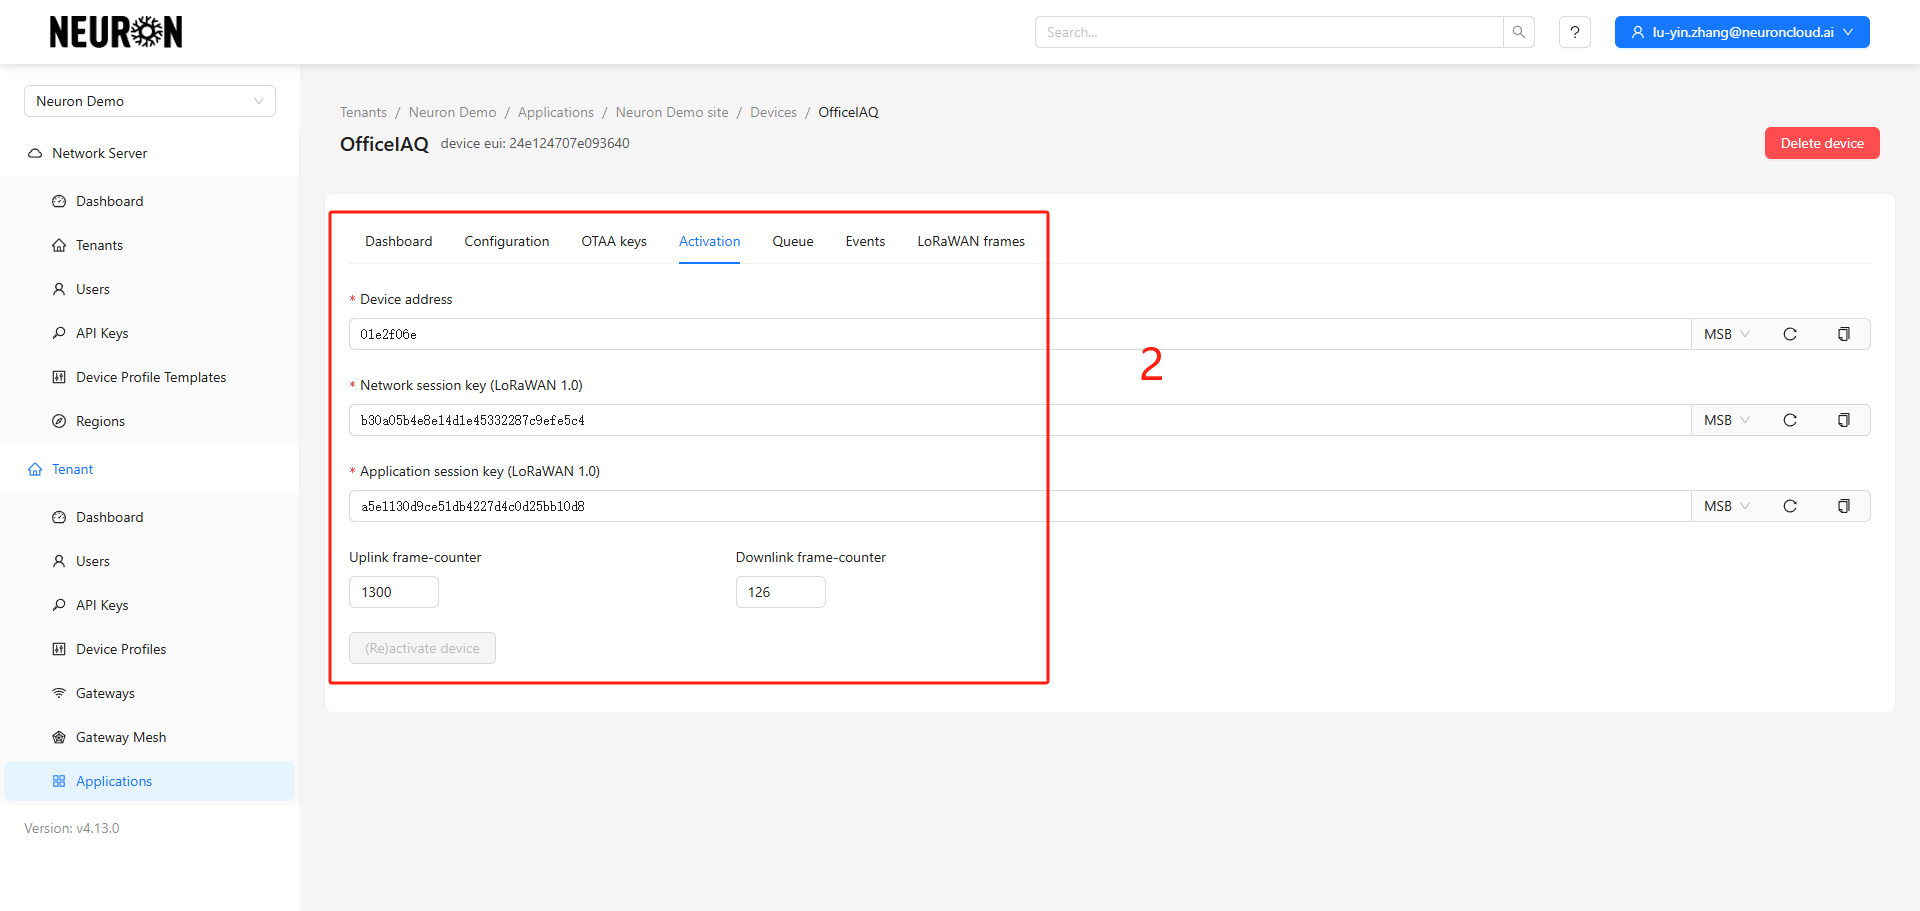
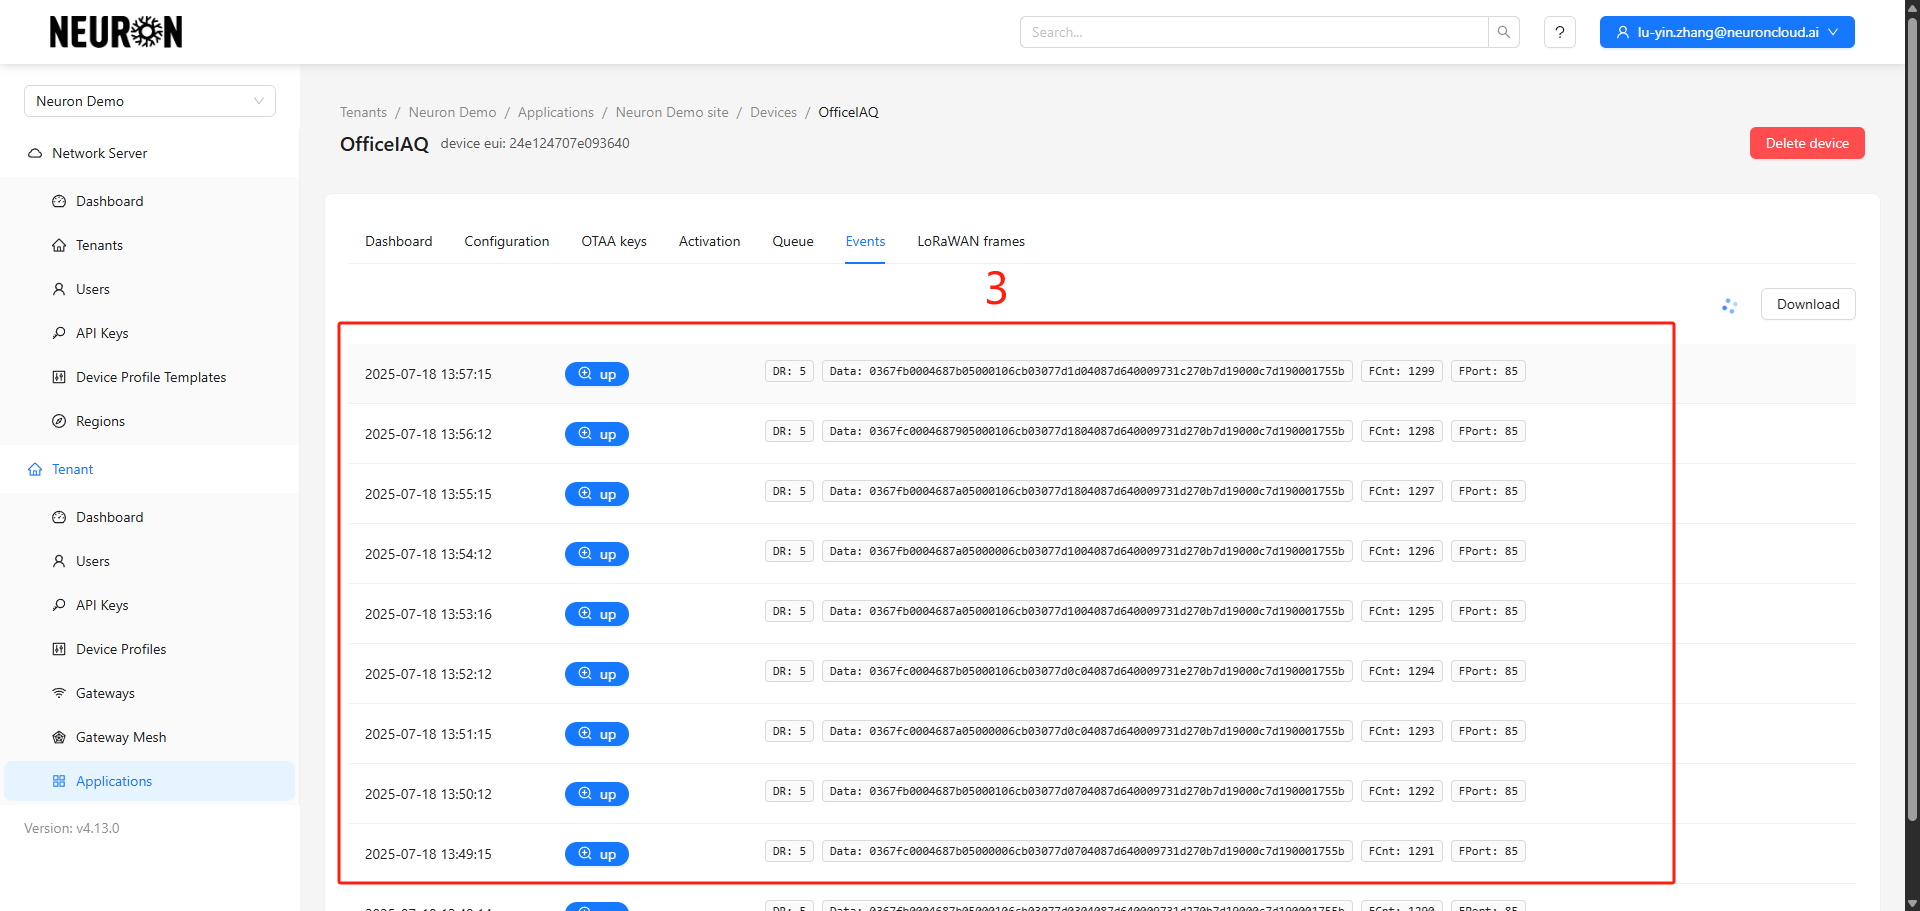
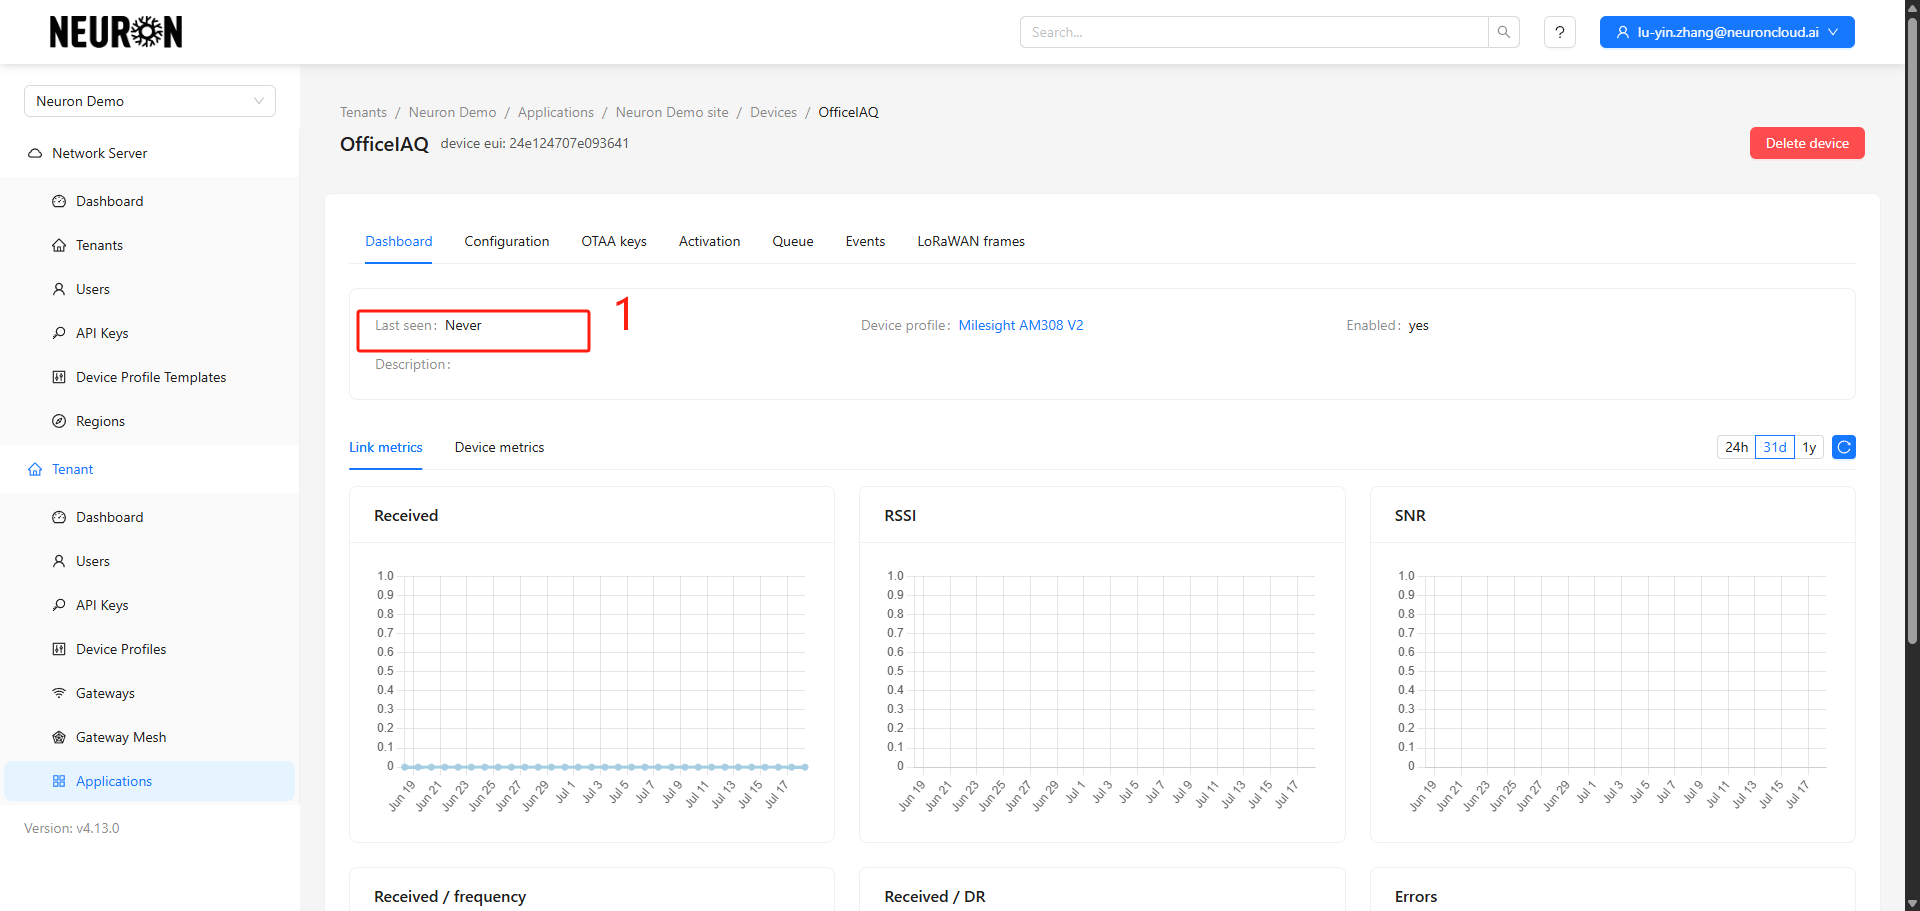
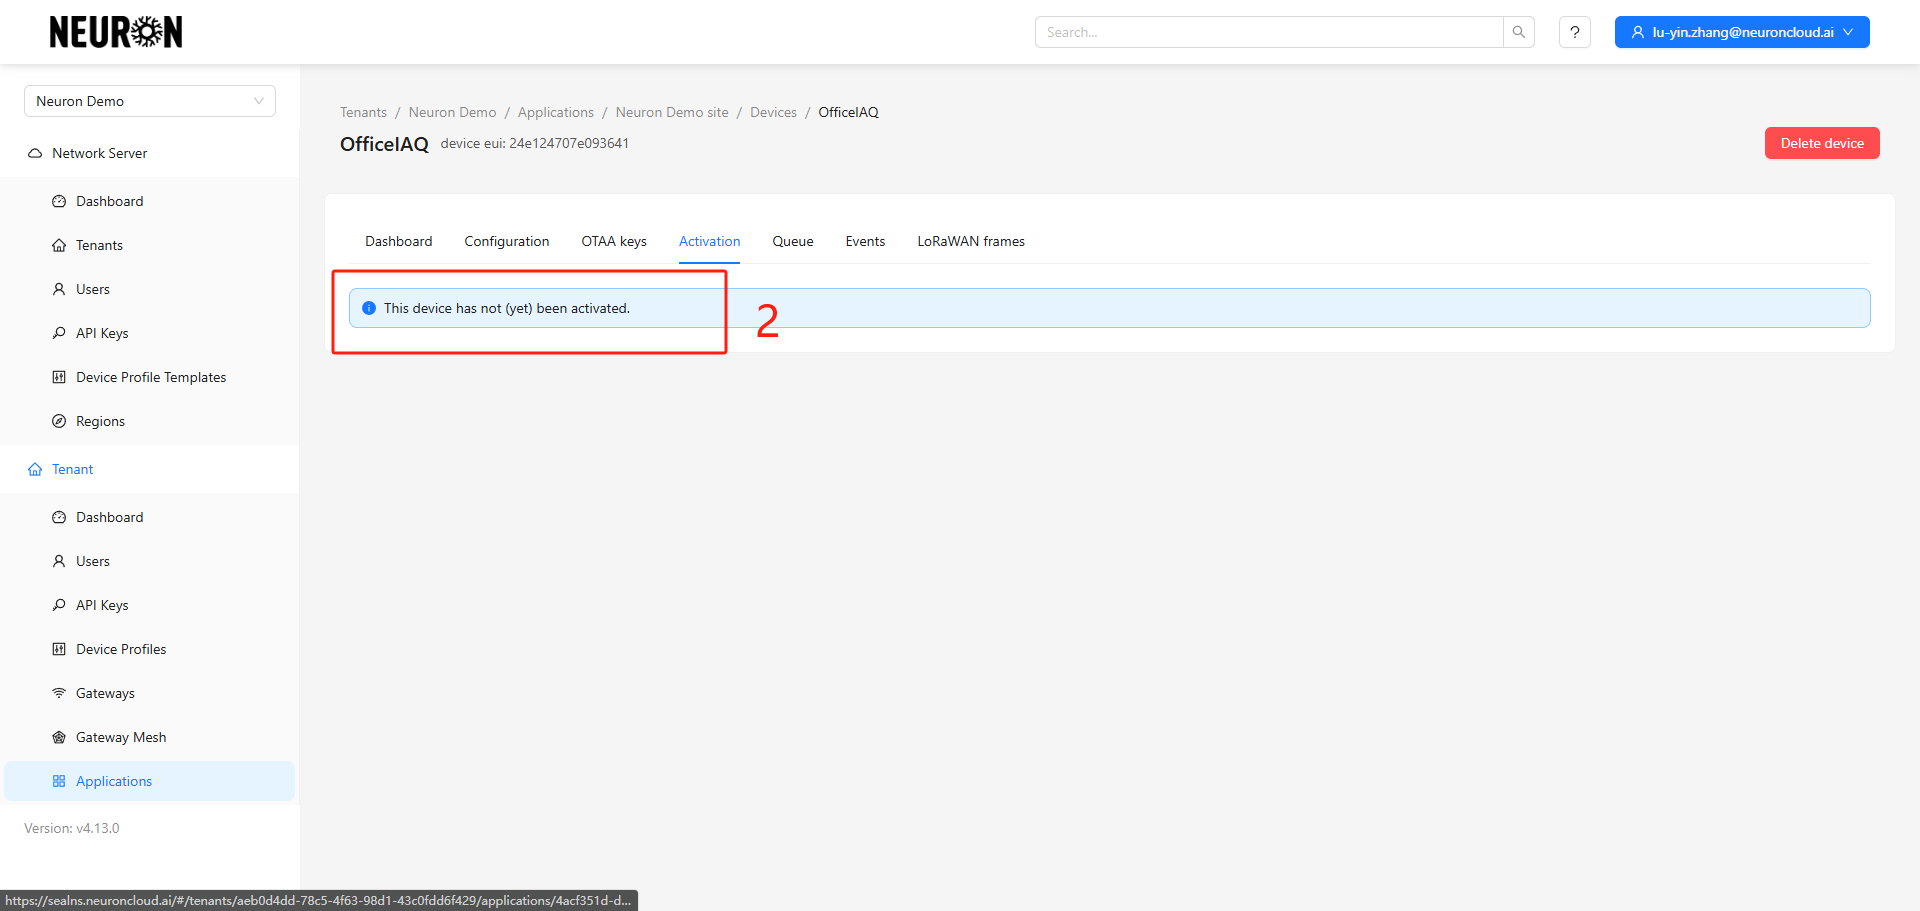
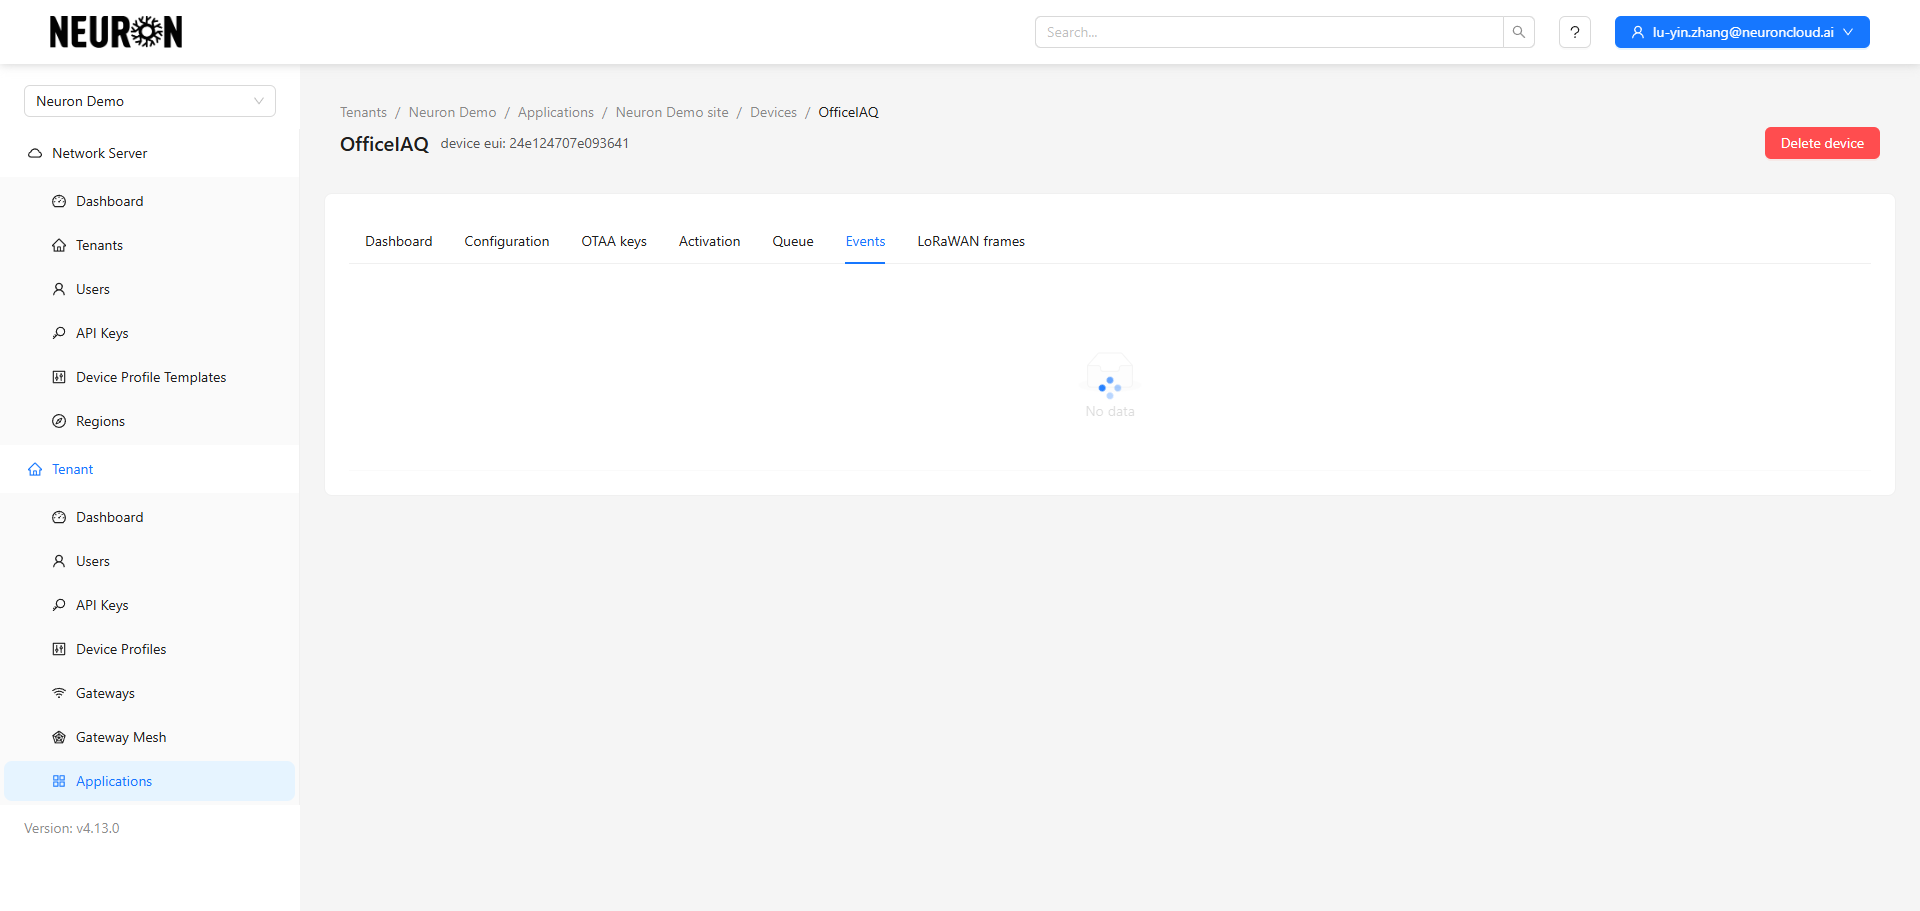
Step 4. Confirm Device Network Join Status
After adding the device, you need to confirm whether it has successfully joined the network. Check the Last Seen time, Activation parameters, or Events options to determine the status.
Data is being reported, the device is online.
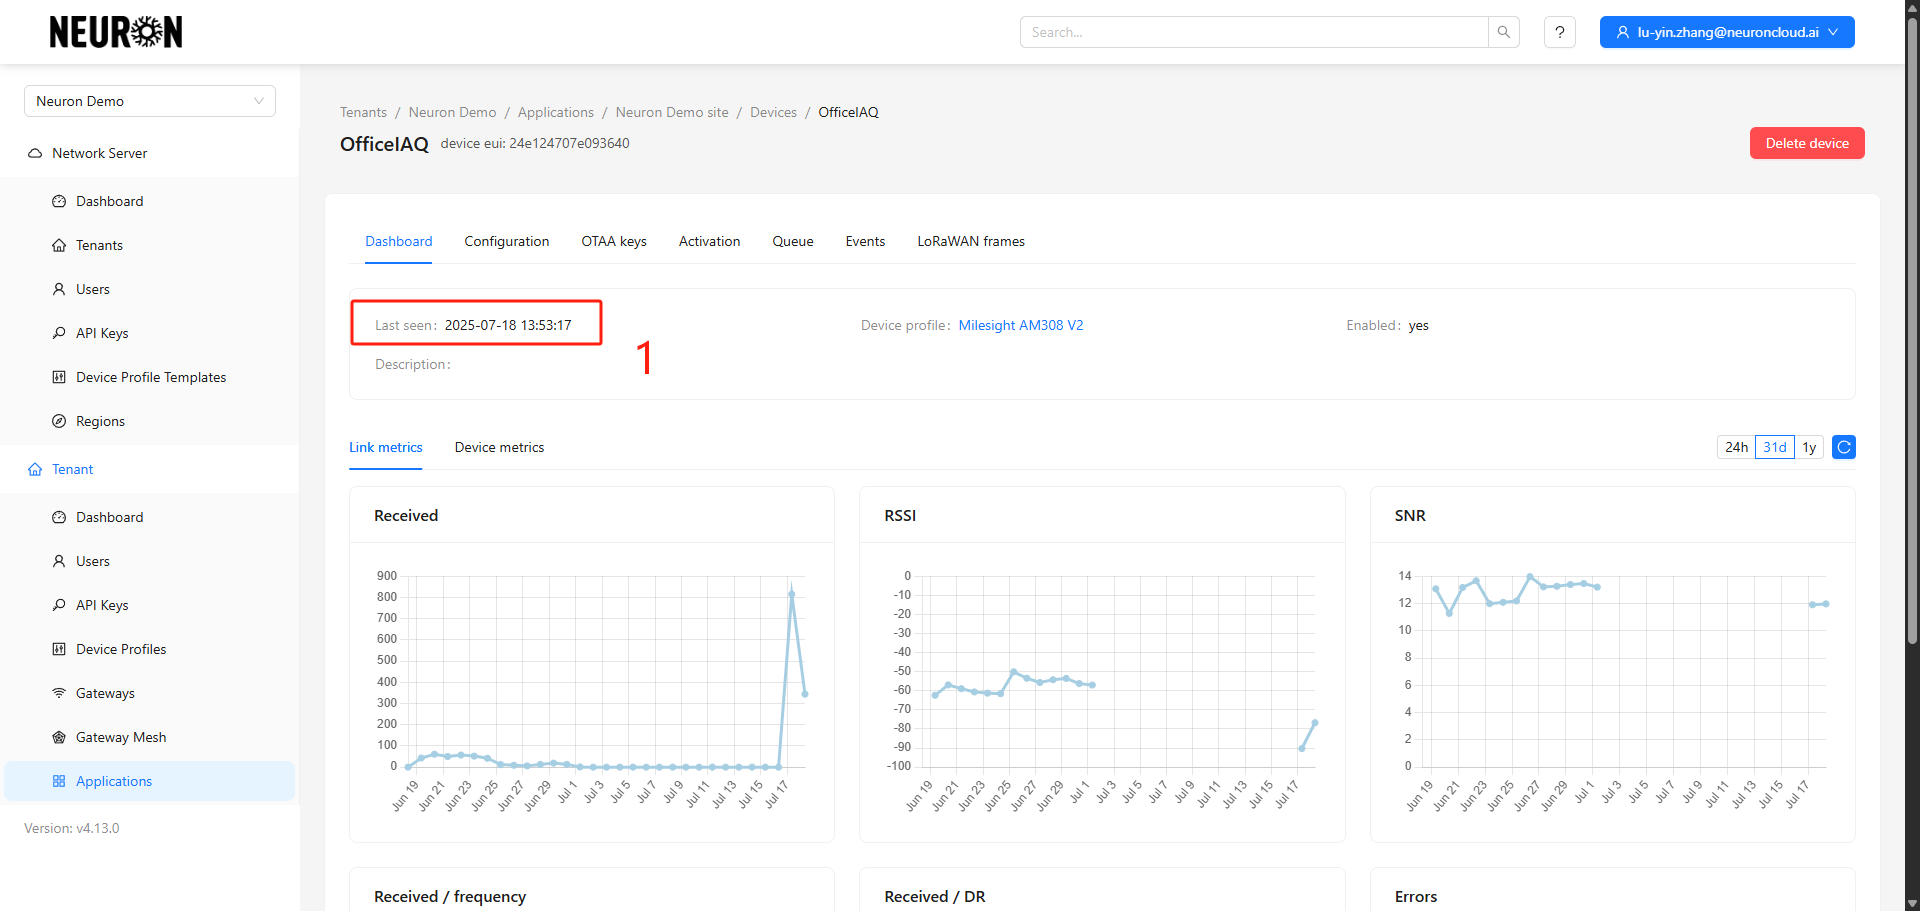
Activation parameters exist, the device is online.
Join event and data report events exist, the device is online.
Join Failure:
Last Seen shows "Never", the device is offline.
No activation parameters, the device is offline.
No join event, the device is offline.
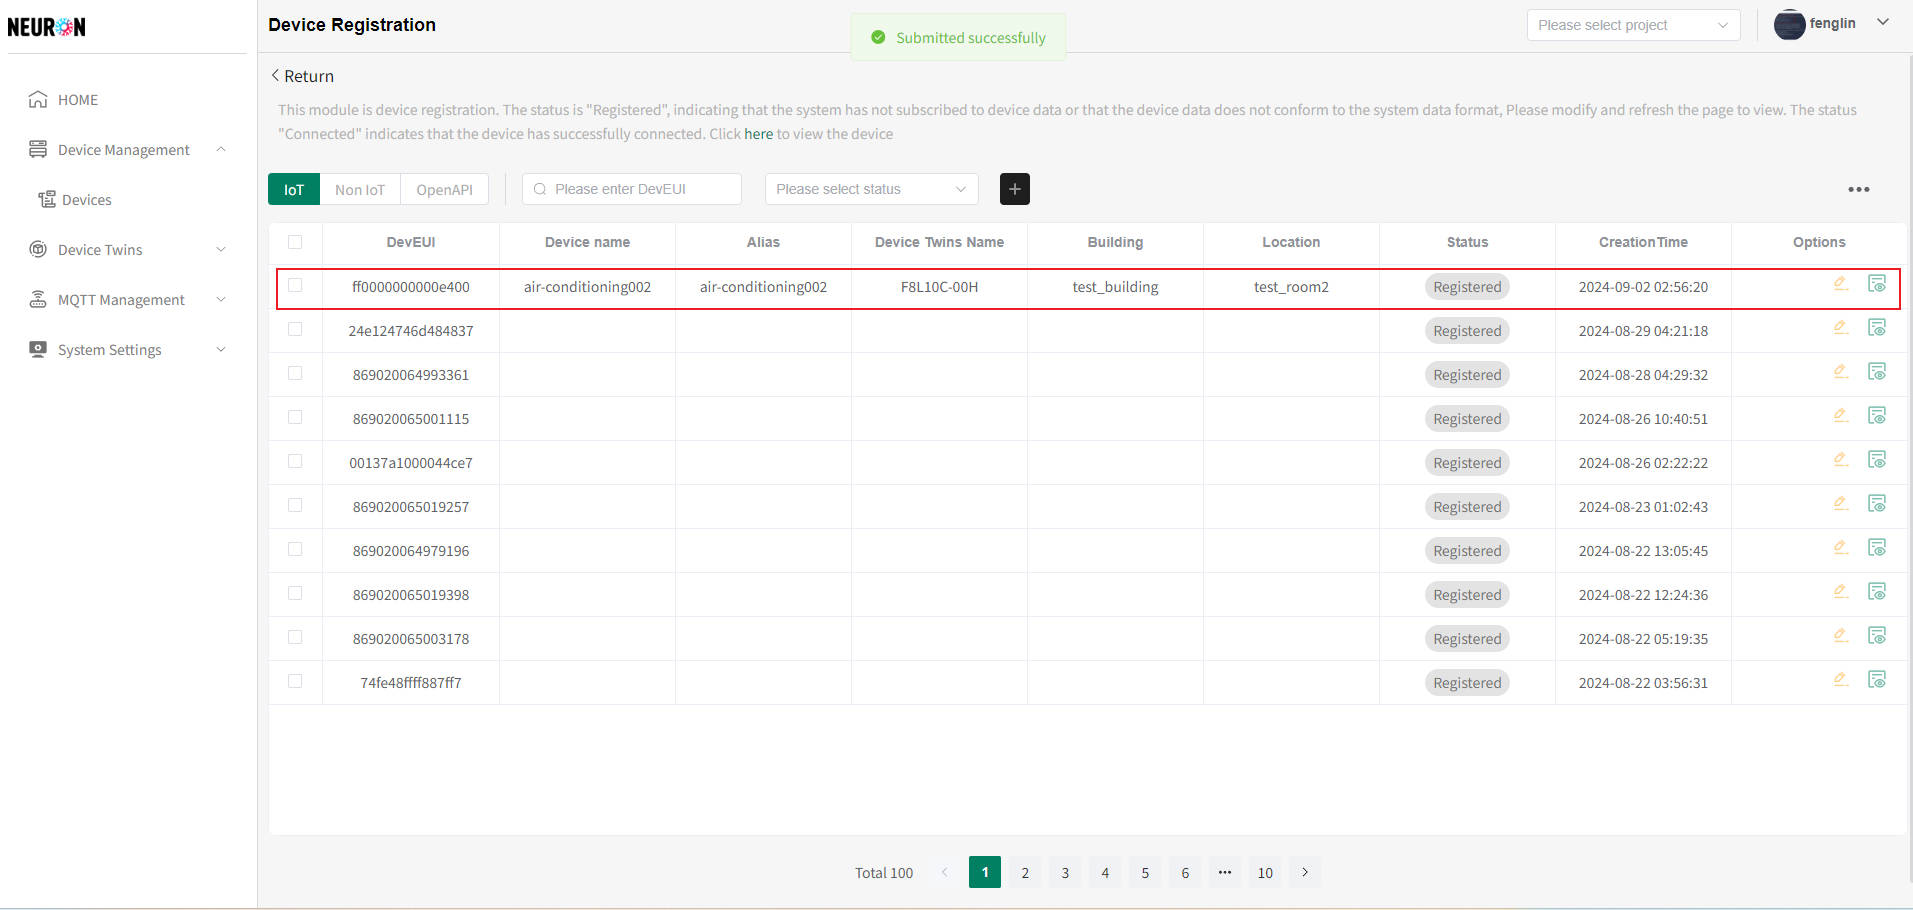
Device Access to Neuron Data Platform
Refer to LoRaWAN Device Access to register the device on the Neuron platform.
When selecting the LoRaWAN NS, you can choose an Existing NS or create your own NS. Note that in either case, the topic needs to be configured to match the topic in the Chirpstack platform. The topic name reference format is: application/**APPLICATION_ID**/device/+/event/up
Please replace APPLICATION_ID according to the actual situation.
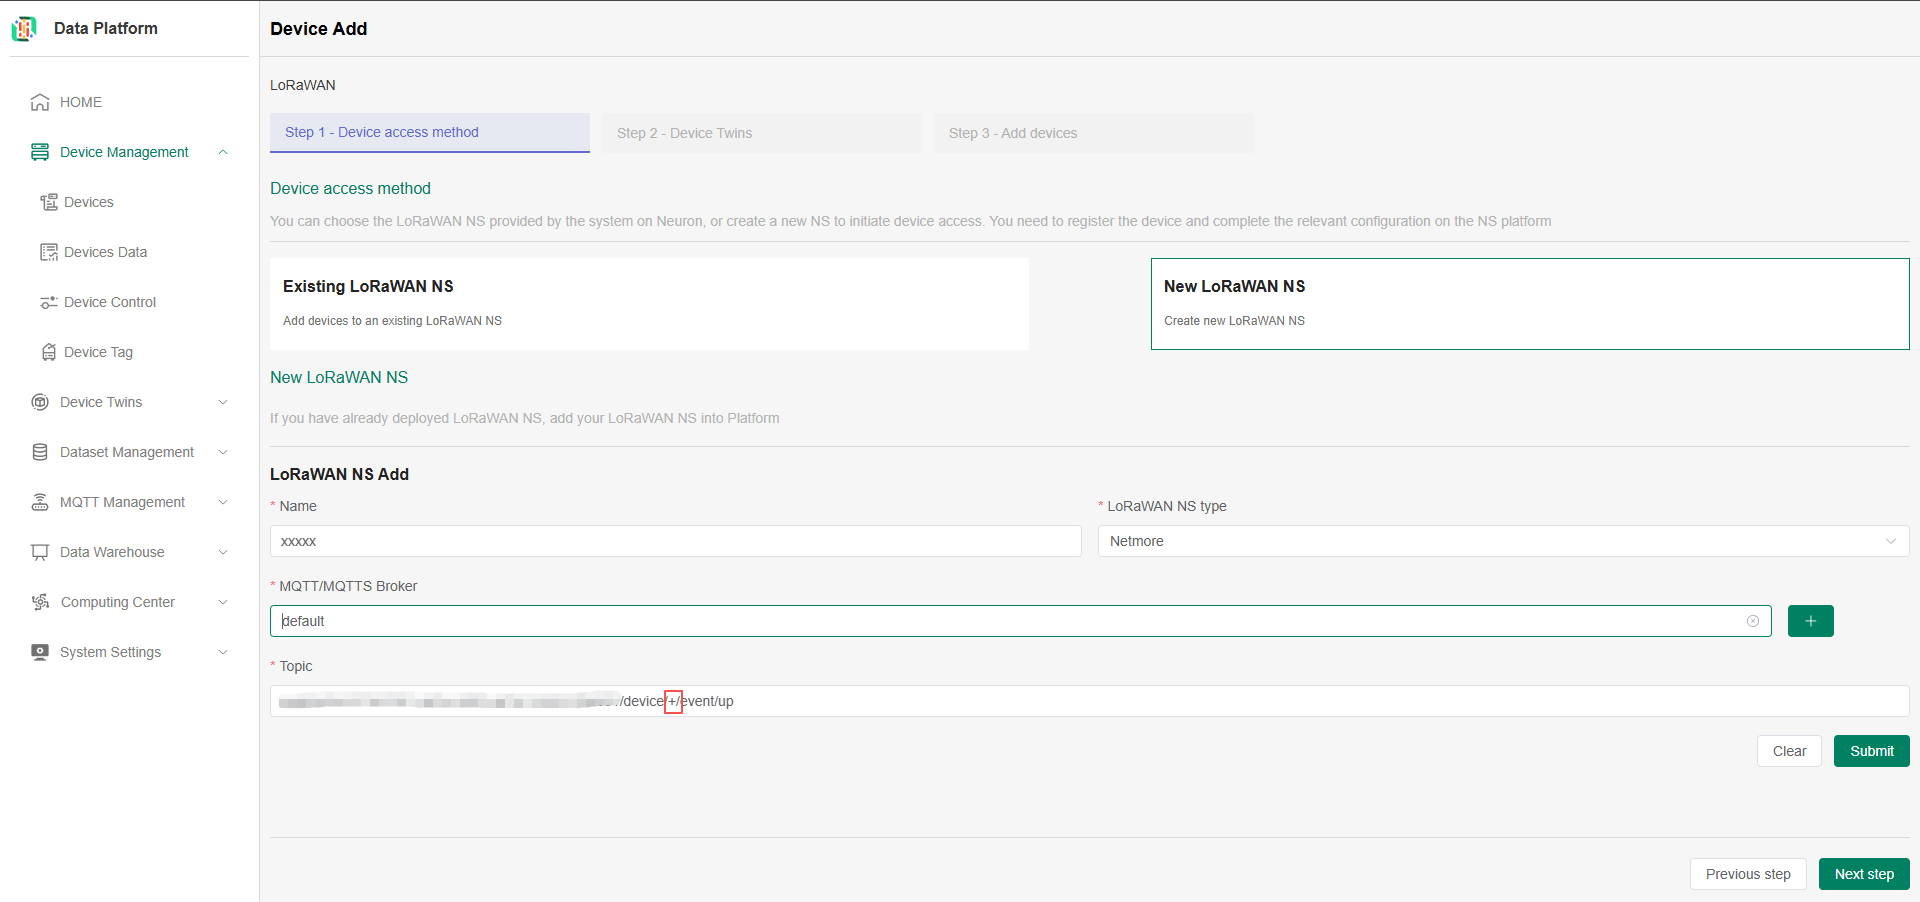
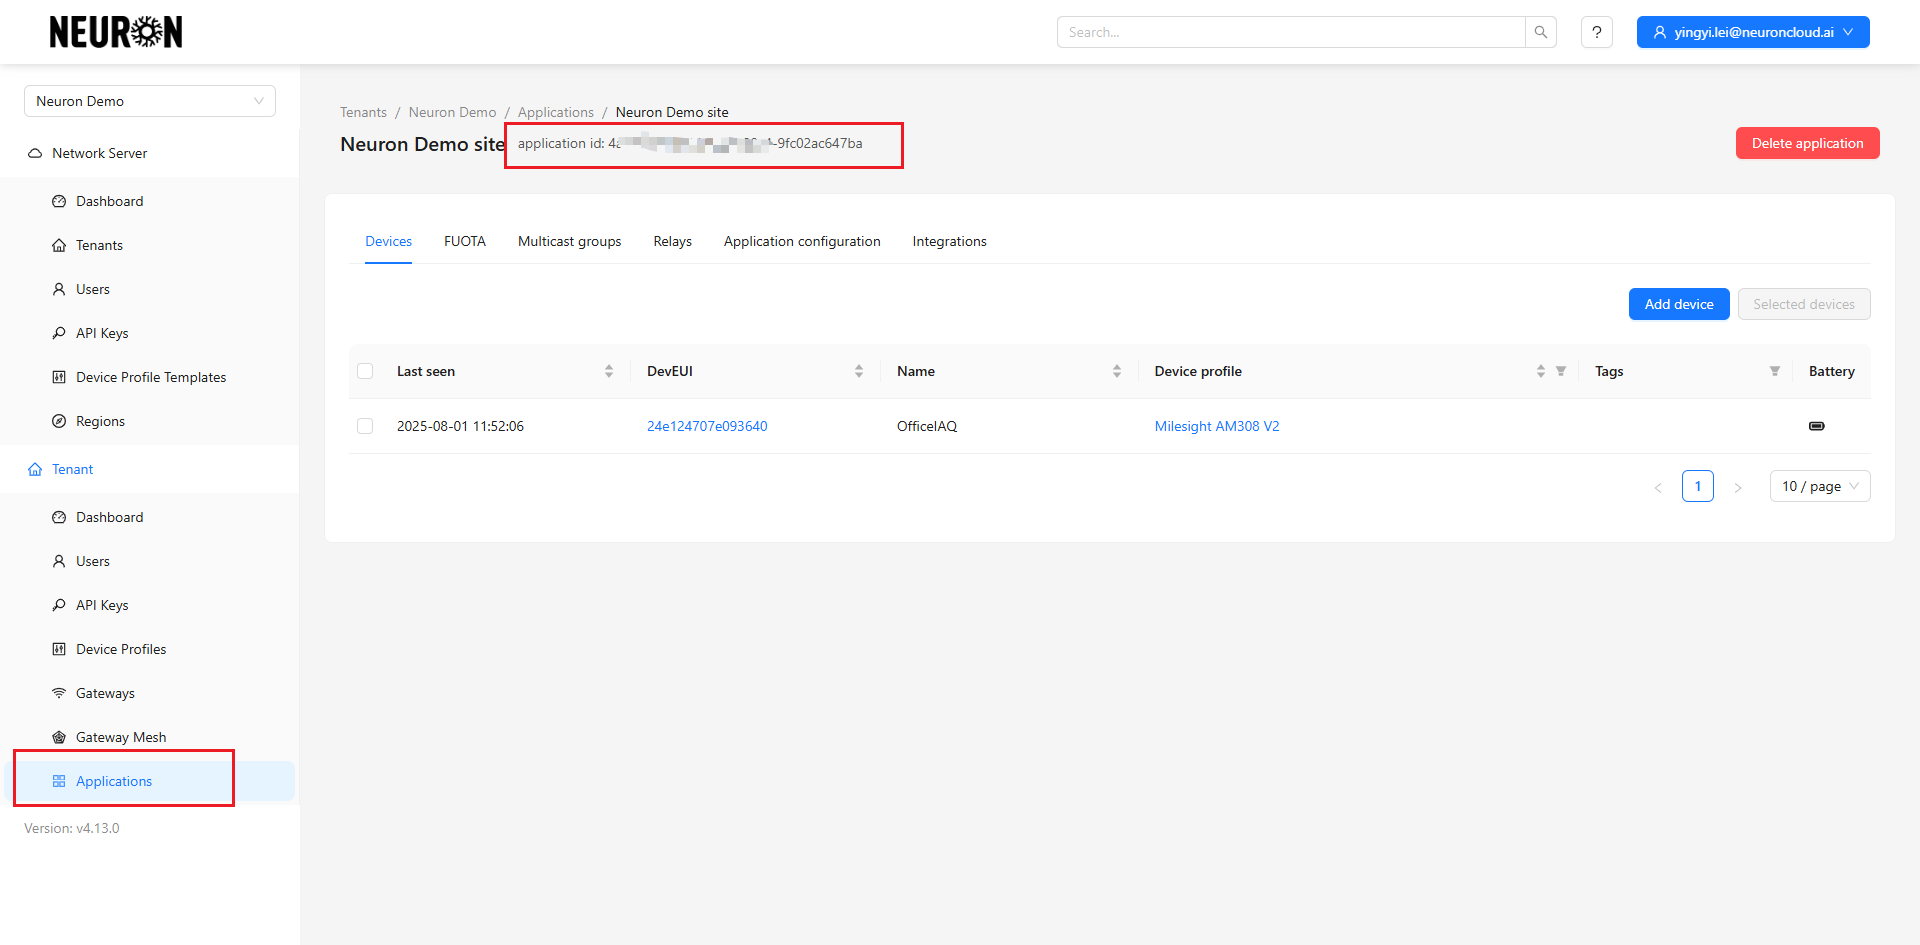
APPLICATION_ID: In the ChirpStack platform, select the corresponding application from the application menu and copy the APPLICATION ID.
Note:
- Successful device registration only means that the platform has recorded the device information and displays a "Registered" status. Real-time data is not yet connected at this point. The system will subscribe to the reported data based on the configured parameters. After data cleansing and storage are completed, the device status will change to "Connected" and appear in the device list.