Device Tags
Overview
The Device Tags module provides a flexible device classification and identification management system, supporting four tag types: Platform Project Tags, System Tags, Category Tags, and Custom Tags.
By adding different types of tags to devices, users can organize and quickly retrieve devices from multiple perspectives such as project affiliation, system architecture, Device Twins classification, and custom dimensions, achieving refined device grouping management and efficient querying.
To ensure the following operational process proceeds normally, please confirm that you have Project Administrator permissions.
Access Method
In the tenant version of the platform, click the 'Device Management' menu, select 'Device Tag' to enter the Device Tags module;
Platform Project Tags
Devices marked with platform project tags can be found by querying the platform project and platform project location.
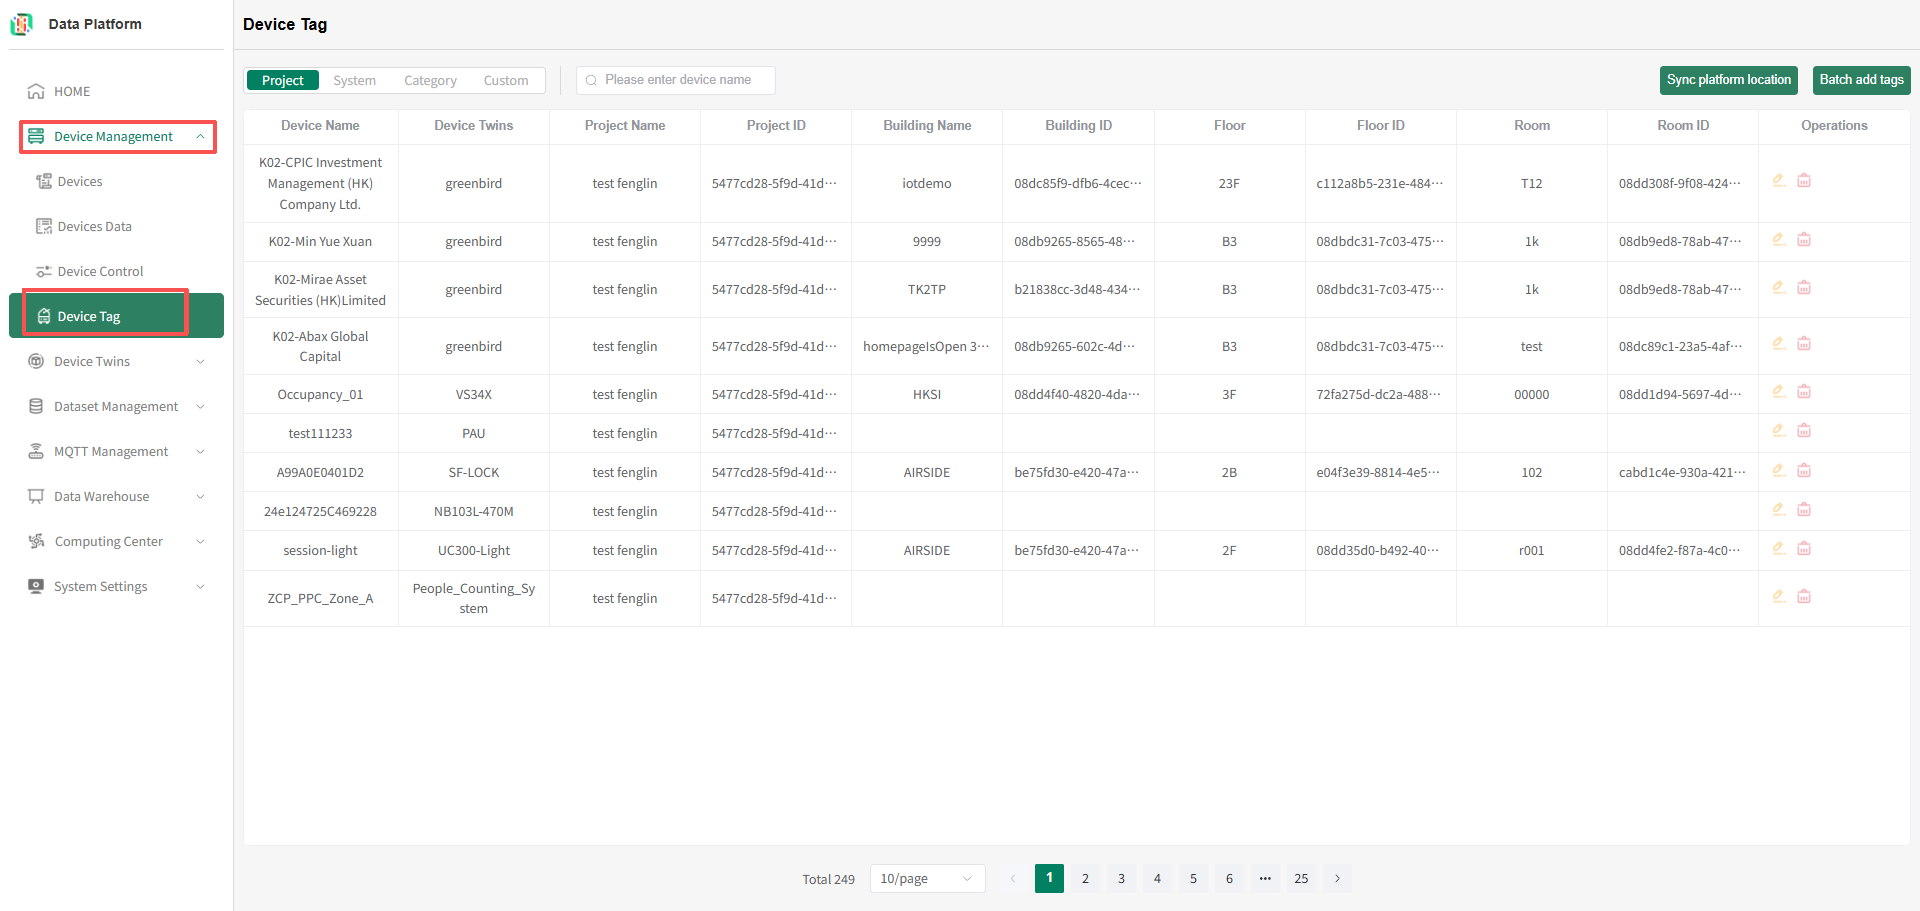
- Enter Device Tags Page
Click the menu bar "System Settings", click the "Device Tag" button to enter the Device Tag module, as shown below.
- Platform Project Tag List
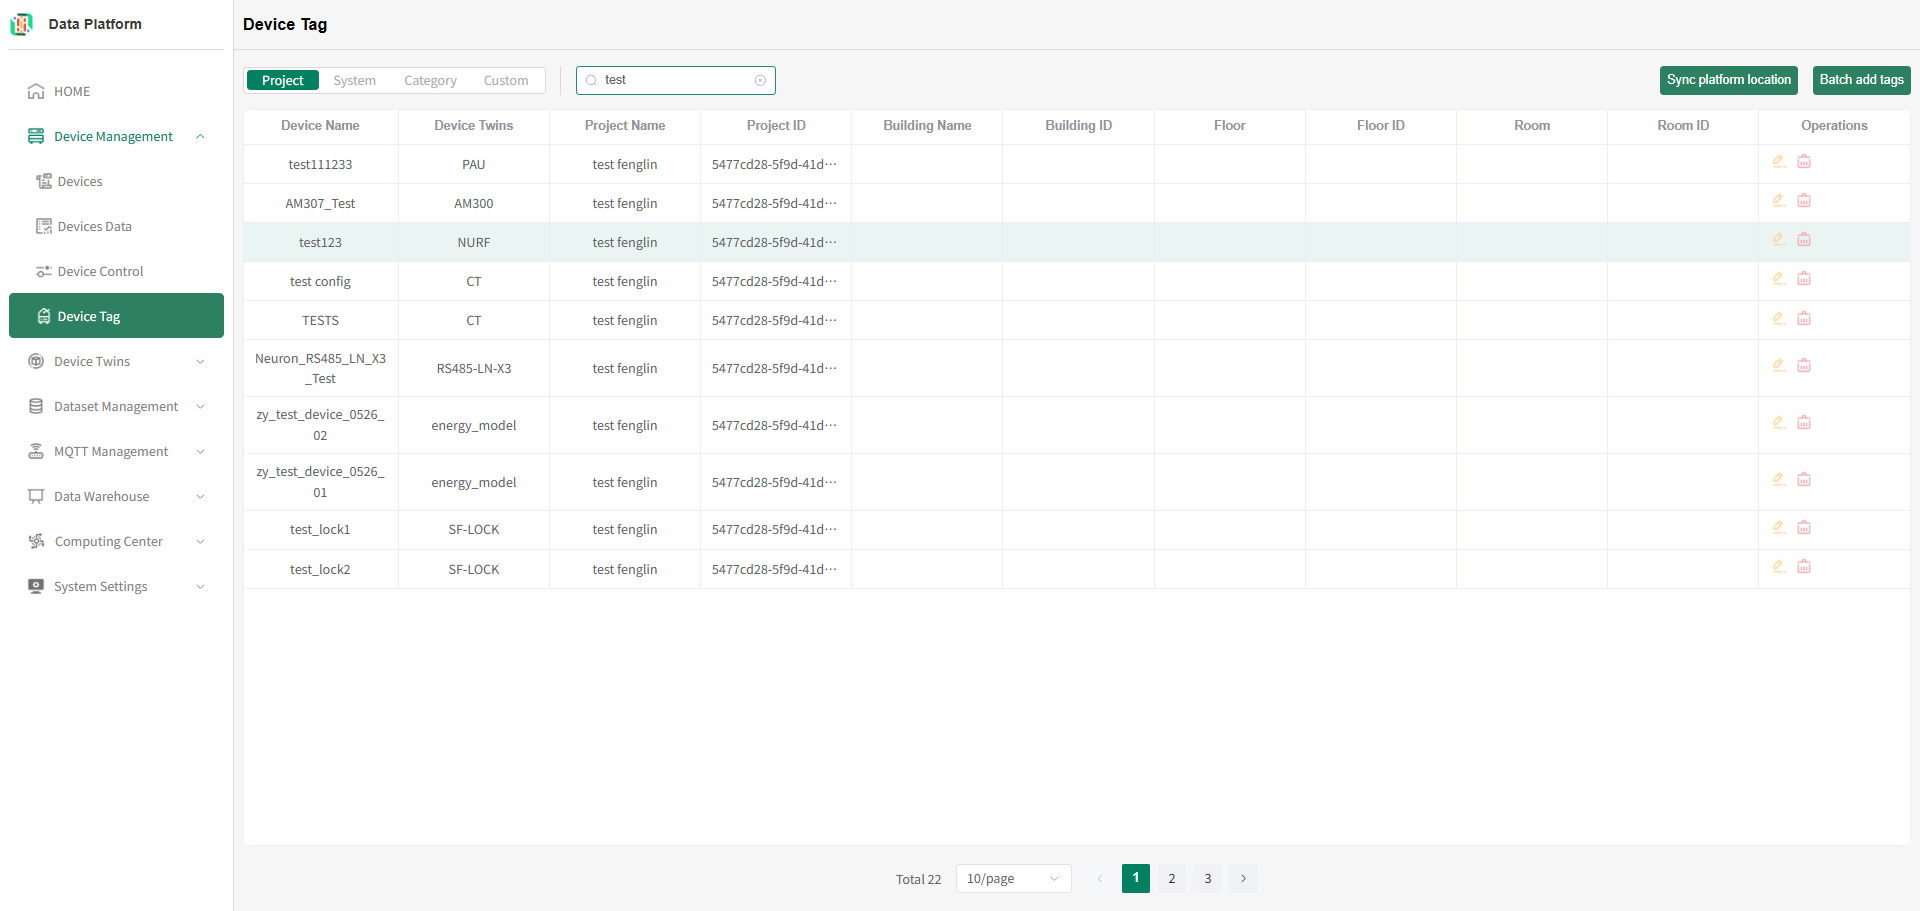
Enter the device name you want to query and press Enter to refresh the project tag list, as shown below.tipPlatform project tags are system project tags created by bound Neuron platform users, supporting device name query.
 tip
tipThe system supports both binding a platform project tag to a single device and binding multiple devices to the same platform project tag.
- Bind Platform Project Tag to Single Device
For operations on binding a platform project tag to a single device, see Device Details / Device Details Page Tags. - Bind Platform Project Tag to Multiple Devices
On the platform project tags page, click the "Batch add tags" button, as shown below. Enter the configuration page for binding platform project tags to multiple devices, as shown below.
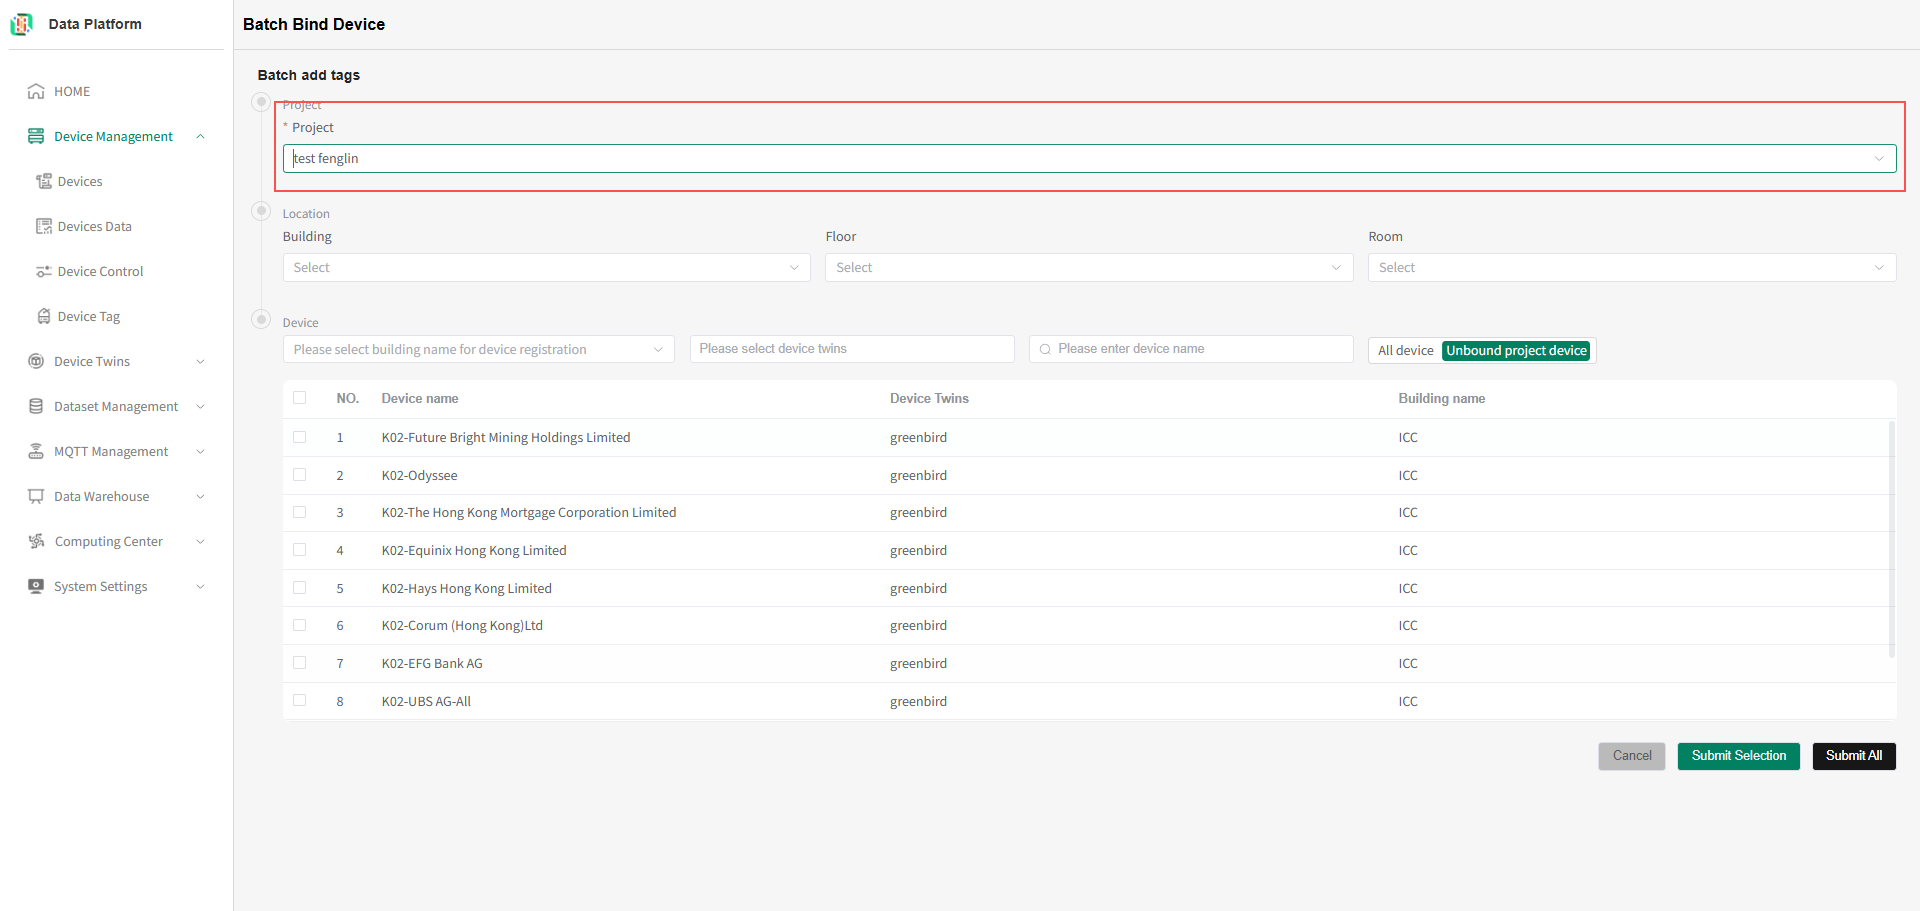
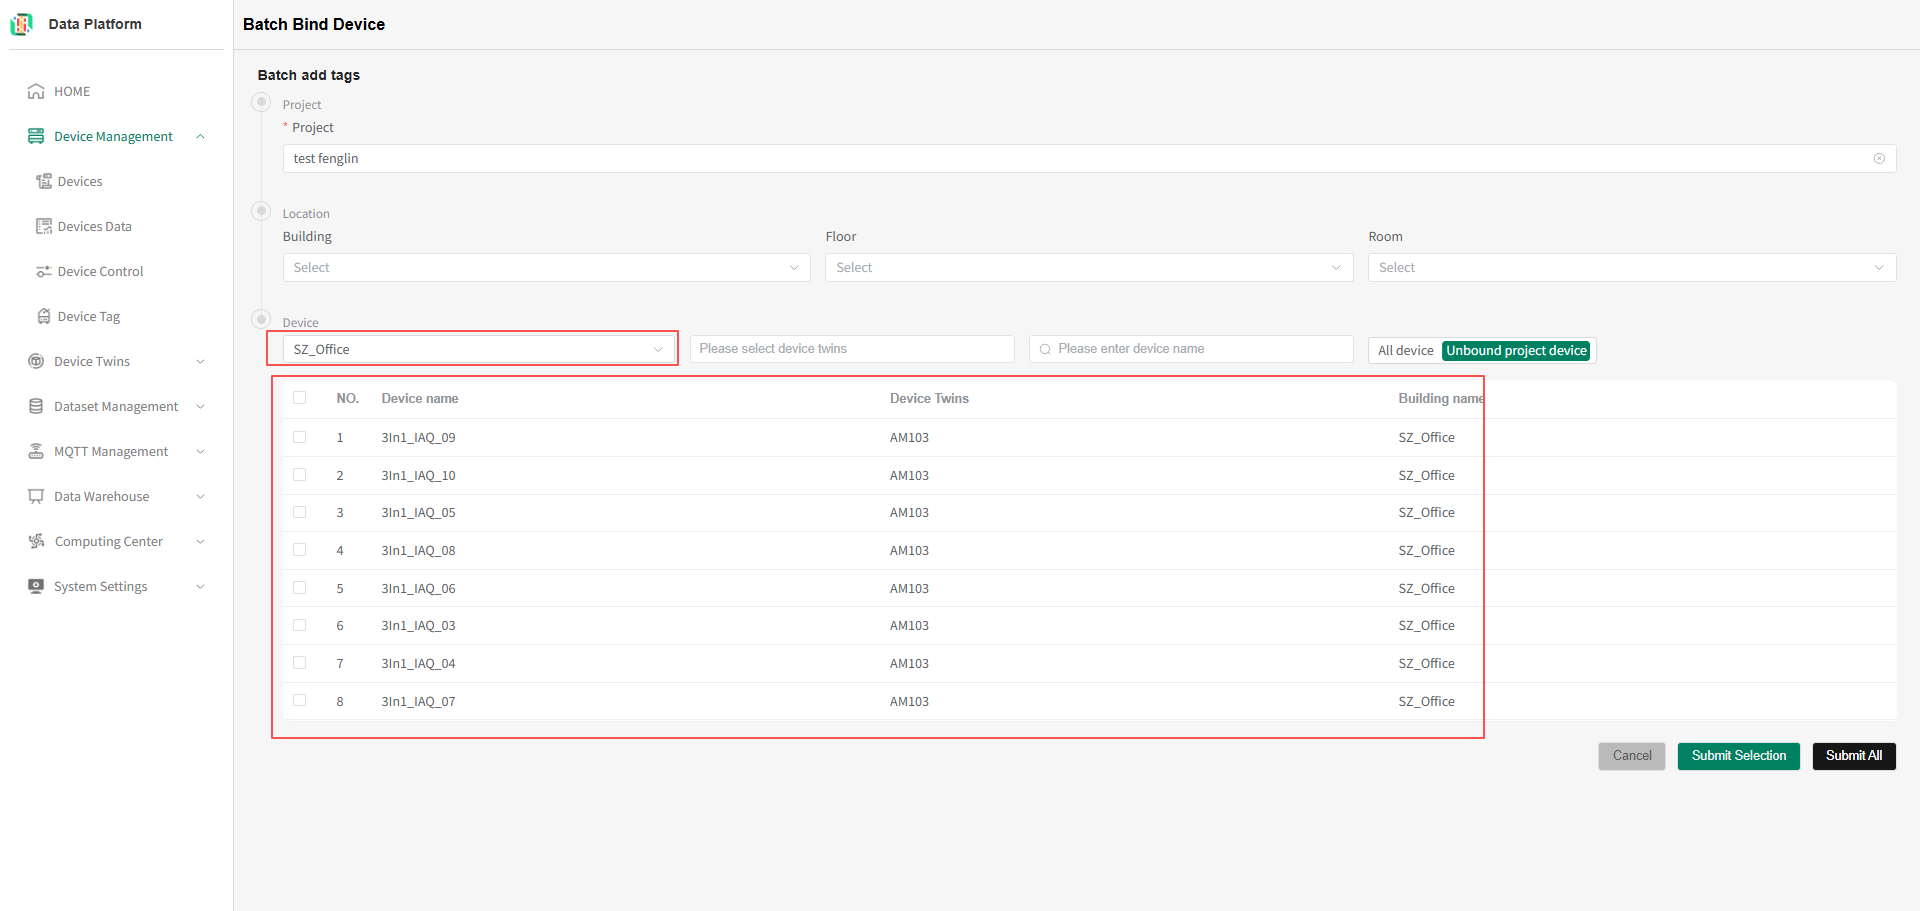
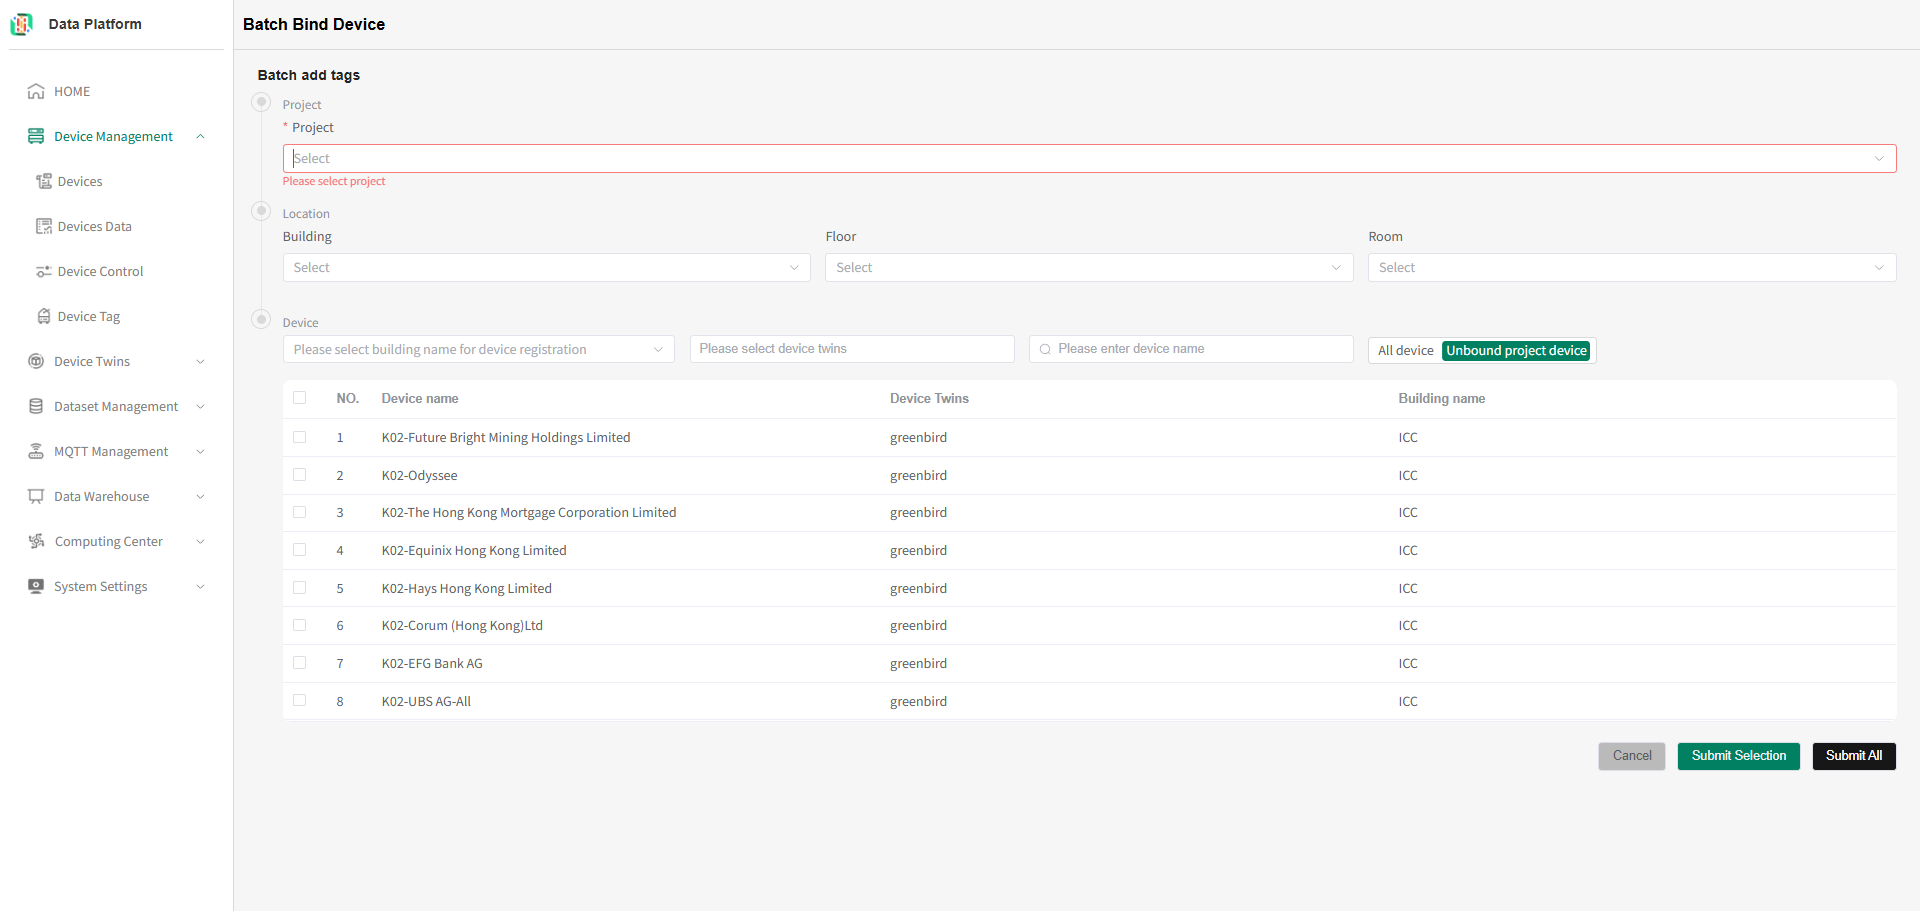 Select the platform project to bind. The system will list all devices not bound to this project, as shown below.
 As shown above, you can search for the required devices as needed.
The following uses device data access building as an example. As shown below, select the building you want to query to refresh the device list.tip
As shown above, you can search for the required devices as needed.
The following uses device data access building as an example. As shown below, select the building you want to query to refresh the device list.tipThe system supports searching by device data access building, device thing model, and device name dimensions.
 warning
The system has two buttons for binding projects (Submit All, Submit Selection). After submission, all operated devices can be bound to the user-selected platform project.
Submit All: Submits all devices meeting the conditions. Operate as needed.
Submit Selection: Submits all user-selected devices. Operate as needed.
When binding the project, you can also bind the location information under the platform (This operation affects multiple devices, please operate carefully).
If bound incorrectly, you can delete the information on the list page or modify the information on the device details page.- Bind Platform Project Information Based on Selected Devices
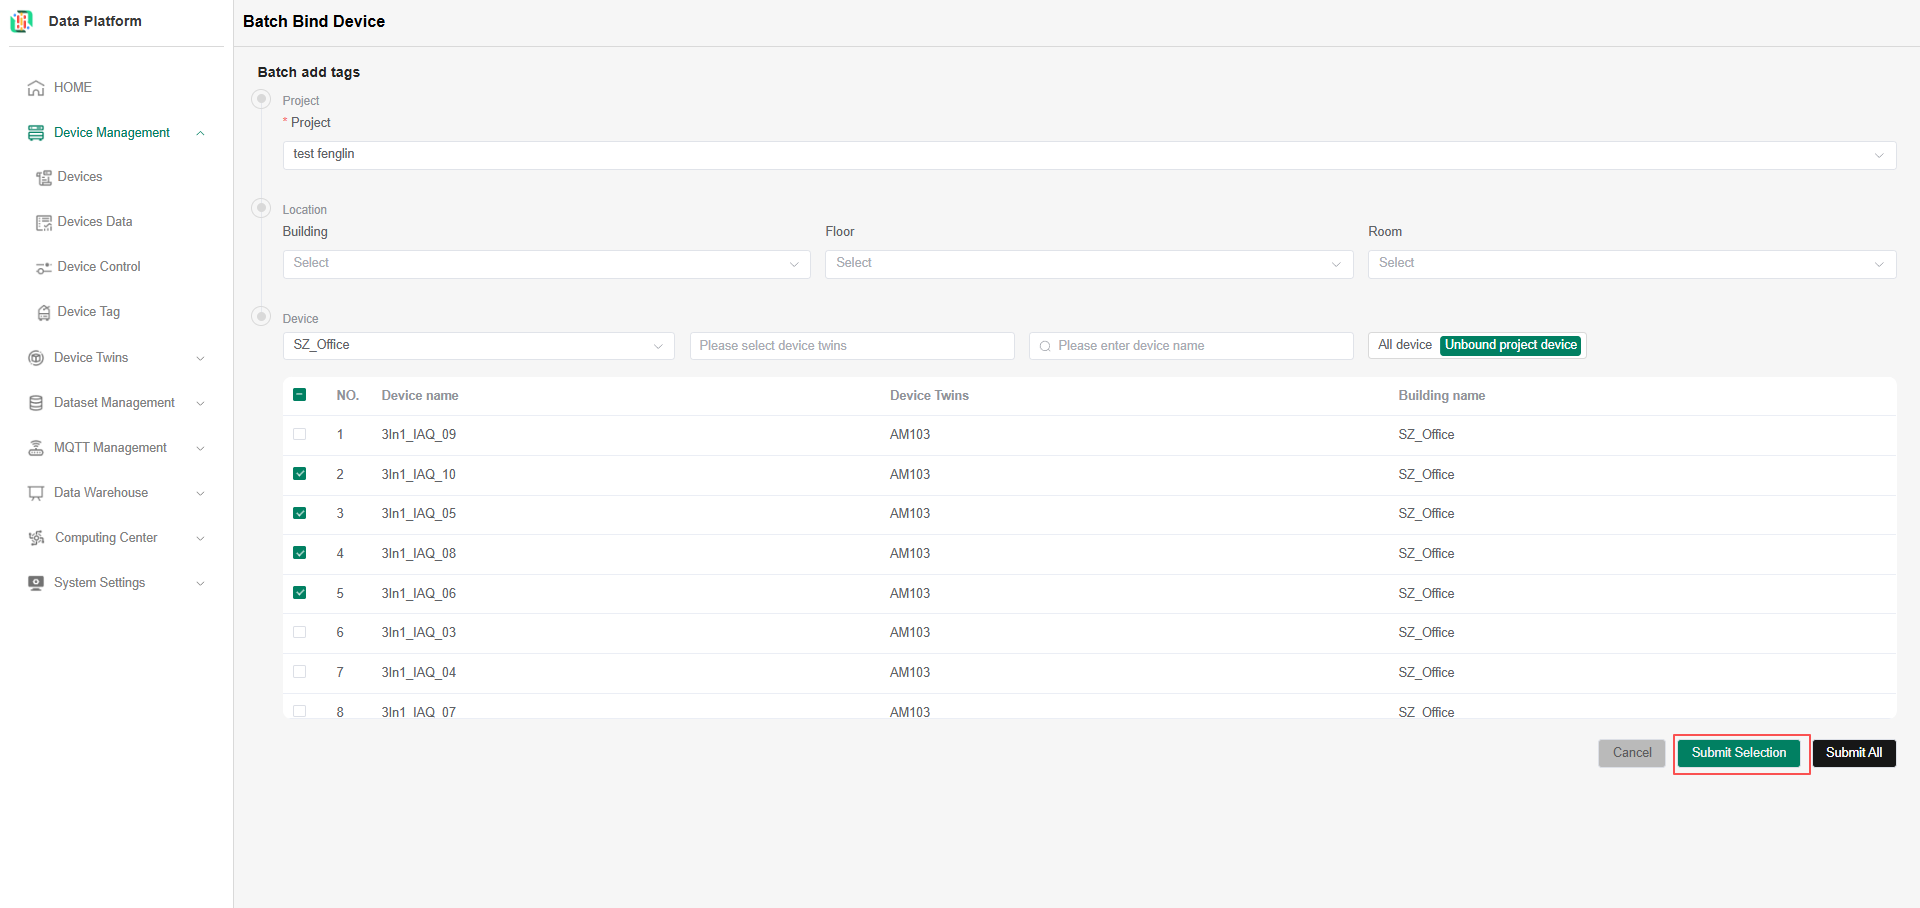
Users can search for the required devices as needed, check the corresponding devices, and click "Submit Selection" to assign the selected devices to the user-selected platform project, as shown below.tip
Device selection supports cross-page selection.
- Bind Platform Project Information Based on Selected Devices
Users can search for the required devices as needed, click "Submit All" to bind all eligible devices to the platform project, as shown below.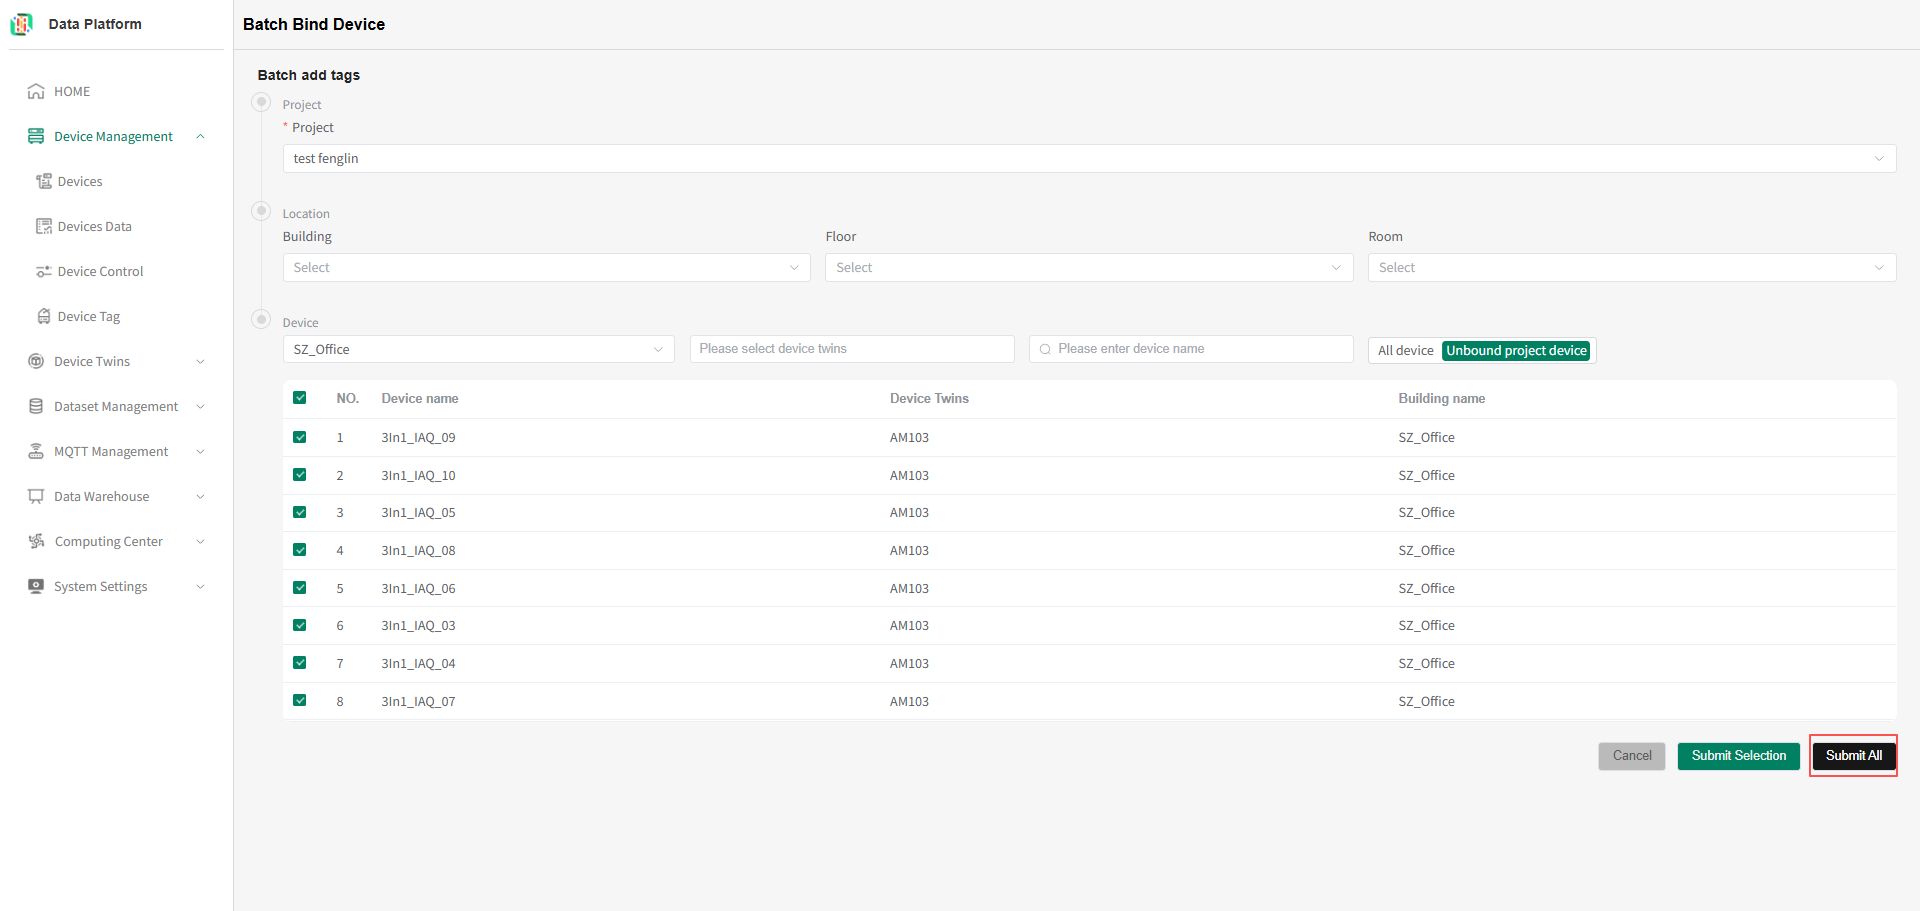
- Bind Platform Project Information Based on Selected Devices
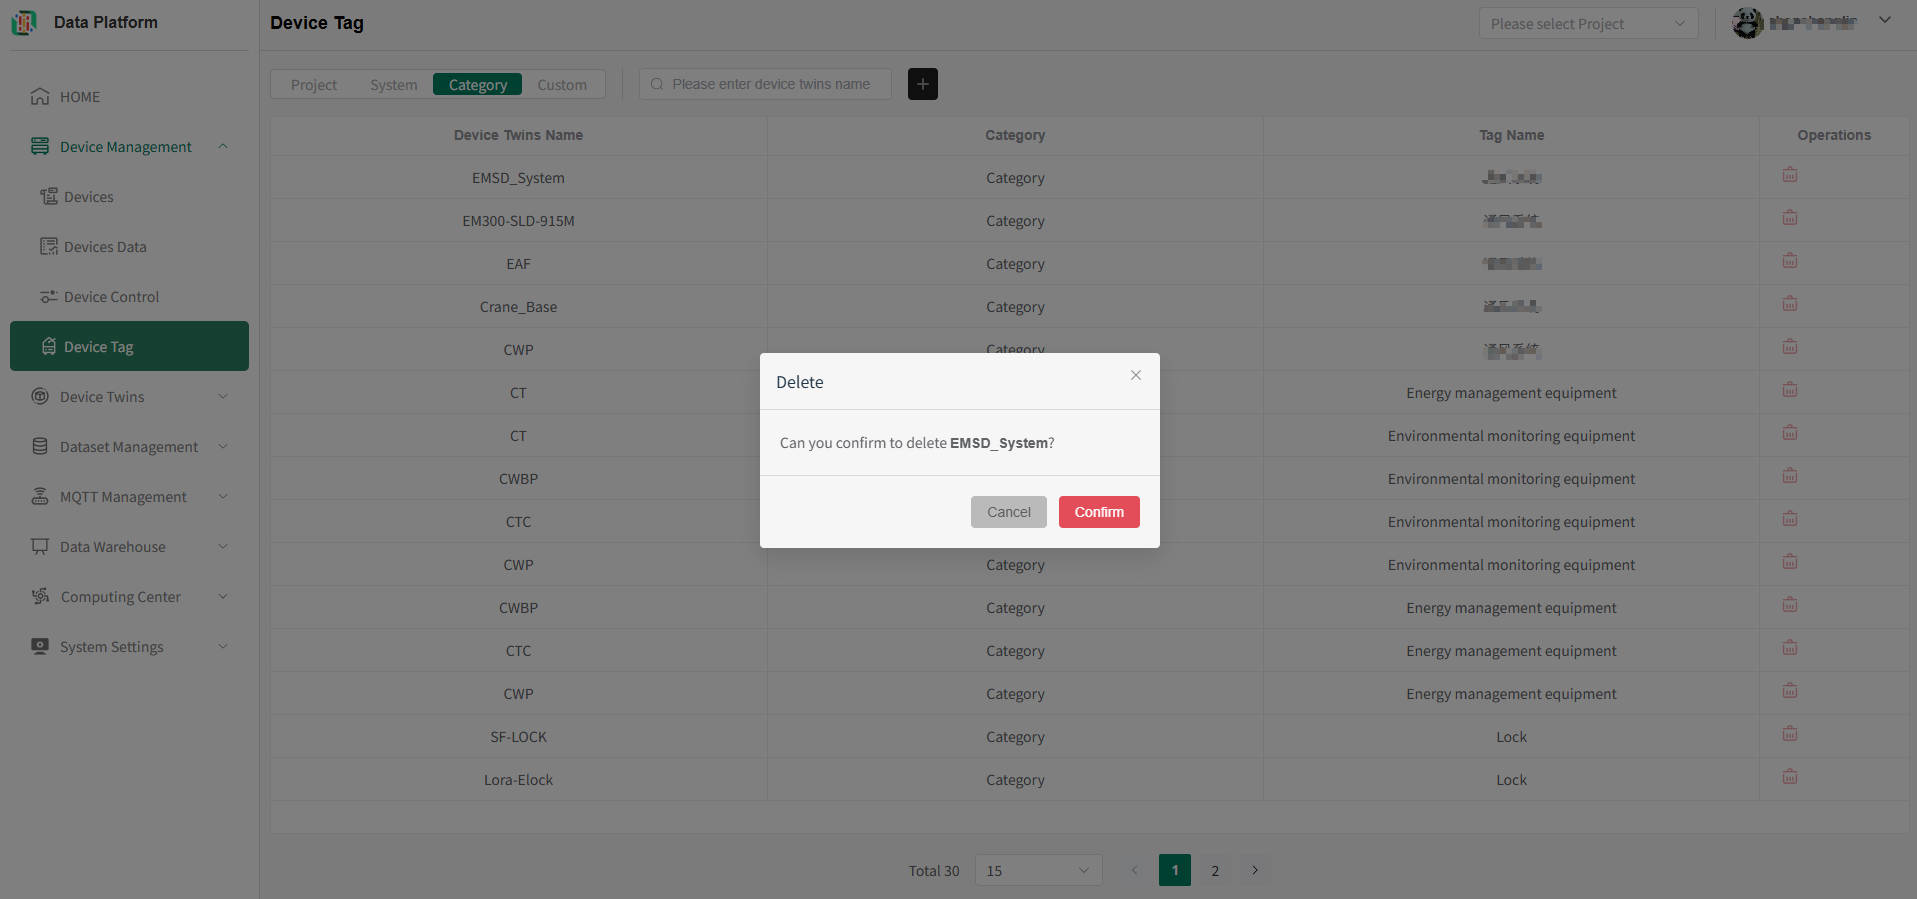
- Delete Device Platform Project Tag
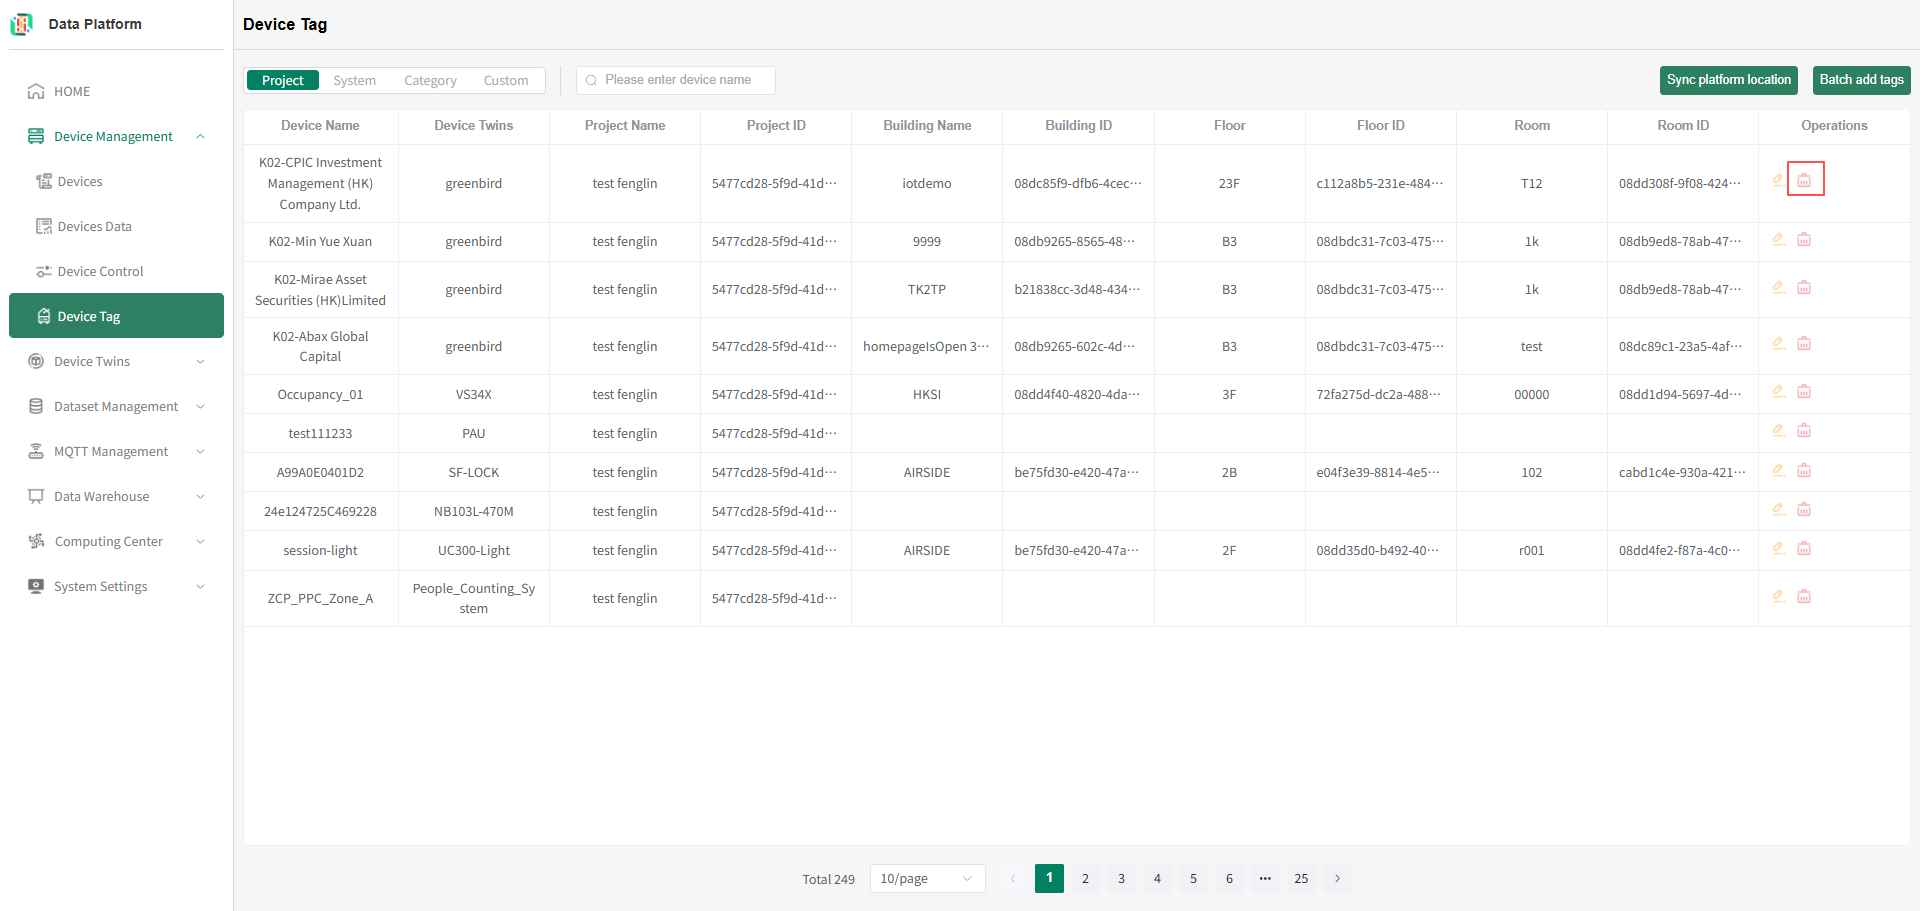
On the device tag list page, click the "Delete" button on the right side of the row of the device to be unbound. After user confirmation, the binding between the device and the platform project can be deleted, as shown below.tipOnly the project administrator and super administrator can unbind projects.
System Tags
Devices marked with system tags can be found by querying the device's system, subsystem, device type, etc.
- Enter Device Tags Page
Click the menu bar "Device Management", click the "Device Tag" button to enter the Device Tag module, as shown below.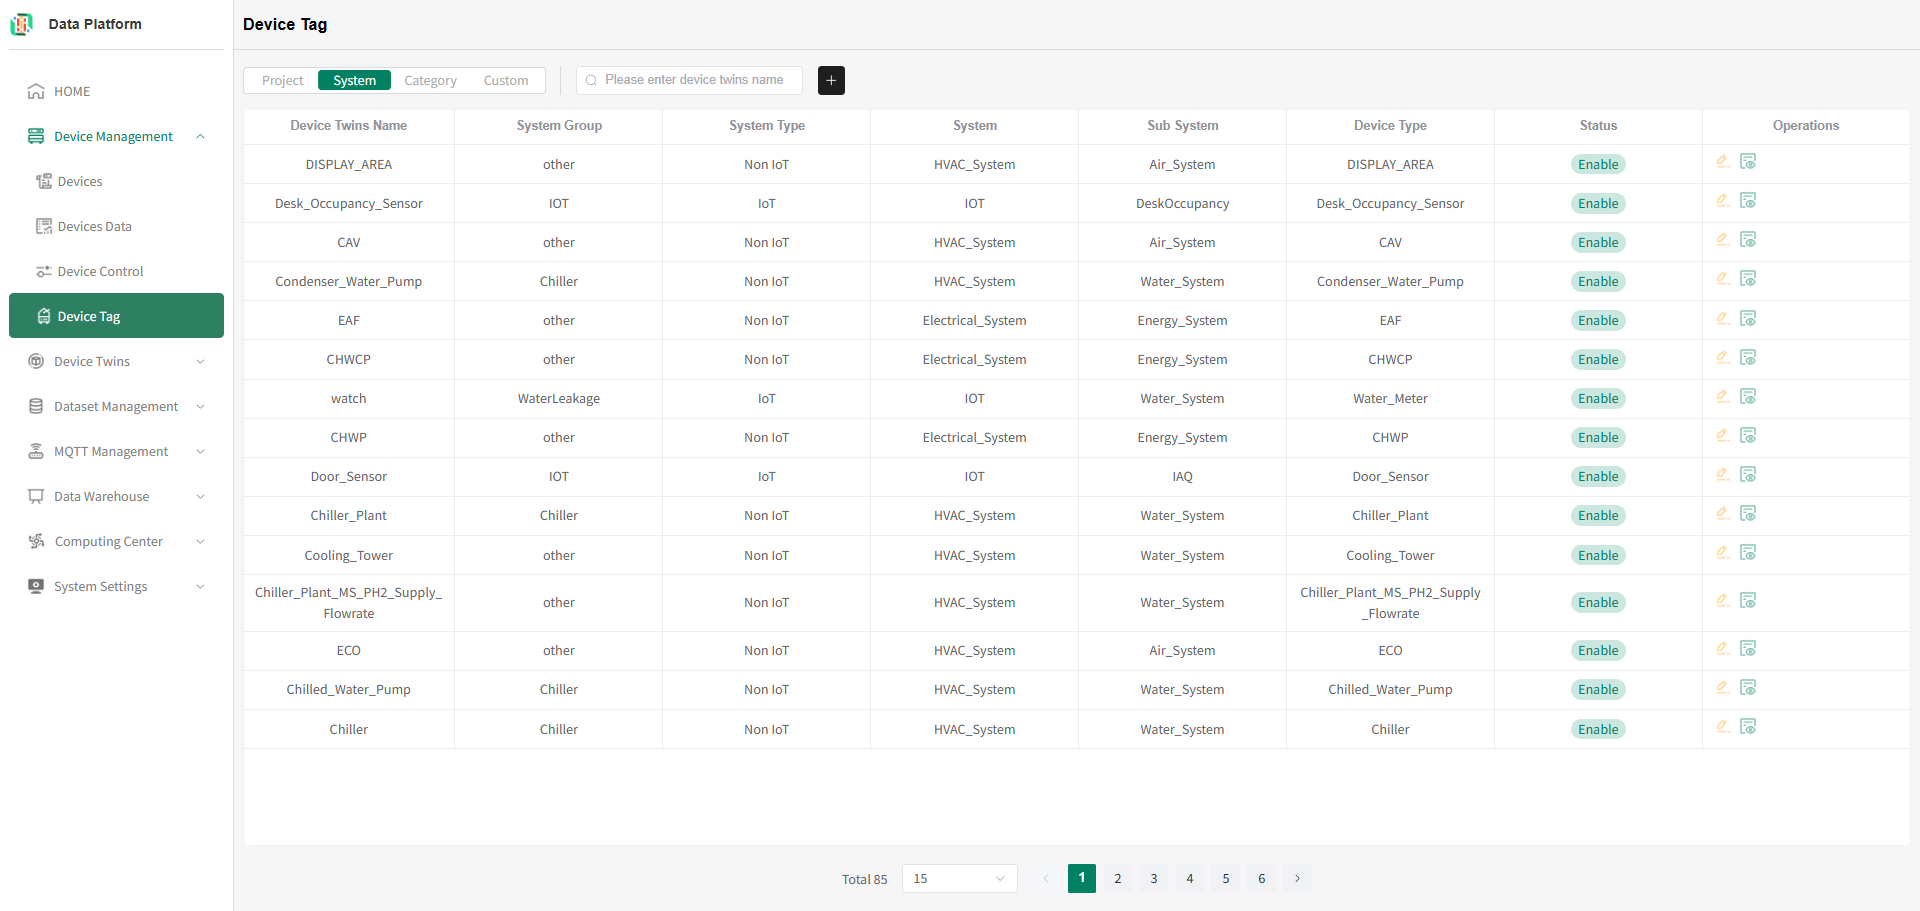
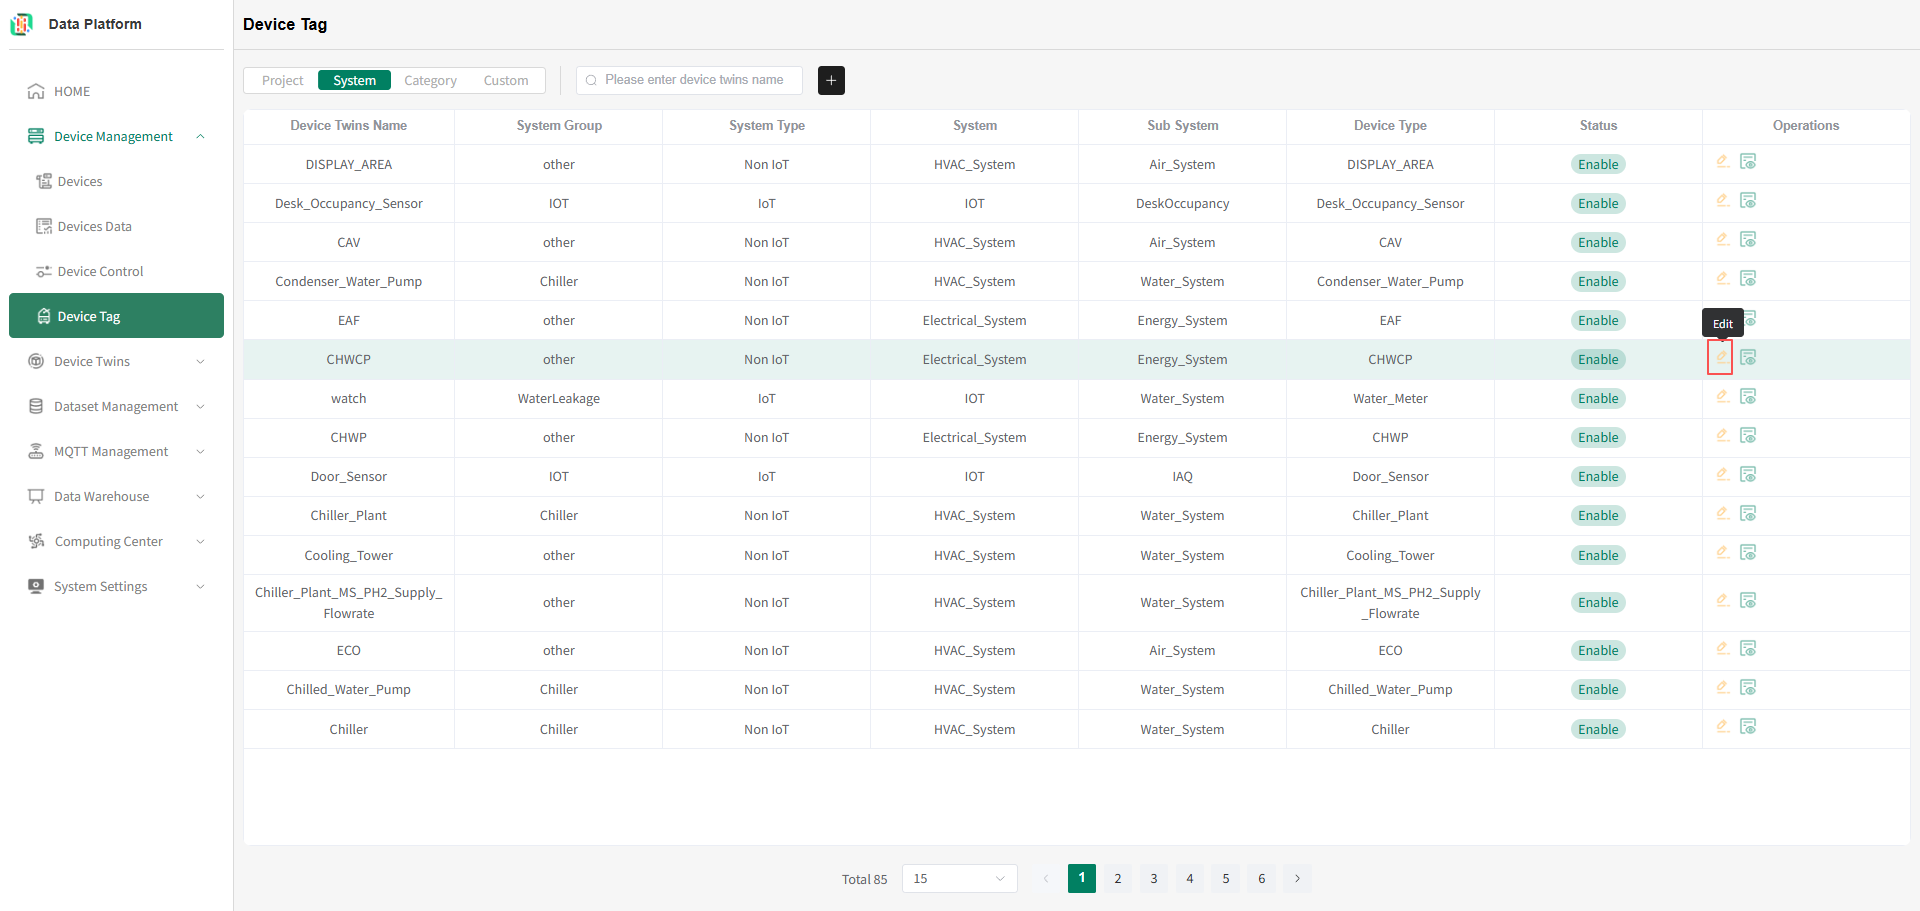
- System Tag List
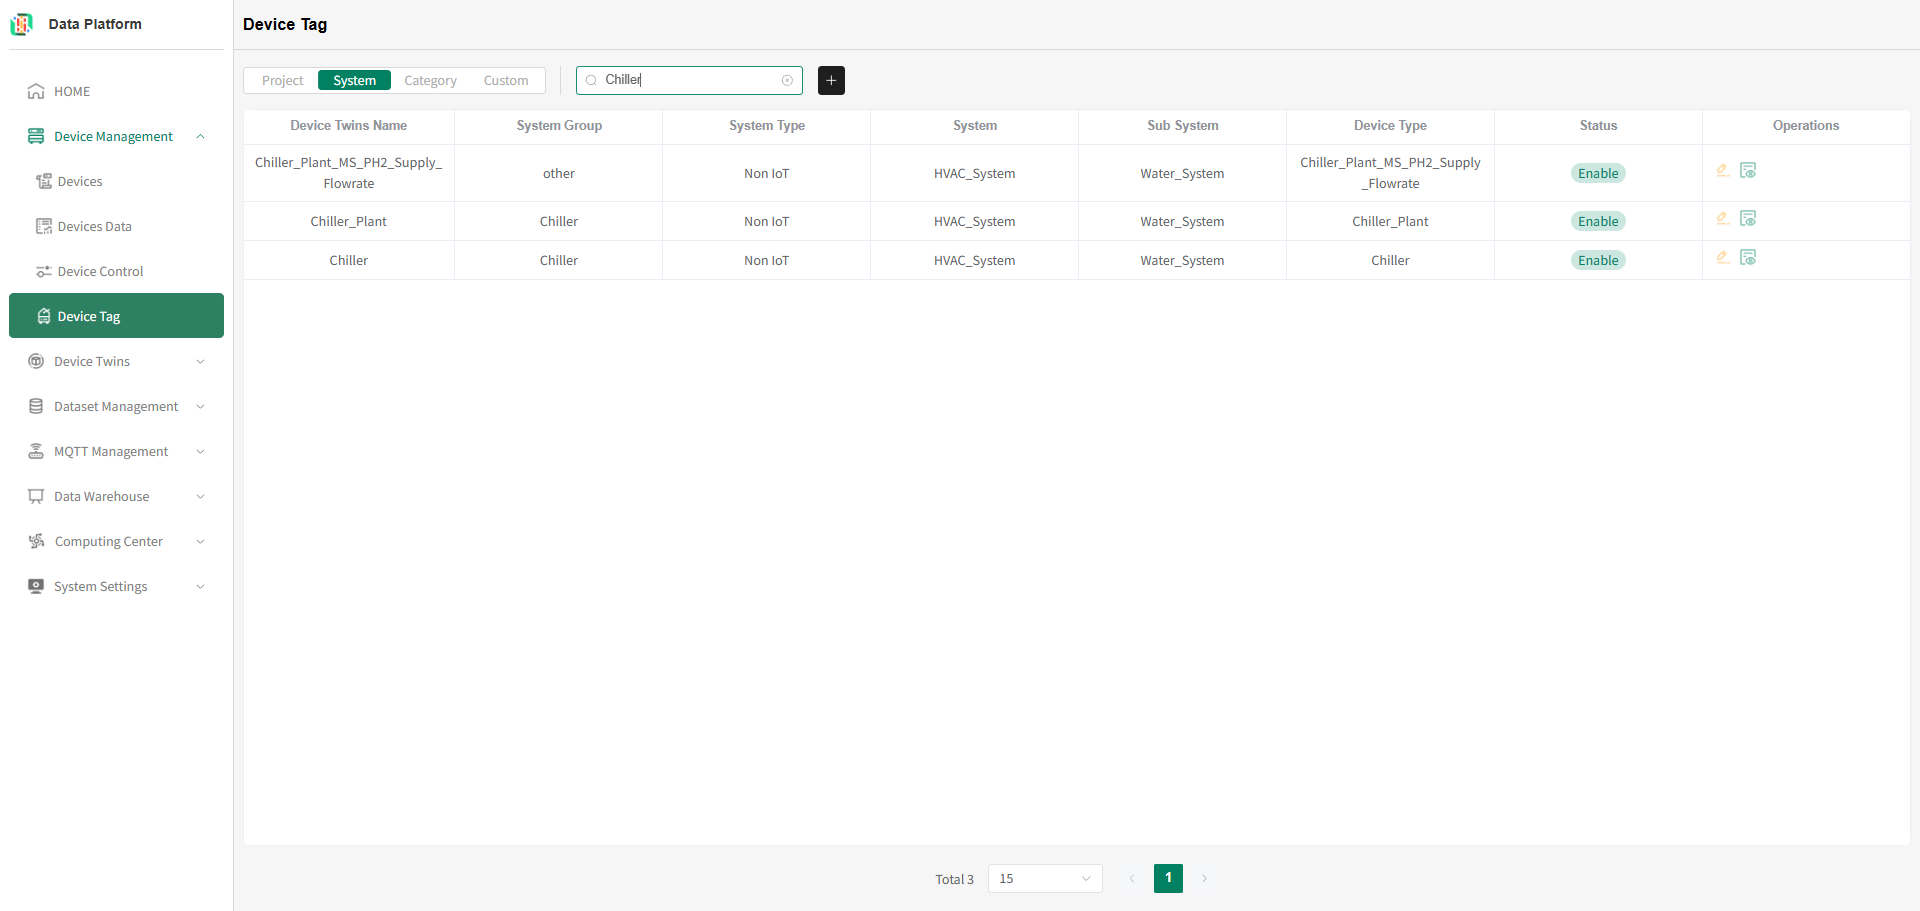
Enter the thing model you want to query and press Enter to refresh the system tag list, as shown below.tip
The system supports querying system tag information by thing model.
- Add System Tag
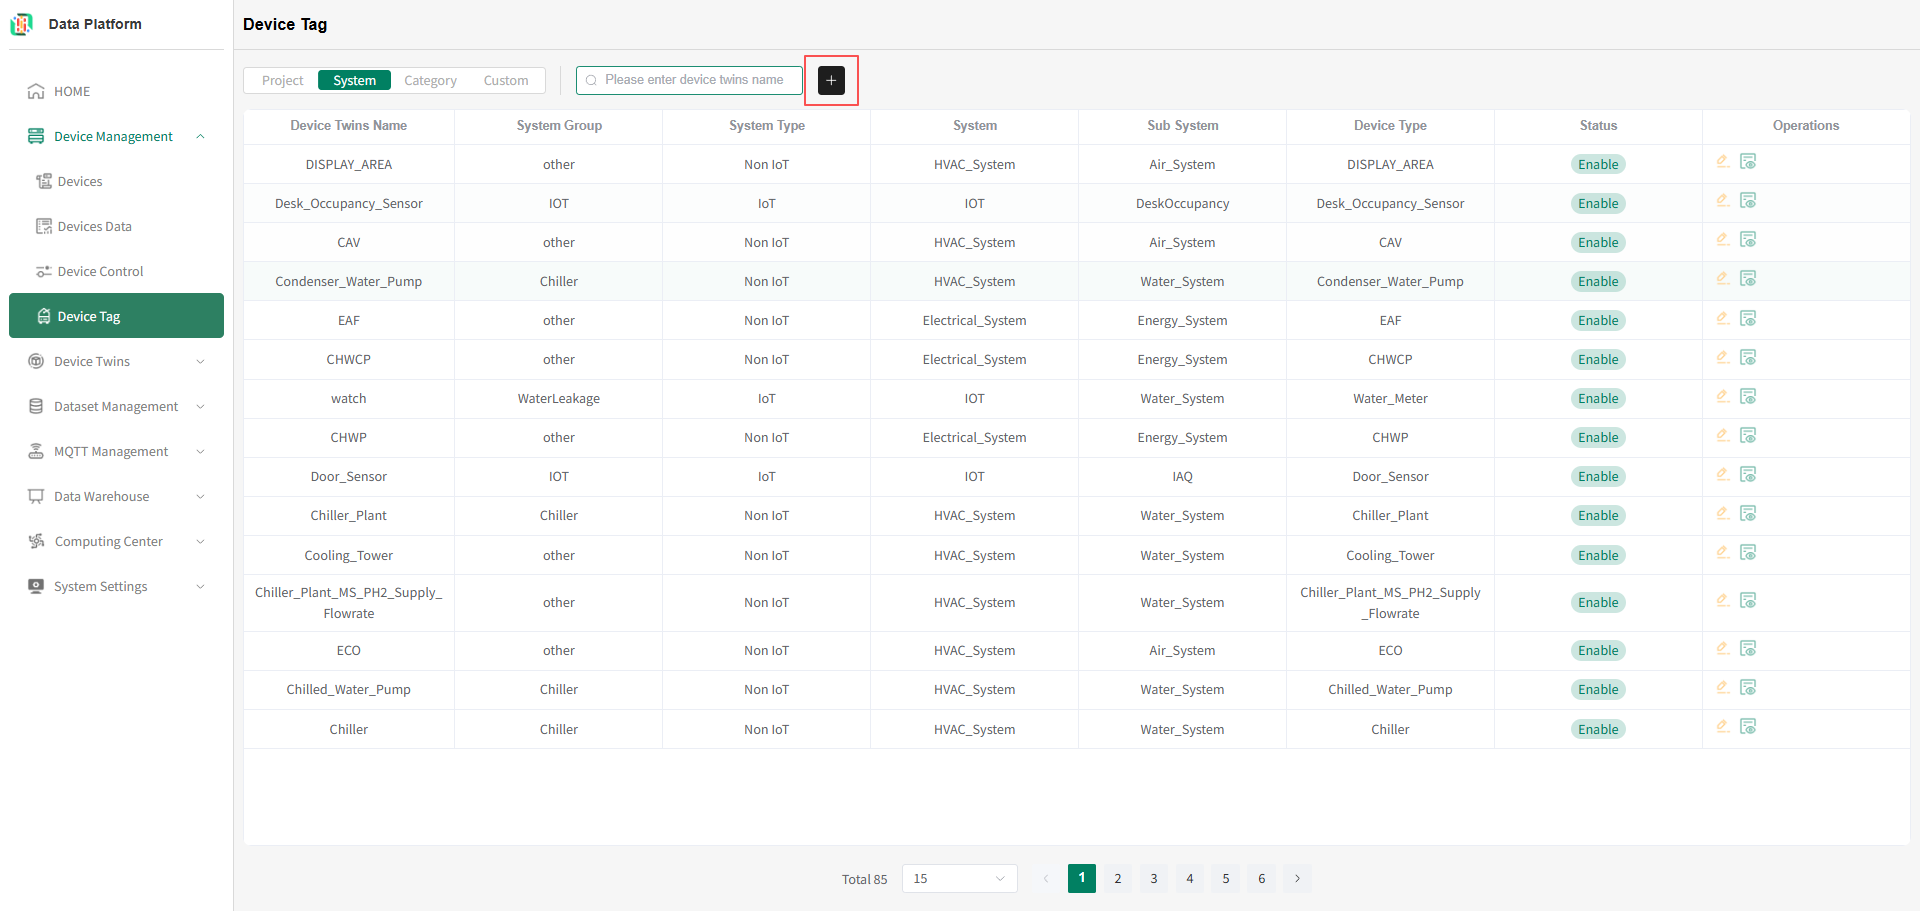 Click the "+" button in the figure above to enter the system tag addition page, as shown below.
 warning
One thing model can be bound to multiple system tags. But if data such as system, subsystem, system type is already marked (the system will verify), the addition will fail. You can modify and try again.
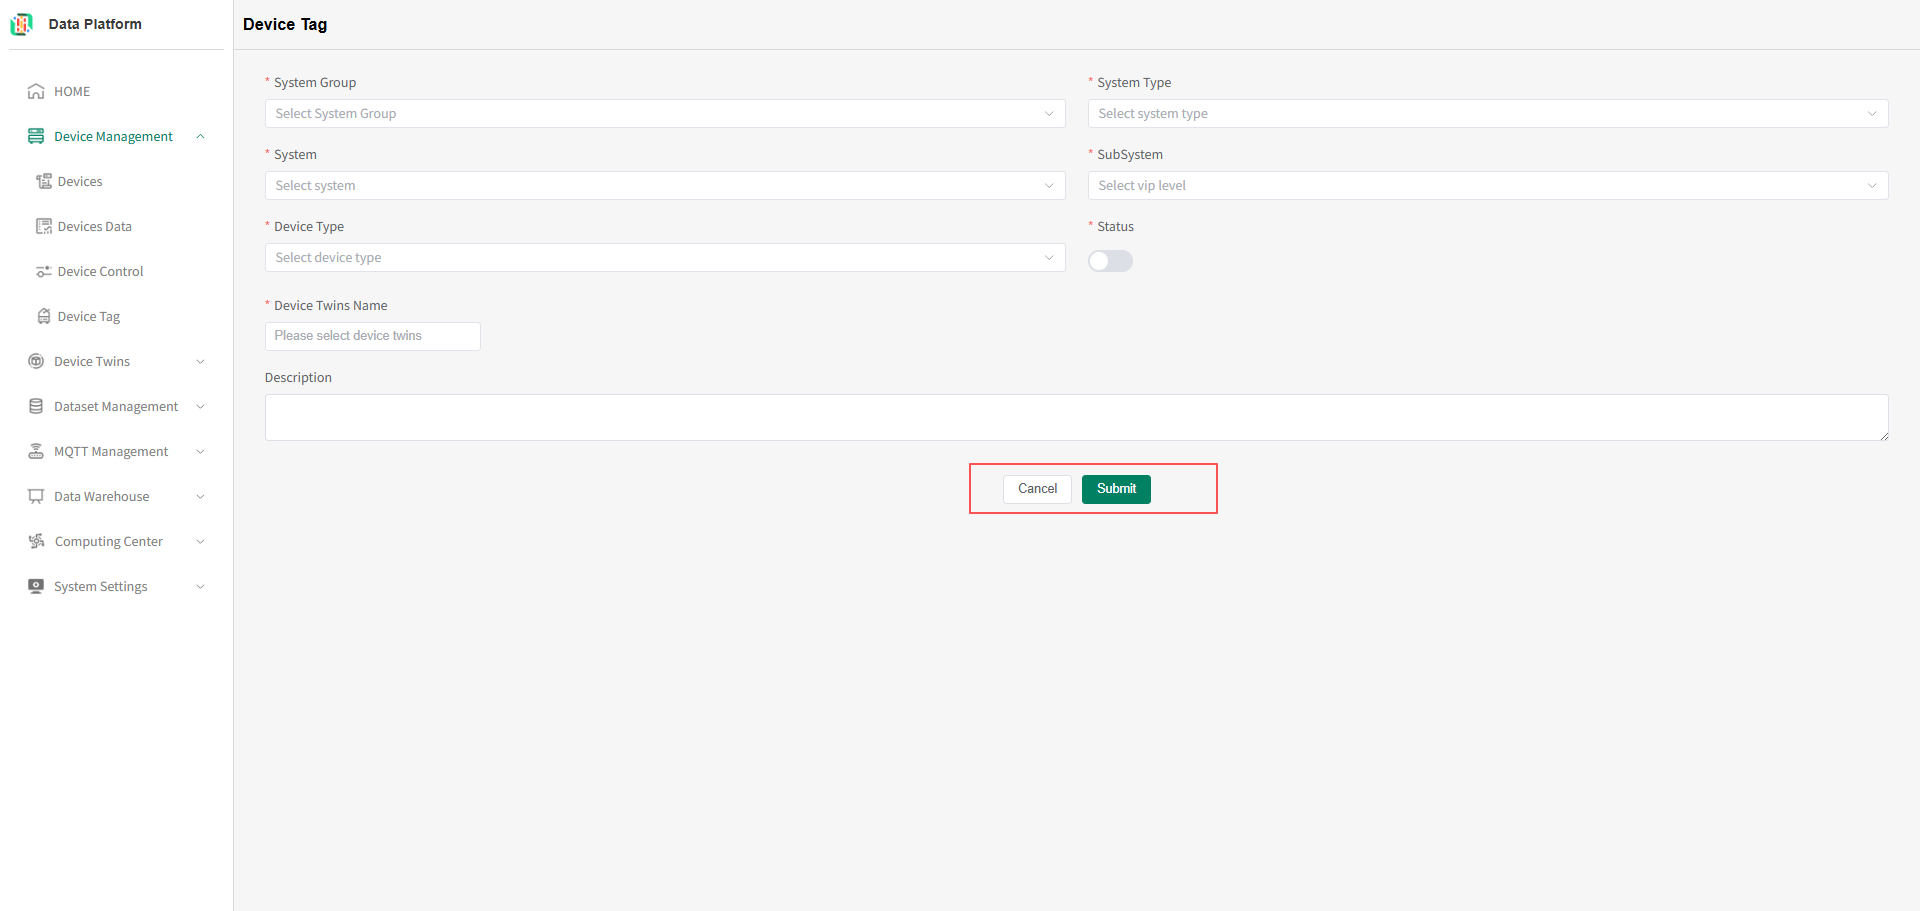
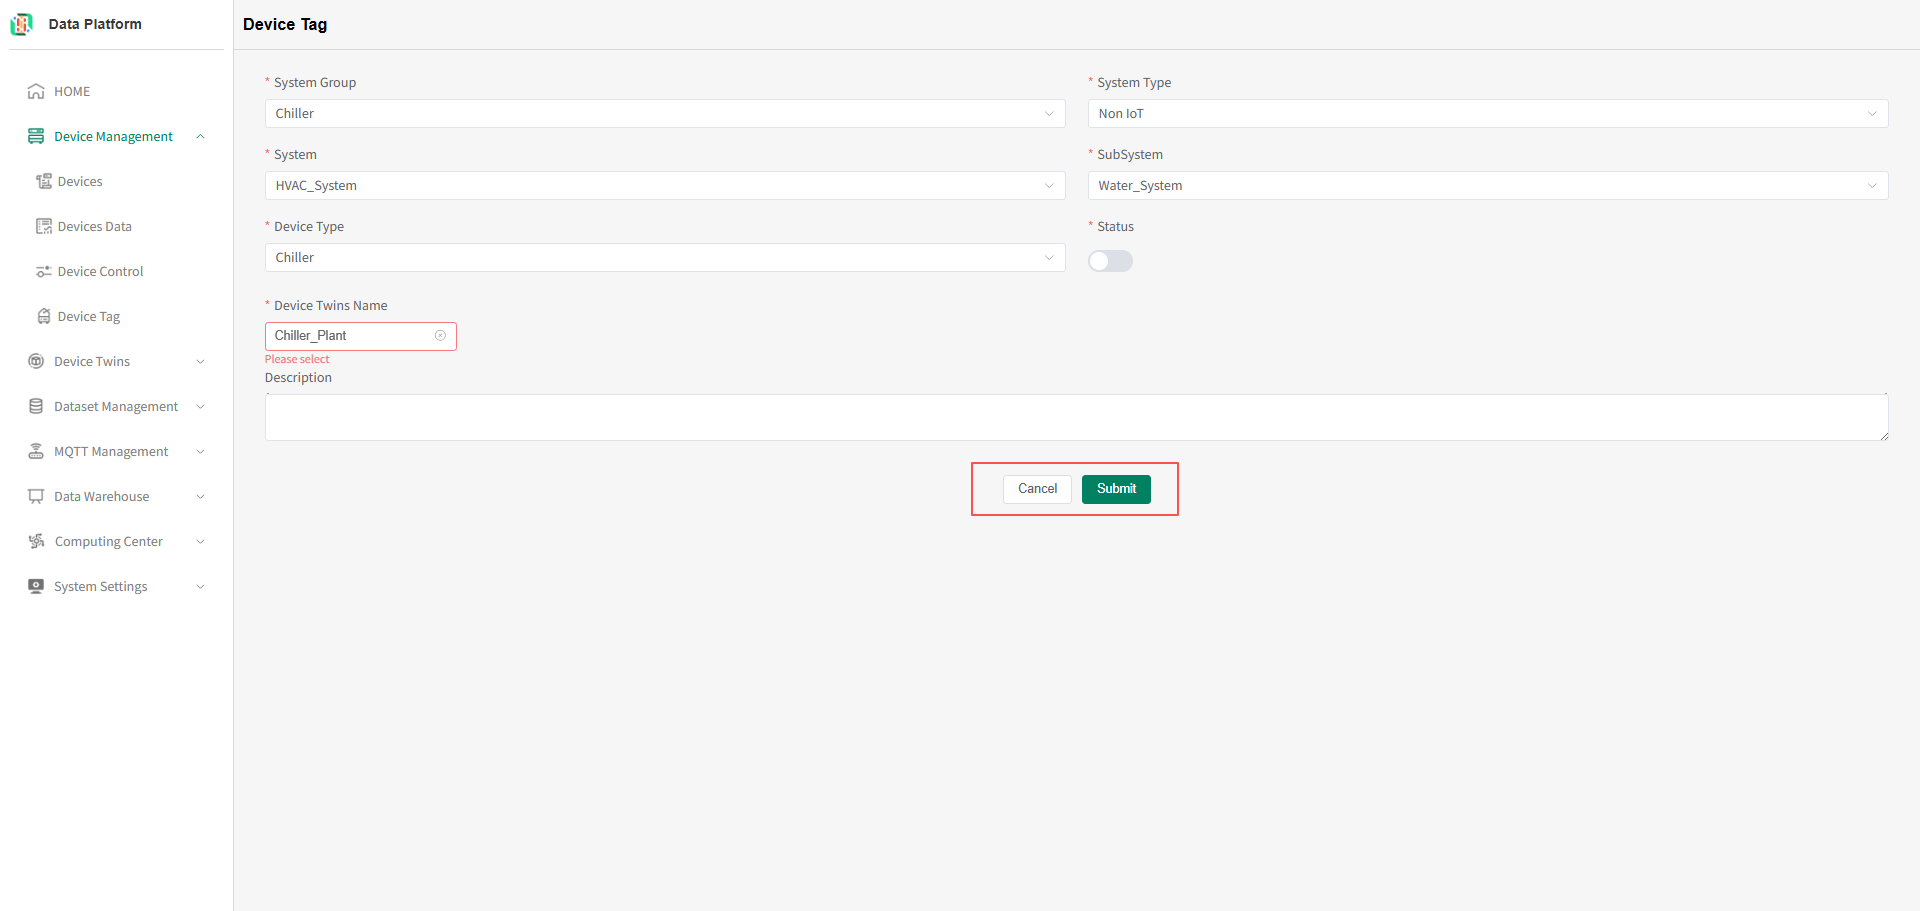 After filling in the required content, click submit to complete the system tag addition.
 - Modify System Tag
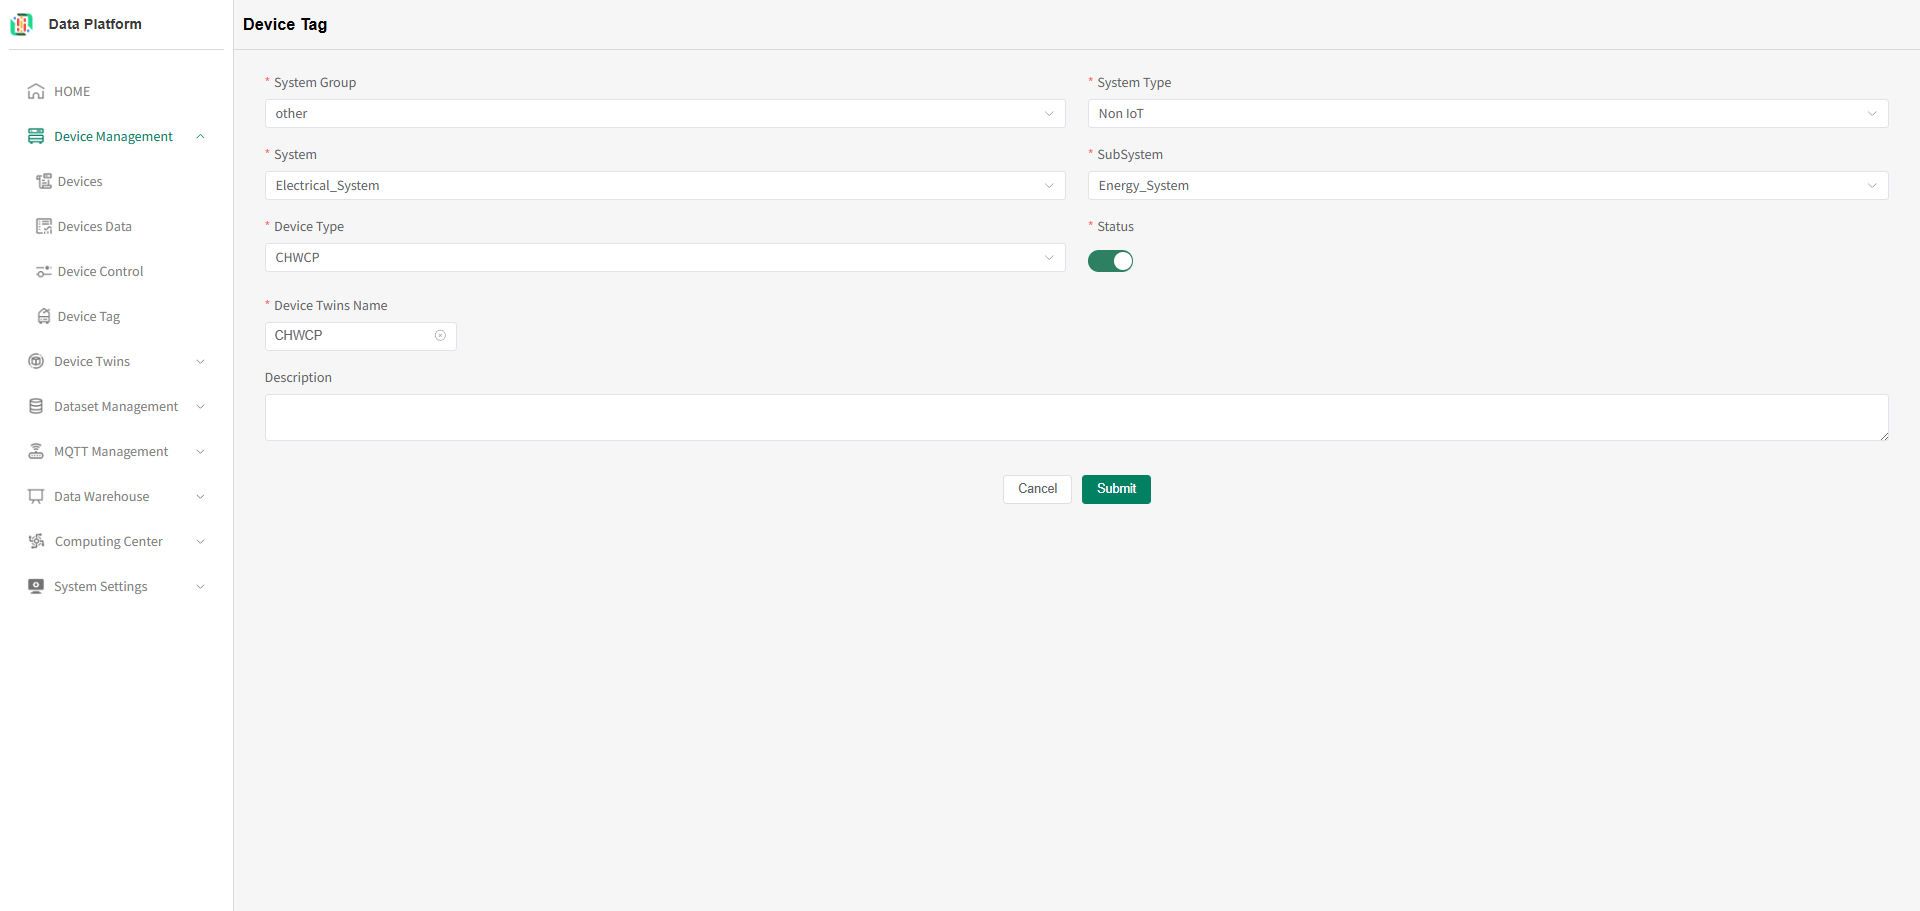
On the system tag list page, click the "Edit" button on the right side of the corresponding tag row to enter the system tag modification page, as shown below.
 As shown below, modify the correct information and submit to complete the system tag modification.
- Delete System Tag
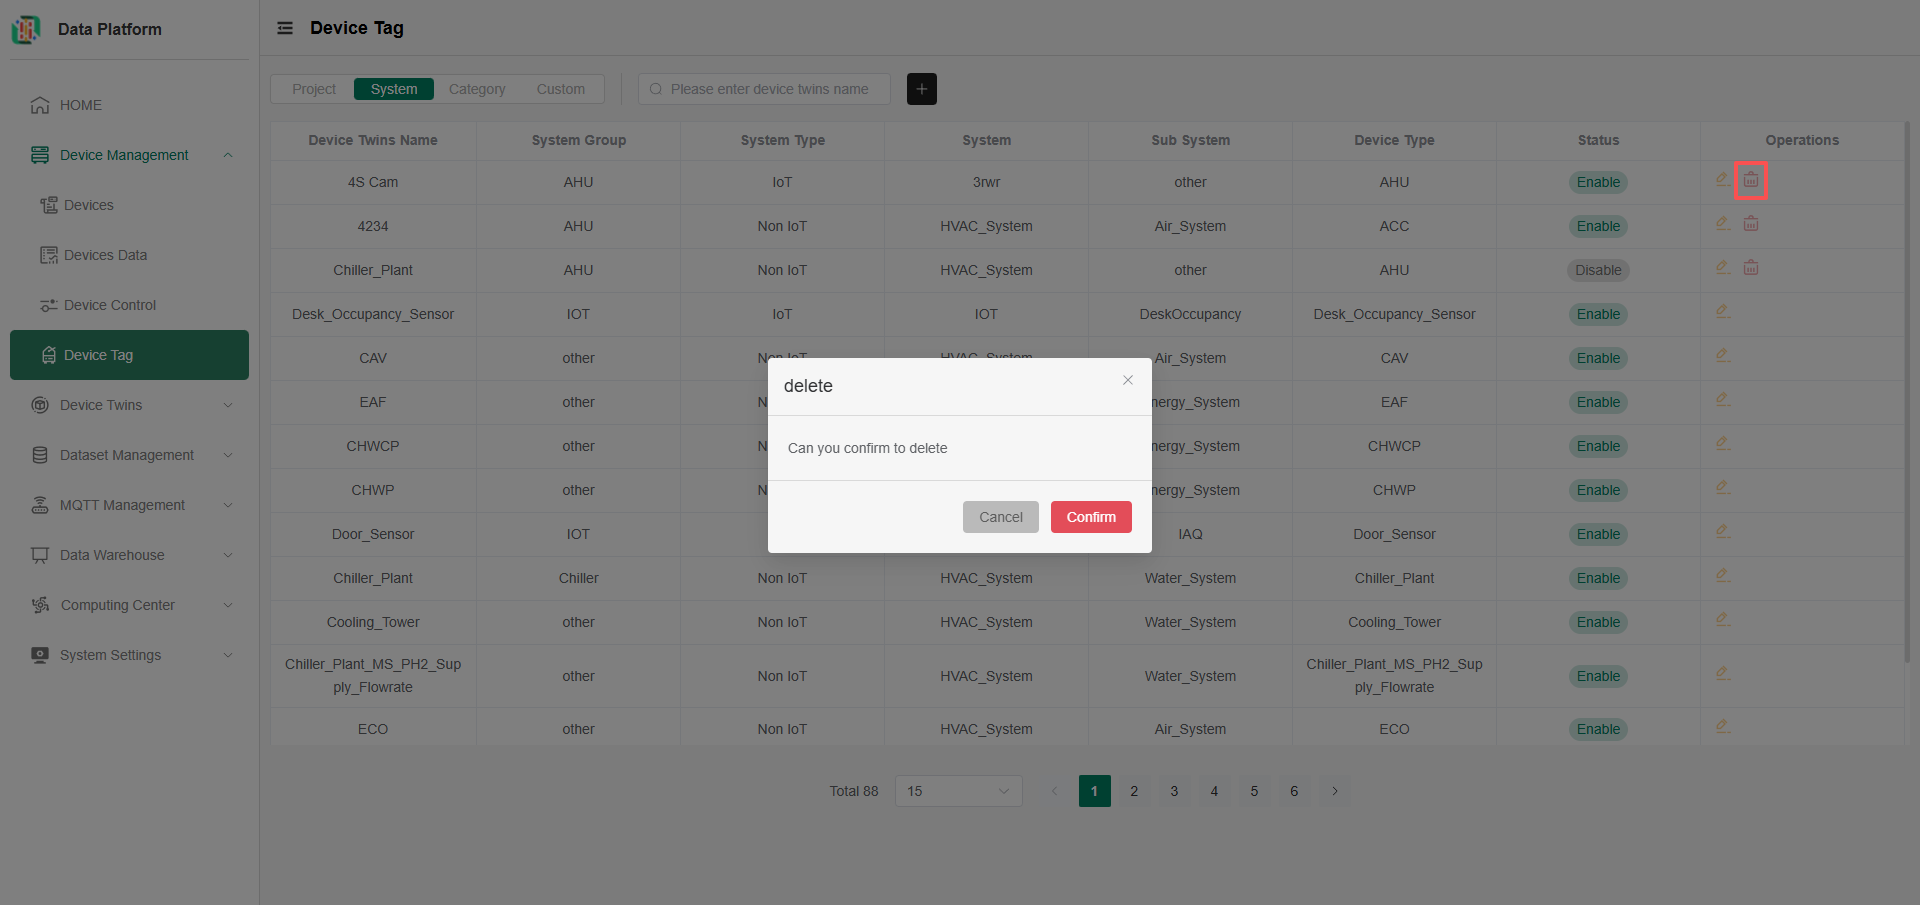
Click the "Delete" button on the right side of the corresponding tag row. After user confirmation, the system tag can be deleted, as shown below.warning
System tags created by the current user's tenant can be deleted.
- System Tag List
Category Tags
The system supports thing model category tag information. After configuring categories, you can query thing models by category information, and also query devices by category.
- Enter Device Tags Page
Click the menu bar "Device Management", click the "Device Tag" button to enter the Device Tag module, as shown below.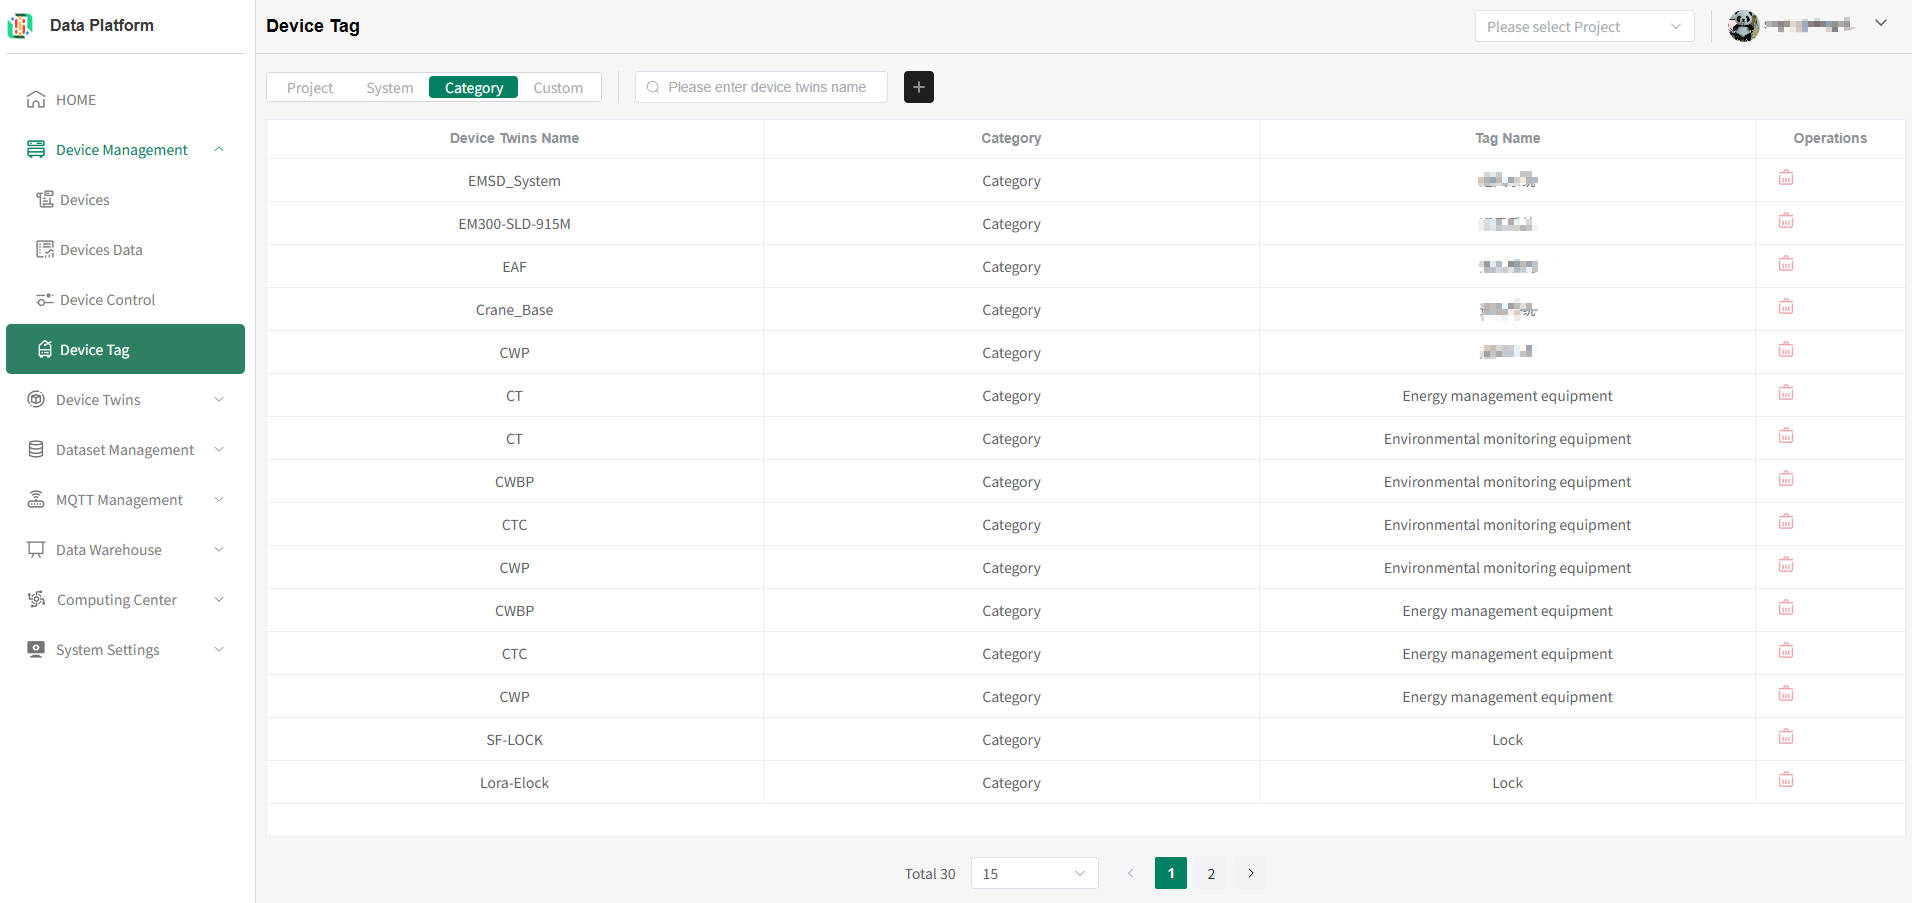
- Device Category Tag List
Enter the thing model you want to query and press Enter to refresh the system tag list, as shown below.tip
The system supports thing model category tag information.

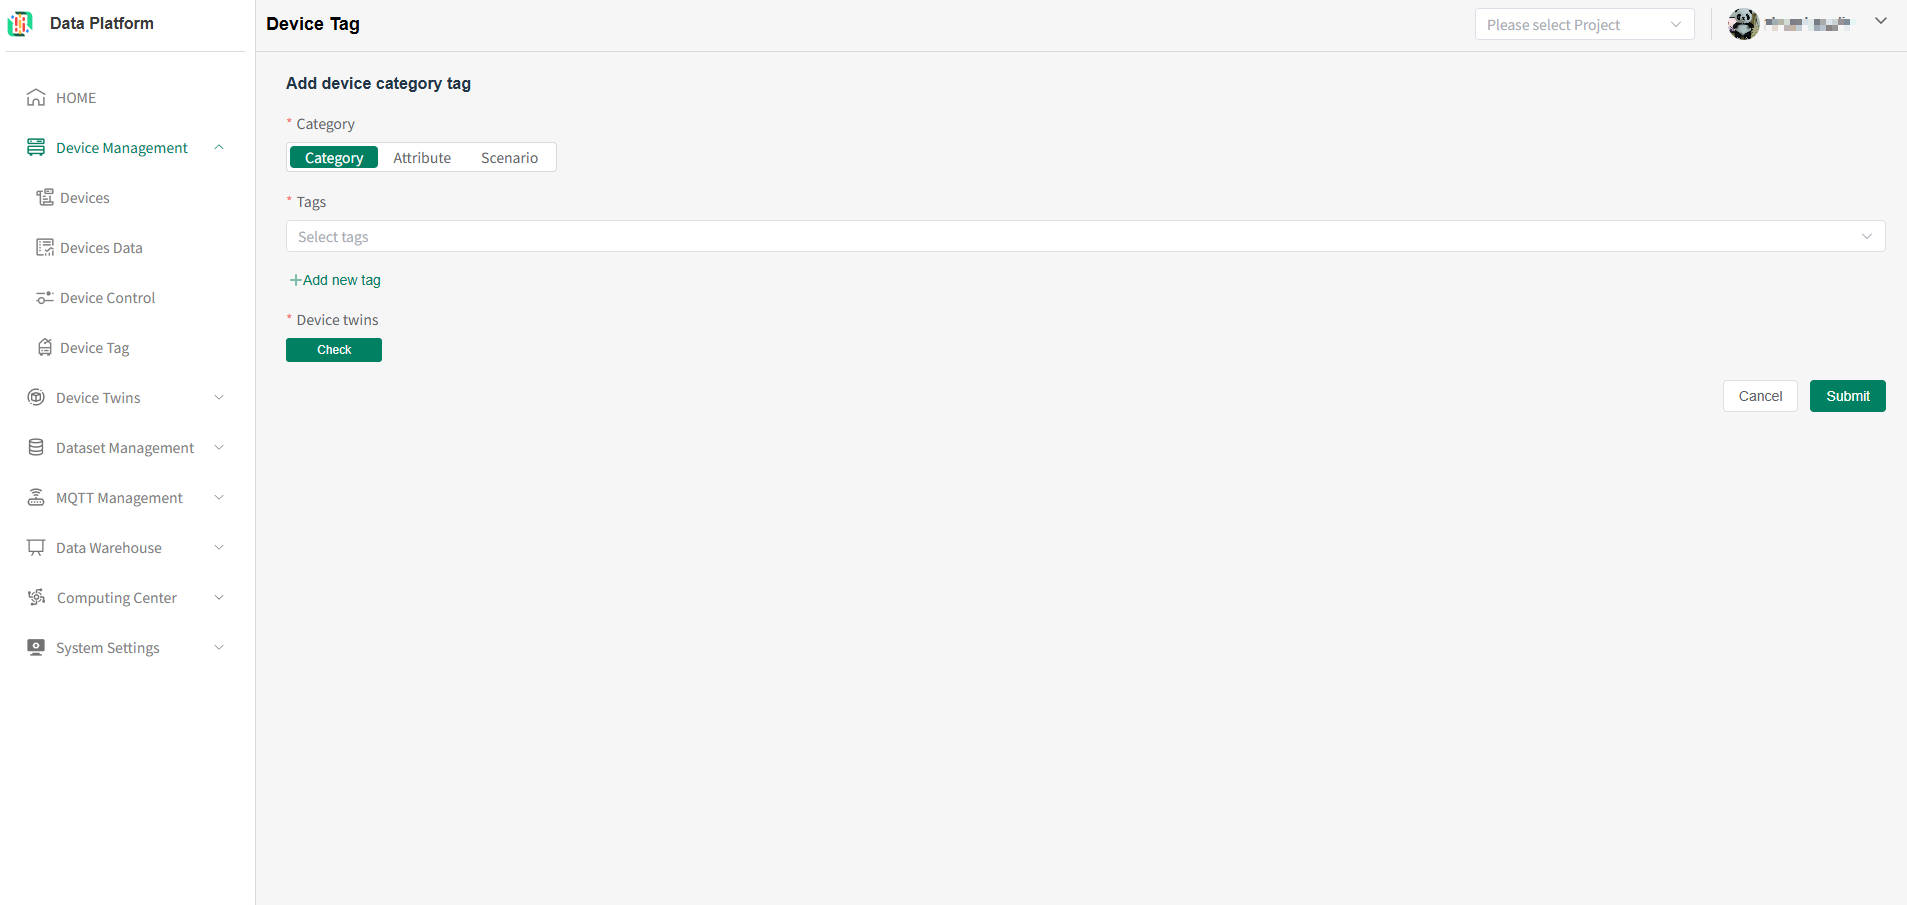
- Add Category Tag
Click the "+" button in the figure above to enter the system tag addition page, as shown below.
 warning
One thing model can be bound to multiple category tags, and one category tag can also be bound to multiple thing models. But if the category and thing model data are already marked (the system will verify), the addition will fail. You can modify and try again.
Select the required category. If none exists, you can add one, as shown below.
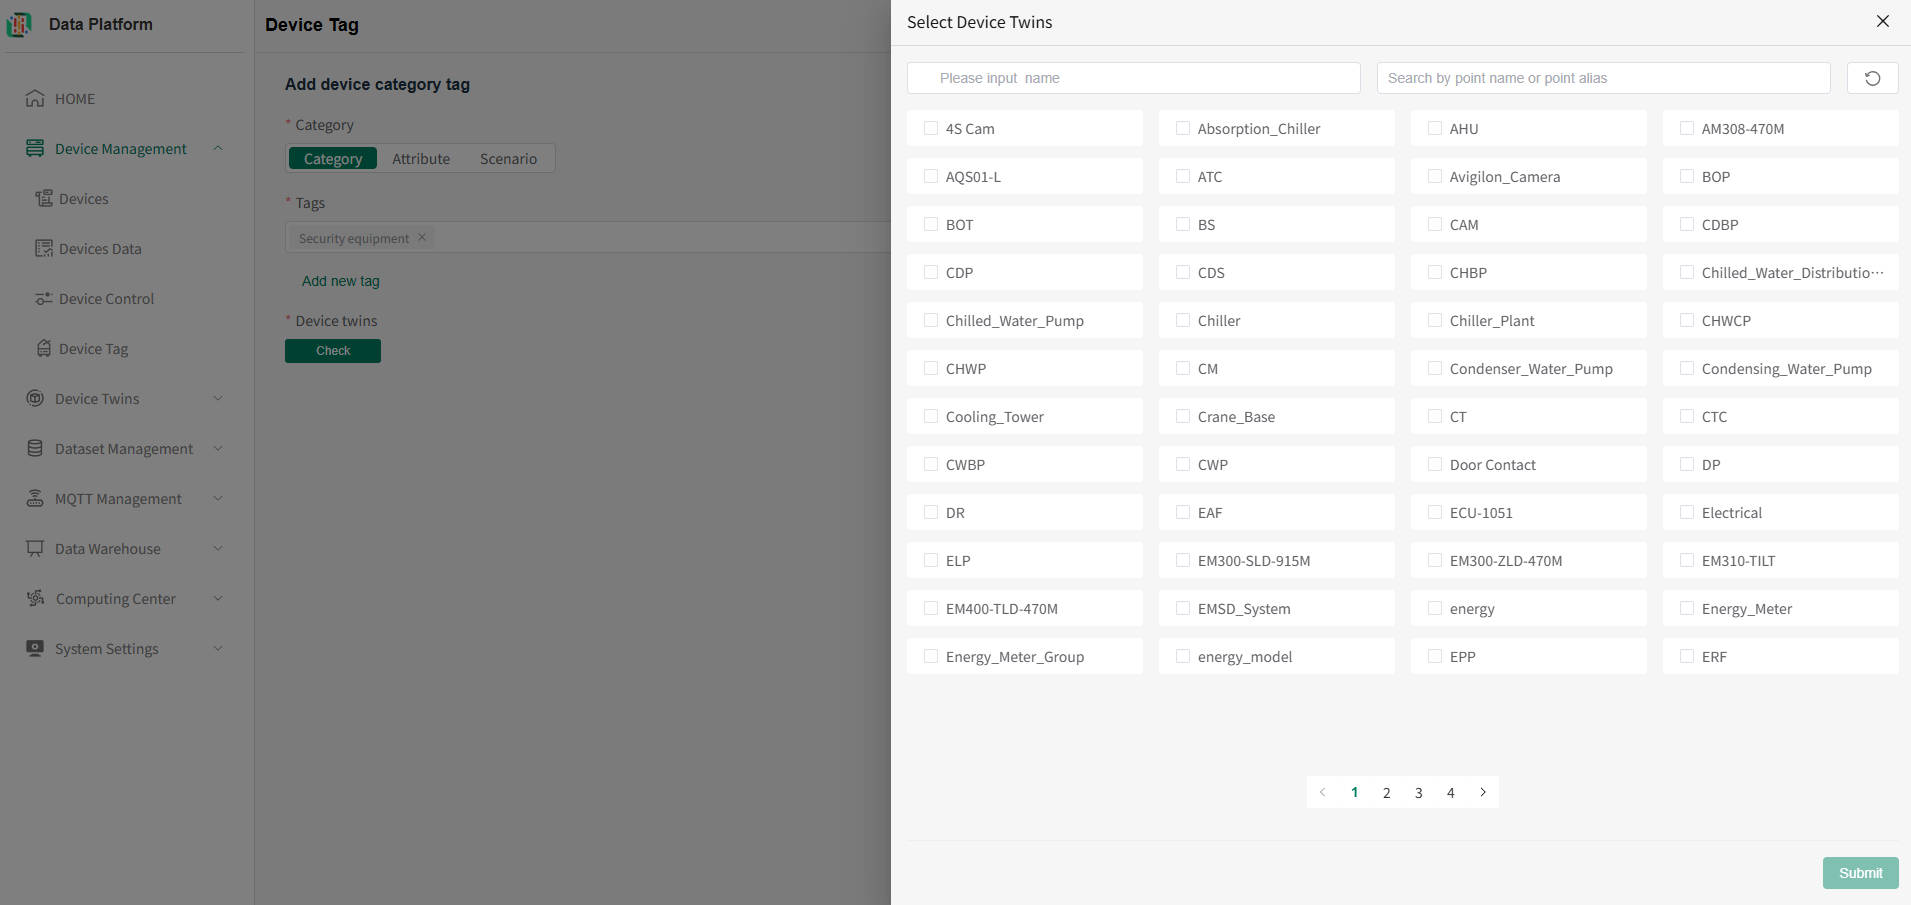
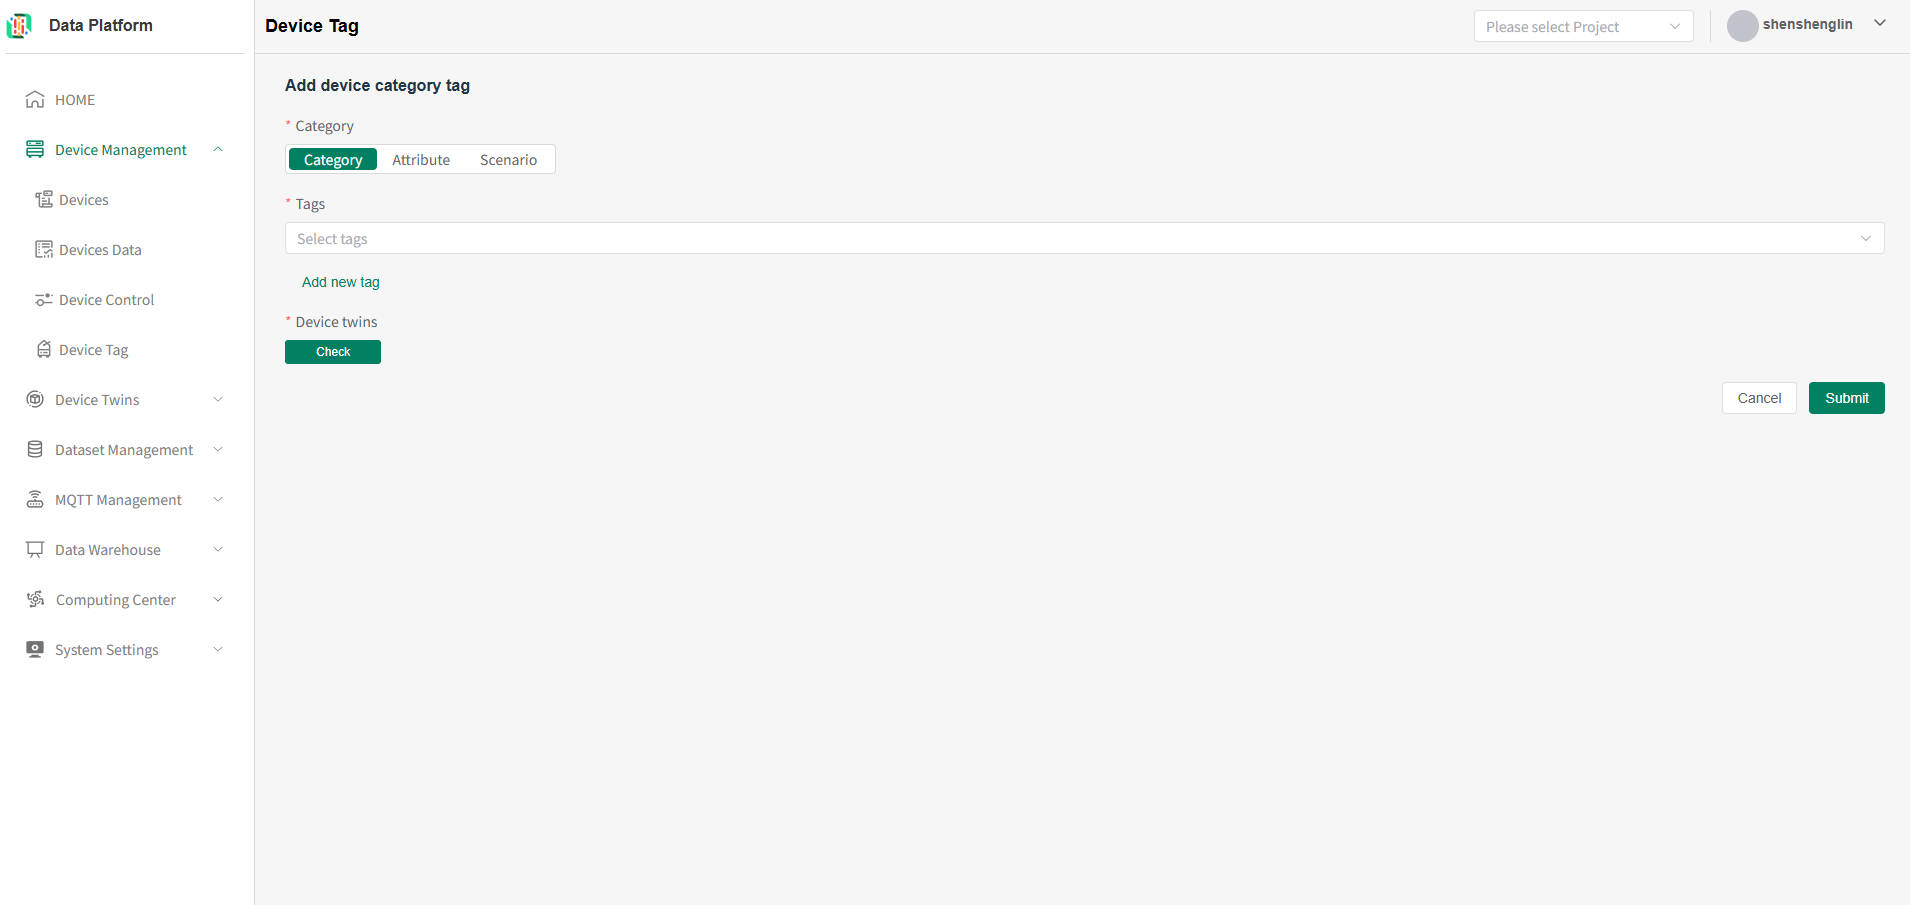 After completing the category selection, click to select thing models (multiple can be selected), and finally submit to complete the category tag addition.
- Delete System Tag
Click the "Delete" button on the right side of the corresponding tag row. After user confirmation, the system tag can be deleted, as shown below.warning
Incorrectly bound thing model categories can be deleted and re-added for correction.
- Device Category Tag List
Custom Tags
The system supports defining tags for individual devices. One device can have multiple tags added. After configuration, devices can be queried by tag.
- Enter Device Tags Page
Click the menu bar "Device Management", click the "Device Tag" button to enter the Device Tag module, as shown below.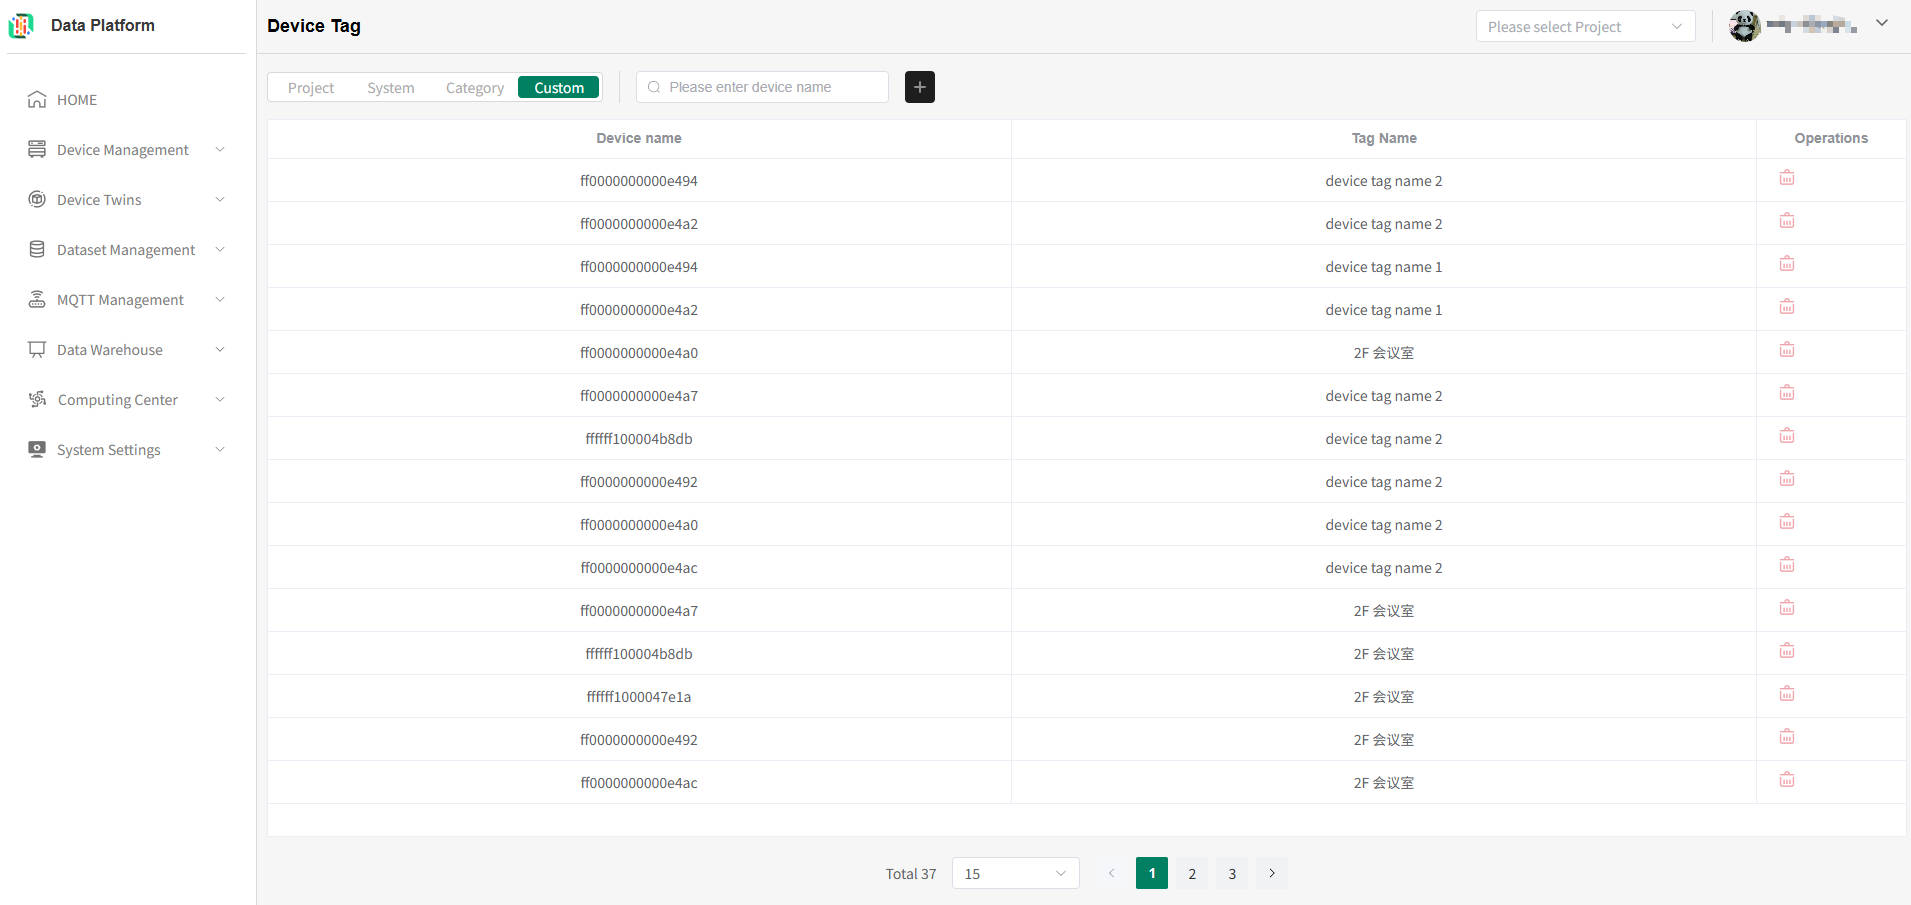
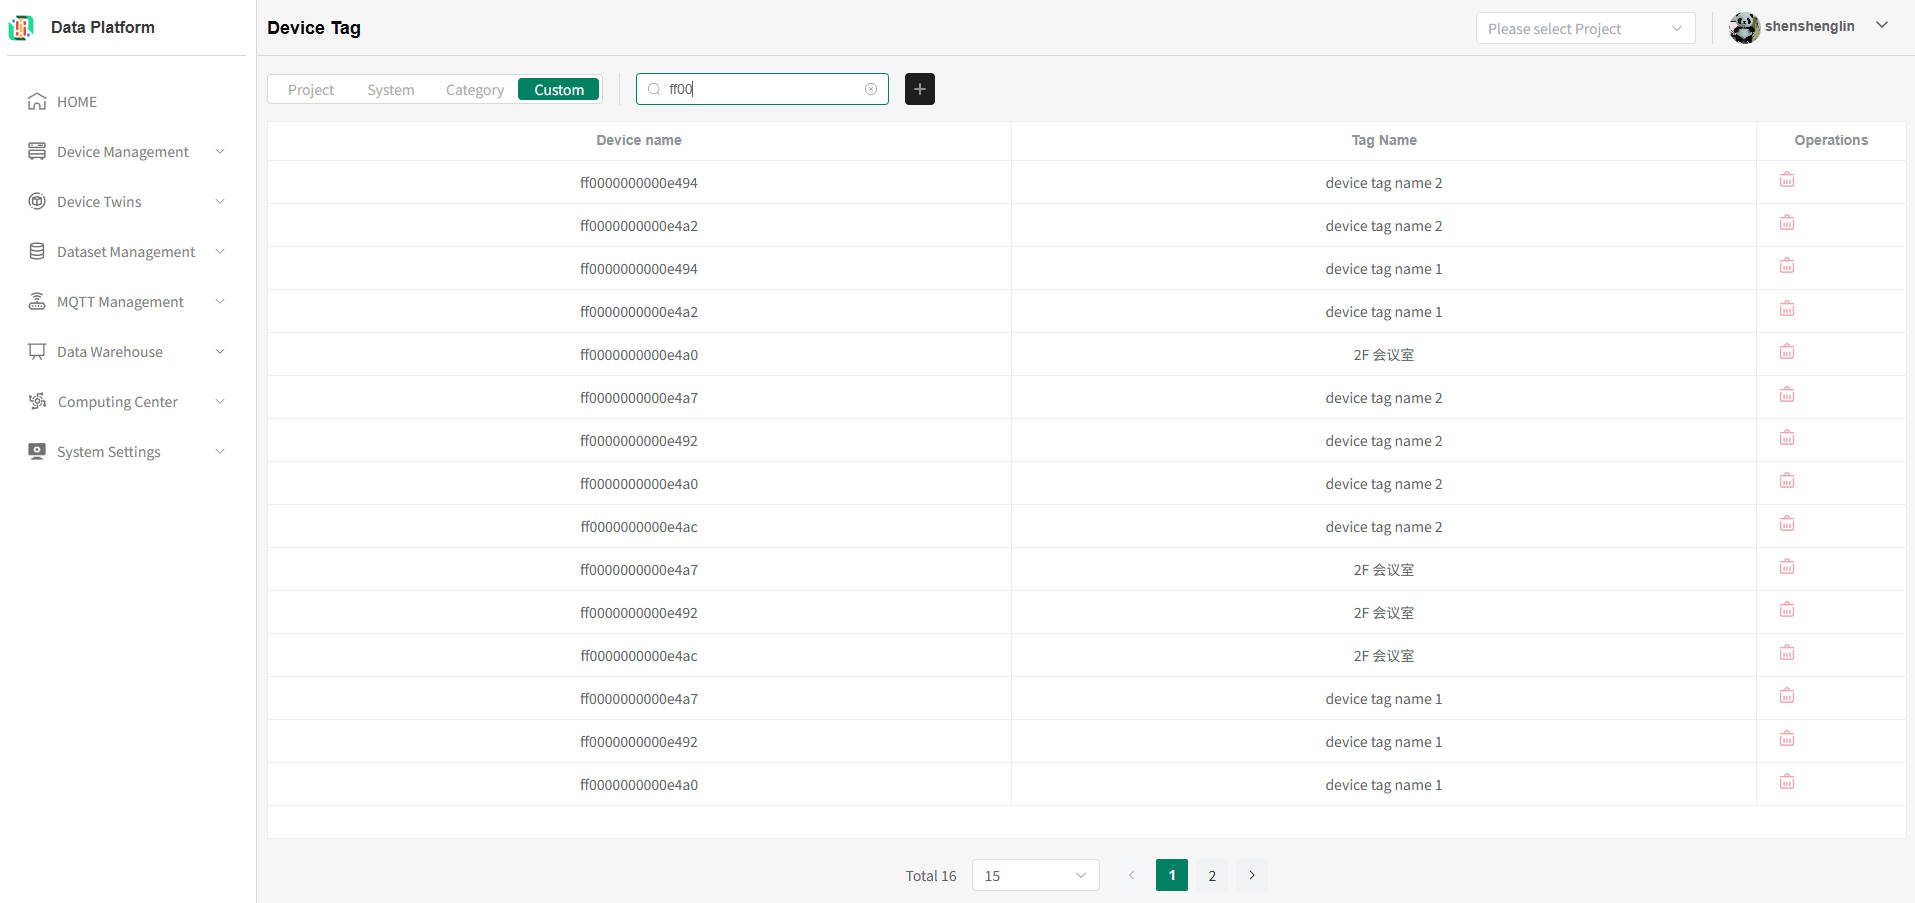
- Device Custom Tag List
Enter the device name you want to query and press Enter to refresh the system tag list, as shown below.tip
The system supports multiple custom tags for a single device.
- Add Custom Tag
Click the "+" button in the figure above to enter the system tag addition page, as shown below.
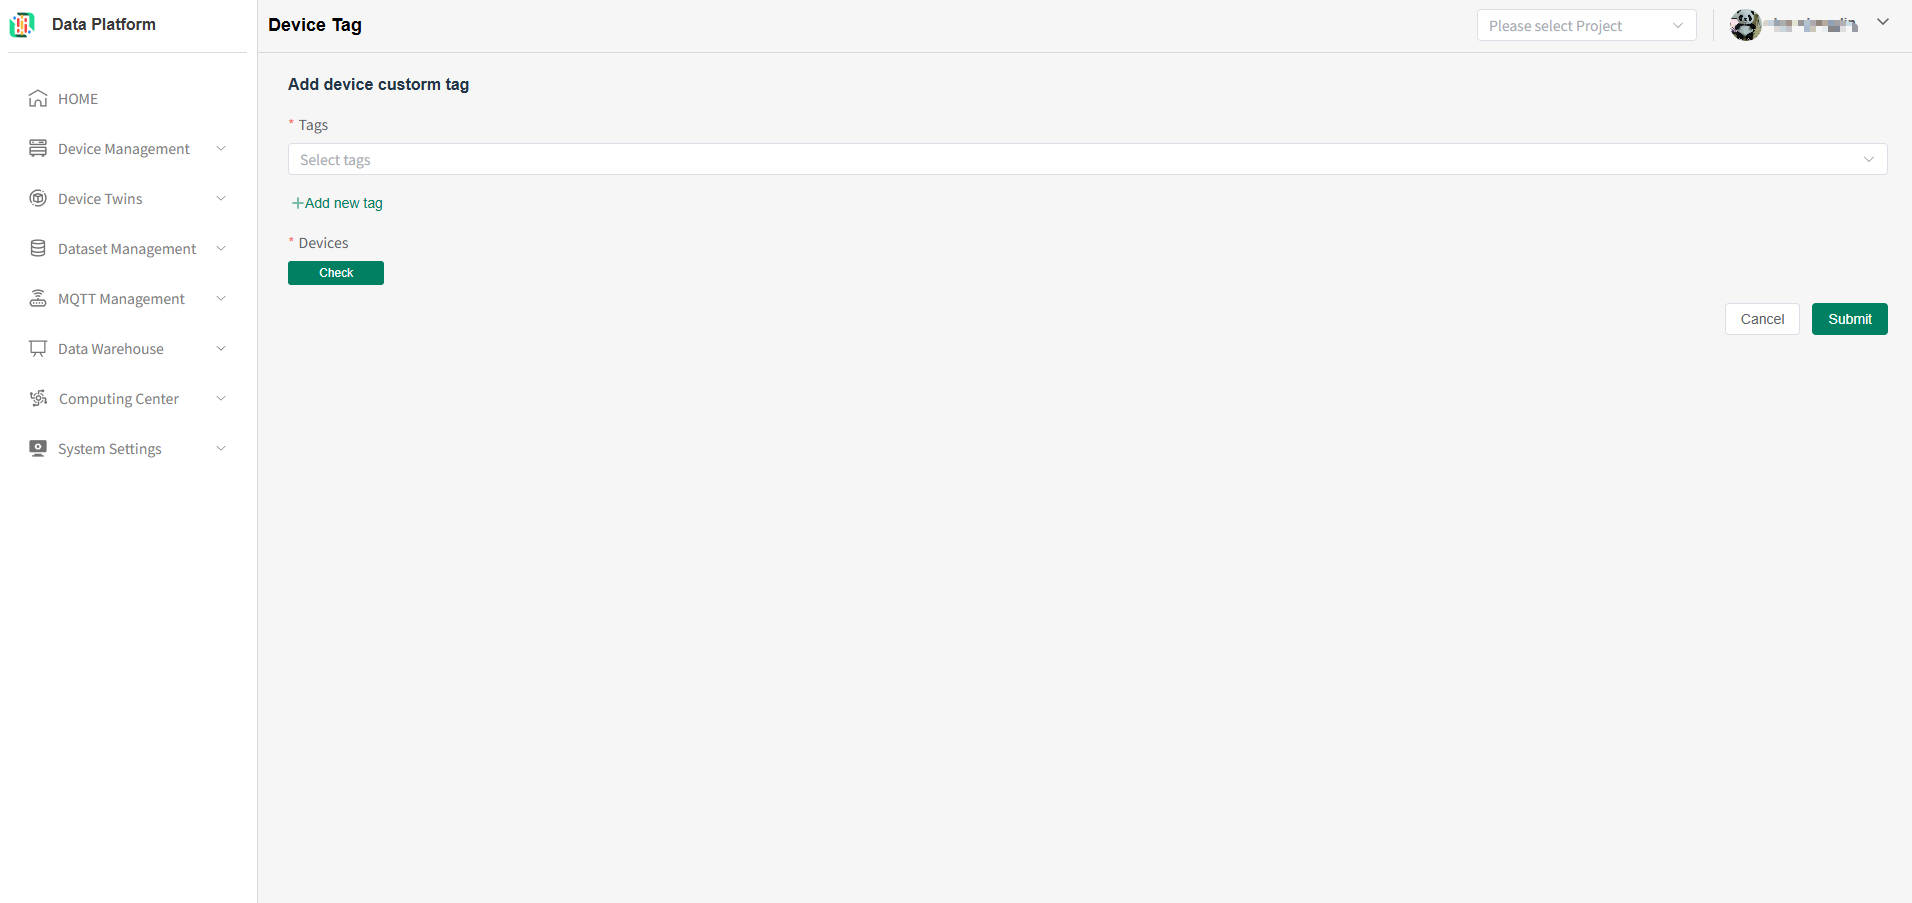 Select the required tag. If none exists, you can add one, as shown below.warning
One device can be bound to multiple custom tags, and one custom tag can also be bound to multiple devices.
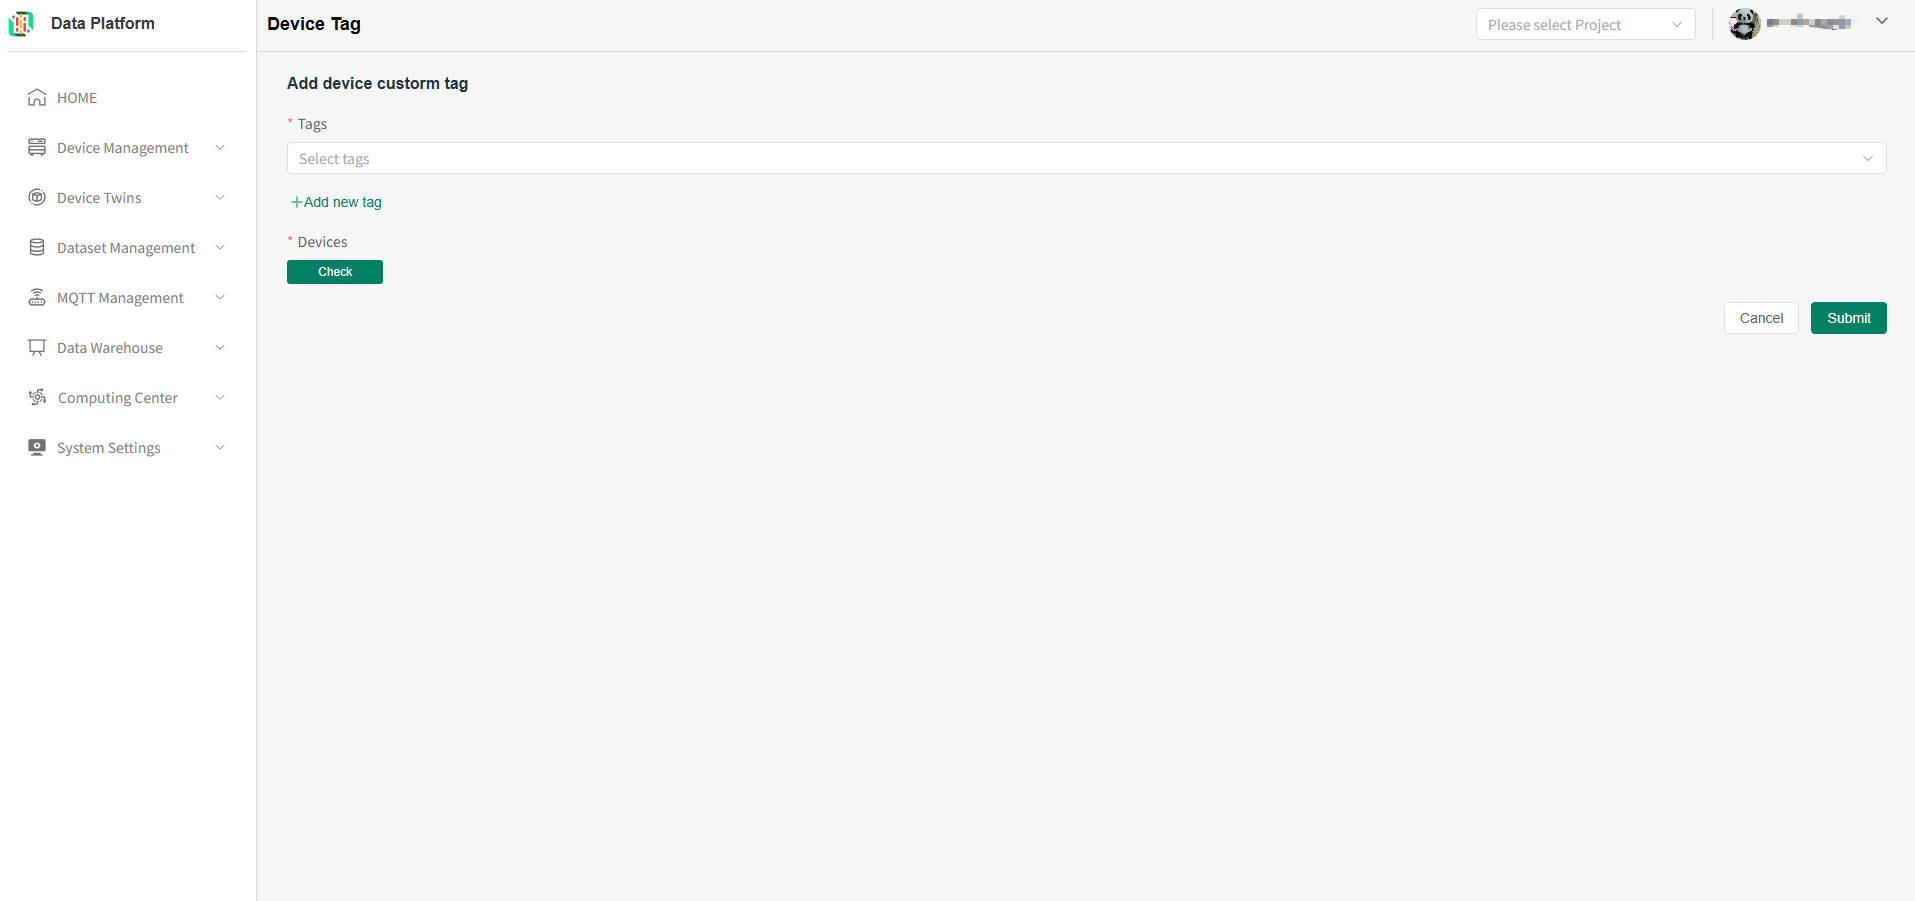 After completing the tag selection, click to select devices (multiple can be selected), and submit to complete the device custom tag addition.

- Delete System Tag
Click the "Delete" button on the right side of the corresponding tag row. After user confirmation, the system tag can be deleted, as shown below.warning
Incorrectly bound thing model categories can have the current category deleted.

- Device Custom Tag List
BMS Device Tags
In addition to the above four tag types, the platform provides special tag marking for BMS devices. After marking, the device's Function type can be properly recorded.
- Enter BMS Device Tags Page
Click the menu bar "Device Management", click the "Devices" button to enter the device list, then click "Register Device" to enter the registered devices page, select "Non IoT" to enter the non-IoT list, as shown below.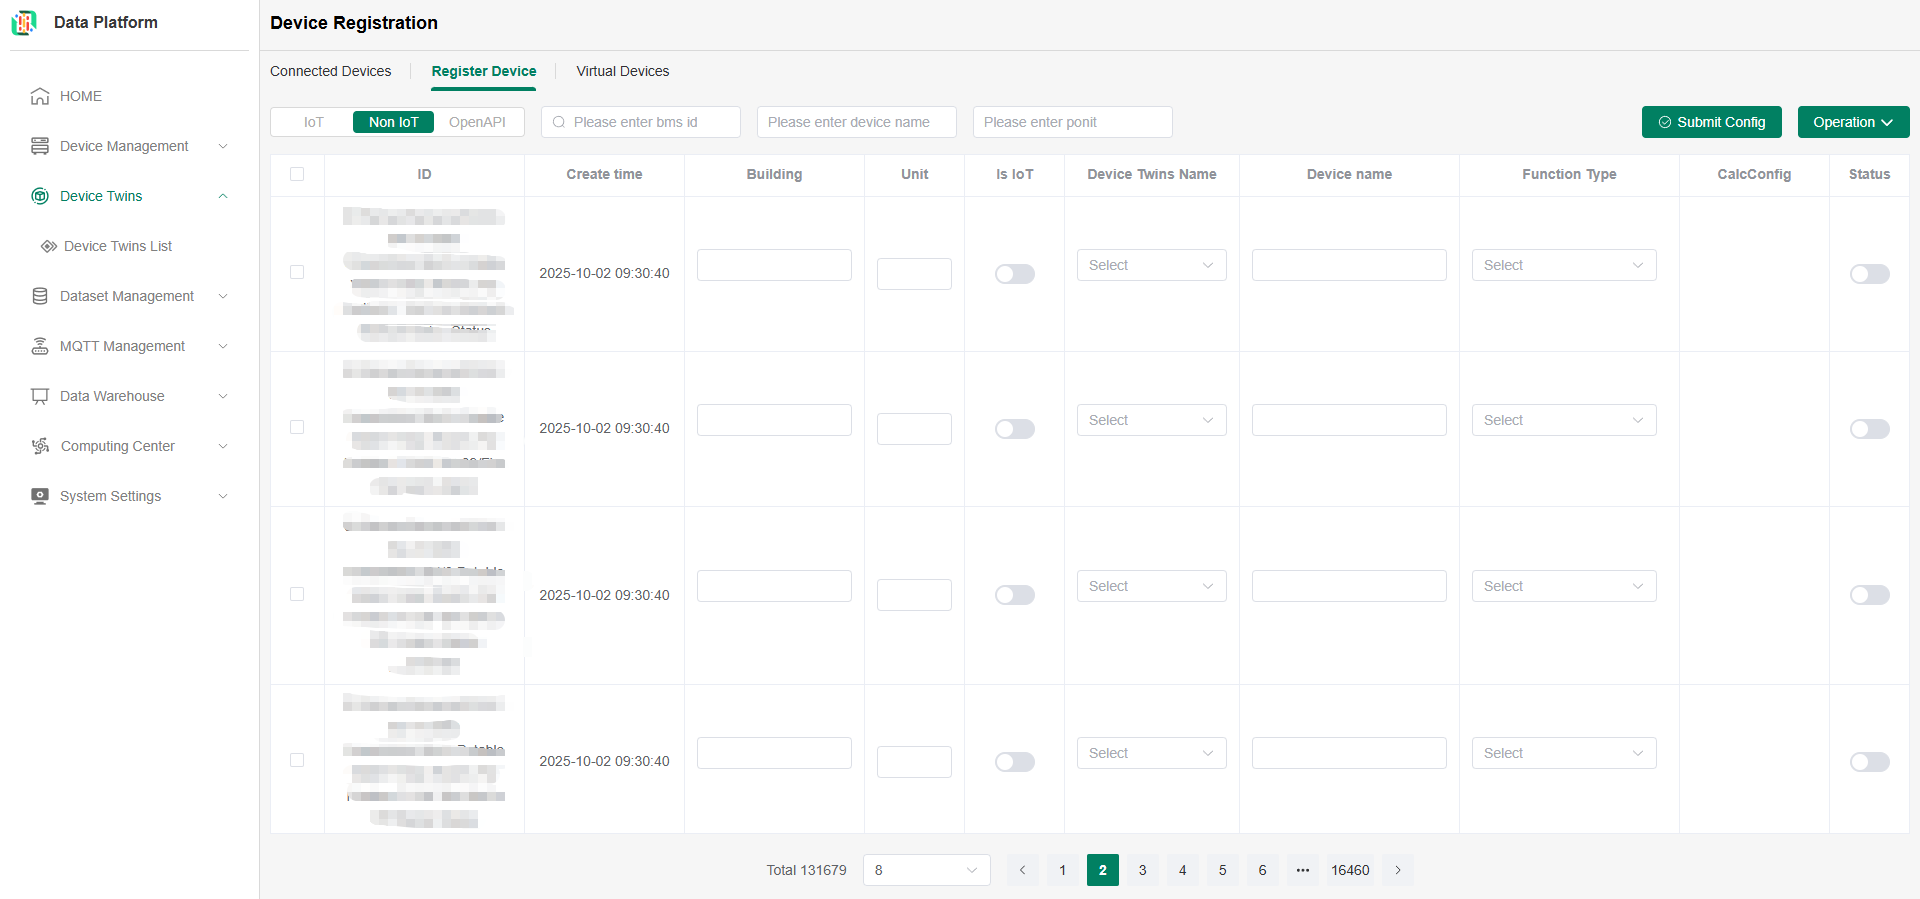
-
Mark BMS Device Tags
tipThe system supports individual marking and batch marking.
Individual Marking: You can search for the required id through the BMS id search bar and fill in the required tag information. Note that the status must be Enabled.
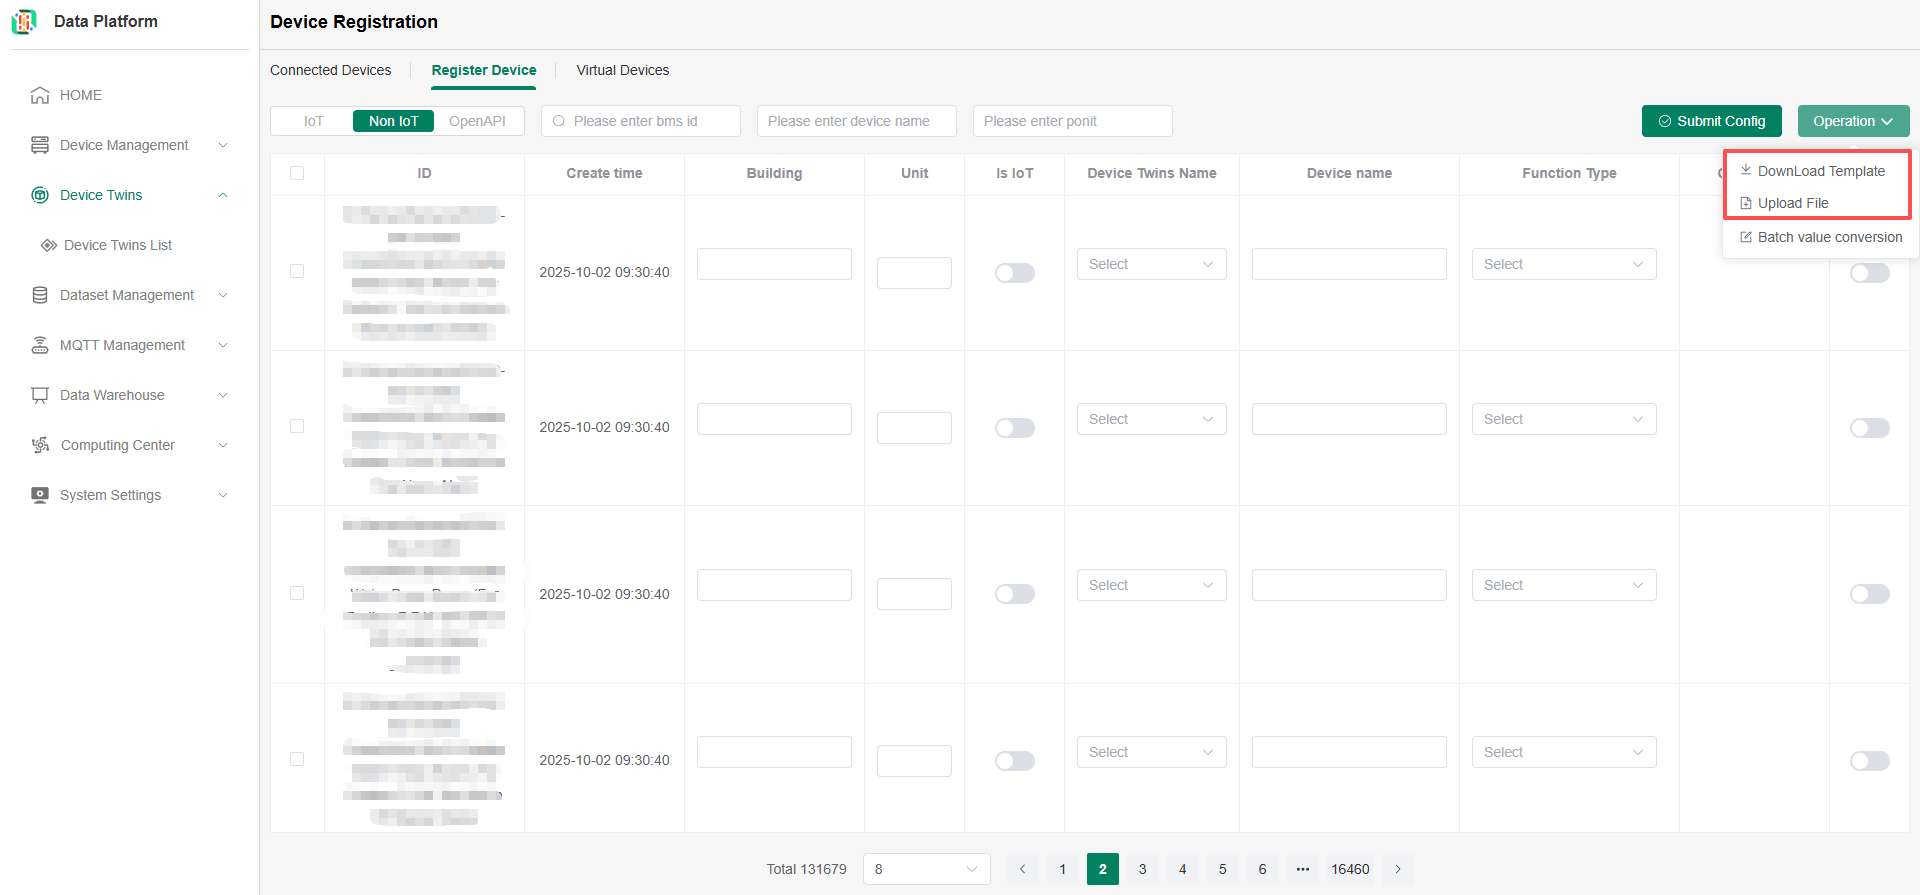
Batch Marking: You can download the template to generate an excel sheet, batch fill in the required tag information in the sheet, note that the status must be Enabled, then return to the platform to upload the file, as shown below.
 warning
One device can match multiple BMS ids, but one device can only match a single thing model.
-
BMS Device Project Binding BMS devices with marked tags should normally appear in the connected device list. If your device does not appear in the list, you can first confirm whether the status was turned on when marking the tag; then check in the project tag list whether the device is bound to a project tag. For operations, see above Platform Project Tags.
-