Create Project
There are two entry points to create a project:
- Click "+" under Building: Creates an enterprise-level project
- Click "+" under Project: Creates a personal project
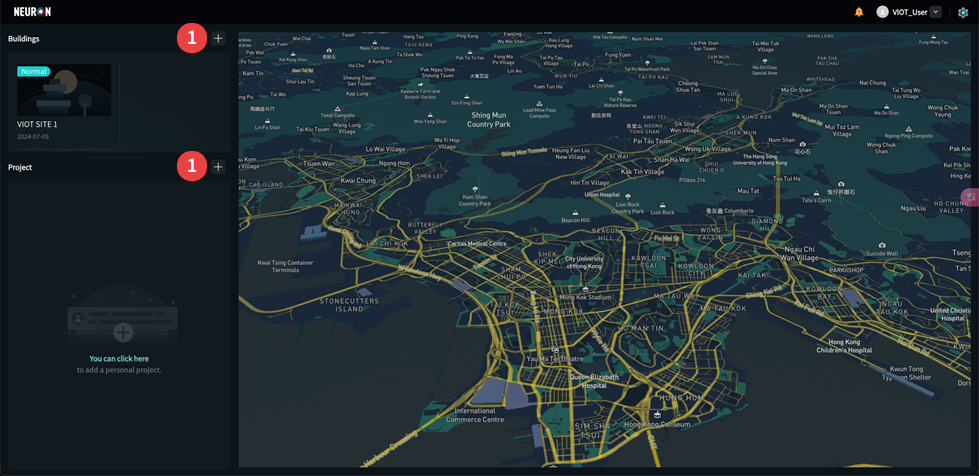
- Click "+" to add a new project;
Step 1. Fill in Basic Project Information
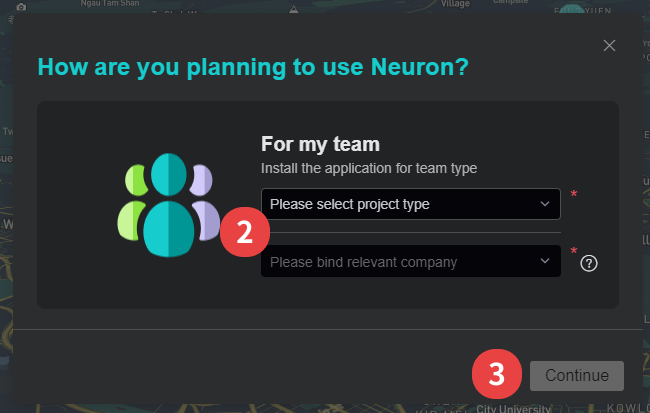
- Select "Project type" and bind related company (optional);
- Click "Continue";
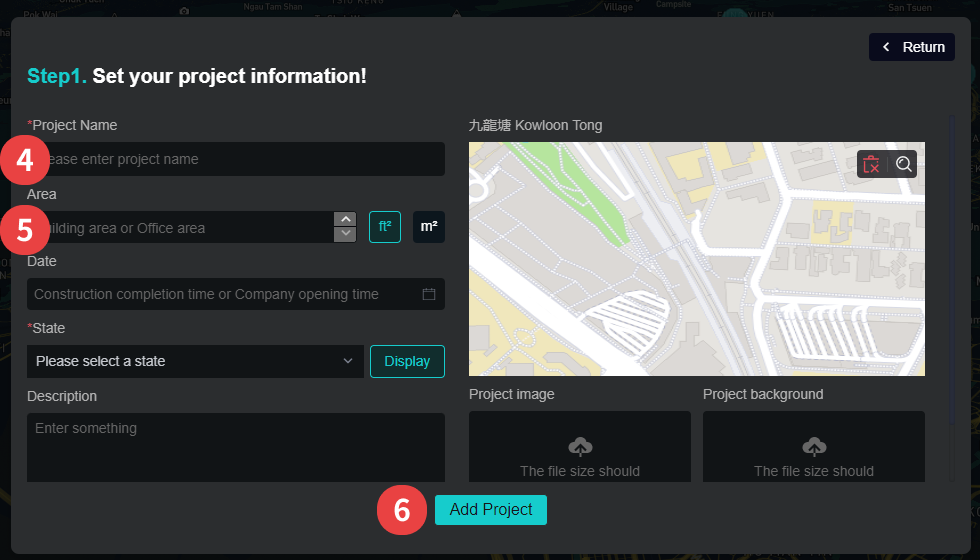
- Enter "Project Name";
- Fill in more project basic information;
- Click "Add Project" to complete project creation;
Step 2. Invite Members
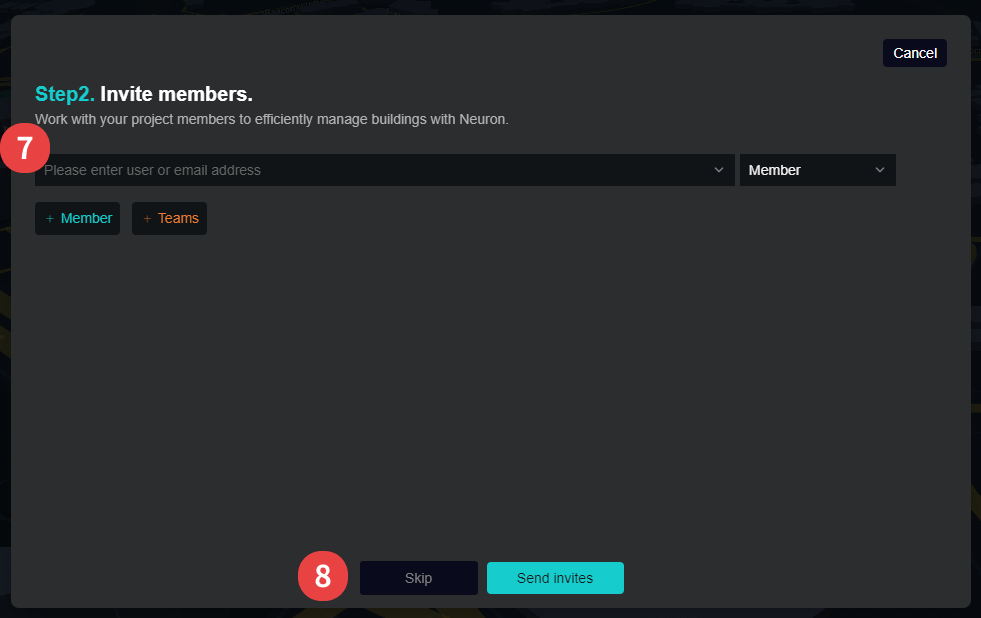
- Enter email to invite users and configure user permissions: Admin/Member/Guest;
- You can also skip inviting members first and directly proceed to Step 3 to install apps. Members can be invited later;
Step 3. Install Apps and Configure Permissions
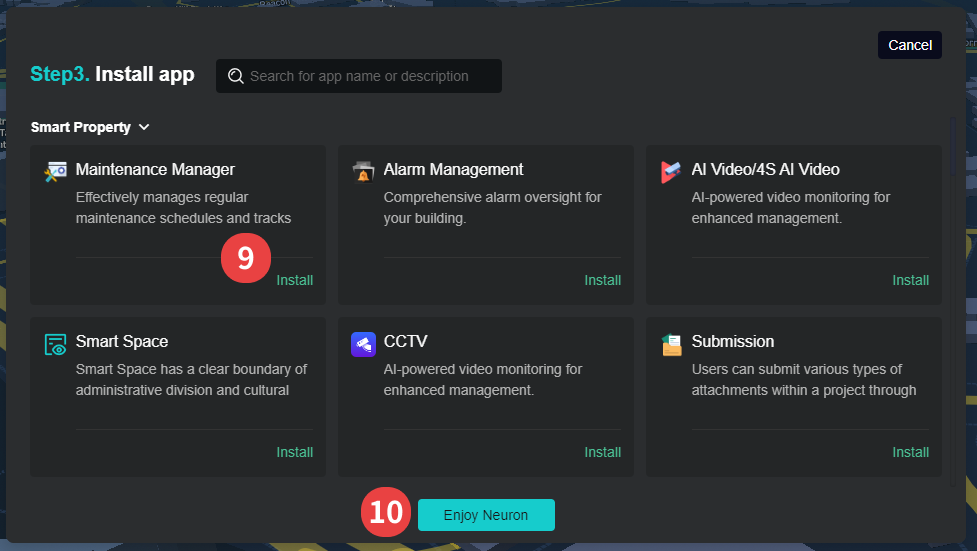
- Install required apps to the project, click "Install" to install apps;
- Click "Enjoy Neuron" to complete project creation and basic configuration. Start using Neuron to manage buildings~
App permissions can be configured with one click after installation
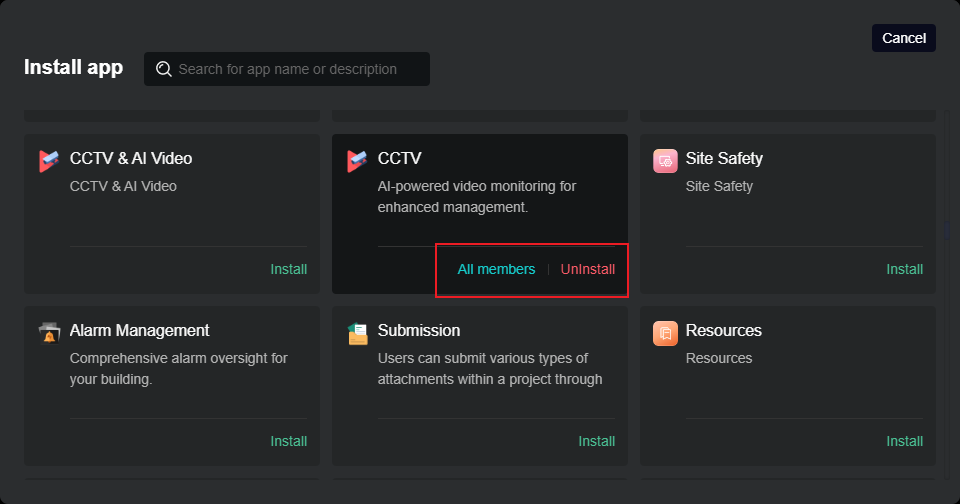
The default permission after app installation is visible to all members. Click to change permissions: Visible to specified members/Configure blocklist
Click "Uninstall" to uninstall apps