Device Pre-Provisioning via ChirpStack Platform
Overview
This tutorial systematically guides you through the process of configuring LoRa devices via the ChirpStack platform, covering the complete path from obtaining basic parameters to device network joining verification.
I. ChirpStack Platform Operations
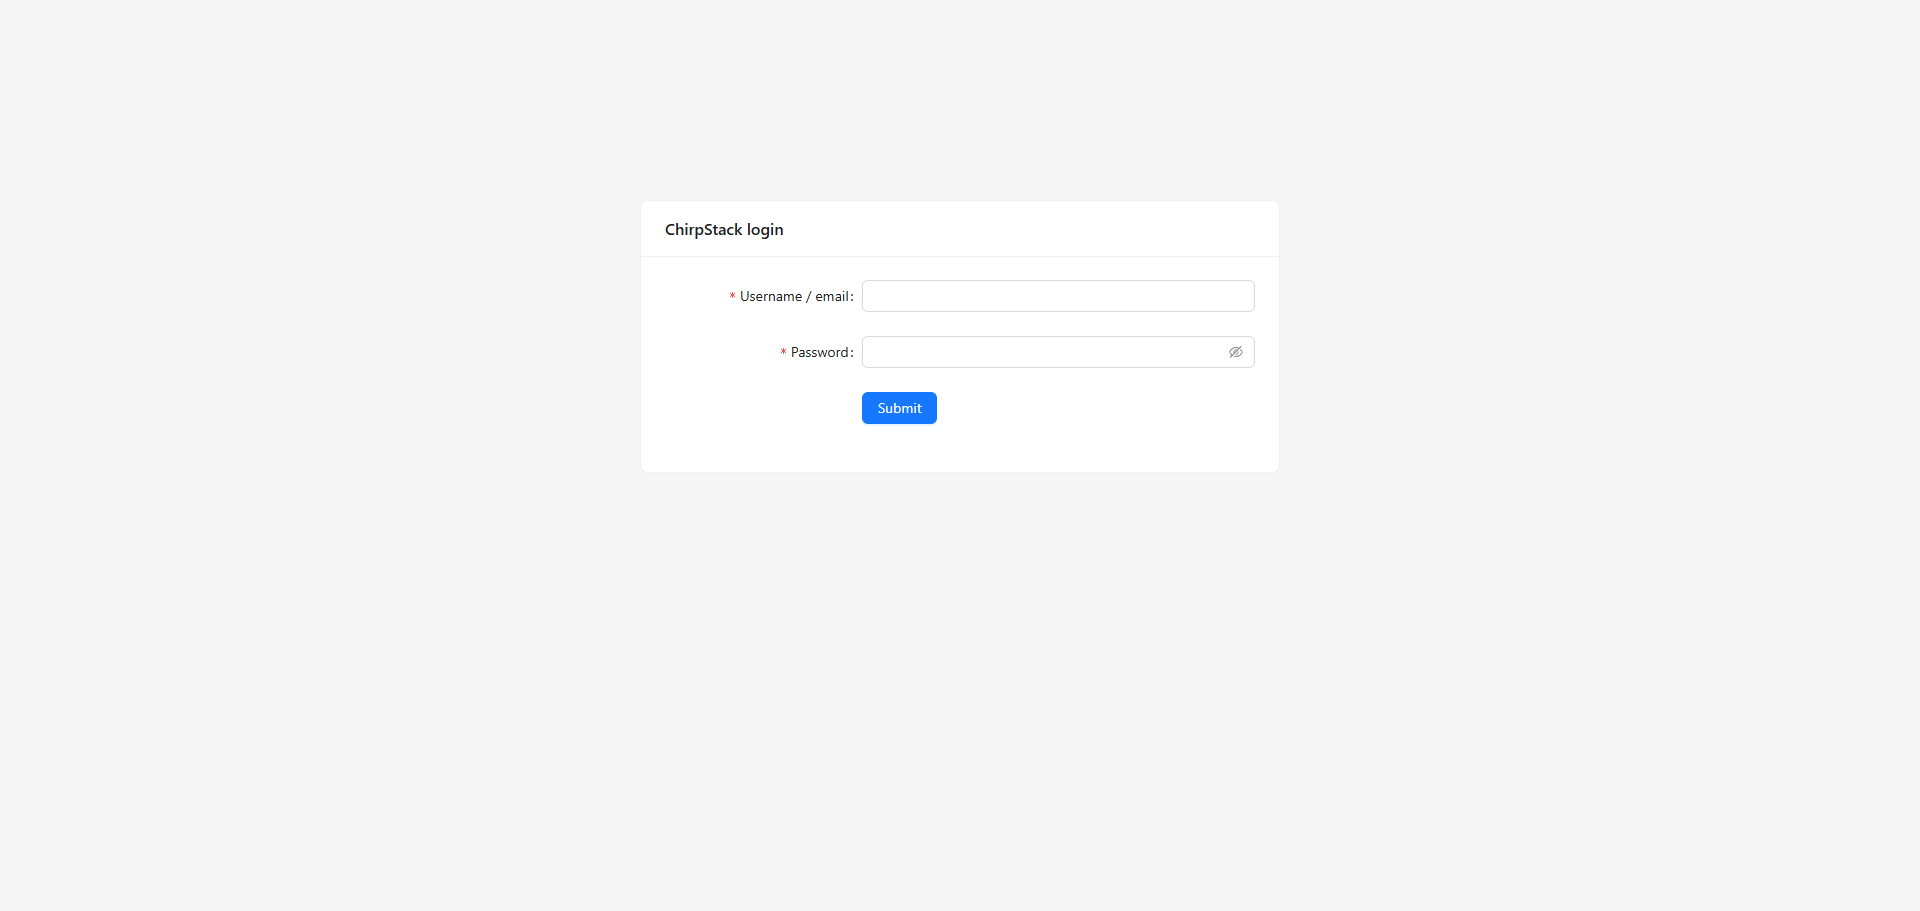
Step 1. Log in to the ChirpStack Platform
Log in to the chirpstack platform to view/register devices (please ask Neuron technical support for the account password).
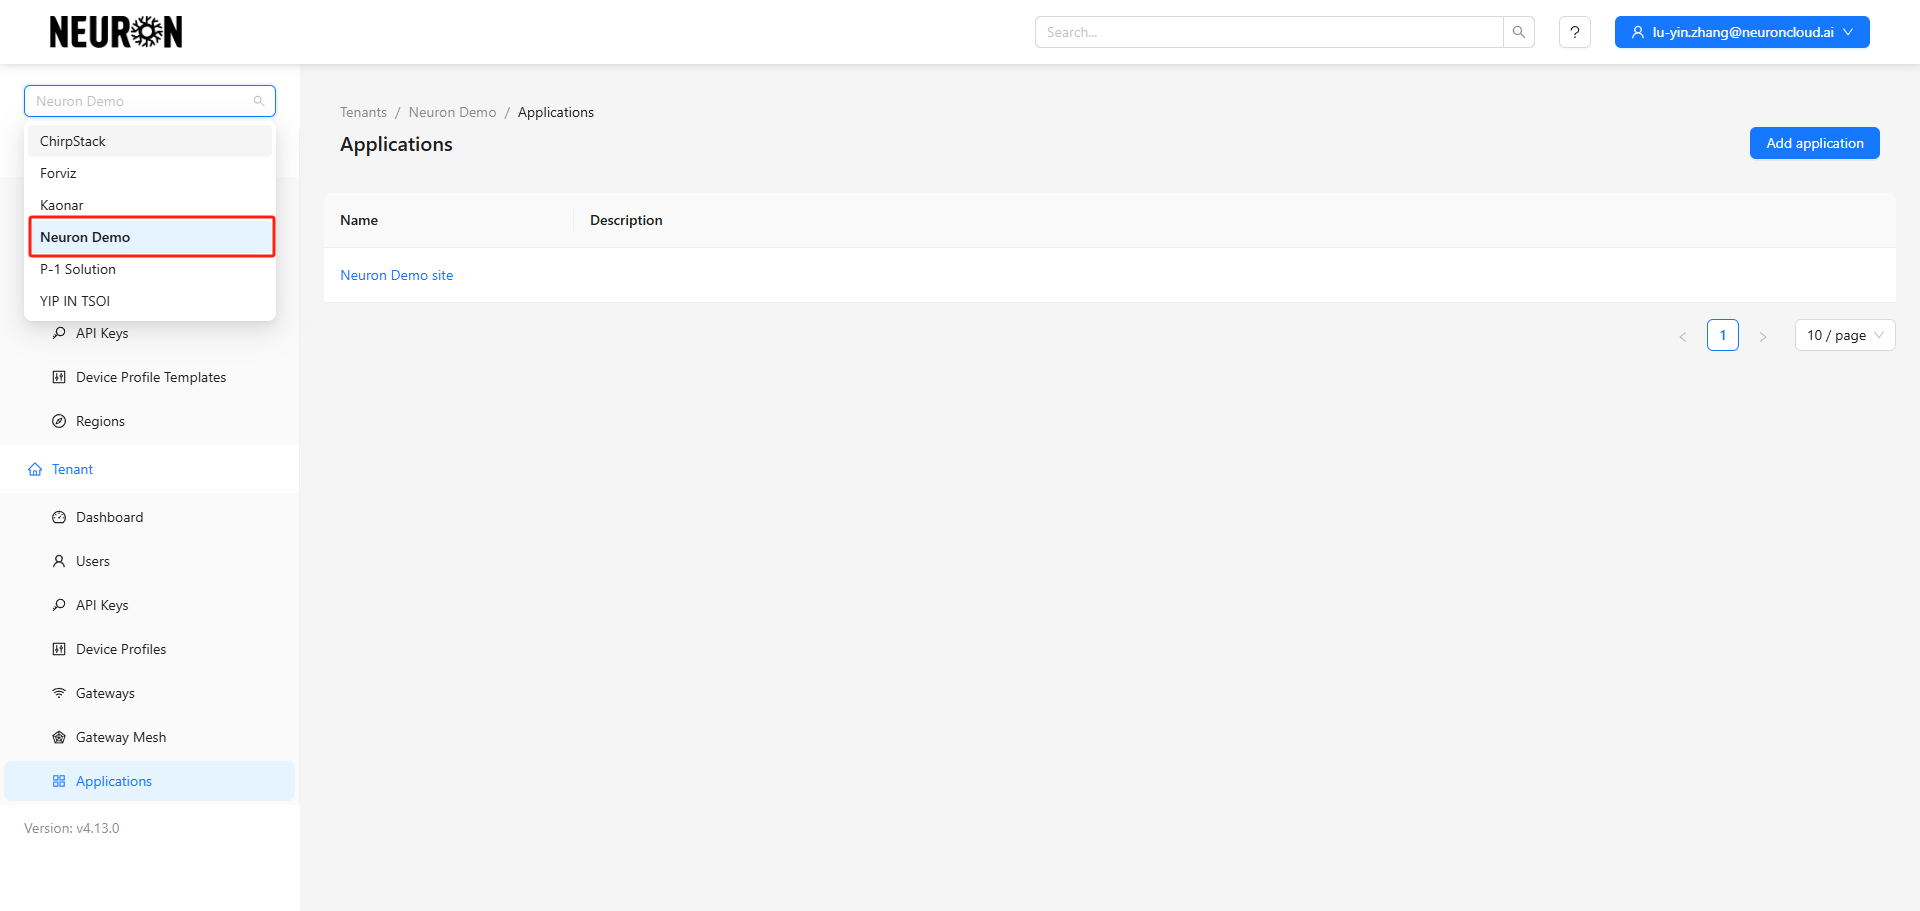
Select the tenant to which you need to add devices.
Here, Neuron Demo is used as an example. The specific tenant should be based on the tenant pre-configured for the platform account by Neuron technical support.
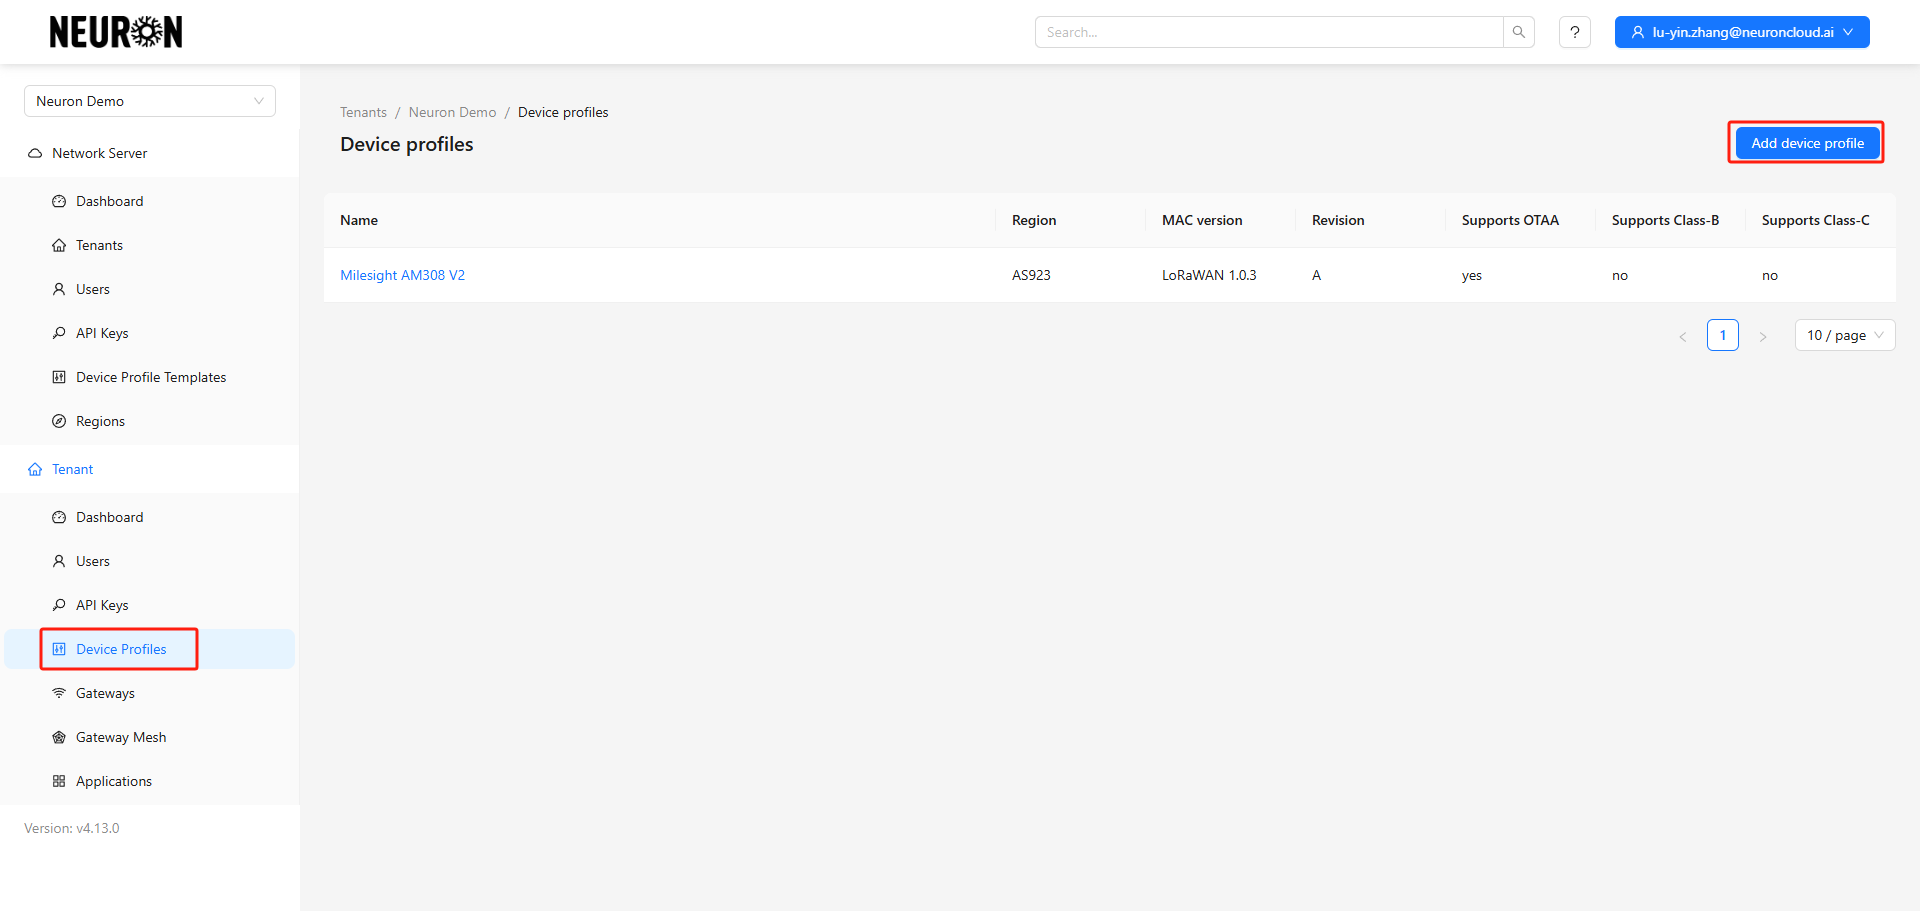
Step 2. Configure Device Profiles
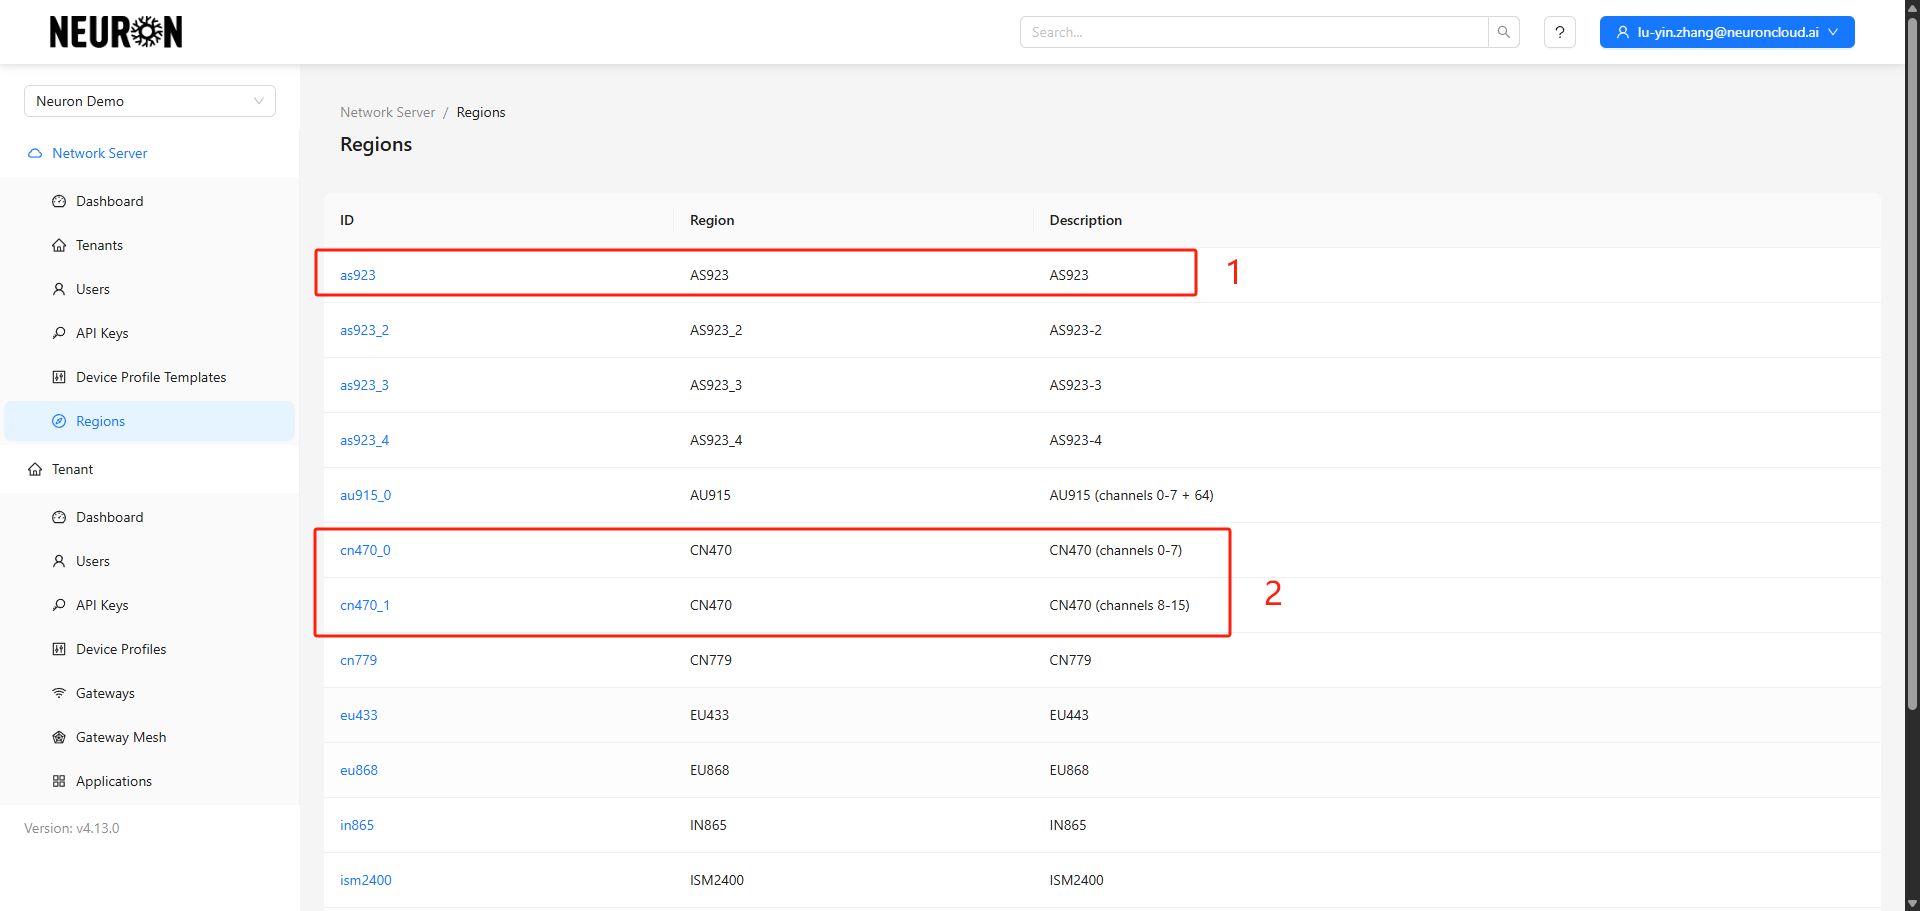
Before adding device configurations, you need to know the device's frequency band and channels.
- The Hong Kong region uses AS923 by default.
- Mainland China uses CN470 by default.
Note the band distinction: Milesight's 470 band gateways and devices are configured by default for 470_1, which is CN470 channels 8-15.
2.1 Navigate to the Profile Configuration Page
2.2 Add Profile Information
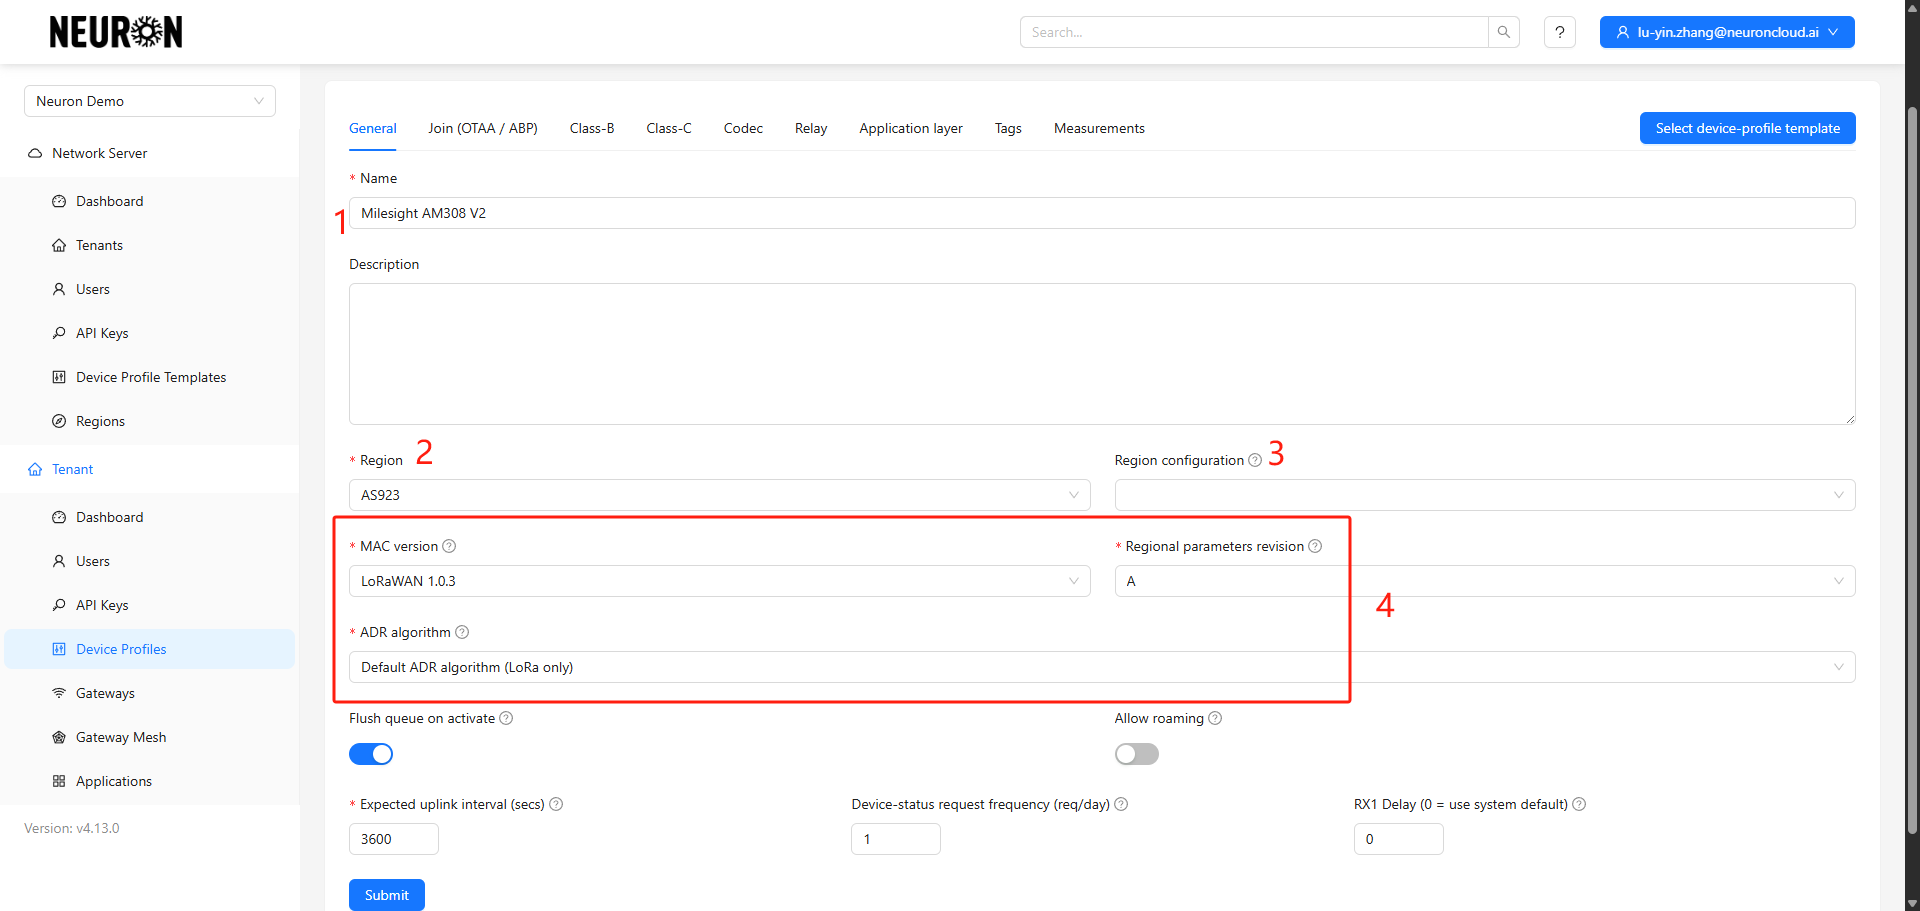
- Device configuration name and description
- Device frequency band
- Device channels (can be ignored for the Hong Kong band)
- Use default configurations for other parameters
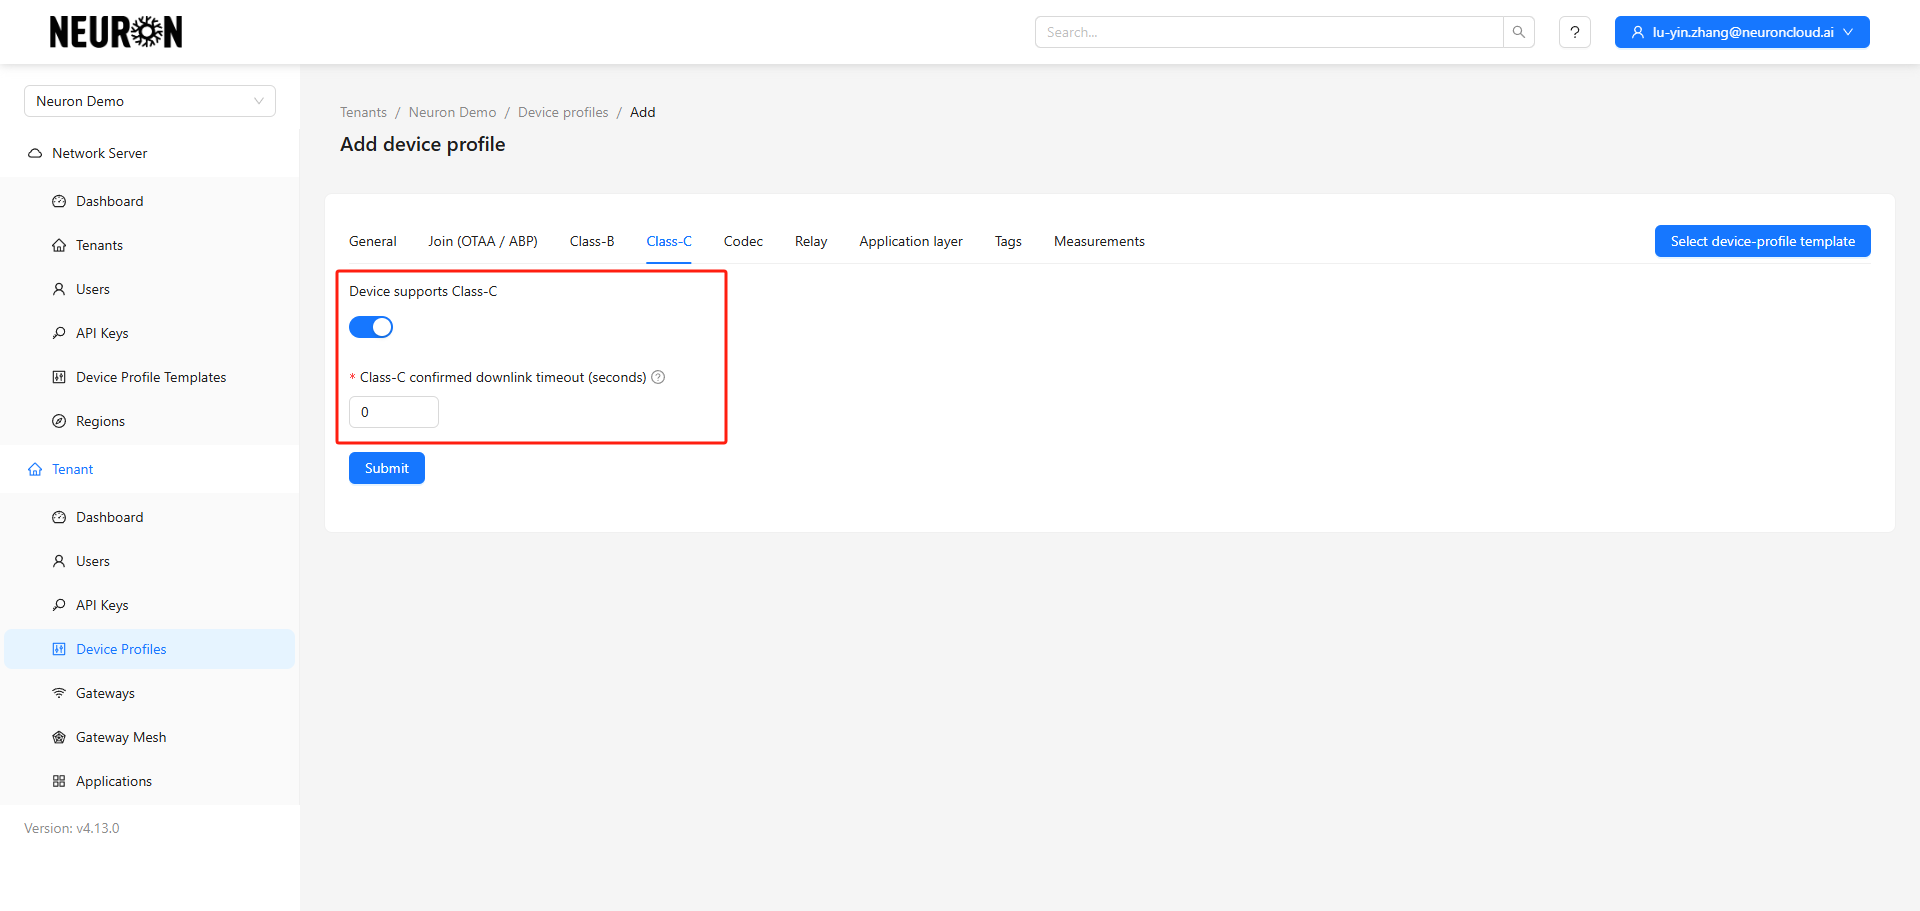
2.3 Enable ClassA or ClassC
Class A devices automatically enter sleep mode outside of reporting cycles; if reverse control is supported, they only respond to command issuance during the reporting window. Class C devices do not sleep outside reporting times and support real-time command issuance.
Class A is enabled by default. Typically, battery-powered devices only require Class A.
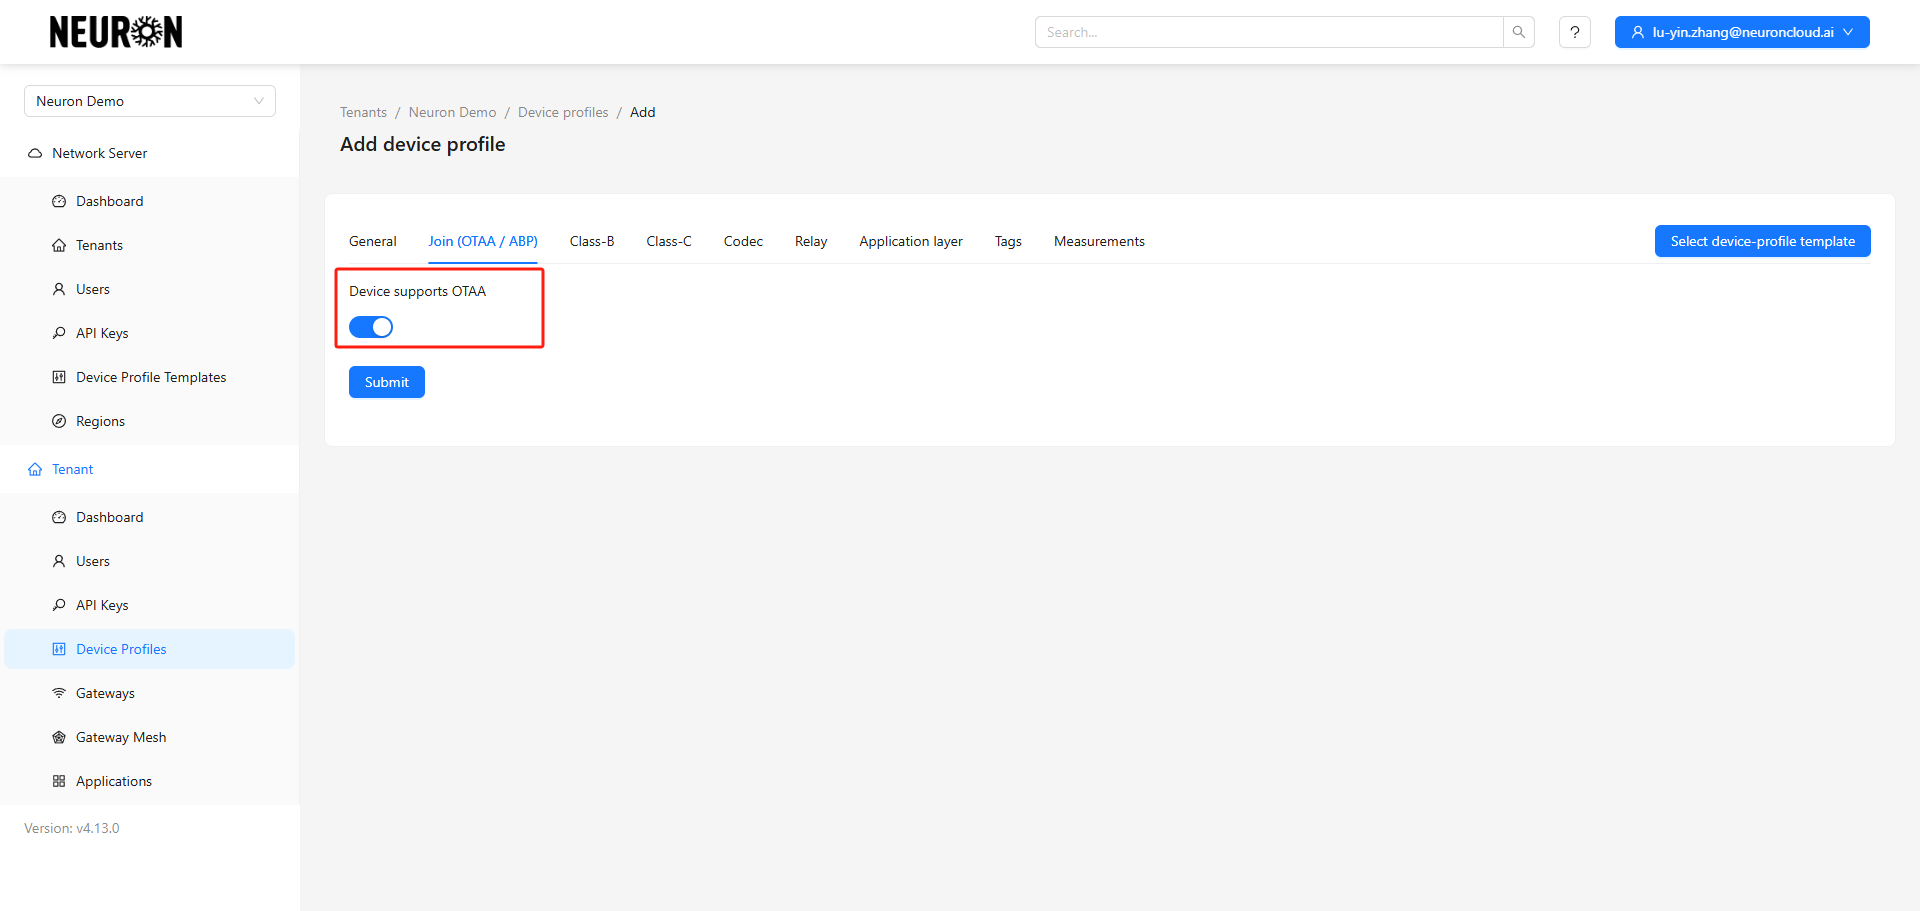
DC-powered devices need Class C enabled.
Step 3. Create Device
3.1 Navigate to Applications under the Tenant
This section shows all Applications created by the user under this tenant.
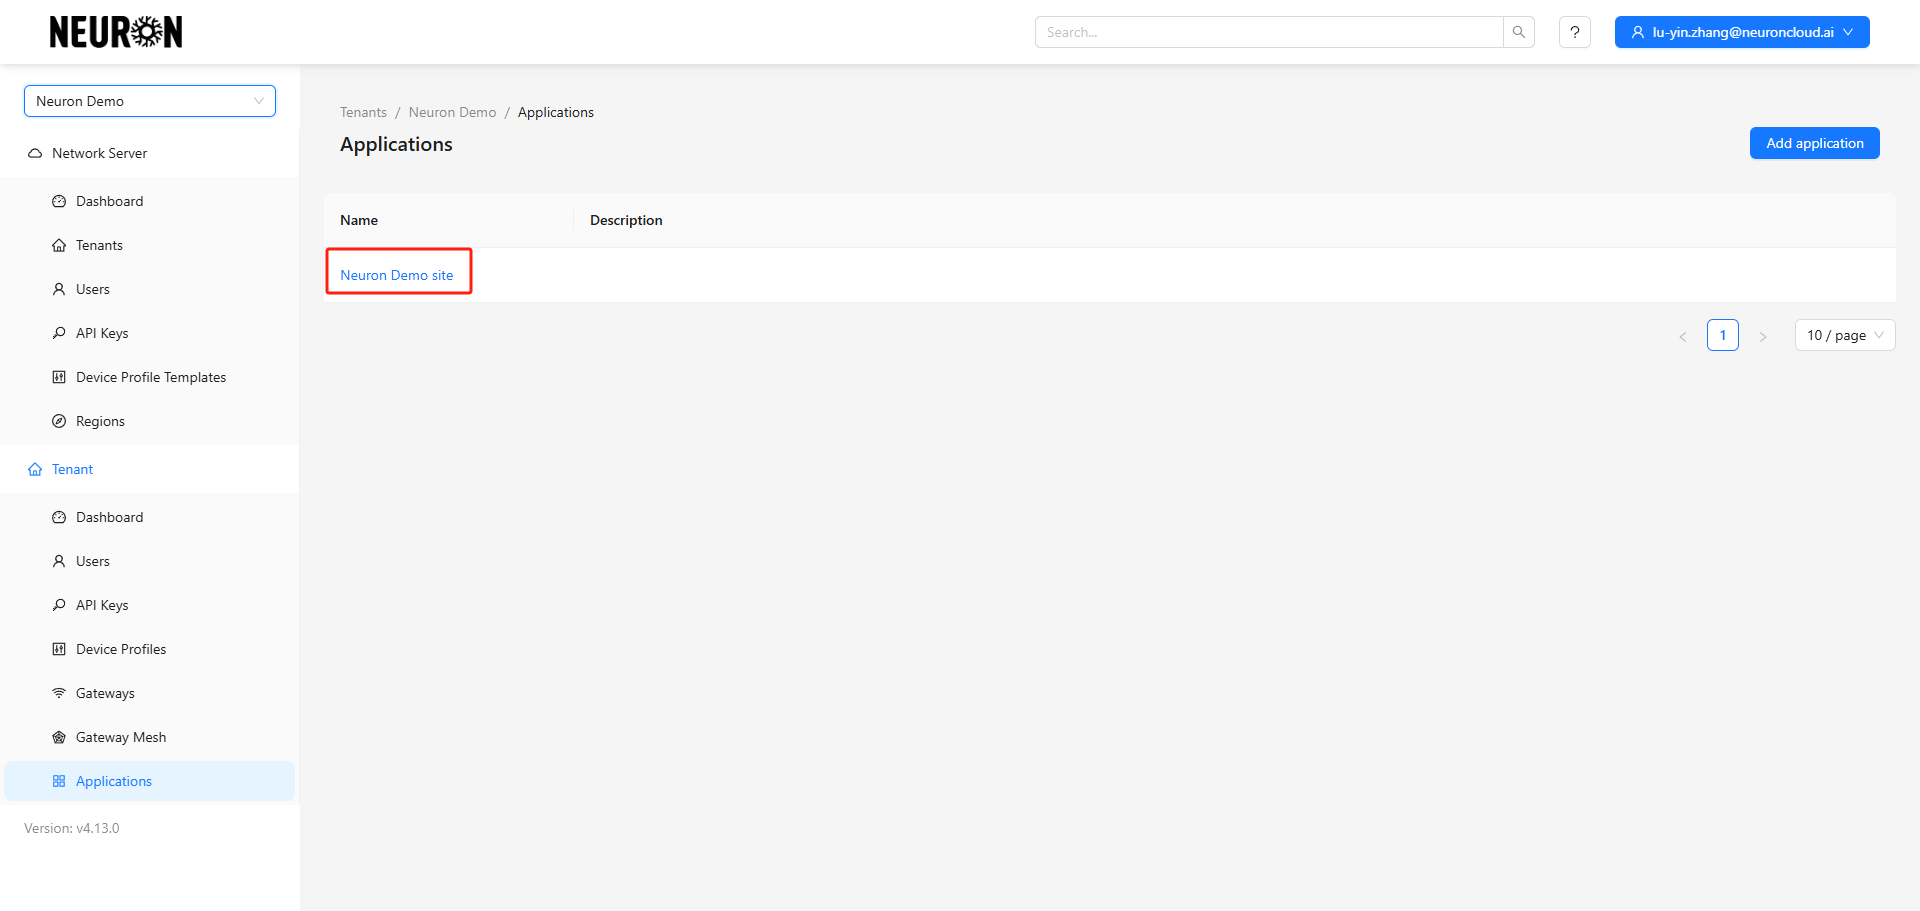
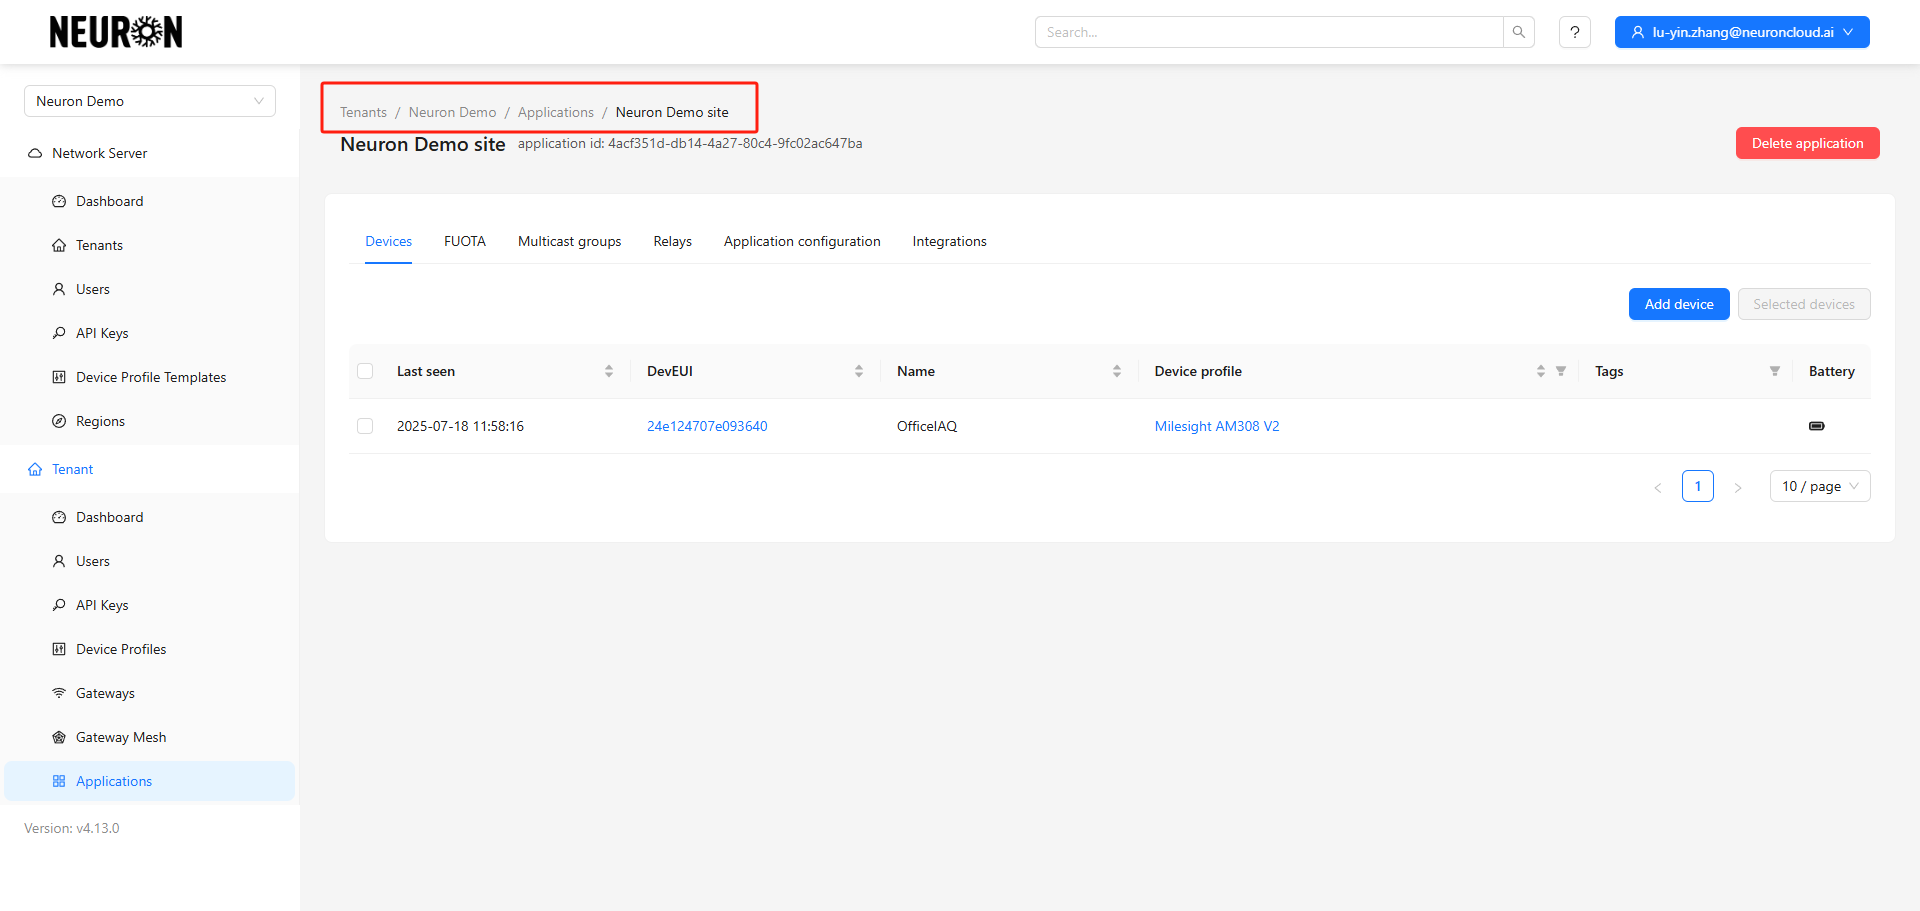
3.2 Enter the Application Sub-item
This section shows all devices registered by the user under this Application sub-item.
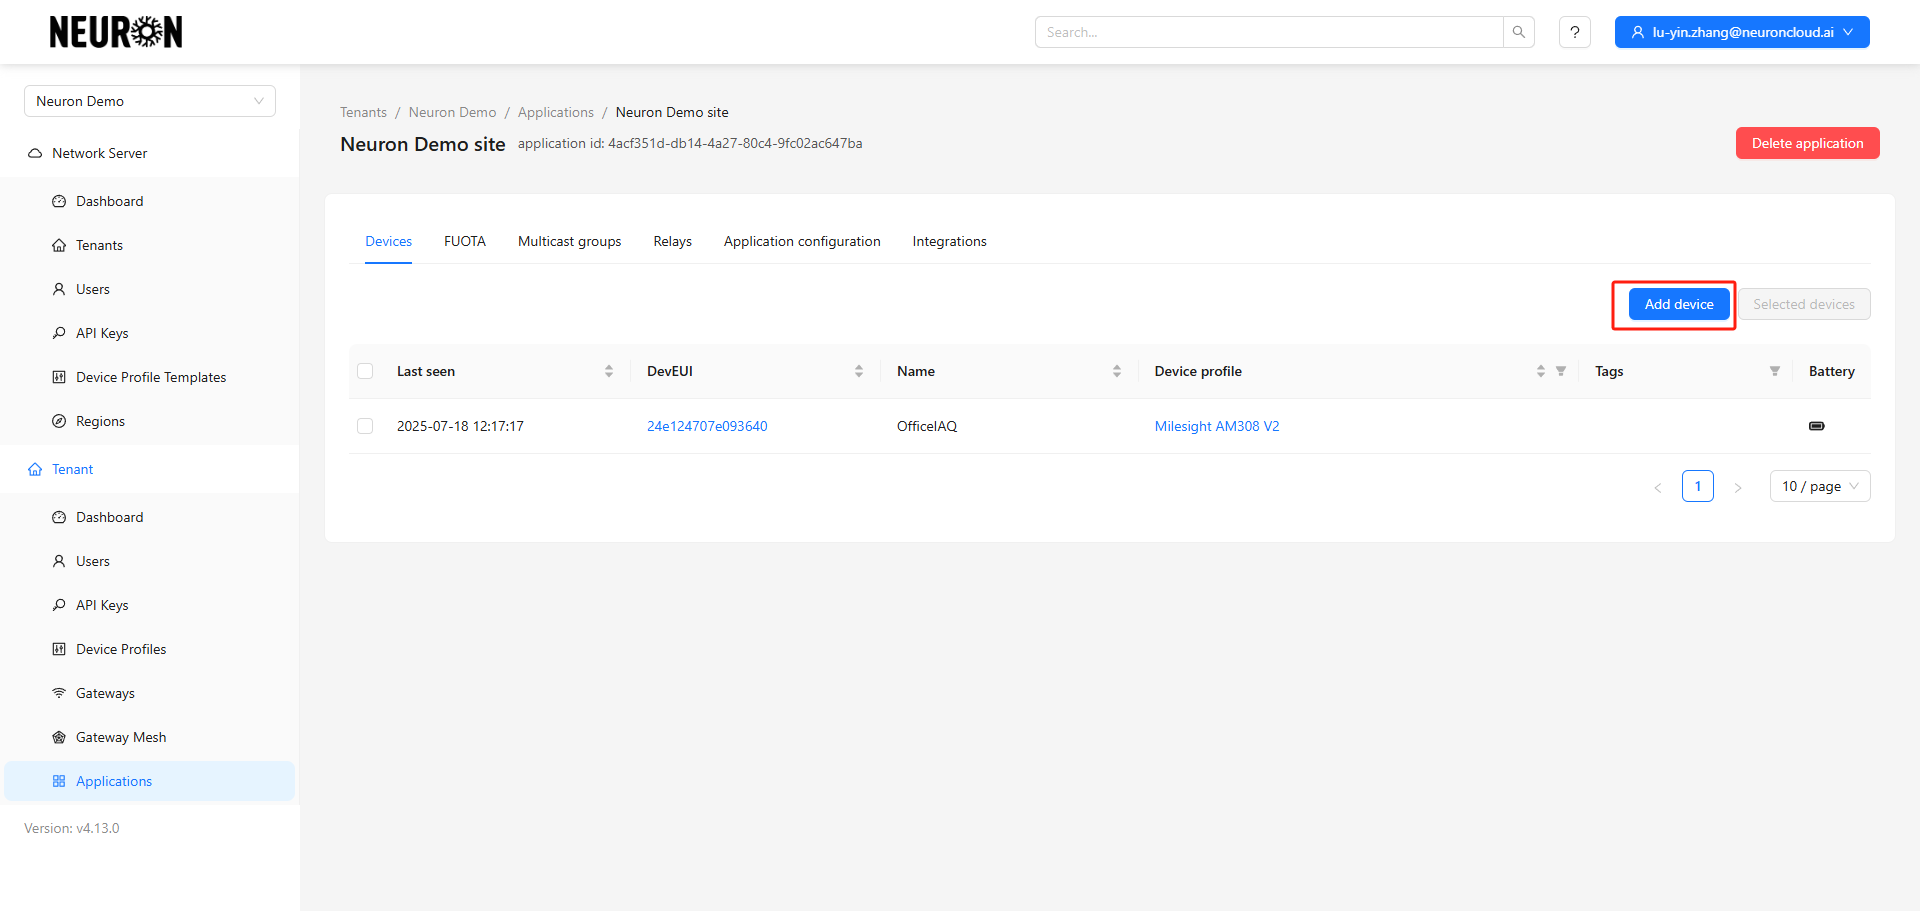
3.3 Add Device
Enter the device addition page.
Fill in the device information.
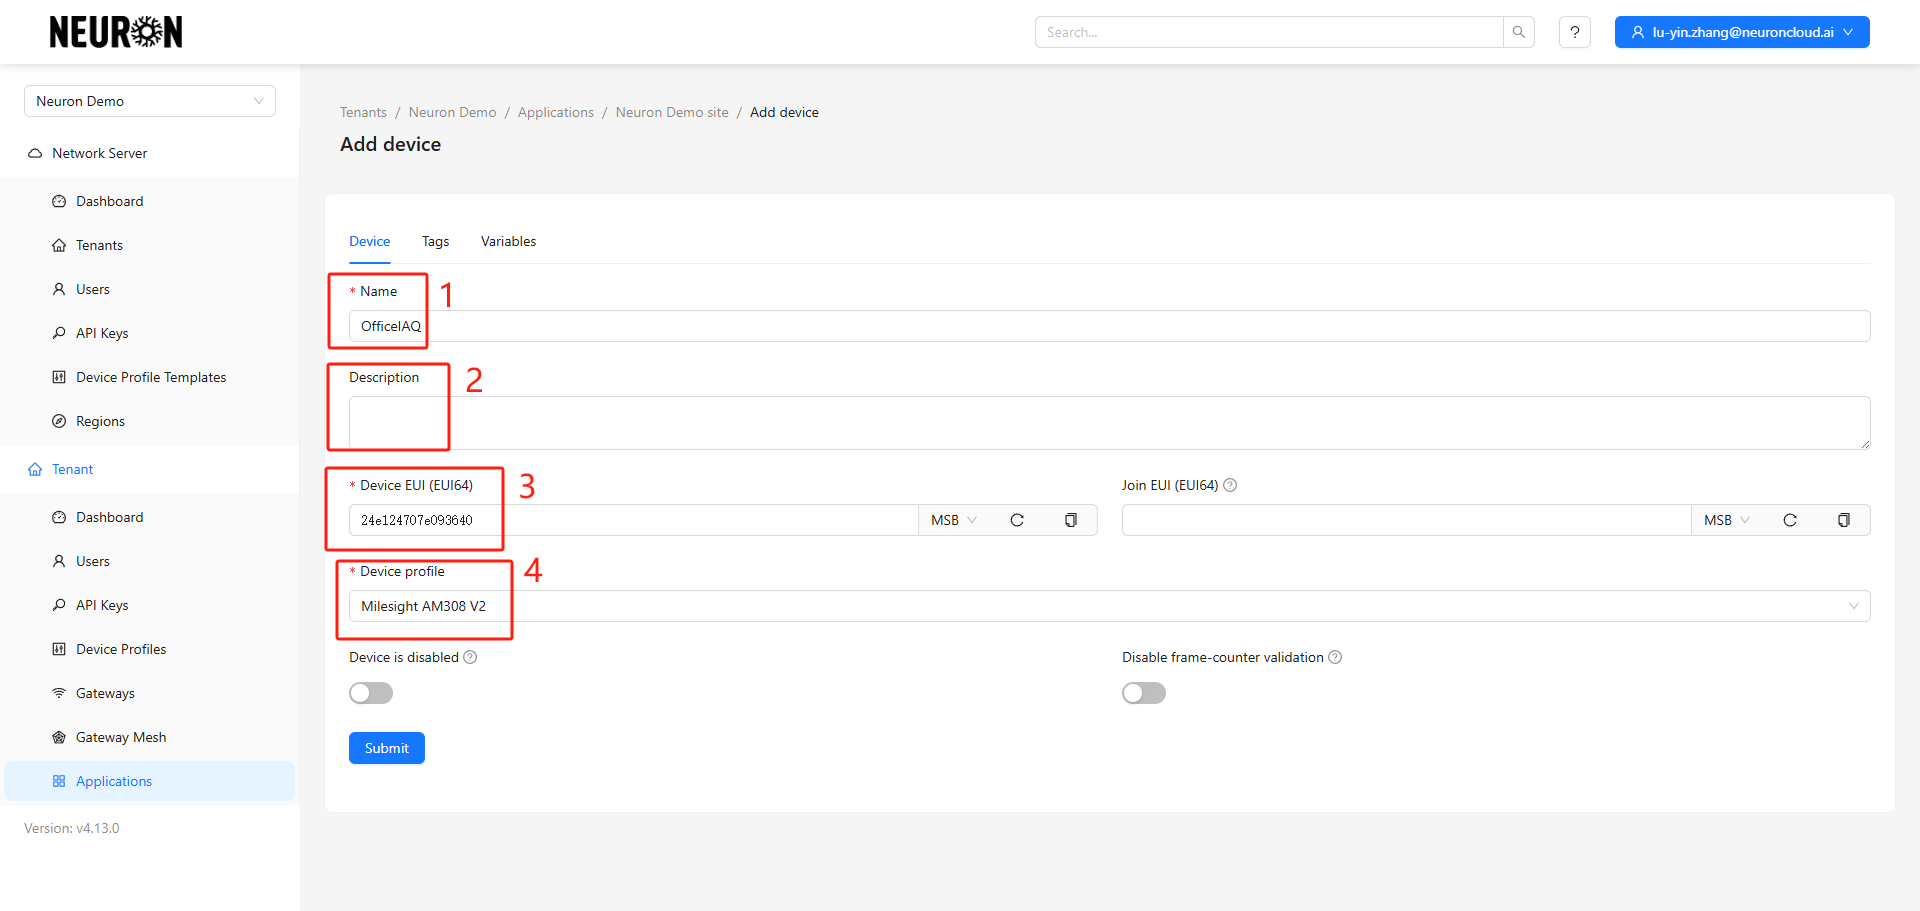
- Device name
- Device description
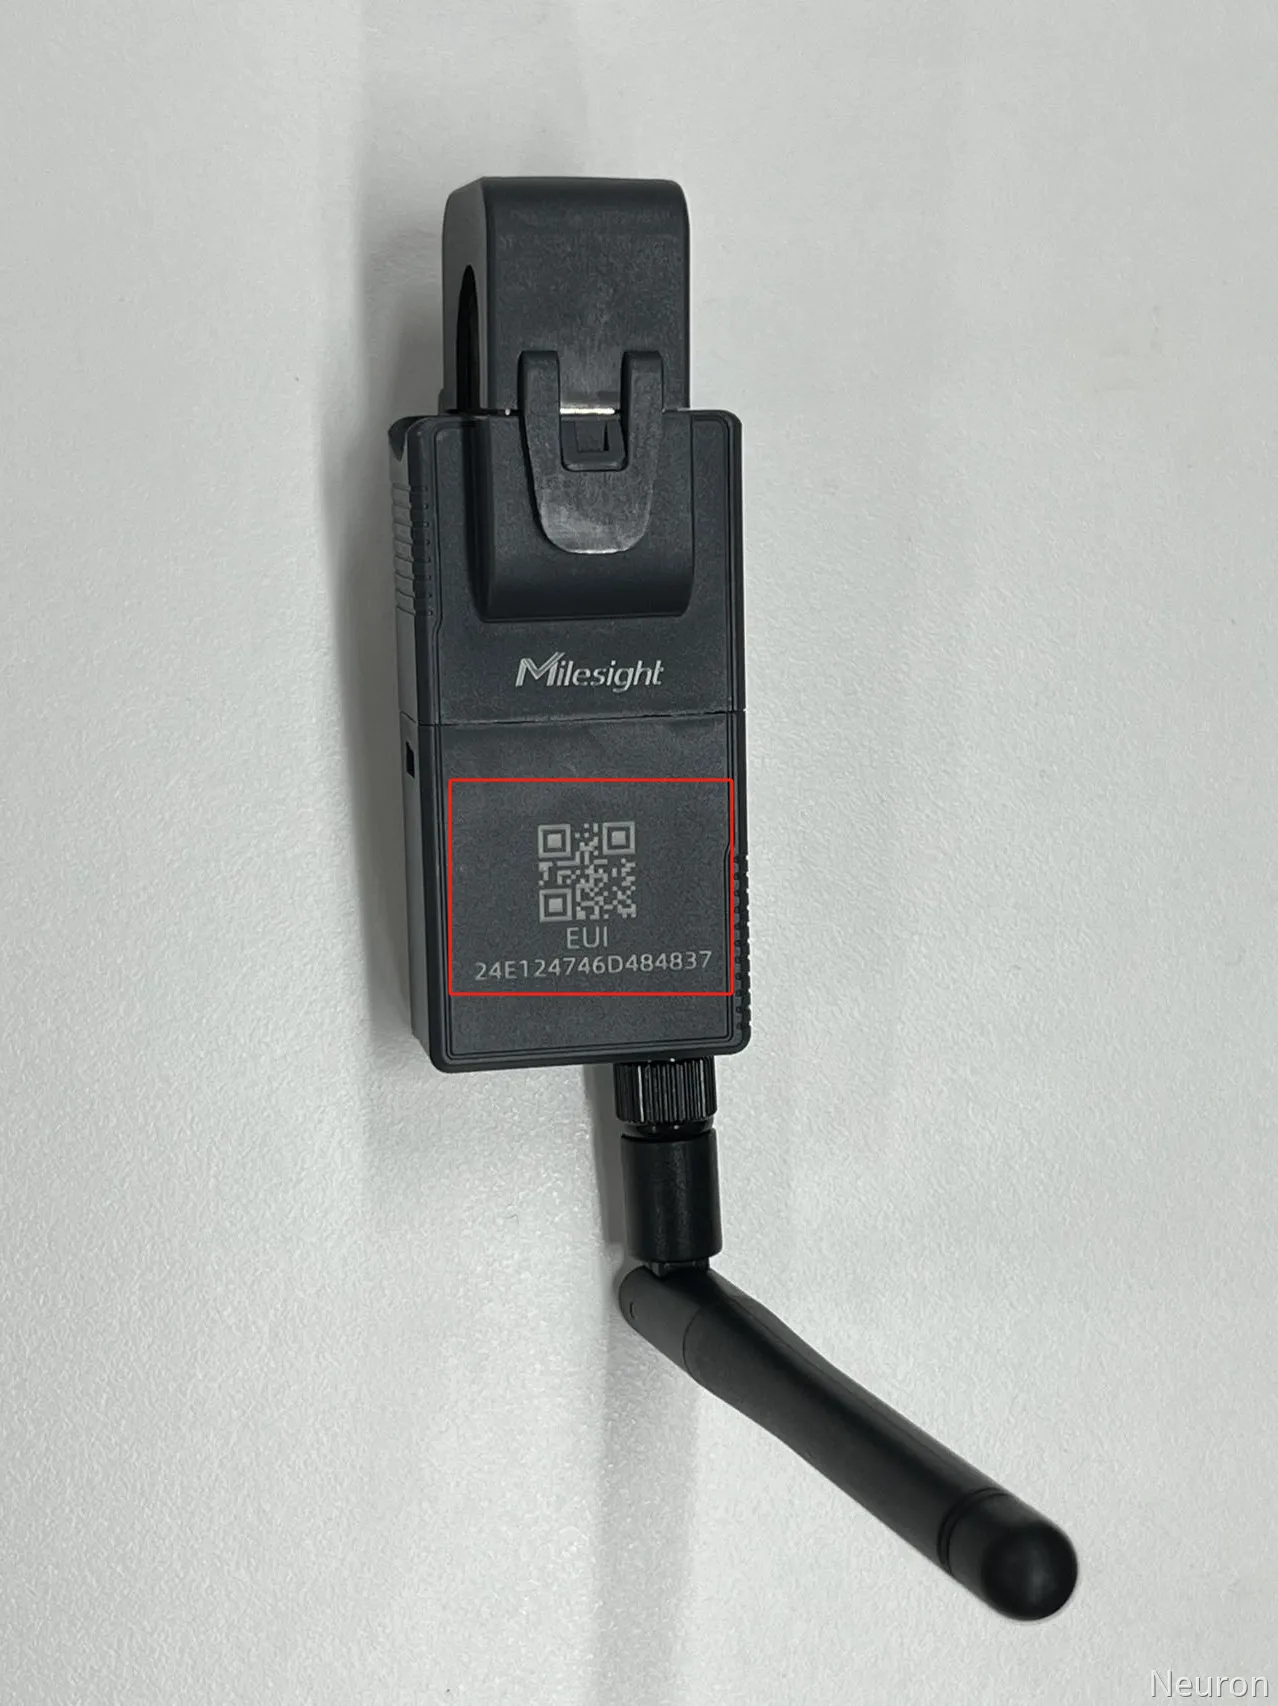
- Device DevEui: Usually printed on the device, it's the unique identifier.
- Device profile
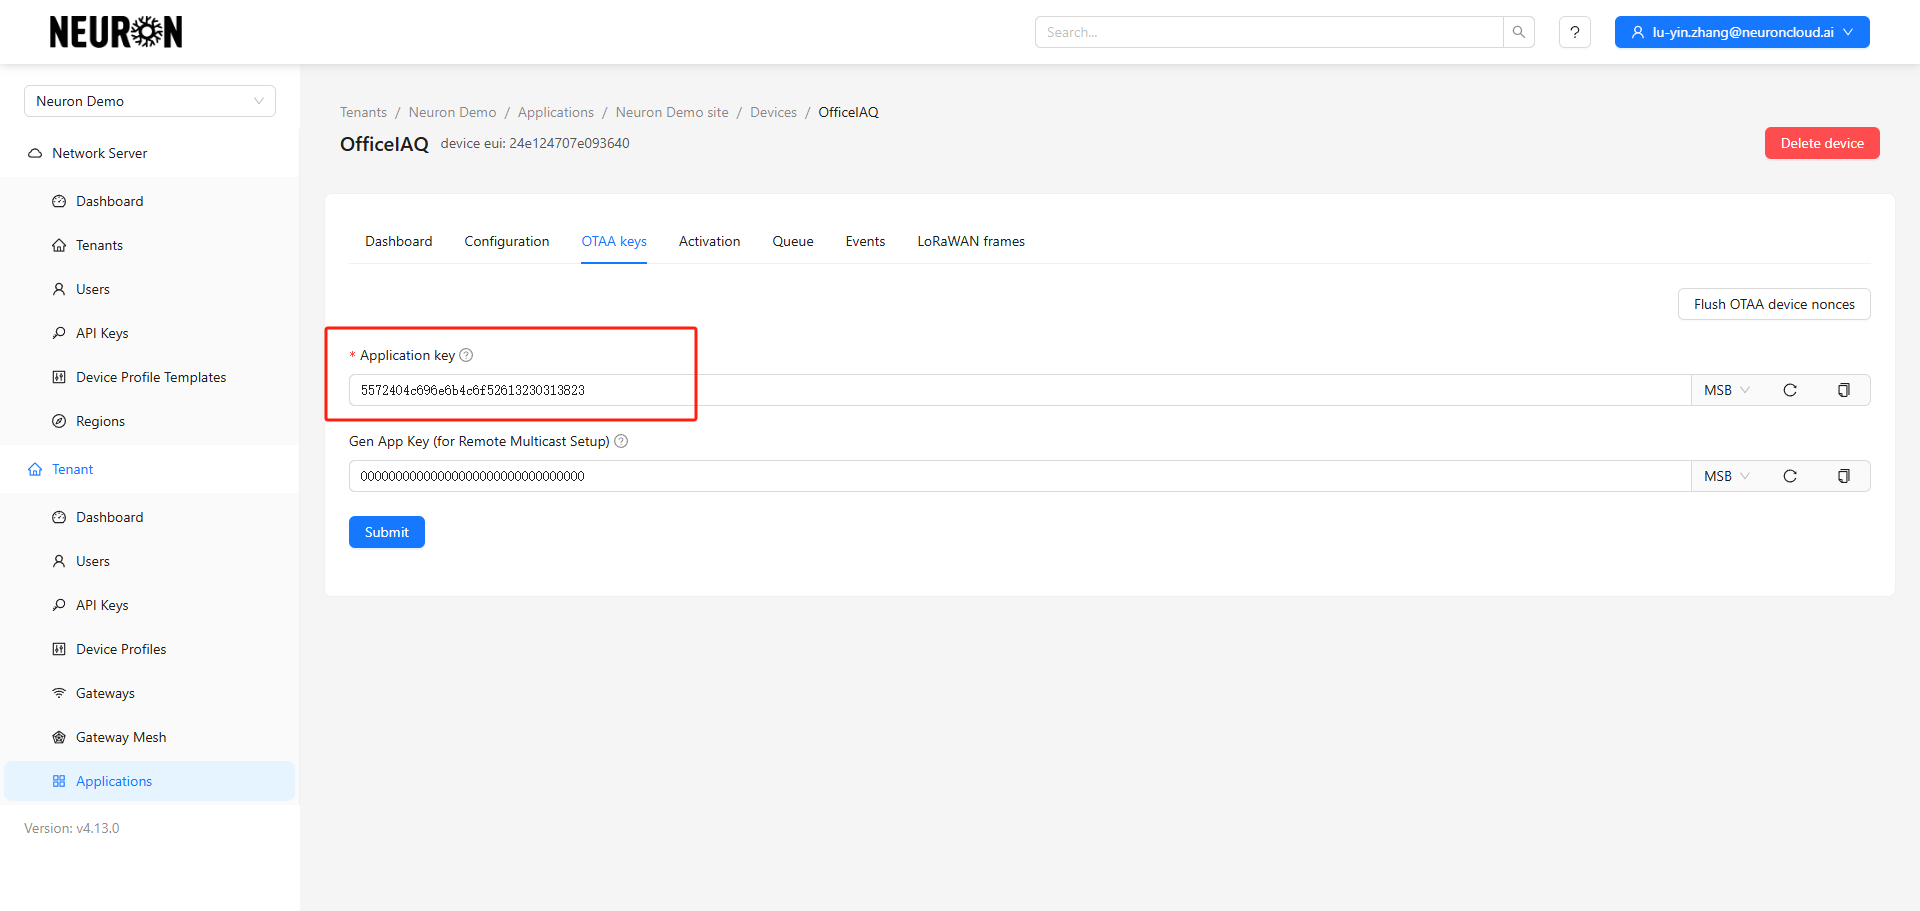
Add Application key.
The Application key is the credential for the device to join the gateway, provided by the manufacturer. The default Application key for Milesight devices is shown below.
Create the device after confirming the information is correct.
Note: The DevEui cannot be incorrect and cannot be modified after saving. Other parameters support editing.
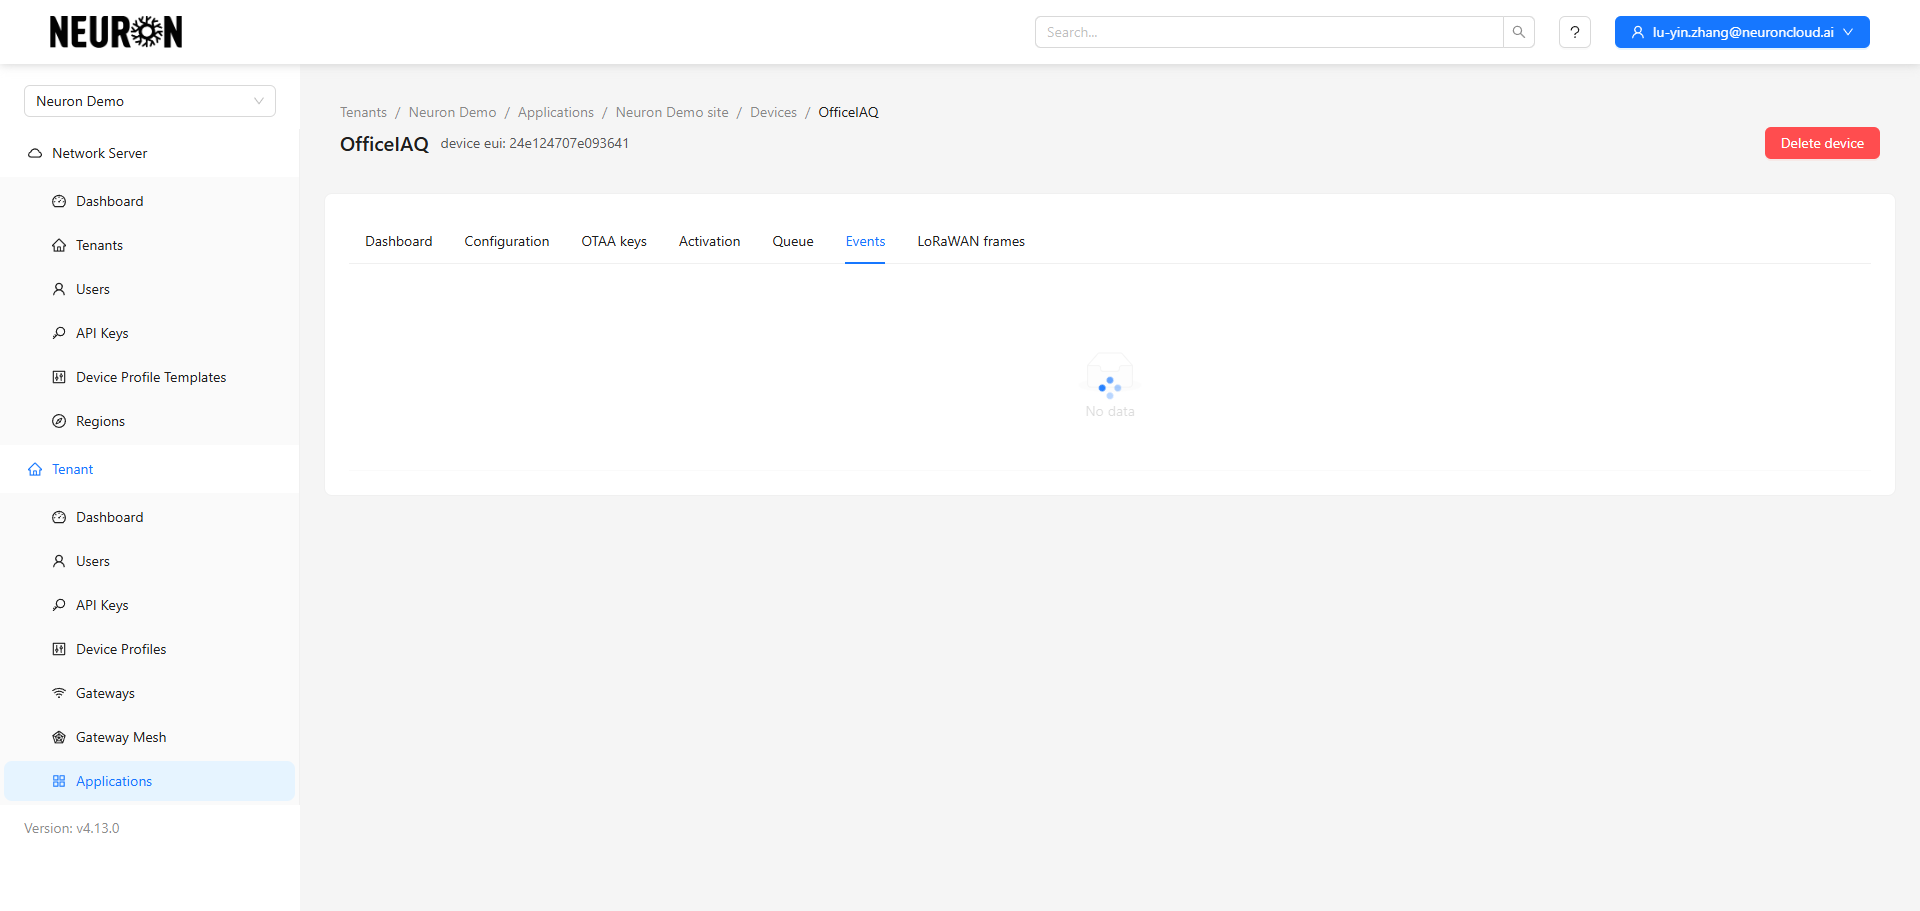
Step 4. Confirm Device Network Joining Status
After adding the device, you need to confirm whether it successfully joined the network. Check the last reported time, activation parameters, or the Events option to determine the status.
Data reported, device is online.
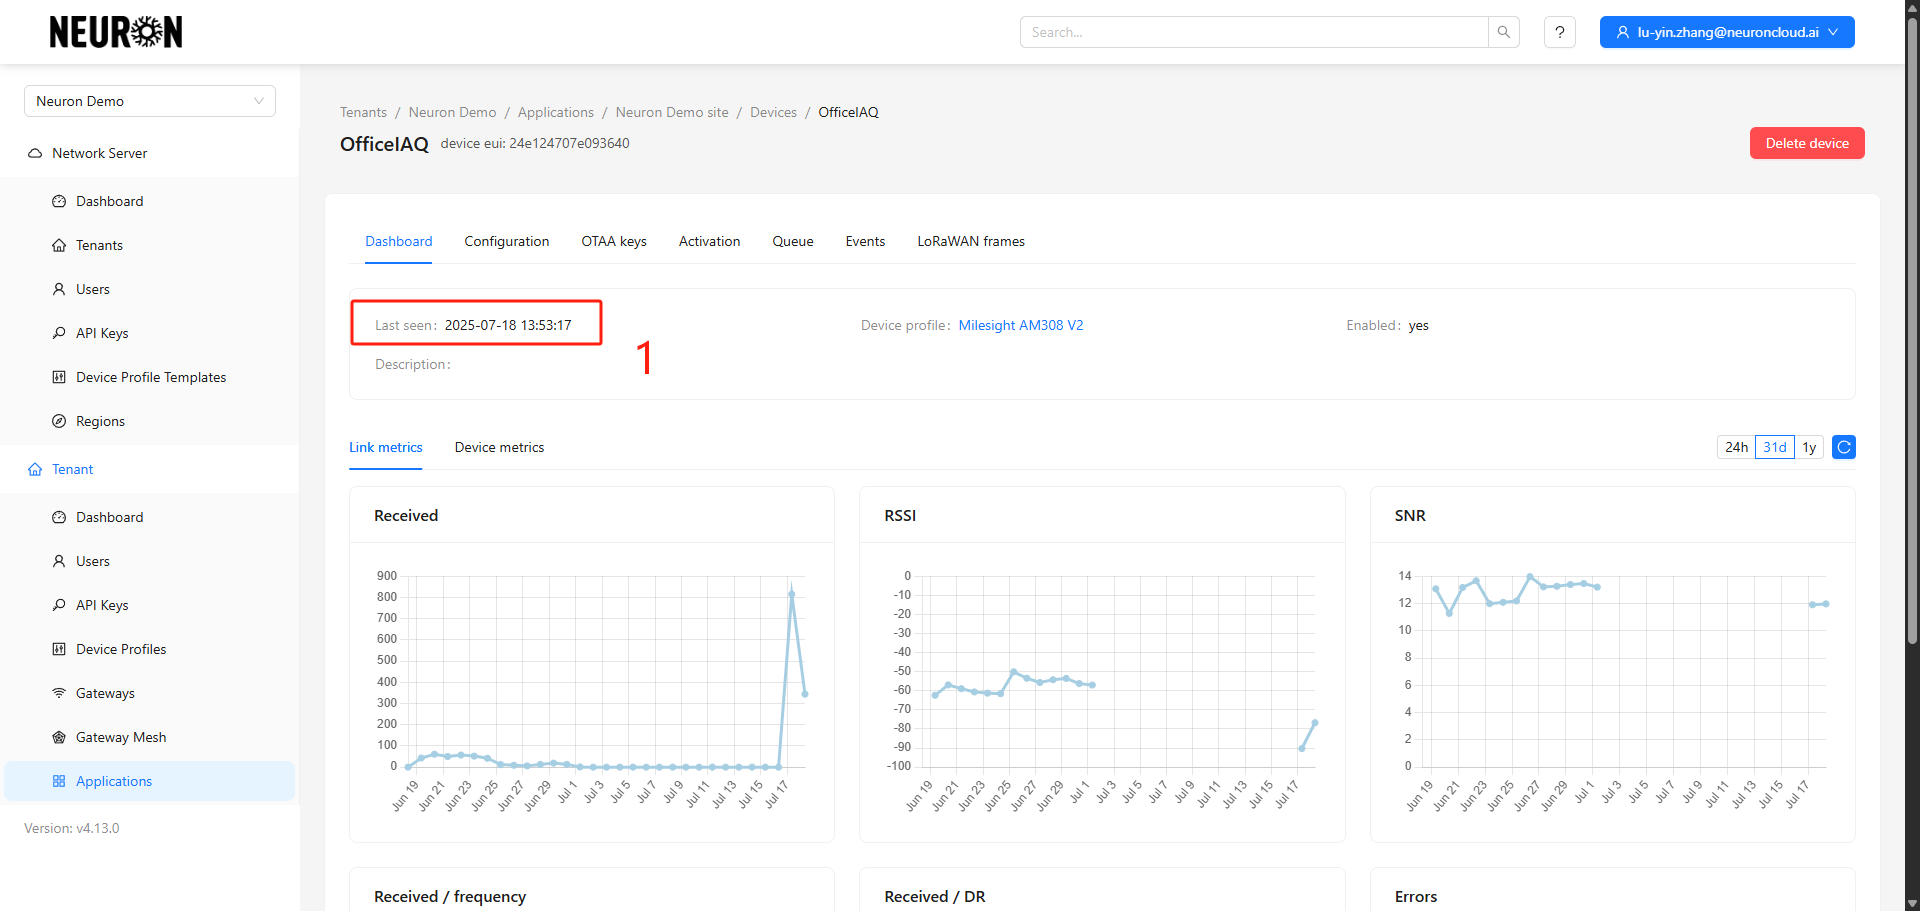
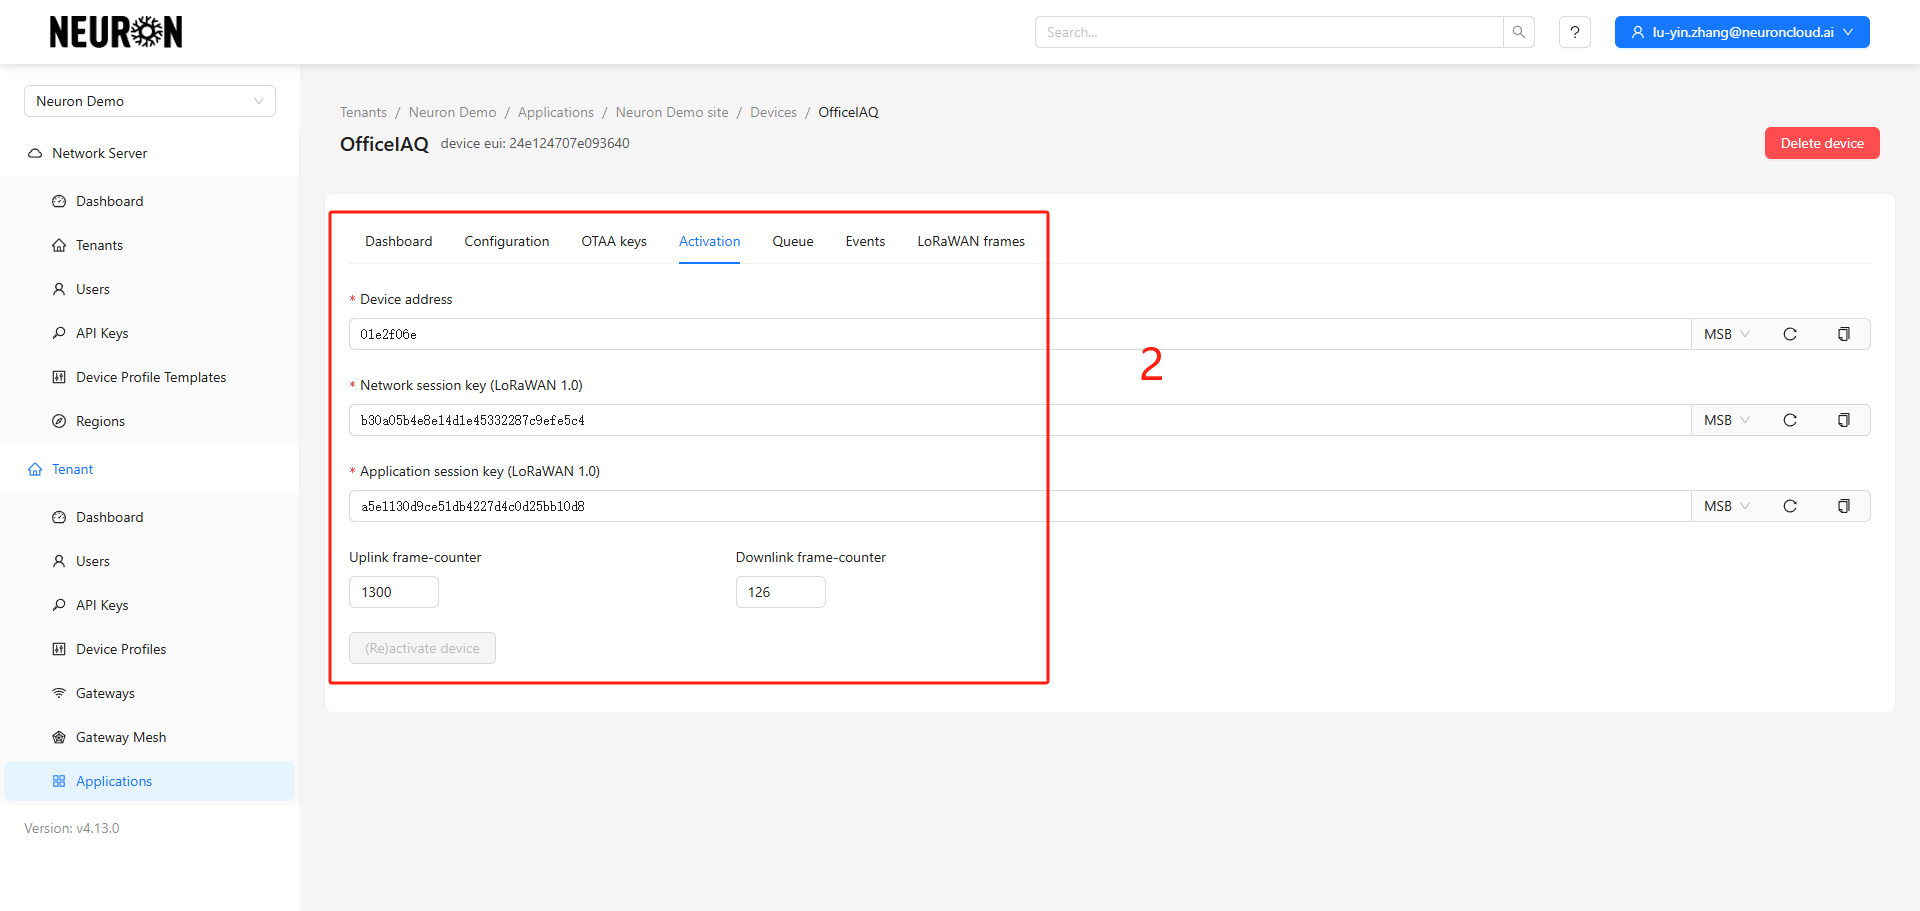
Activation parameters present, device is online.
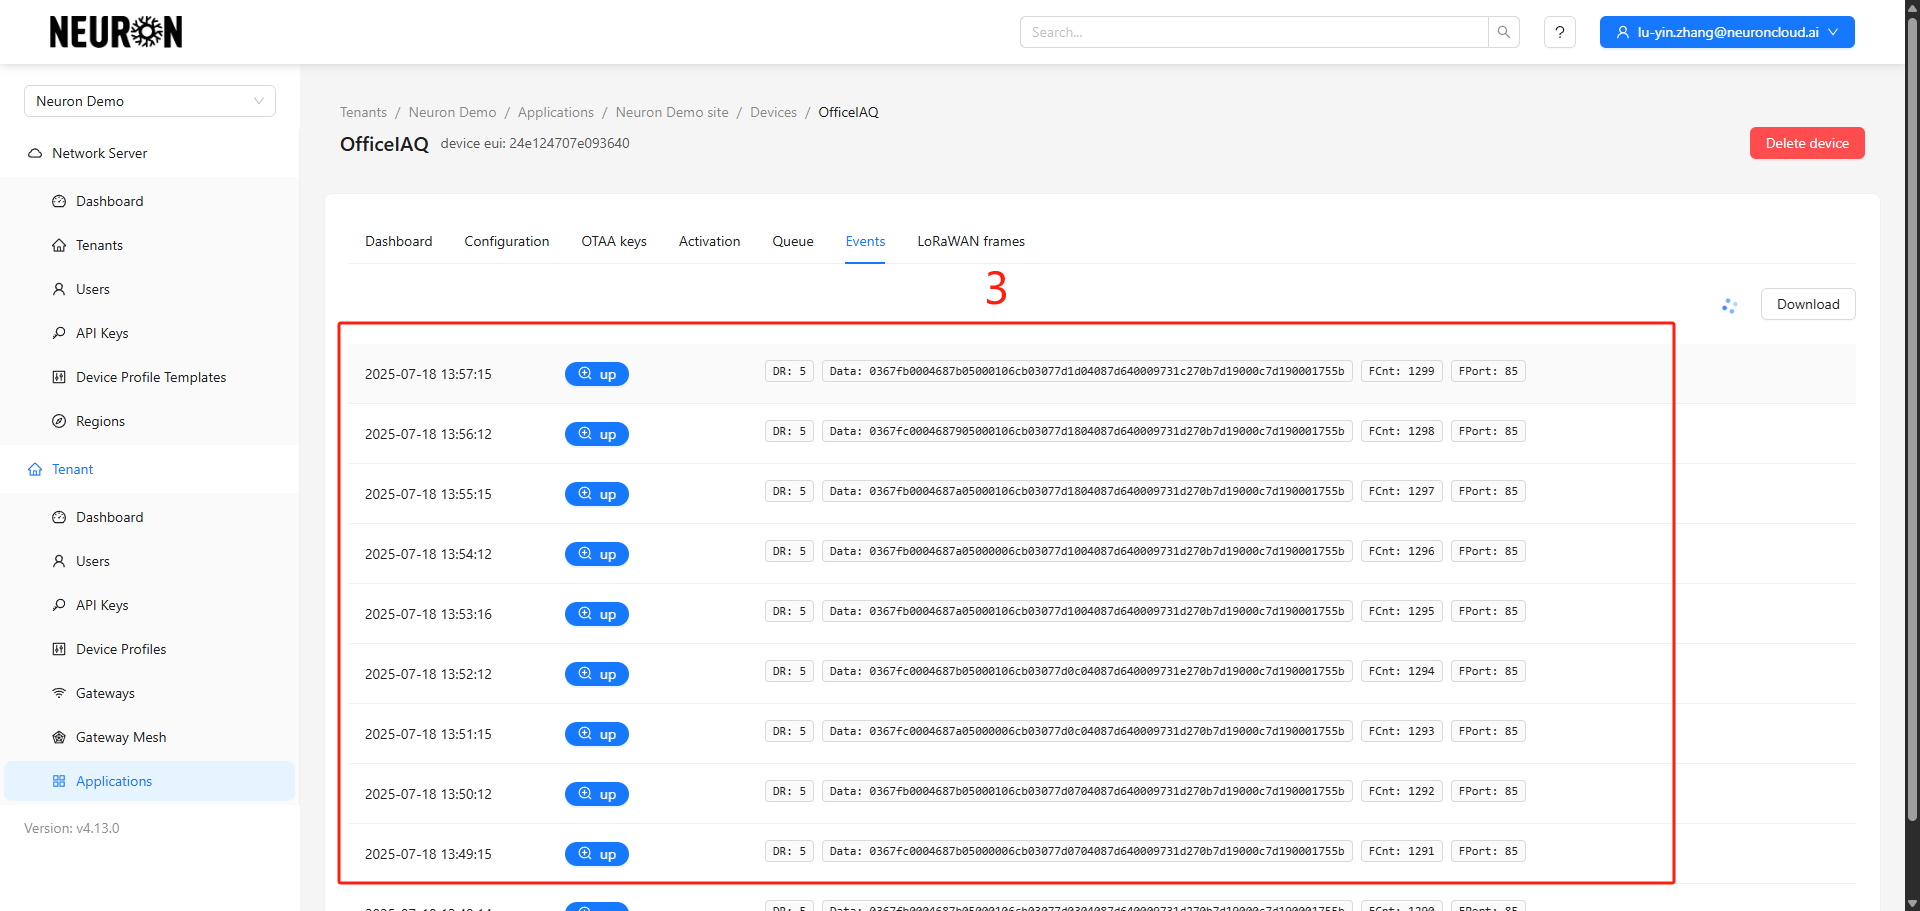
Join event and data report event present, device is online.
Join Failed:
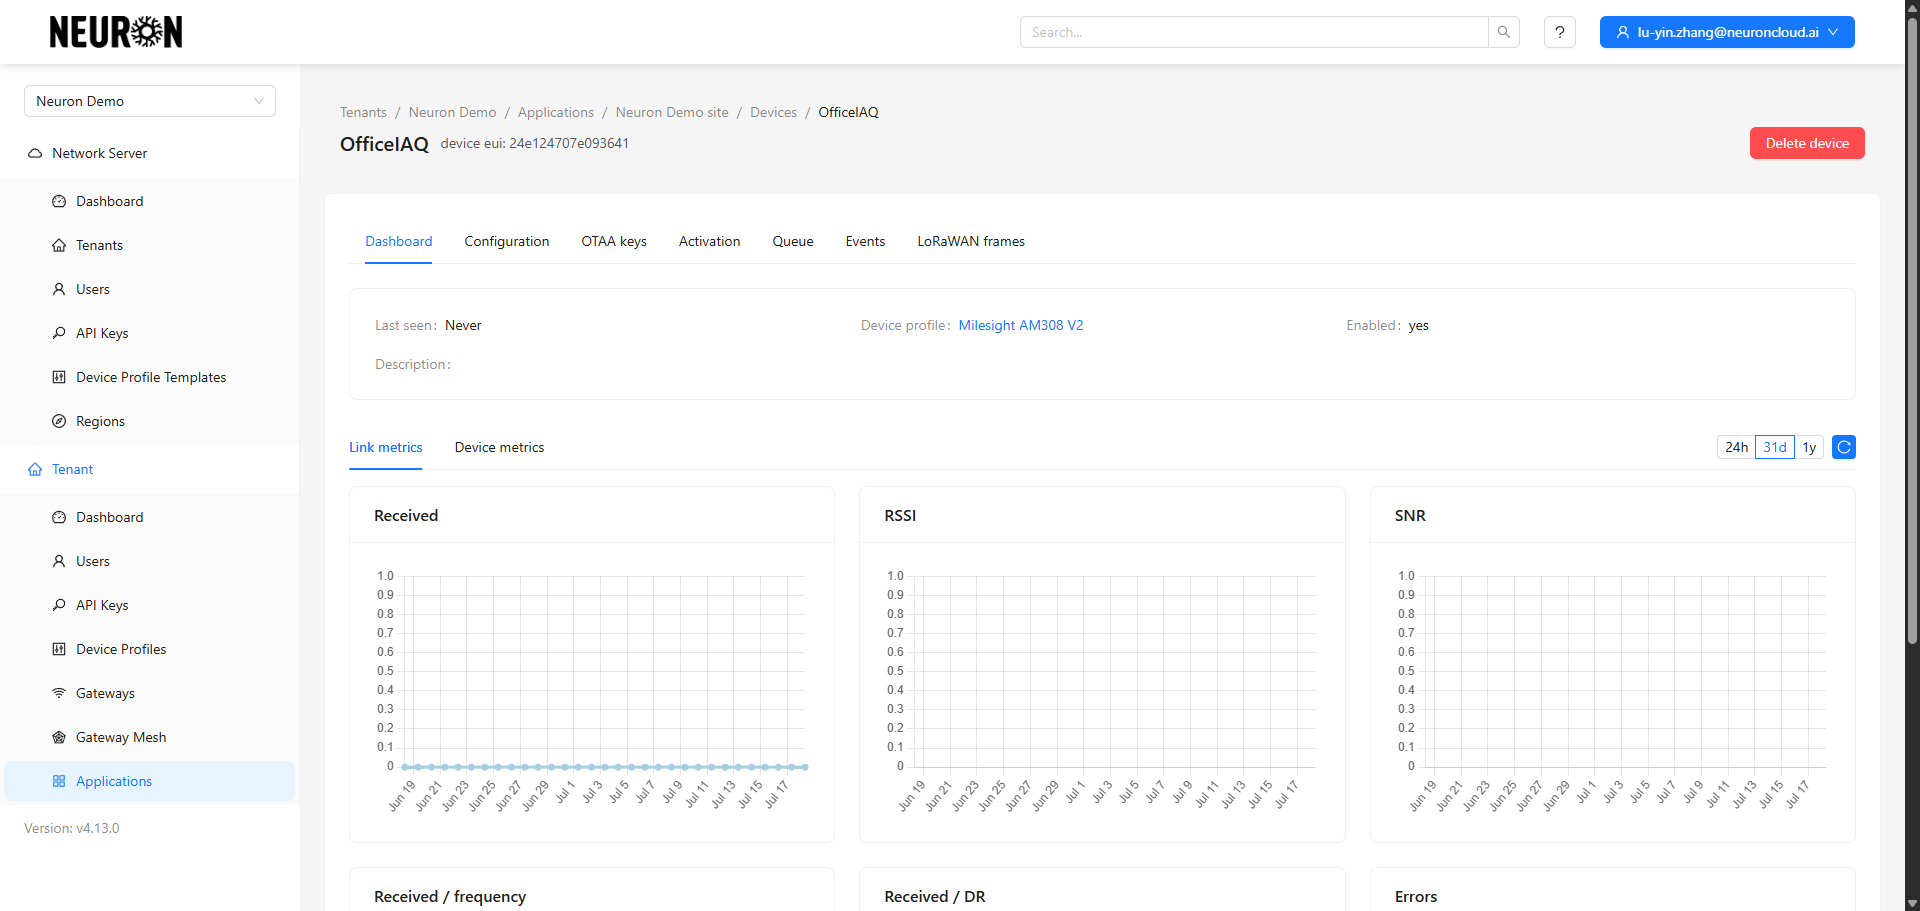
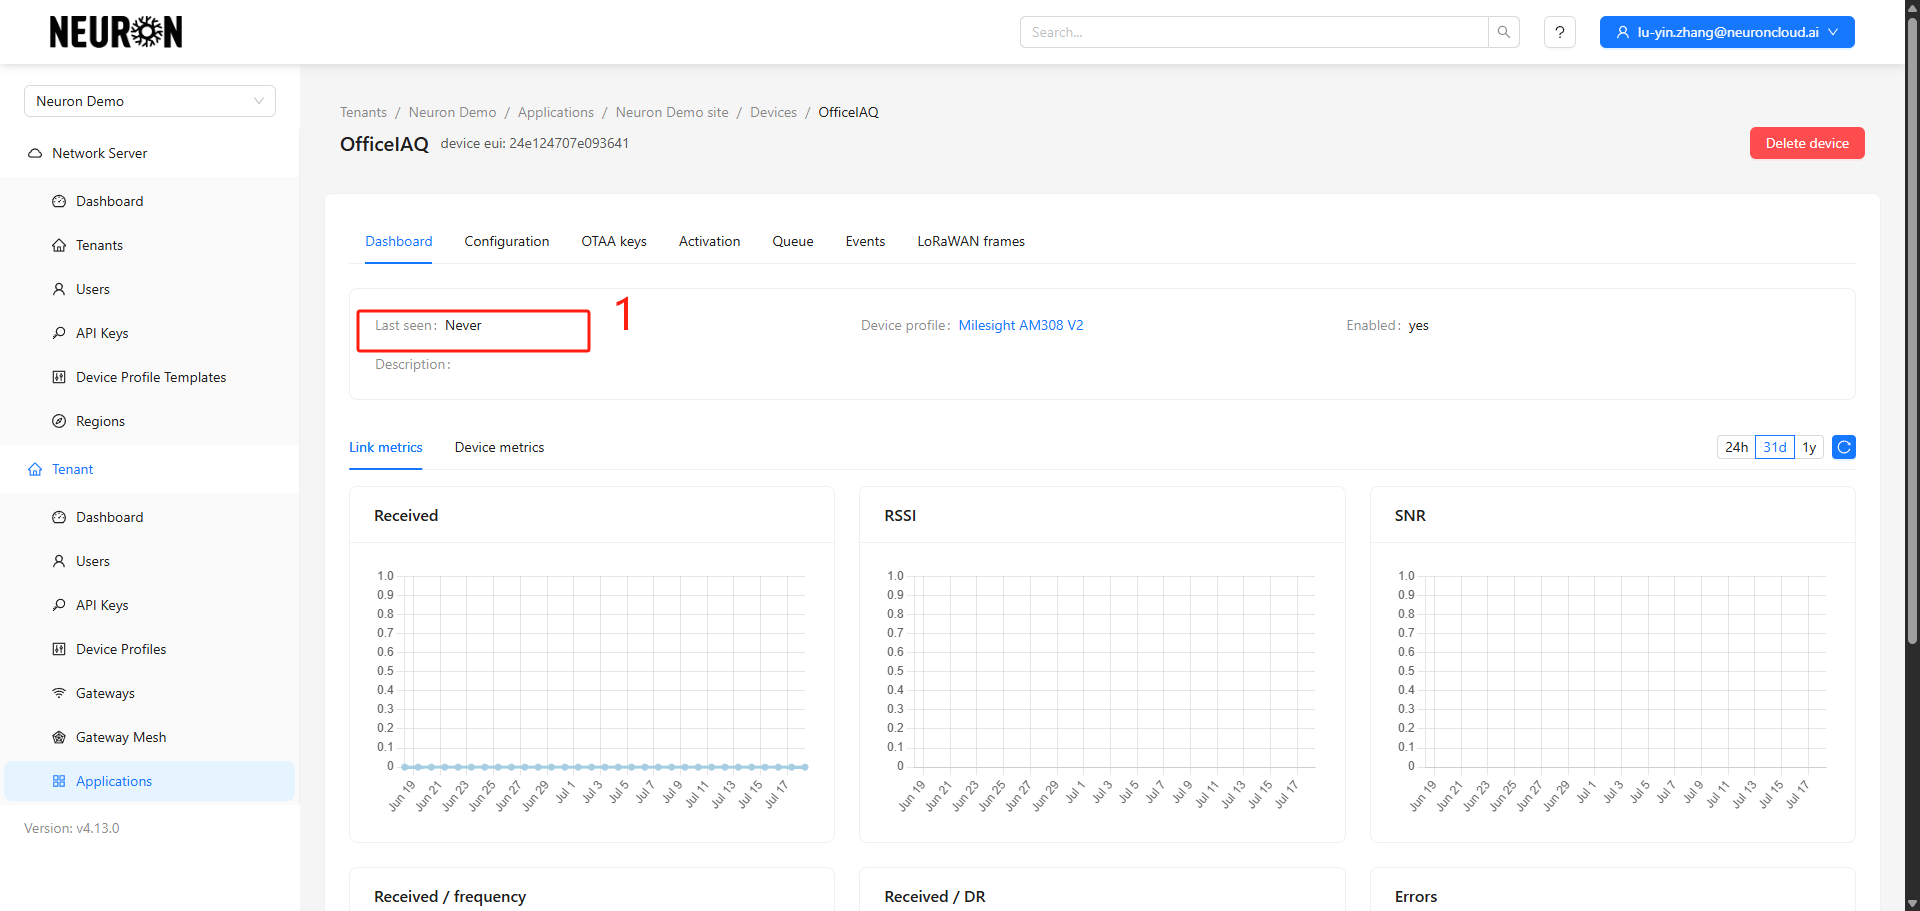
Last reported time shows 'Never', device is offline.
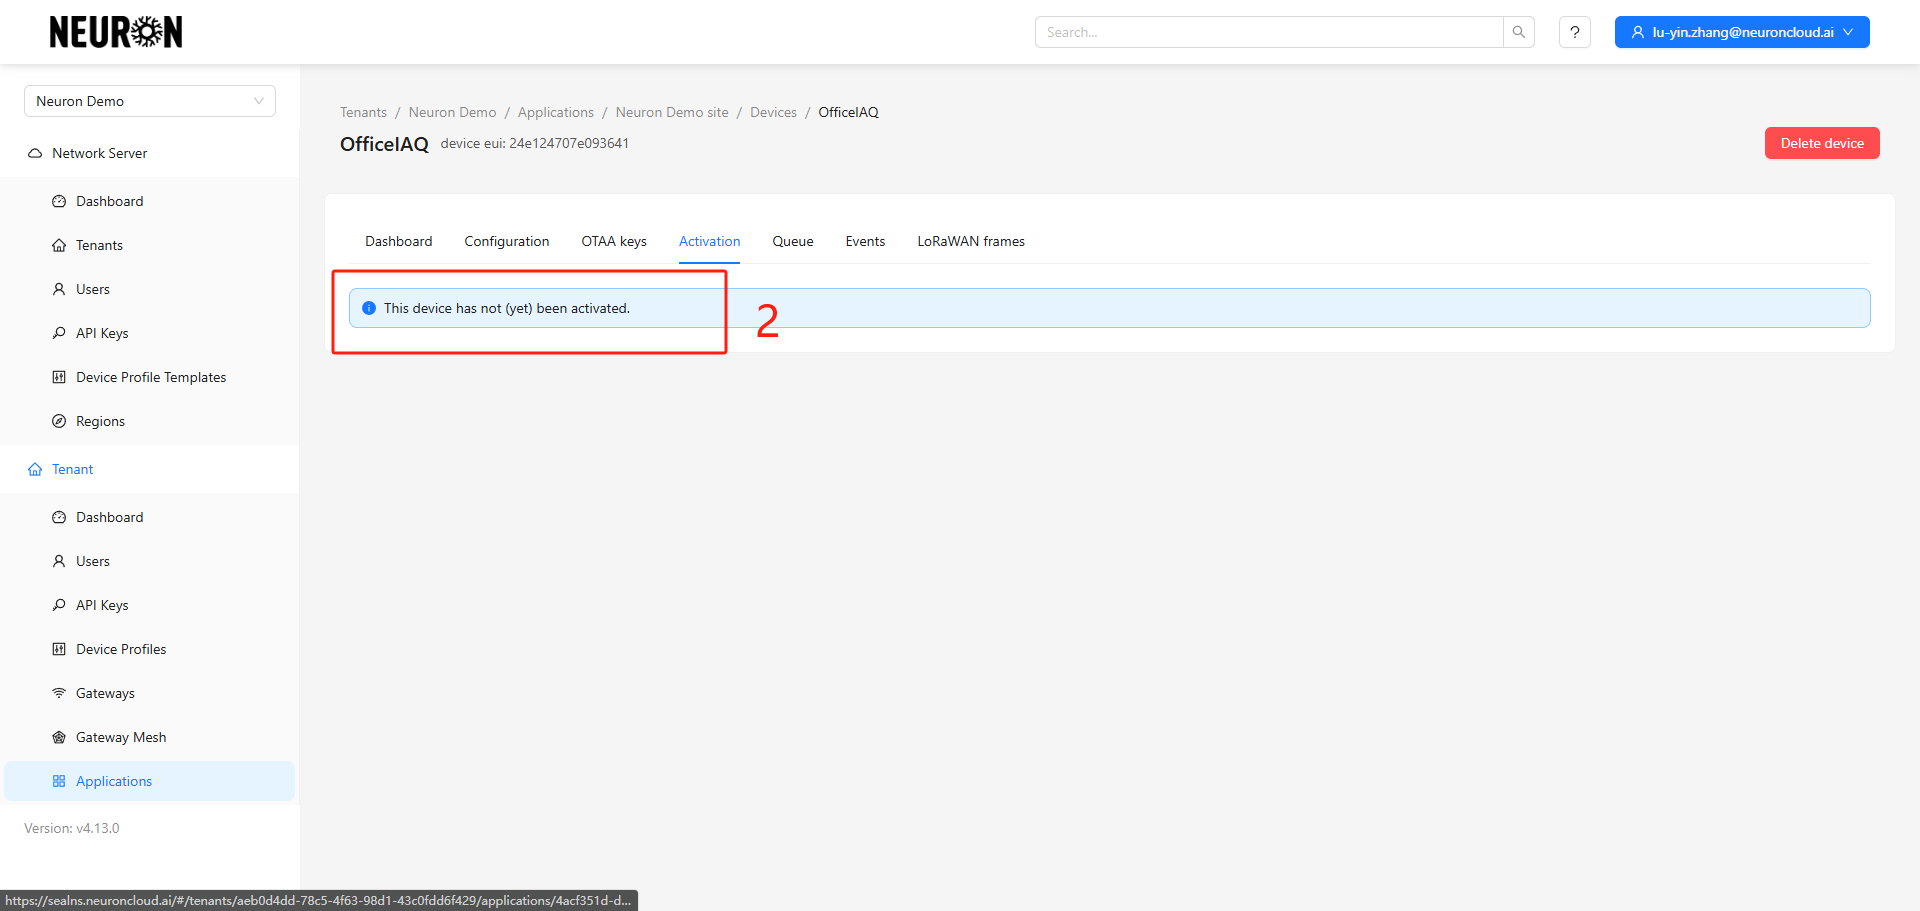
No activation parameters, device is offline.
No join event, device is offline.
II. Device Access to Neuron Data Platform
Refer to LoRaWAN Device Access to register the device on the Neuron platform.
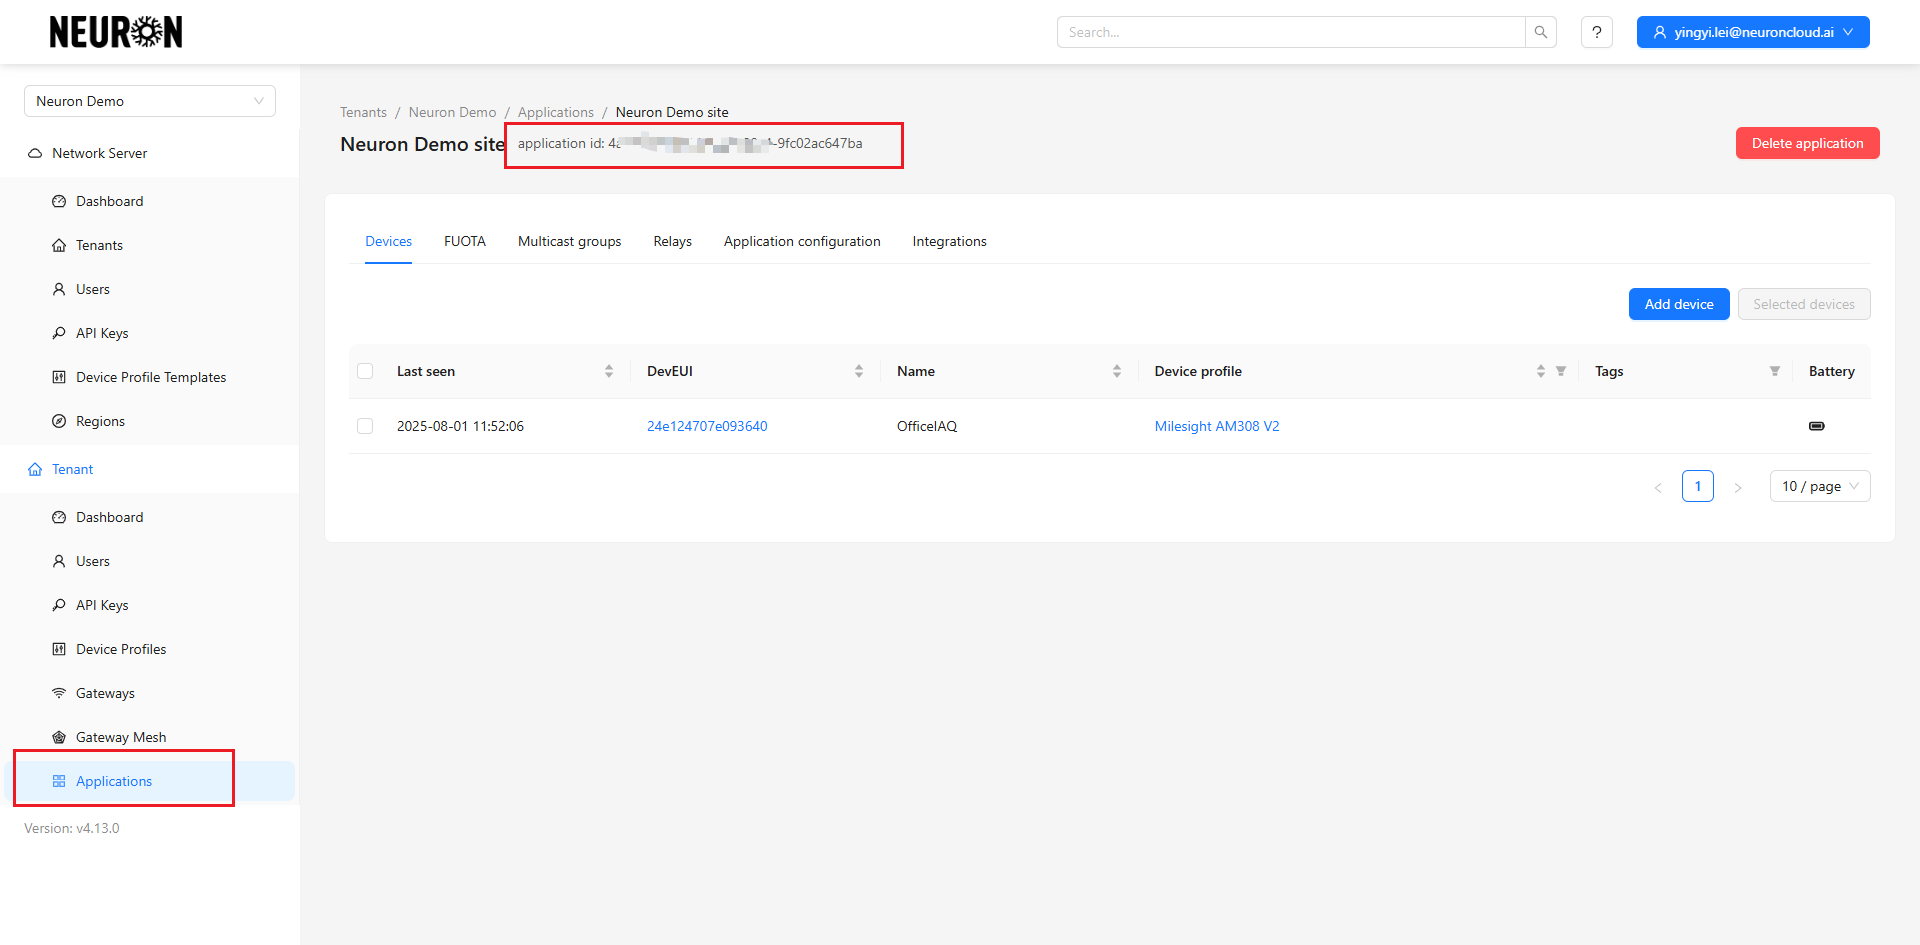
When accessing the device to the Neuron data platform, you need to configure the Topic. The Topic name reference format is: application/APPLICATION_ID/device/+/event/up Replace APPLICATION_ID according to the actual situation.
- APPLICATION_ID: This is the application of the aforementioned device. Select the corresponding application in the ChirpStack platform's Applications menu and copy the application id.