Location Configuration
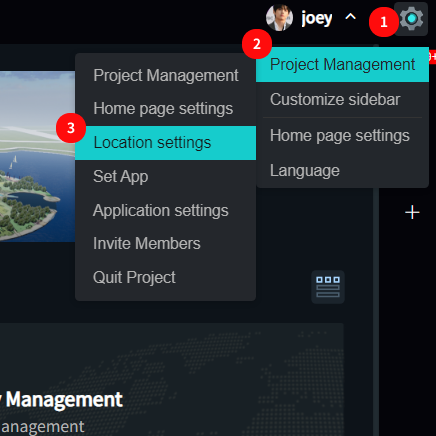
- Click the "Settings" icon to open the project settings menu
- Hover over "Project Management" to open the project management menu
- Click "Location Management" to open the project location management page
Set Location Levels
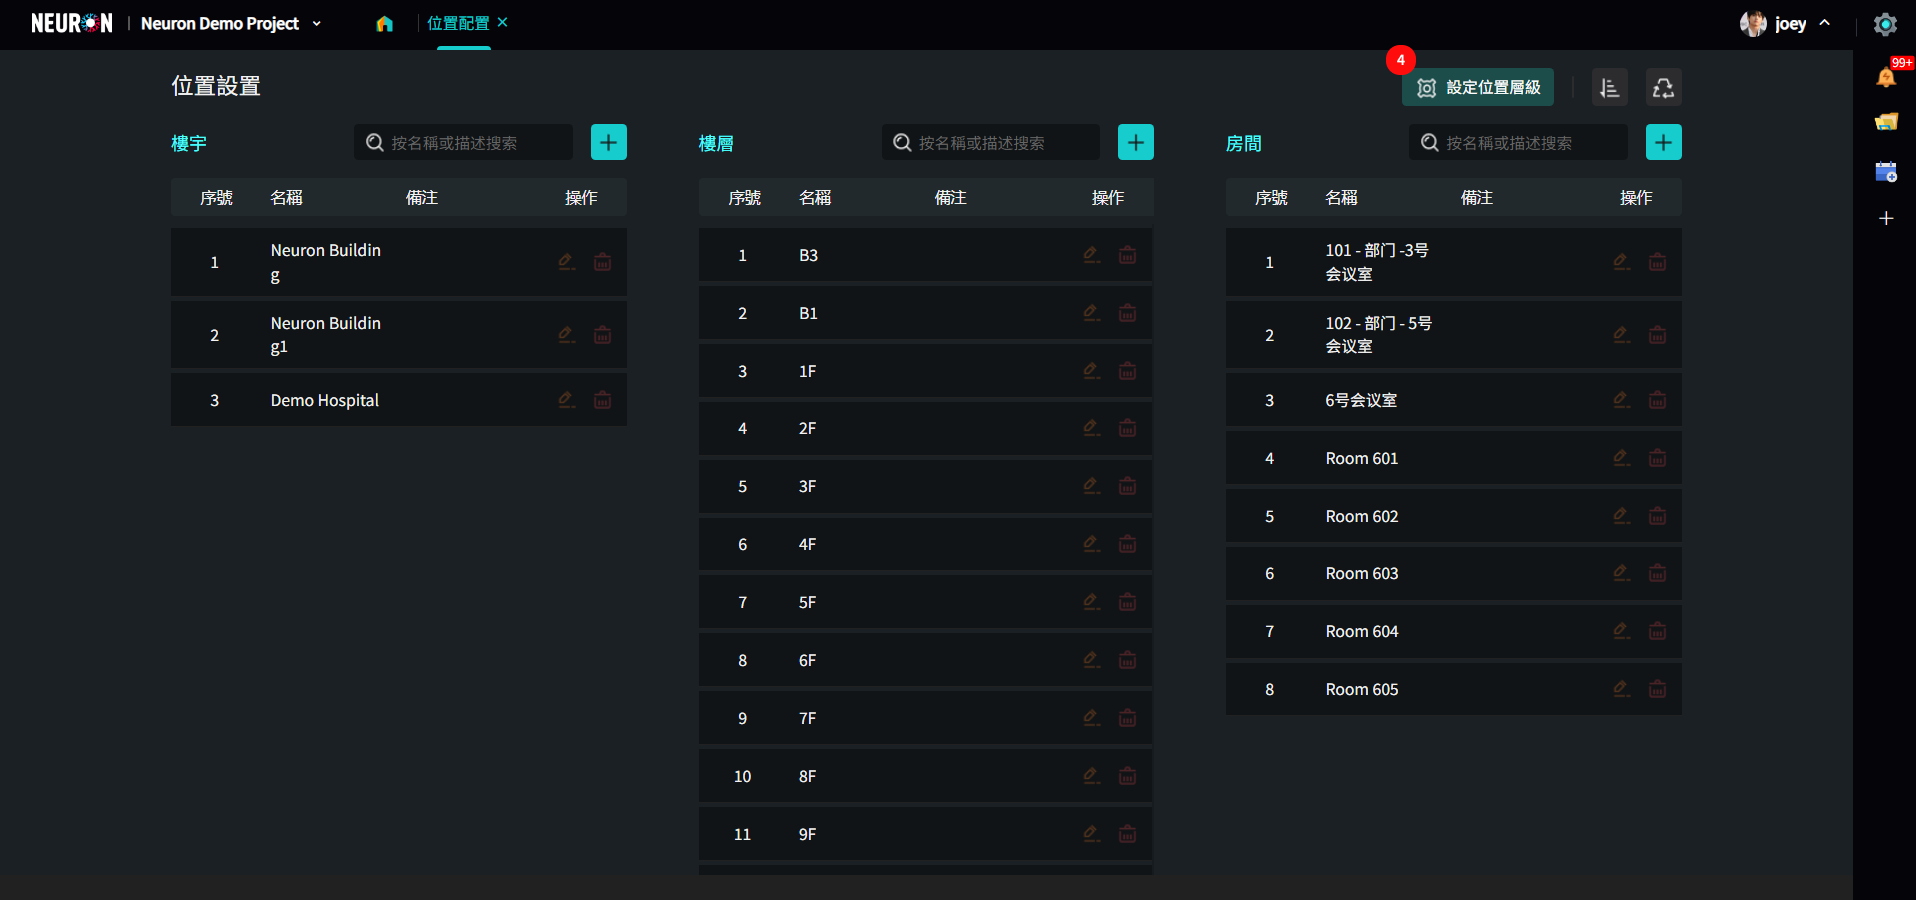
- Click the "Set Location Levels" button to edit level information and control whether levels are used within the project
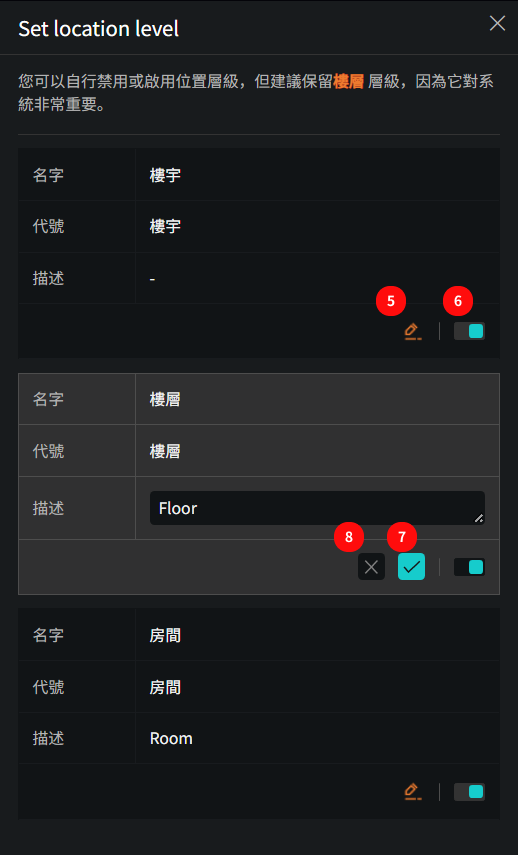
- Click the "Edit" button to modify the description notes for this level
- Toggle the switch to disable/enable this level
- Click the "Checkmark" icon to save edited content
- Click "×" to discard edited content
Add Location Information
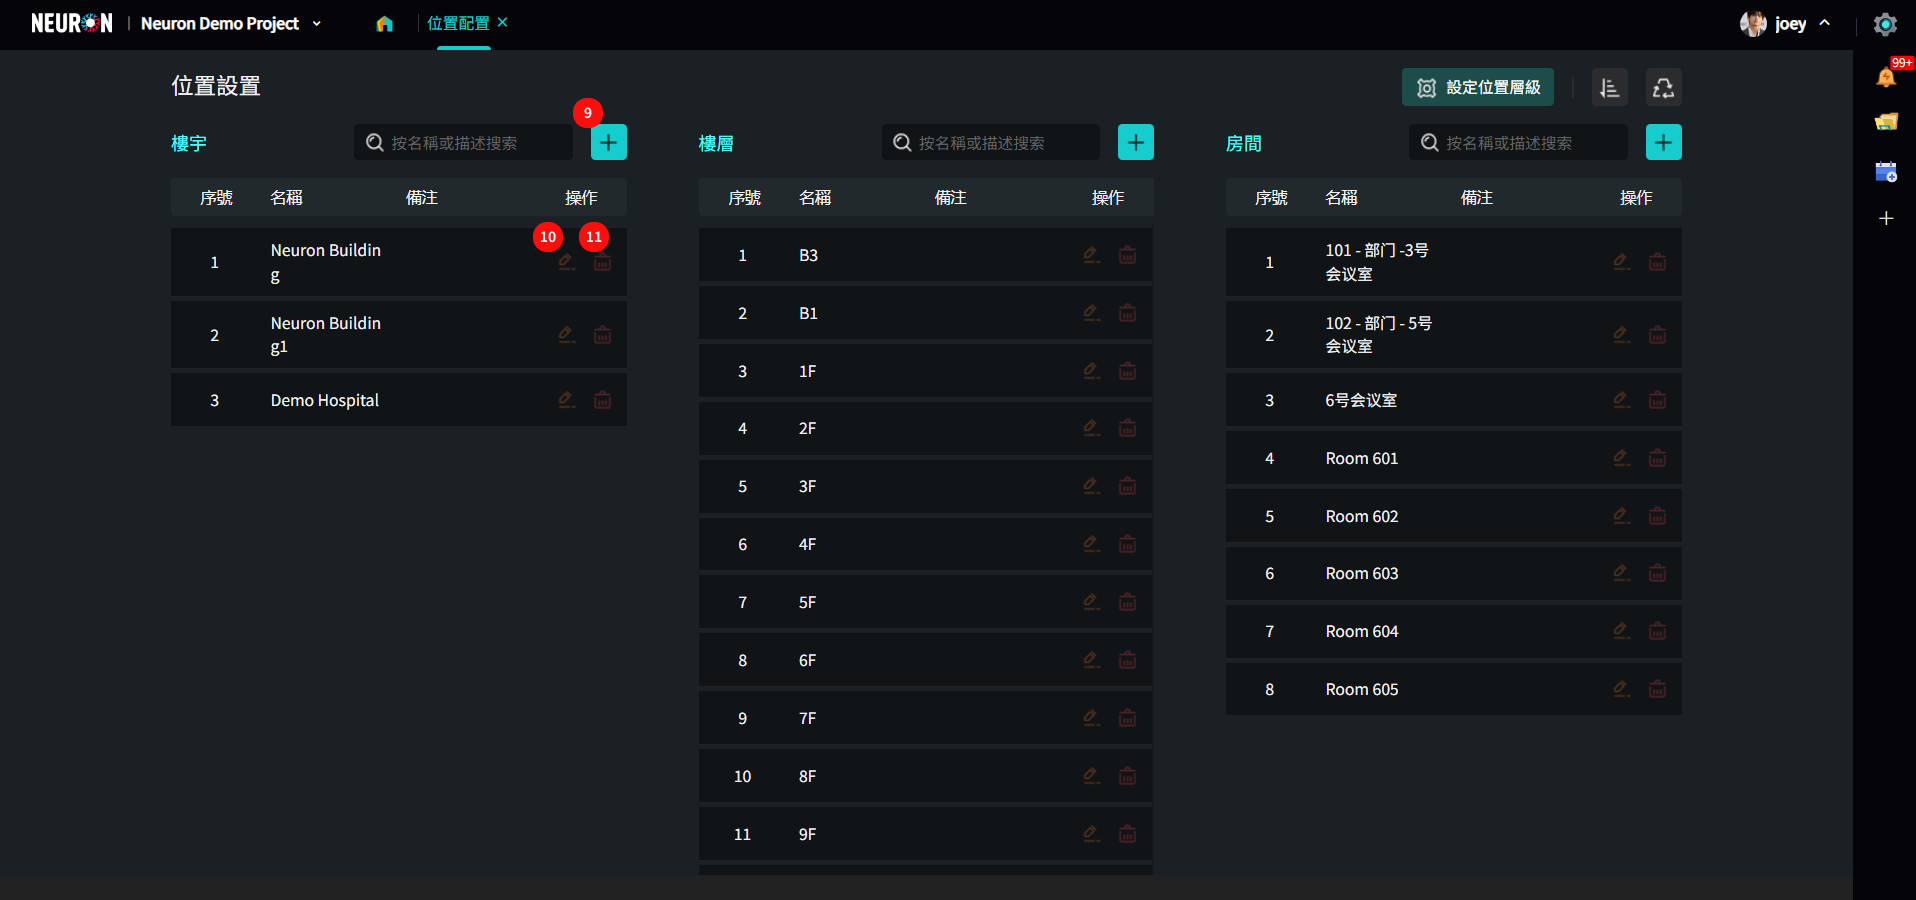
- Click the "+" icon to enter building data (Similarly for floors/rooms, data can be entered according to actual project needs)
- Click the "Edit" icon to modify data content
- Click the "Delete" icon to delete this data
Deleted data will be placed in the recycle bin and can no longer be selected for use in the project, but deletion will not affect historically generated data. You can restore deleted data in the recycle bin at any time.
📍 There are two input methods: Batch add / Single add
1. Batch Add
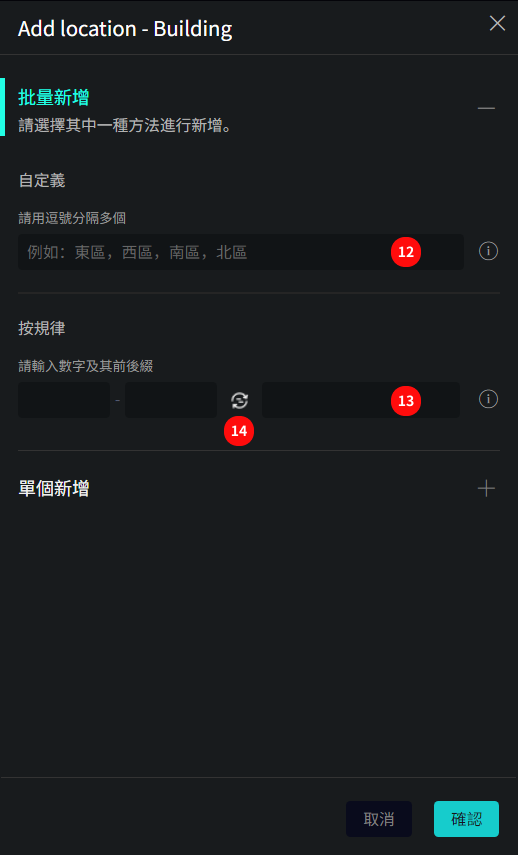
Batch add also provides two methods
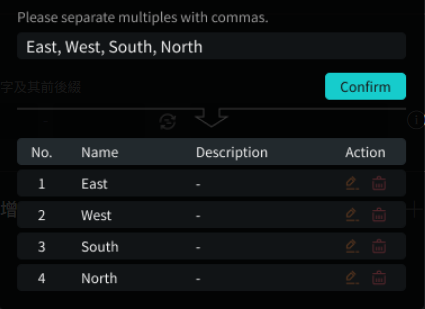
- Unordered data entry: Enter data in the input box separated by "English commas"
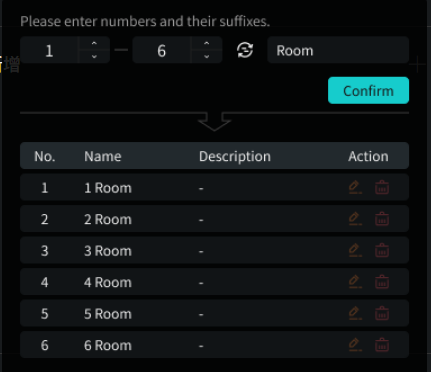
- Patterned data entry: For data like floors that contain numbers and follow a certain format, this input method can be used. Enter the number range and unit to batch enter all floor data within the range at once
- Click to switch the order of numbers and units
Unordered data entry example:
Patterned data entry example:
2. Single Add
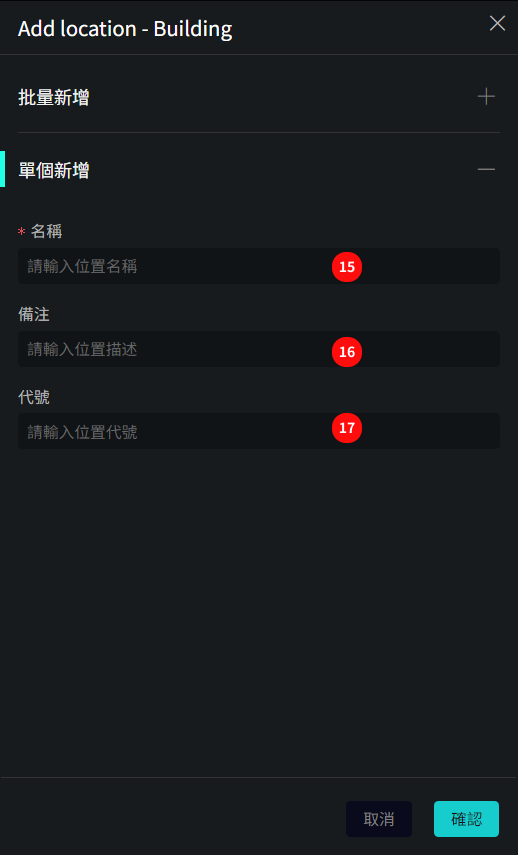
- Enter location name (will be displayed in the project)
- Fill in remarks
- Code is mainly for system identification and can be left blank
Adjust Sorting
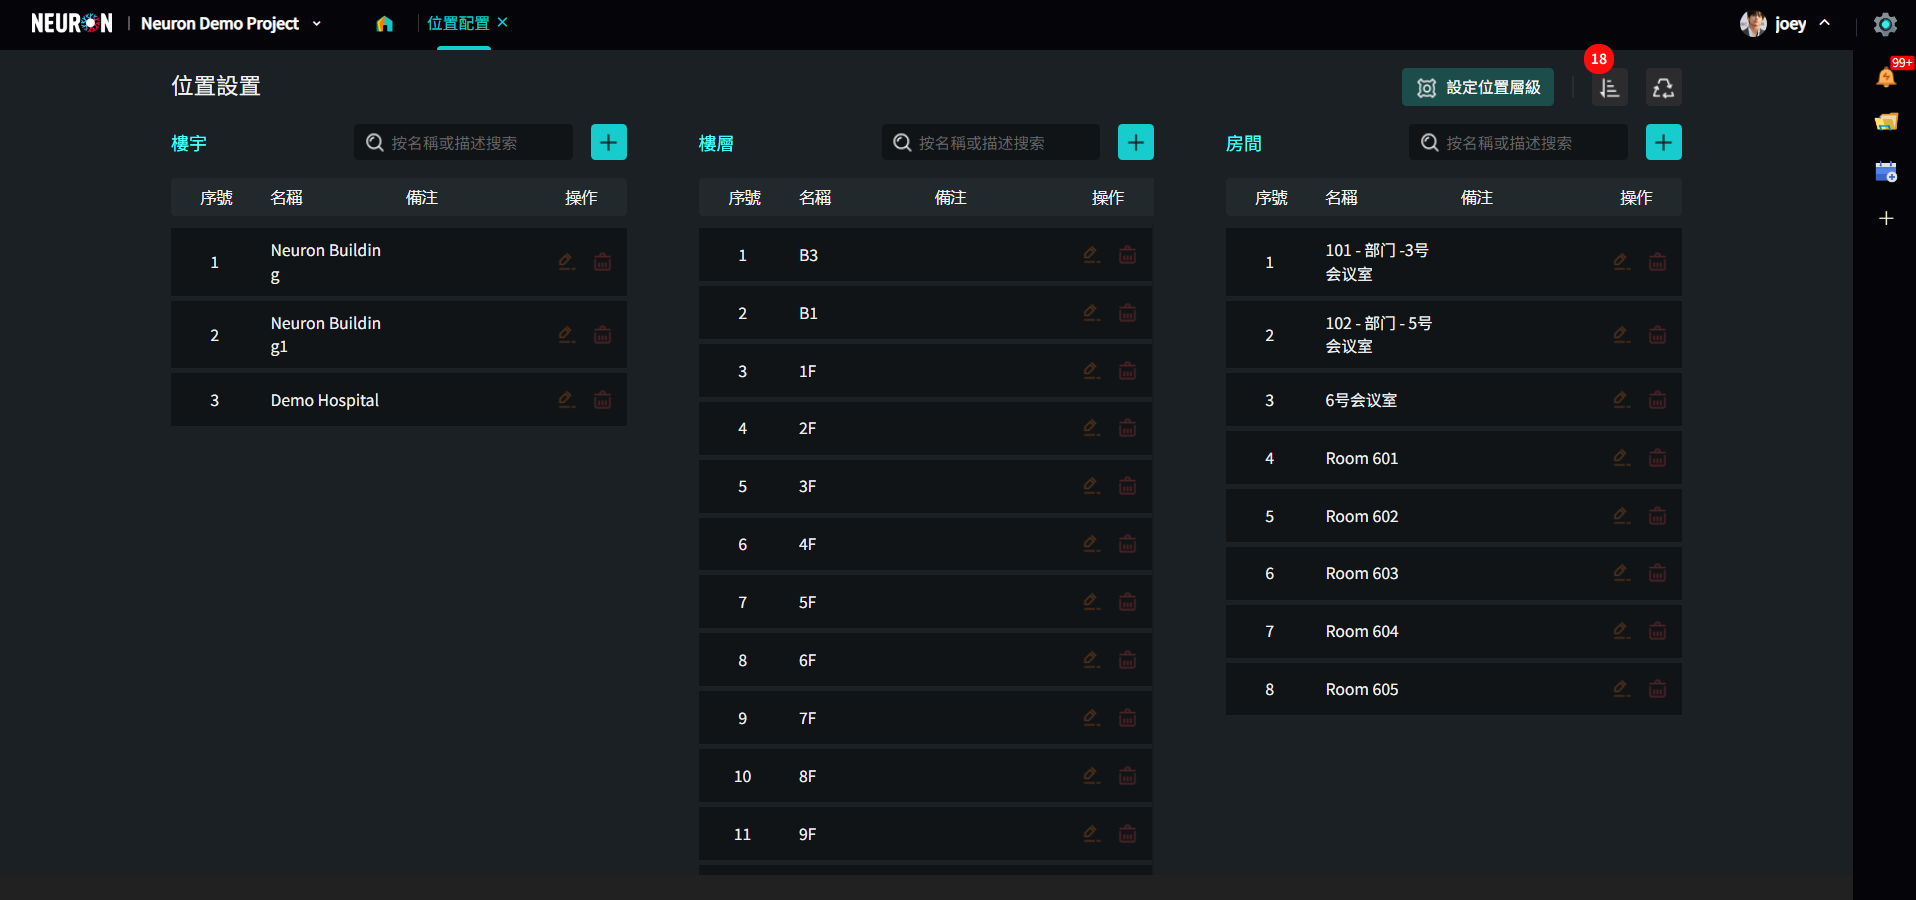
- Click the "Sort" icon to enter the location sorting management page
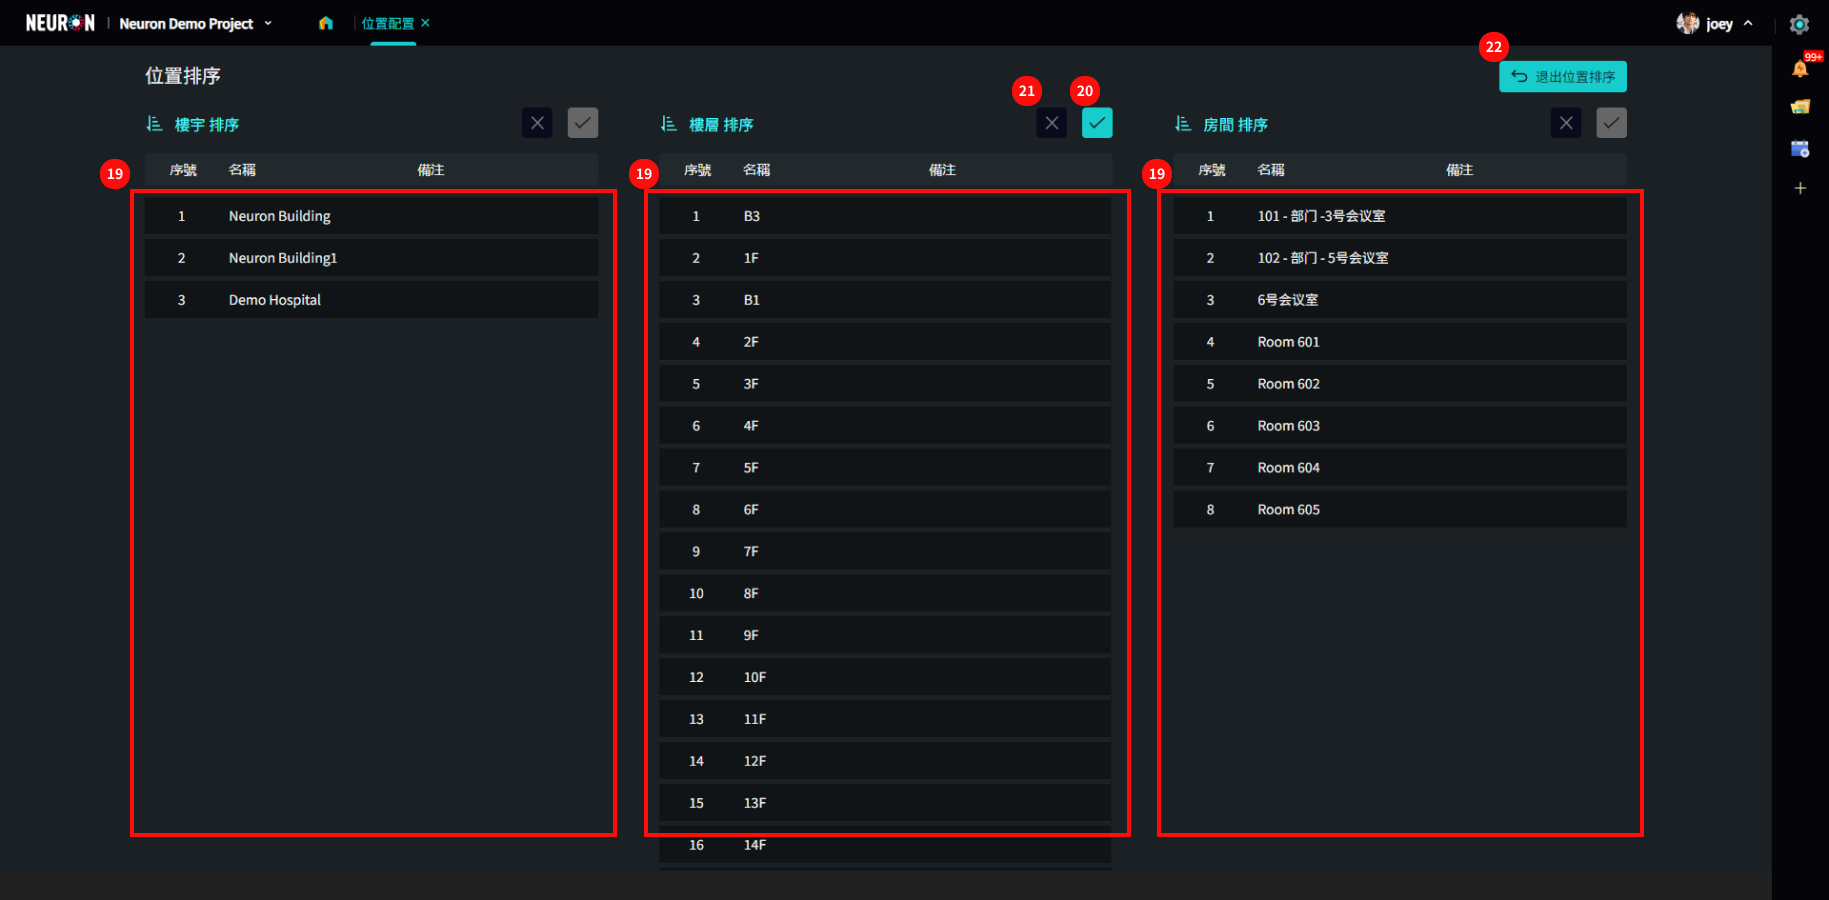
- Drag data to adjust sorting
- Click the "Checkmark" icon to save sorting
- Click "×" icon to discard changes and reset sorting
- Click "Exit Location Sorting" to return to location list
Recycle Bin
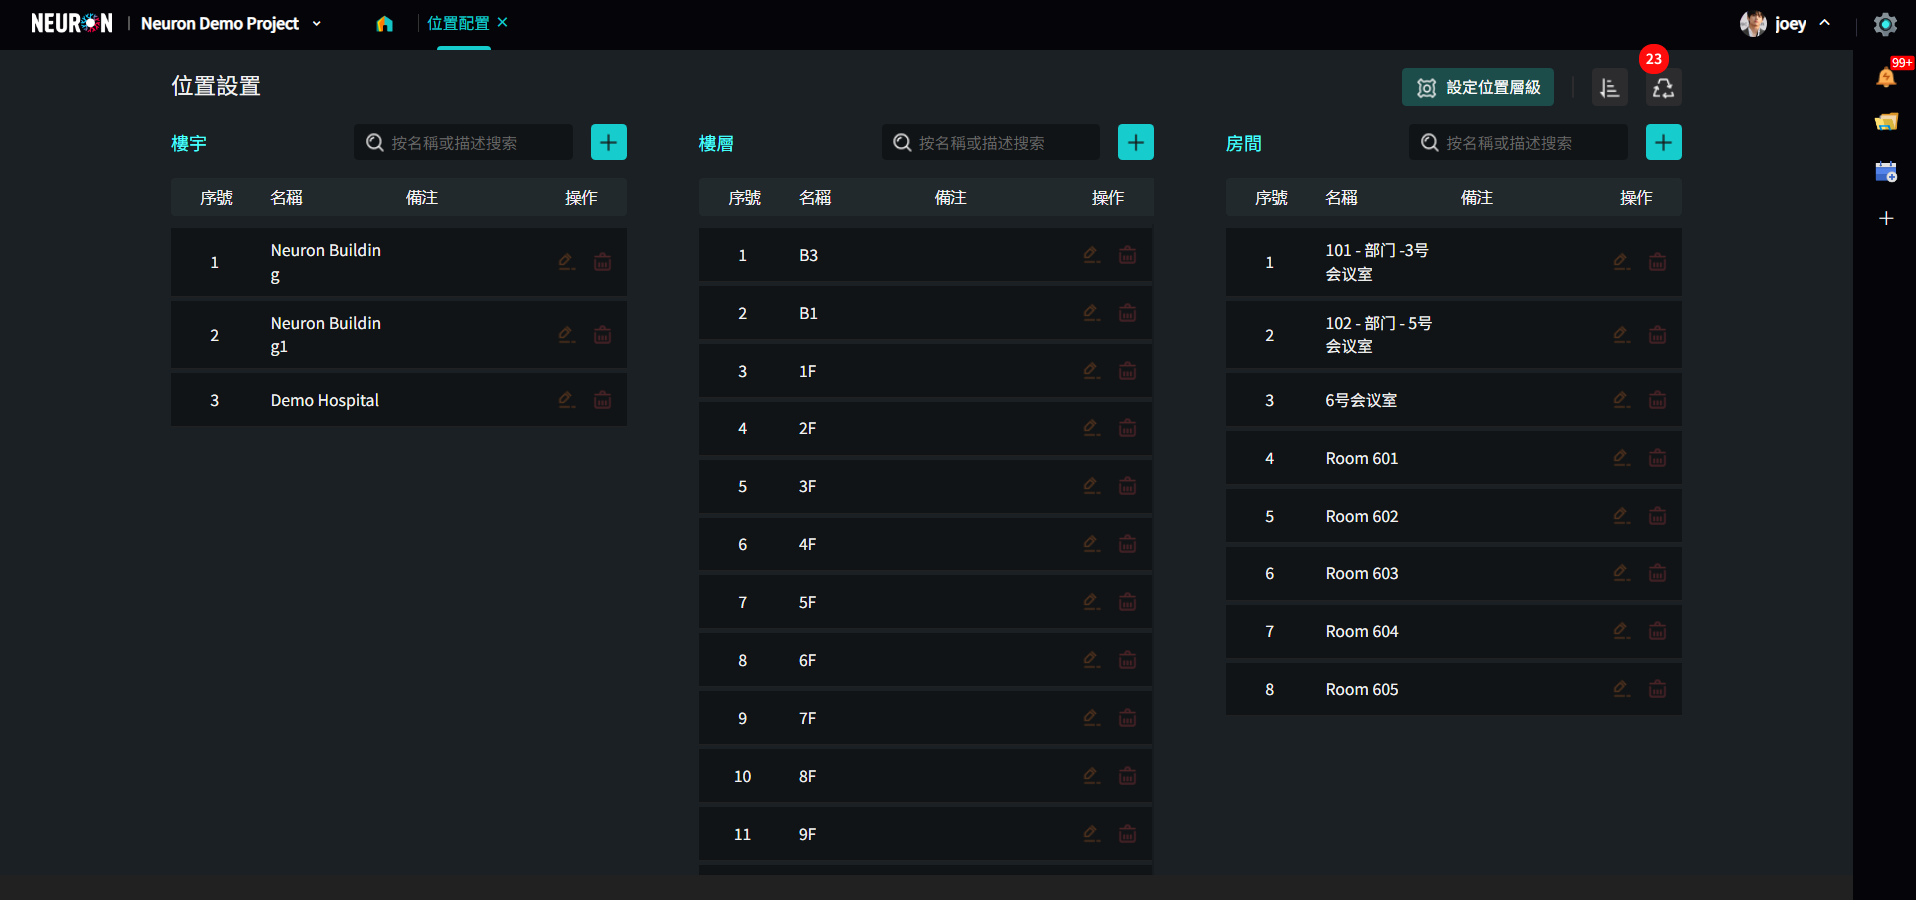
- Click the "Recycle Bin" icon to enter the recycle bin management page and view deleted location data
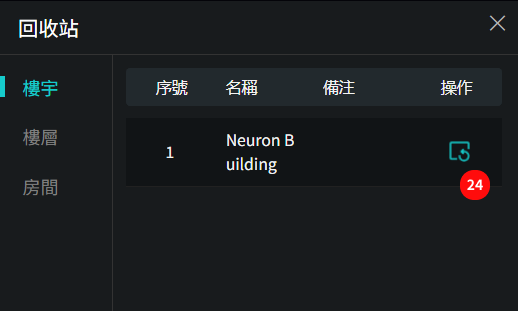
- Click the "Restore" icon to restore deleted location data