Pre-configuration Before Asset Addition

Step 1: Configure Project Location Information
1. Open the Location Management Page
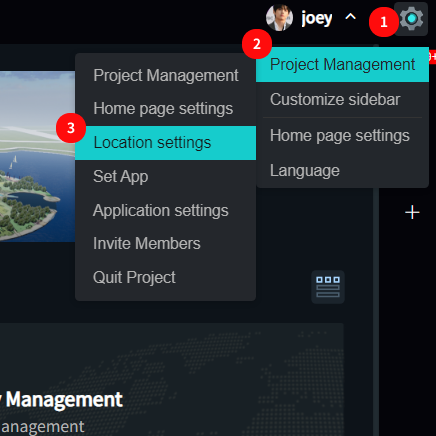
- Click the “Settings” icon to open the project settings menu.
- Hover over “Project Management” to open the project management menu.
- Click “Location settings” to access the project location management page.
2. Set Location Levels
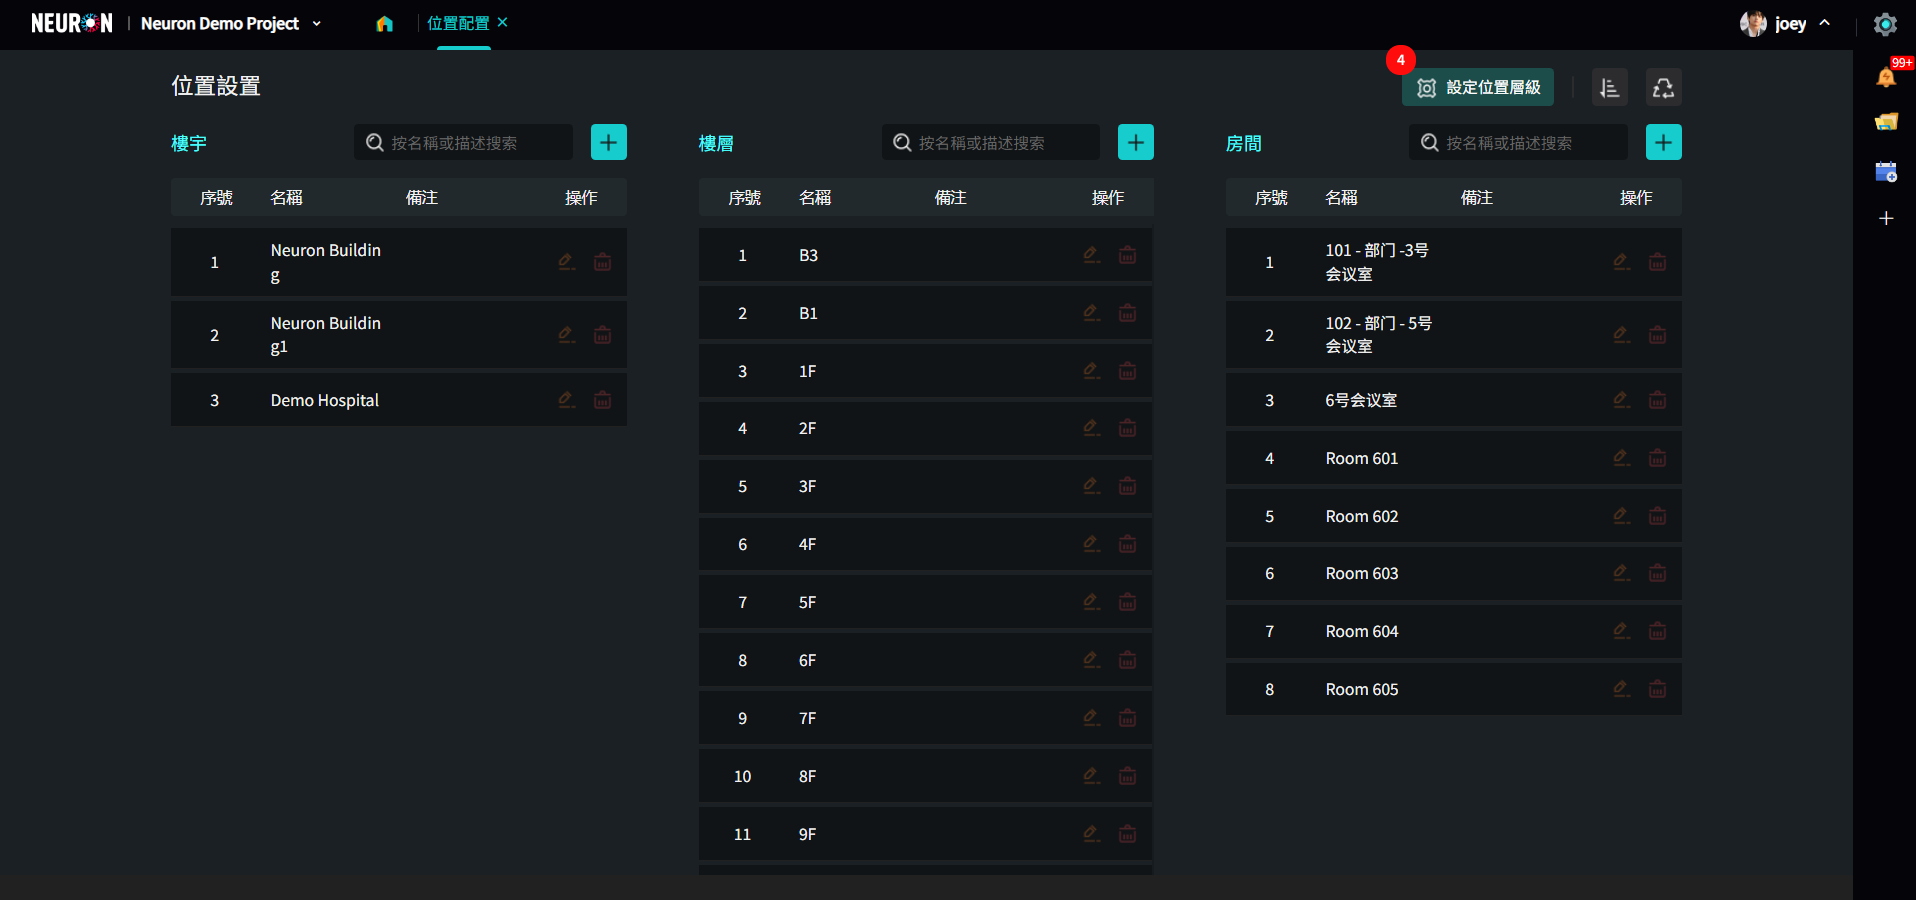
- Click “Set Location Levels” to edit level information and control whether the level is used in the project.
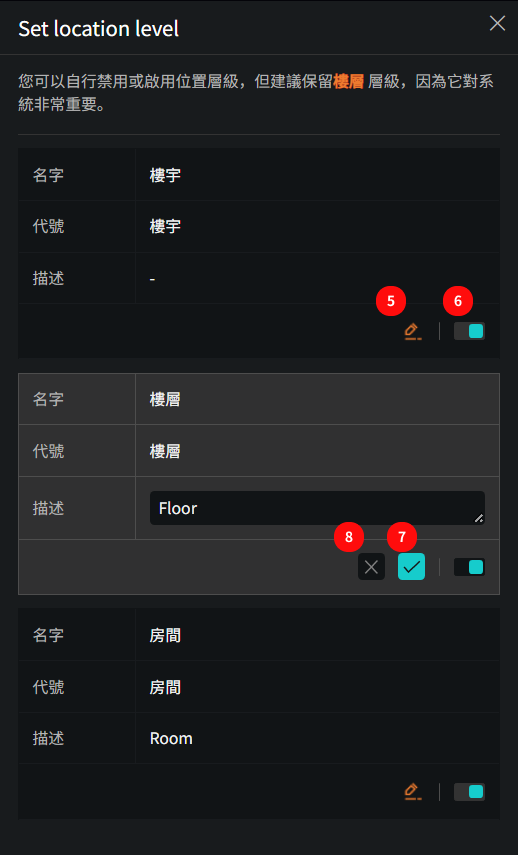
- Click the “Edit” button to modify the level description.
- Use the toggle switch to disable/enable the level.
- Click the “Check” icon to save the edits.
- Click the “×” to discard the edits.
3. Add Location Information
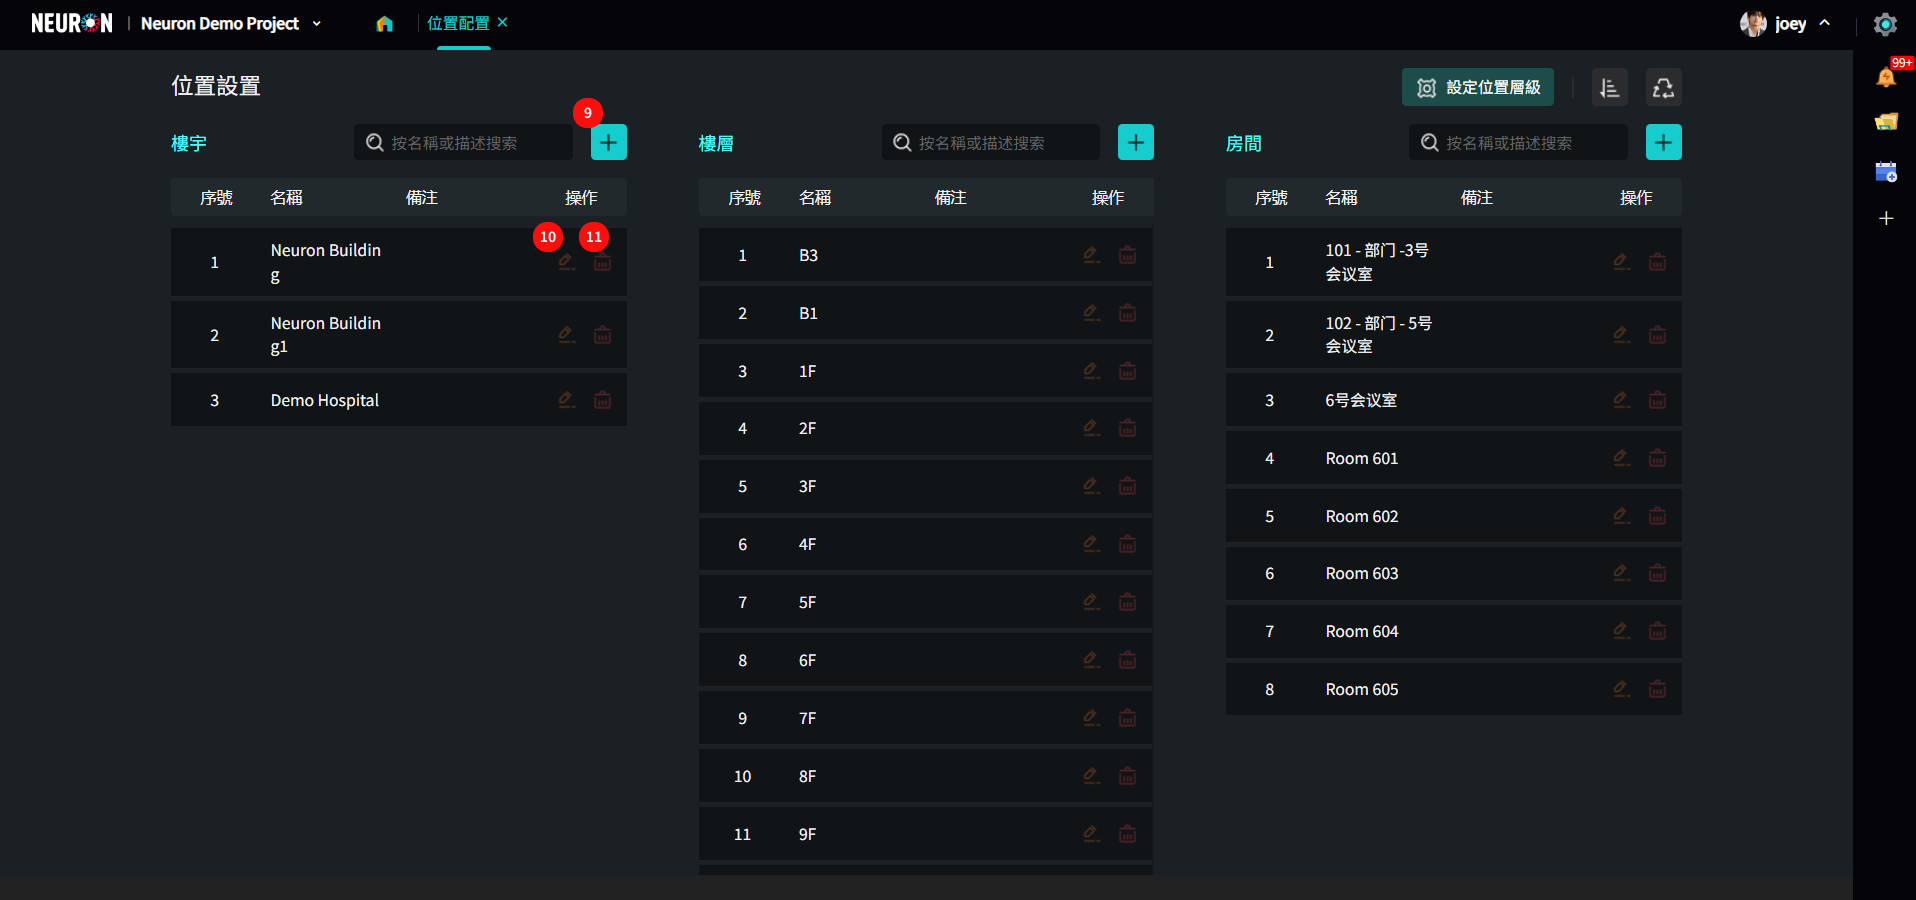
- Click the “+” icon to enter building data (Floor/Room similarly).
- Click the “Edit” icon to modify the data.
- Click the “Delete” icon to remove the data.
Deleted data will go to the recycle bin, and cannot be selected within the project, but will not affect historical data. You can restore deleted data from the recycle bin at any time.
📍 There are two ways to enter data: Batch Addition / Single Addition
1. Batch Addition
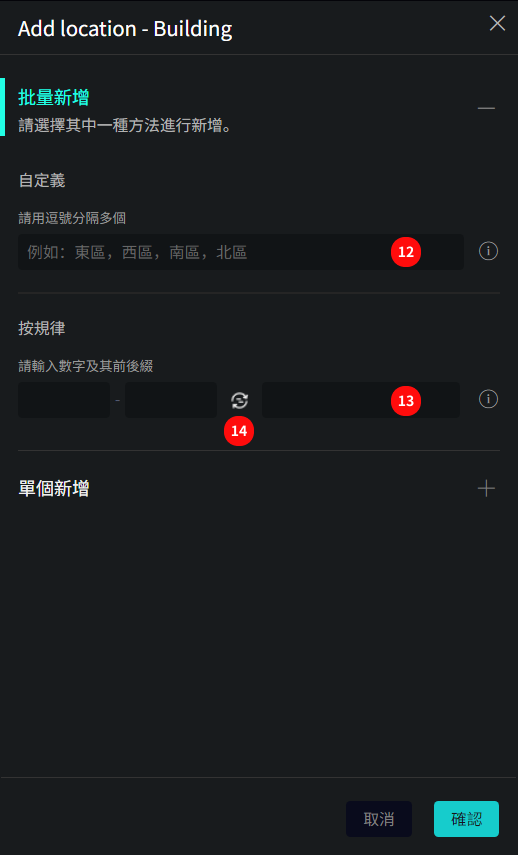
Batch Addition also provides two methods:
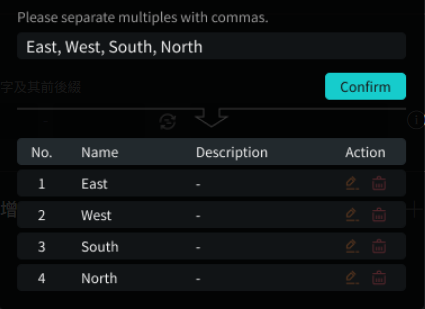
- Unordered data entry: Enter data in the input box separated by “commas”.
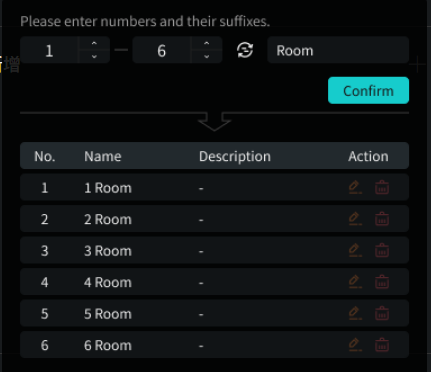
- Ordered data entry: For data like floors with a numerical format, input the range and unit to batch add all floor data within that range.
- Click to toggle the order of numbers and units.
Unordered data entry example:
Ordered data entry example:
2. Single Addition
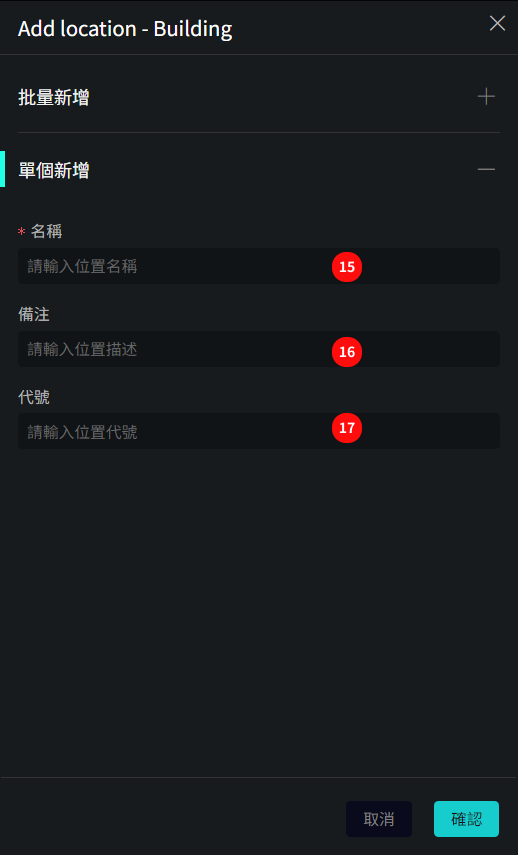
- Enter the location name, which will be displayed in the project.
- Fill in the remarks.
- The code is mainly for system identification and can be left blank.
4. Adjust Sorting
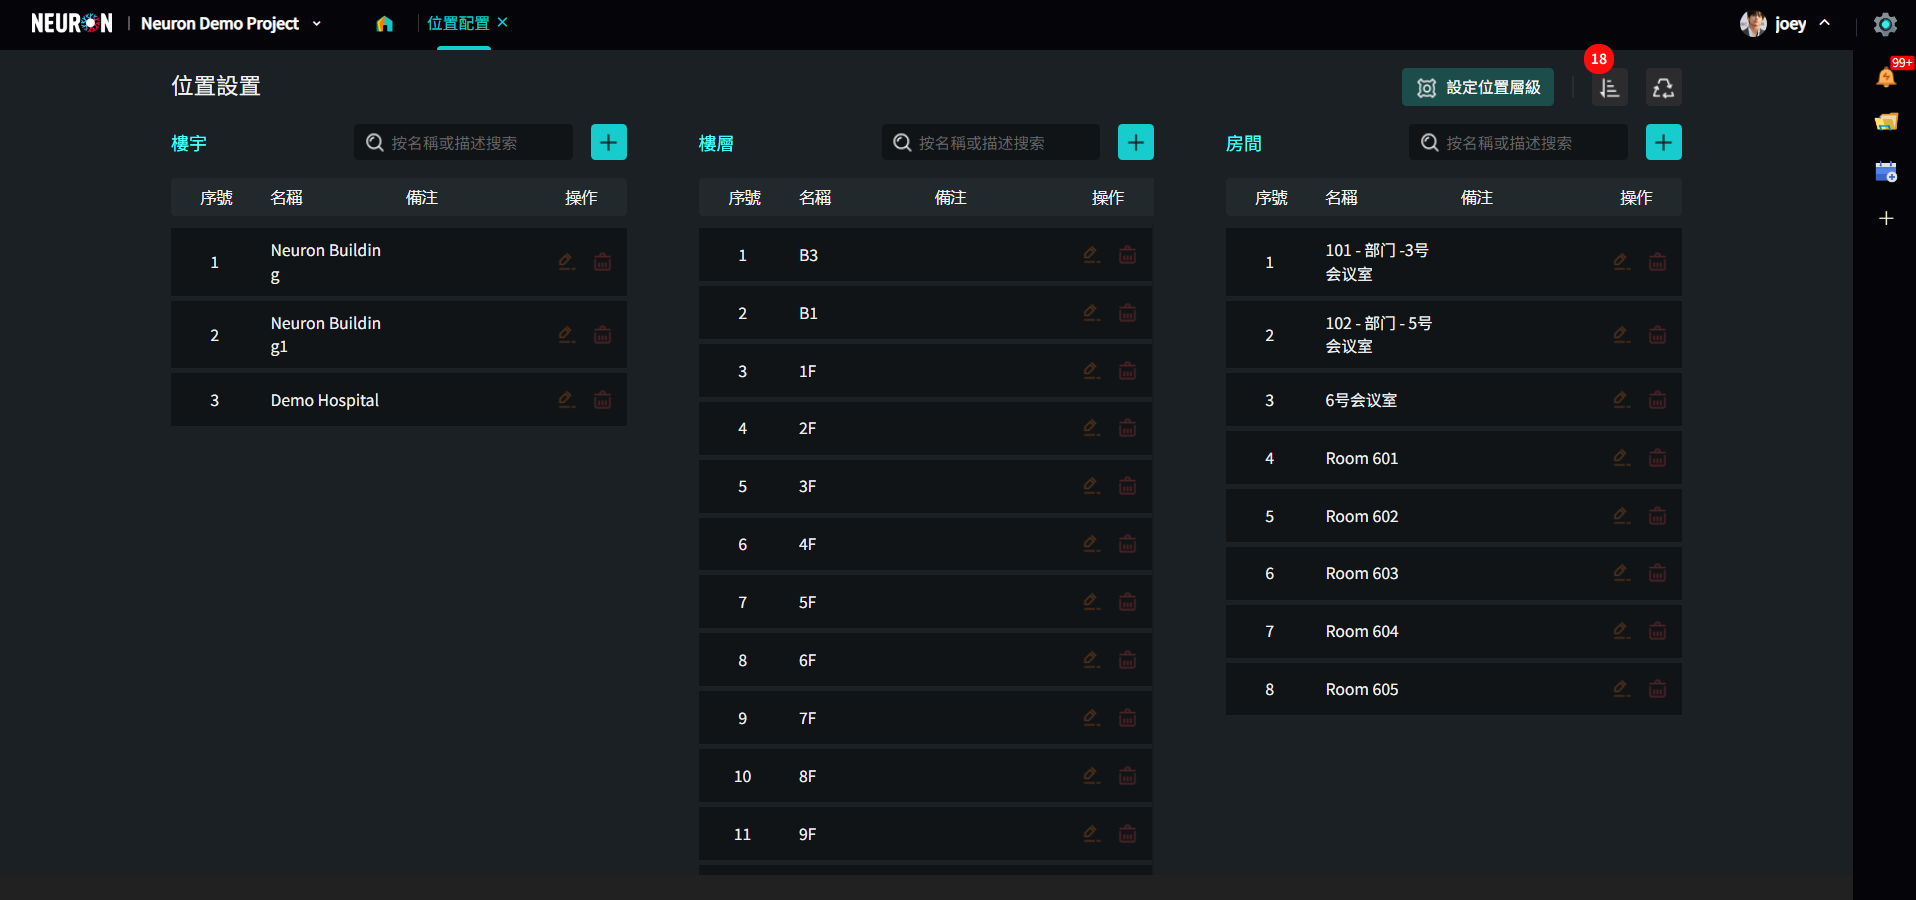
- Click the “Sort” icon to enter the location sorting management page.
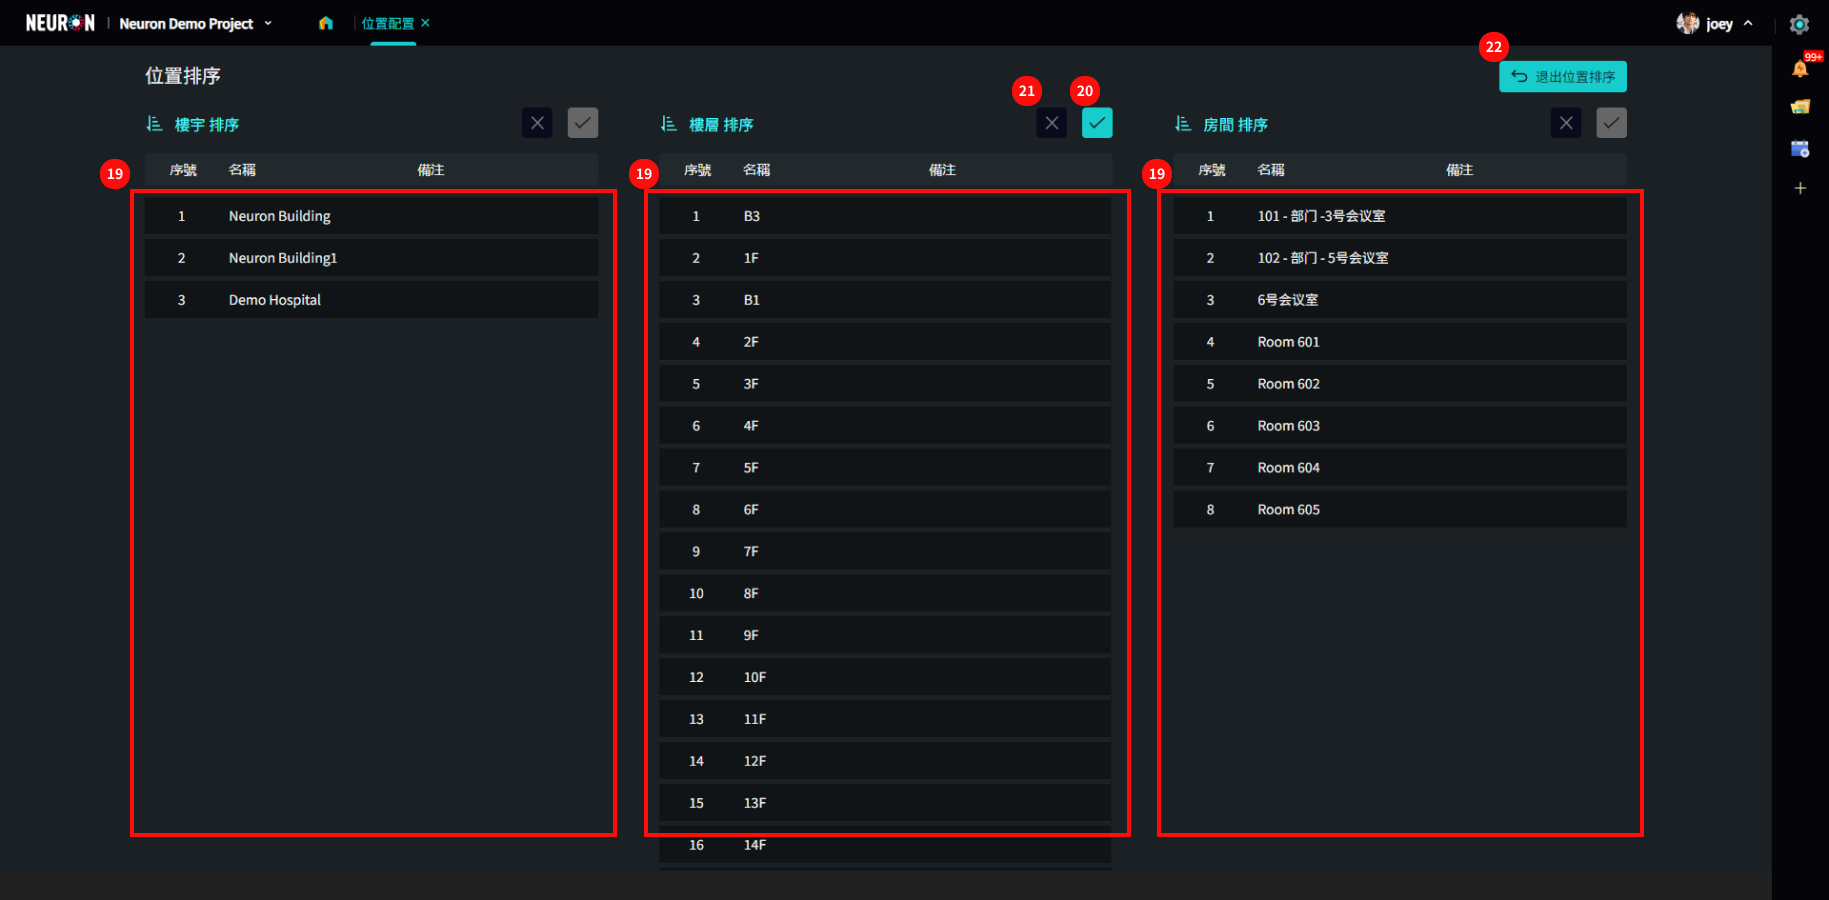
- Drag data to adjust sorting.
- Click the “Check” icon to save the sorting.
- Click the “×” icon to discard changes and reset sorting.
- Click “Exit Location Sorting” to return to the location list.
5. Recycle Bin
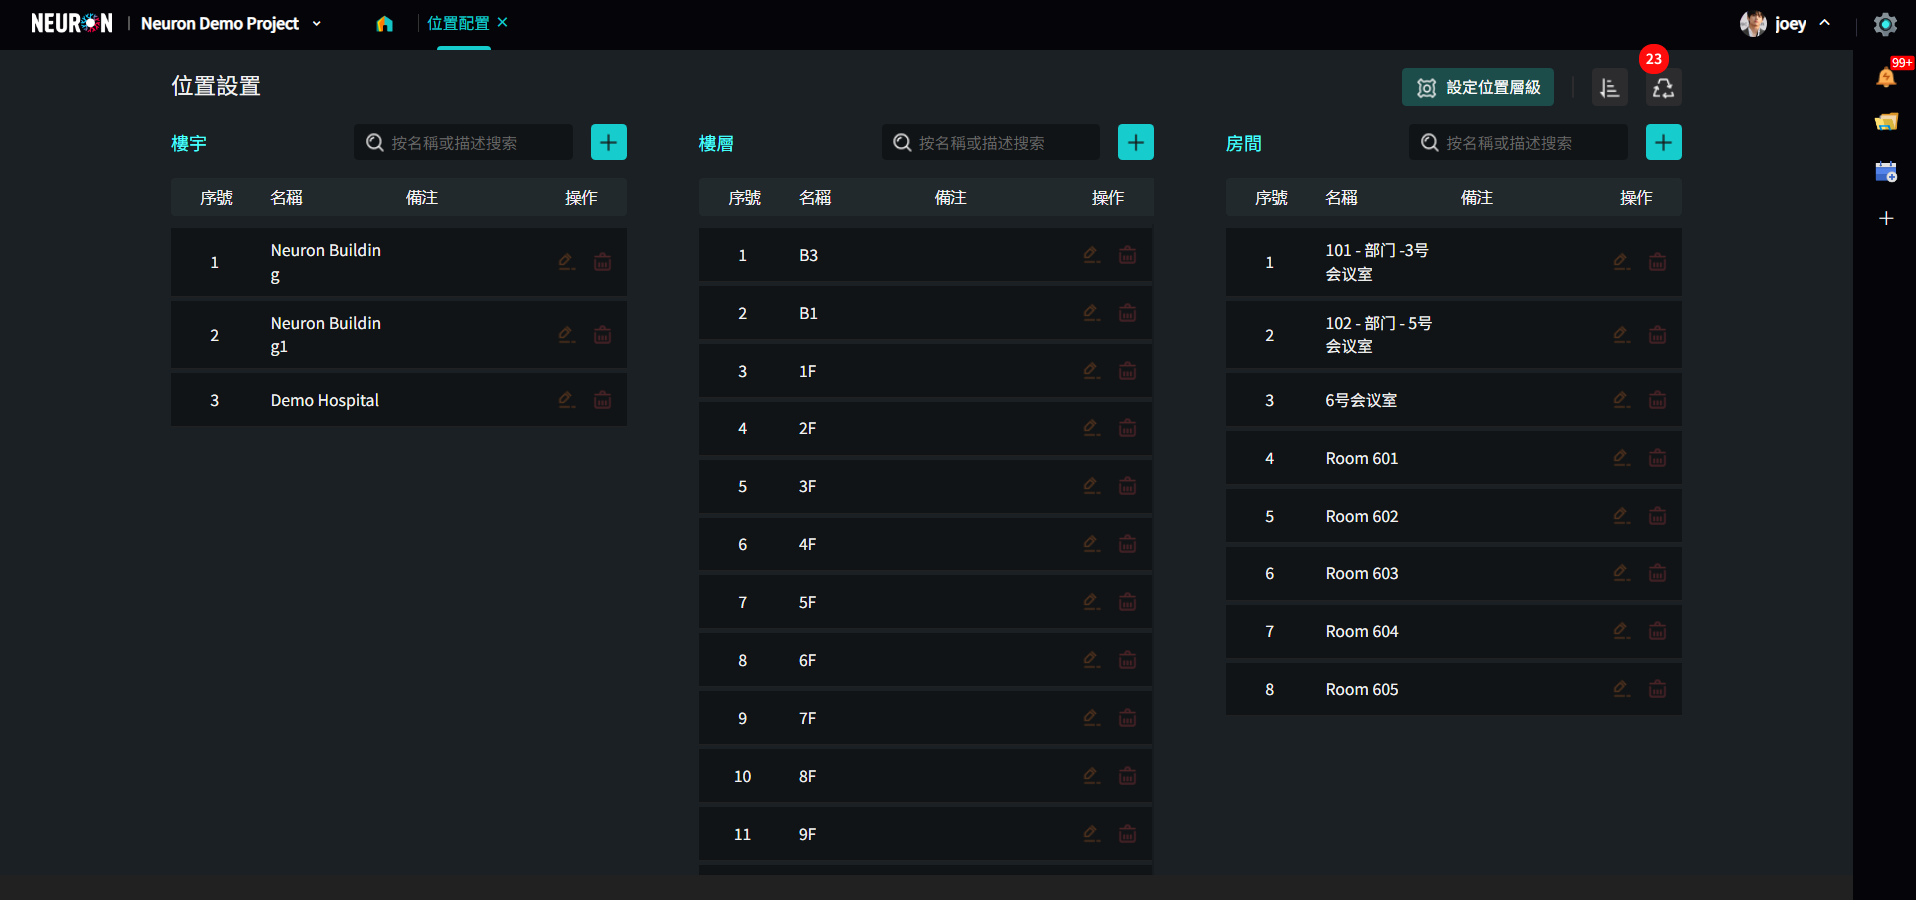
- Click the “Recycle Bin” icon to enter the recycle bin management page and view deleted location data.
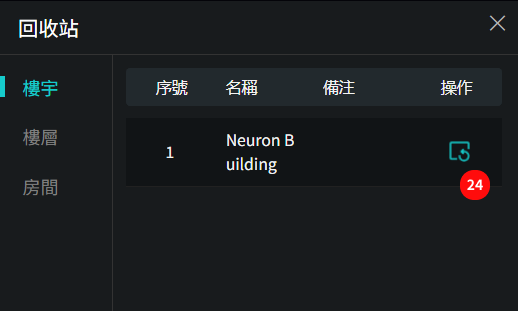
- Click the “Restore” icon to recover deleted location data.
Step 2: Pre-set Asset Systems and Subsystems
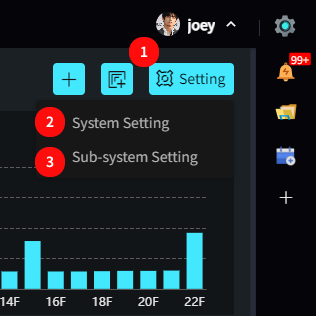
- Hover over the “Settings” button to display the settings menu.
- Click “System Settings” to open the Asset System Settings page.
- Click “Subsystem Settings” to open the Asset Subsystem Settings page.
1. System Settings
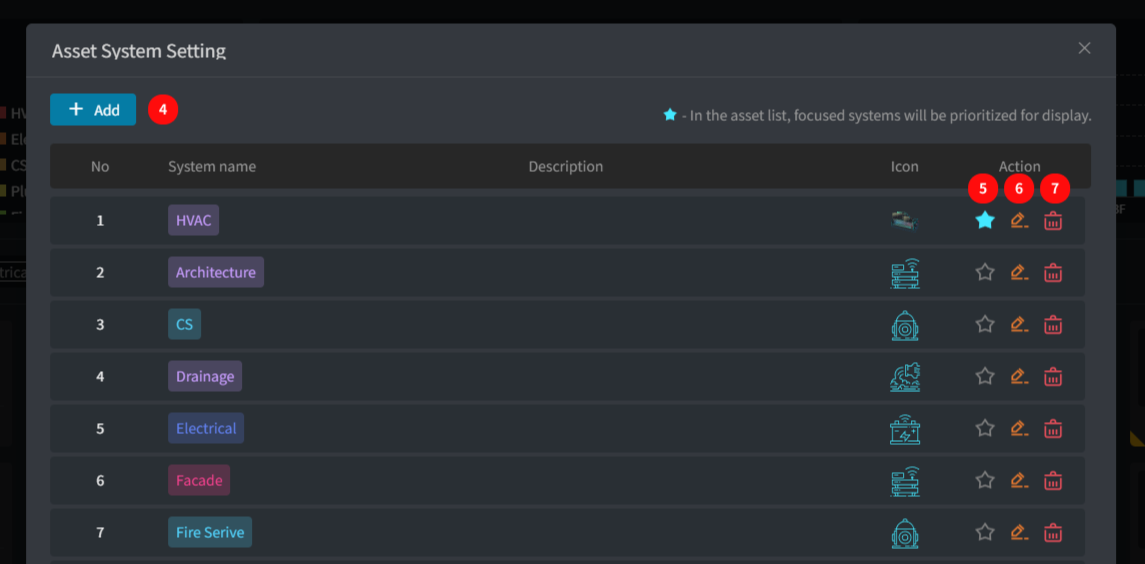
- Click “+ Add” to add a new system.
- The highlighted icon indicates assets of focus within that system, and their data will be displayed preferentially in the asset list. (If you want to display all devices preferentially, do not set this option.)
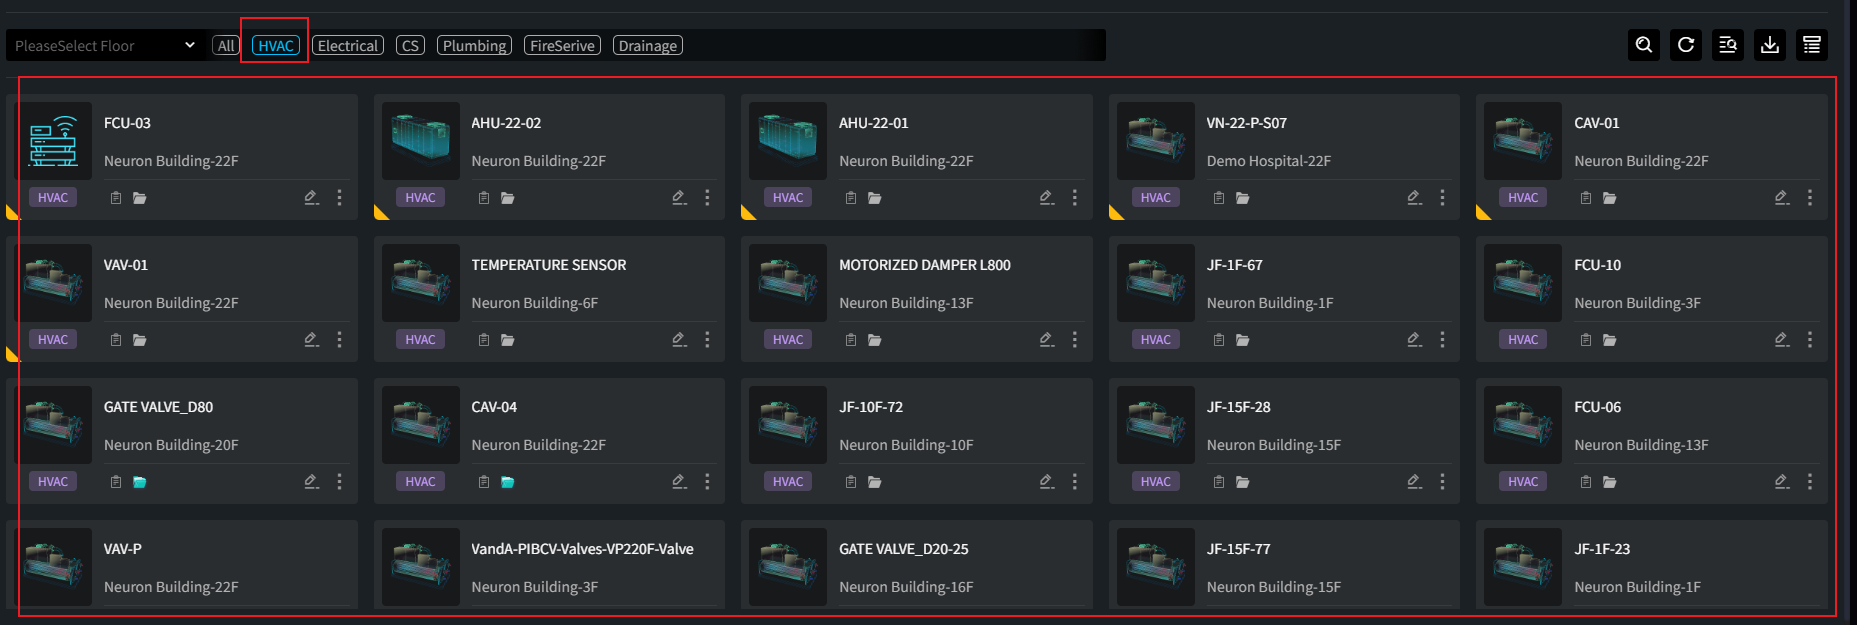
- Click the “Edit” icon to modify system information.
- Click the “Delete” icon to remove that system. (Systems in use cannot be deleted.)
Adding a System
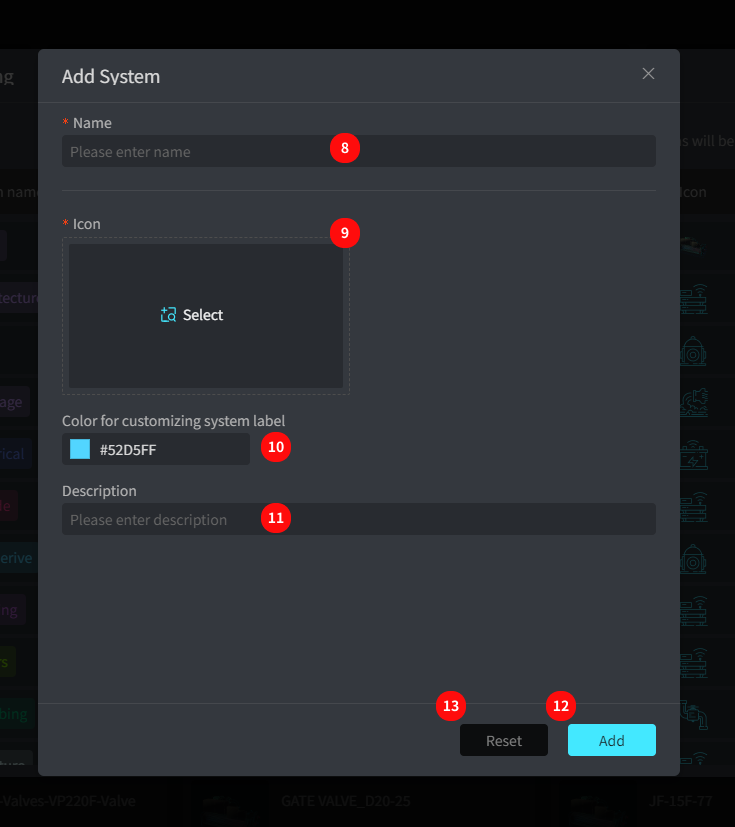
- Enter the system name.
- Choose an icon for the system, which will be displayed in the asset list and detail page to represent the system’s assets.
- Select a color tag for the system, which the platform will use to display that system.
- Fill in remarks.
- Click “Add” to save the information.
- Click “Reset” to clear the form and start over.
The system provides some common type icons:
Icon and color tag display in the asset list:
Both system and subsystem can set icons separately. If Asset A has both system and subsystem information, the subsystem's icon will take precedence in the display.
2. Subsystem Settings
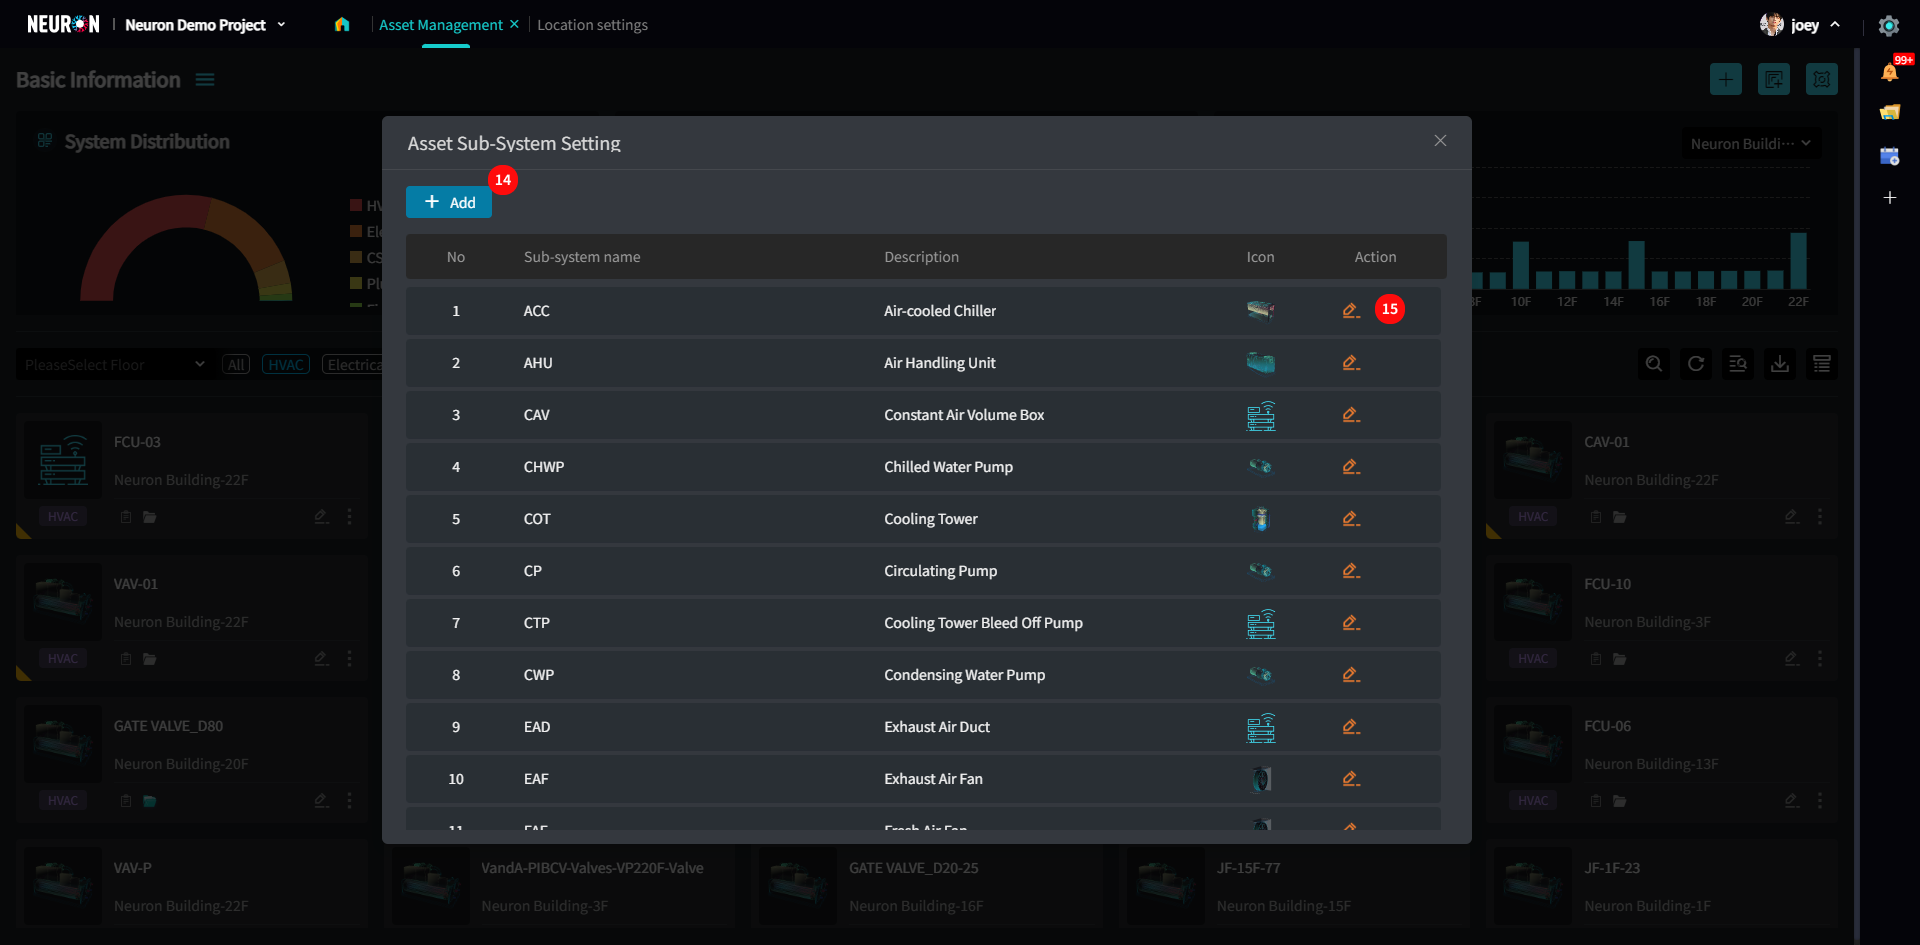
- Click “+ Add” to add a new subsystem.
- Click the “Edit” icon to modify subsystem information.
Adding a Subsystem
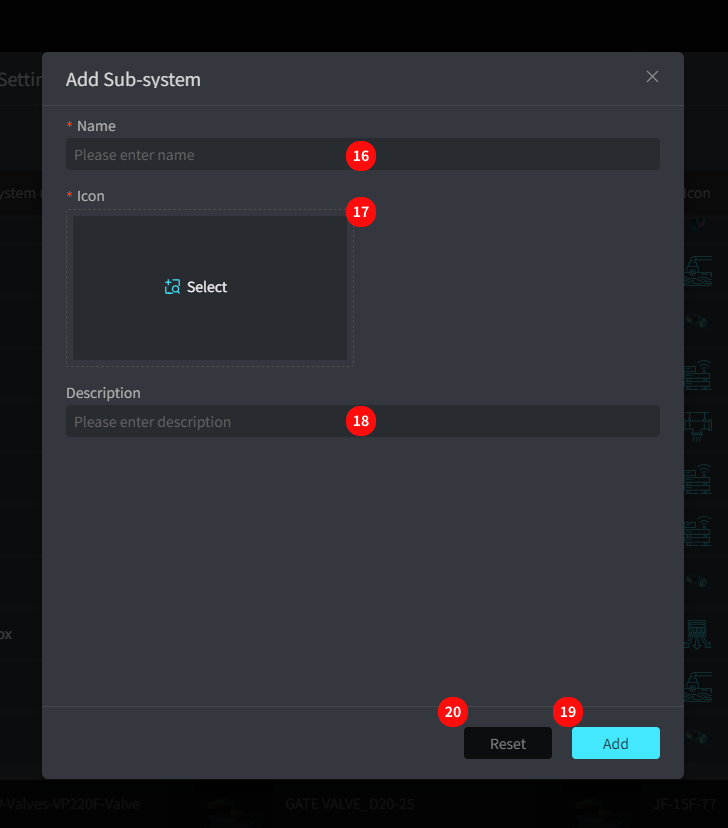
- Enter the subsystem name.
- Choose an icon for the subsystem, which will be displayed in the asset list and detail page to represent the subsystem’s assets.
- Fill in remarks.
- Click “Add” to save the information.
- Click “Reset” to clear the form and start over.