Add Asset
- Single Addition
- Batch Addition
I. Single Addition
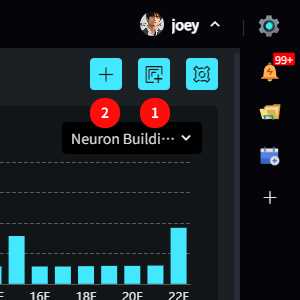
Click the “+” icon in the upper right corner of the asset list to open the single asset addition popup.
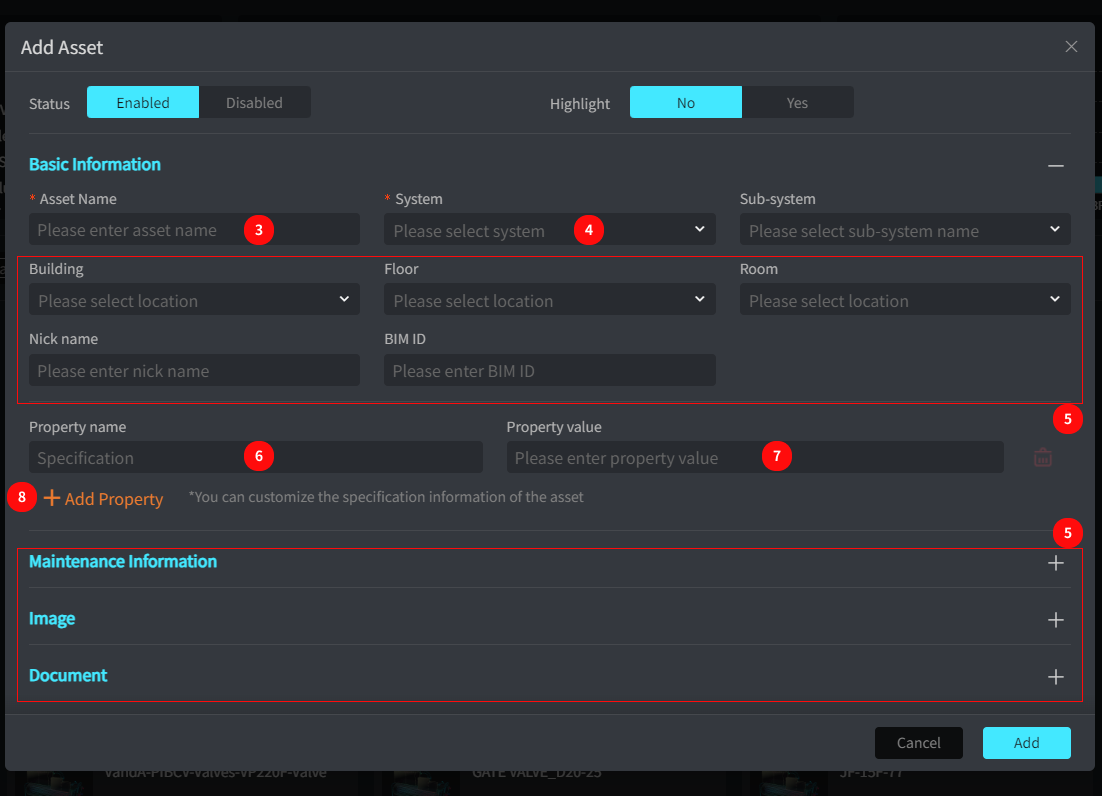
- Enter the asset name, mandatory
- Select a system, mandatory
- The boxed area contains basic information for the asset, which can be filled out as needed; it is not mandatory.
- Custom property name for recording additional specification information of the asset.
- Custom property value for recording additional specification information of the asset. (If the fields provided by the system do not meet recording needs, you can enter the field name and corresponding value here; saving will record it in AM for future viewing and use.)
- Click “Add Property” to add more custom fields.
II. Batch Addition / Edit
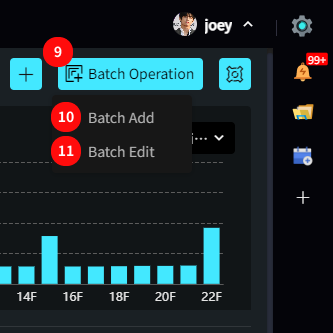
- Hover over the “Batch” icon in the upper right corner to open the batch operation menu.
- Click “Batch Add” to open the batch addition popup.
- Click “Batch Edit” to open the batch editing popup.
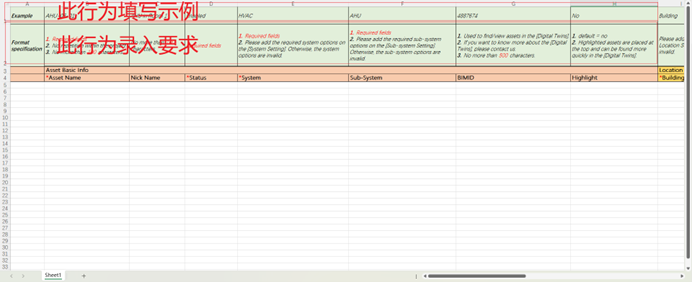
Template Download and Upload
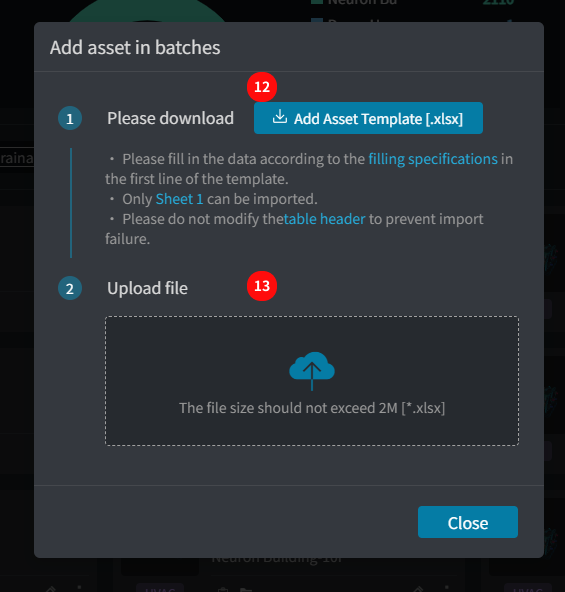
- Download the batch addition / editing template and fill in the content according to the header format example.
- Upload the completed file in this area to complete batch entry.
*The ID column of the batch editing template must not be modified or deleted; the system will identify data based on the ID column.
*Data must be filled out using the template provided by the system; changing the table may result in the system being unable to recognize it, leading to entry failure!
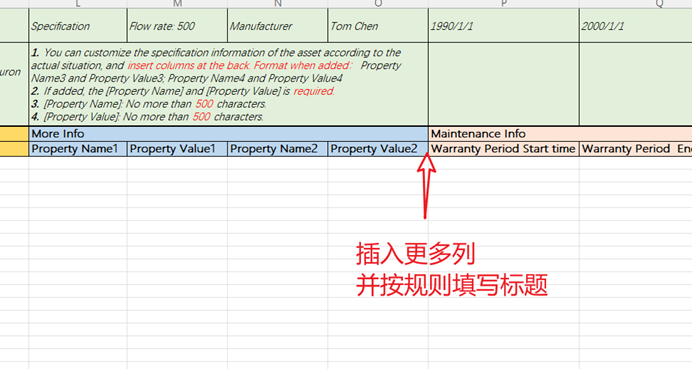
Input of Custom Specification Information.
Users can customize the asset's specification information according to actual situations by inserting columns in the corresponding positions of the template table. The title format when adding must be: Property Name3, Property Value3, Property Name4, Property Value4, and so on.
*The header format for entering multiple files is the same; for details, please refer to the template and example data.
Error Information
When filling out the entry form, if the data is not formatted according to the header requirements, the system may be unable to recognize it. Users can correct the information in the form based on the error messages and attempt to re-enter it.
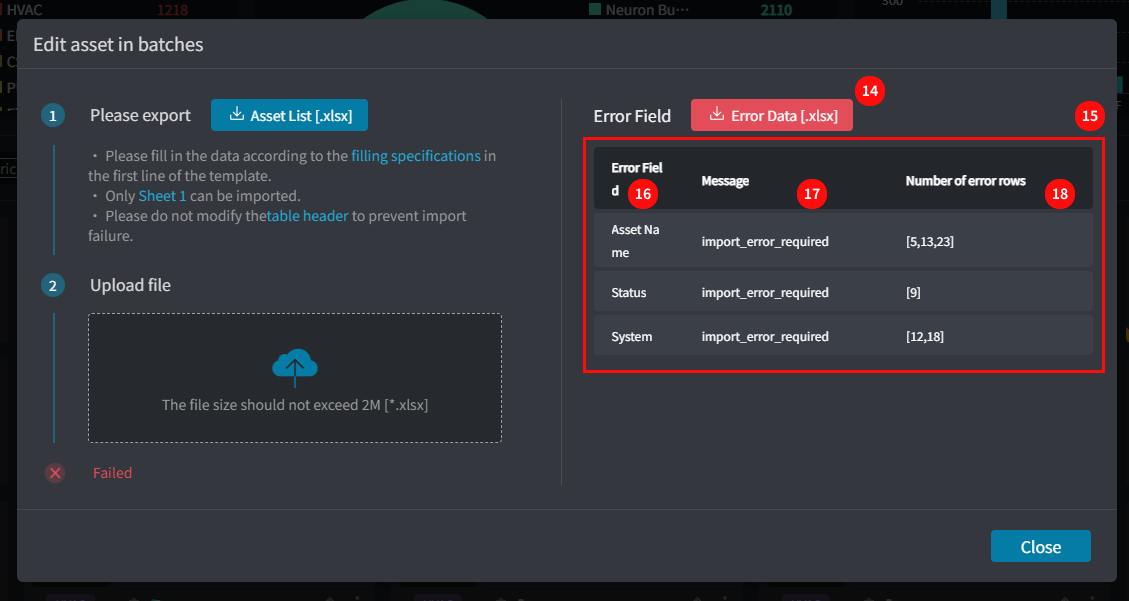
- Click “Error Data” to export the erroneous data, view error details, and make corrections.
- Error detail table displaying the error messages.
- Column names in the table with errors.
- Specific error messages (details will also be in the first column of the exported error data table).
- The number of erroneous rows.