Device Management
In the middle platform tenant version, there are two ways to enter
- Enter the menu bar
- Home Page
- Enter the menu bar
After logging into the system, click on the 'Device Management' menu and select 'Devices' to enter the device management module, as shown below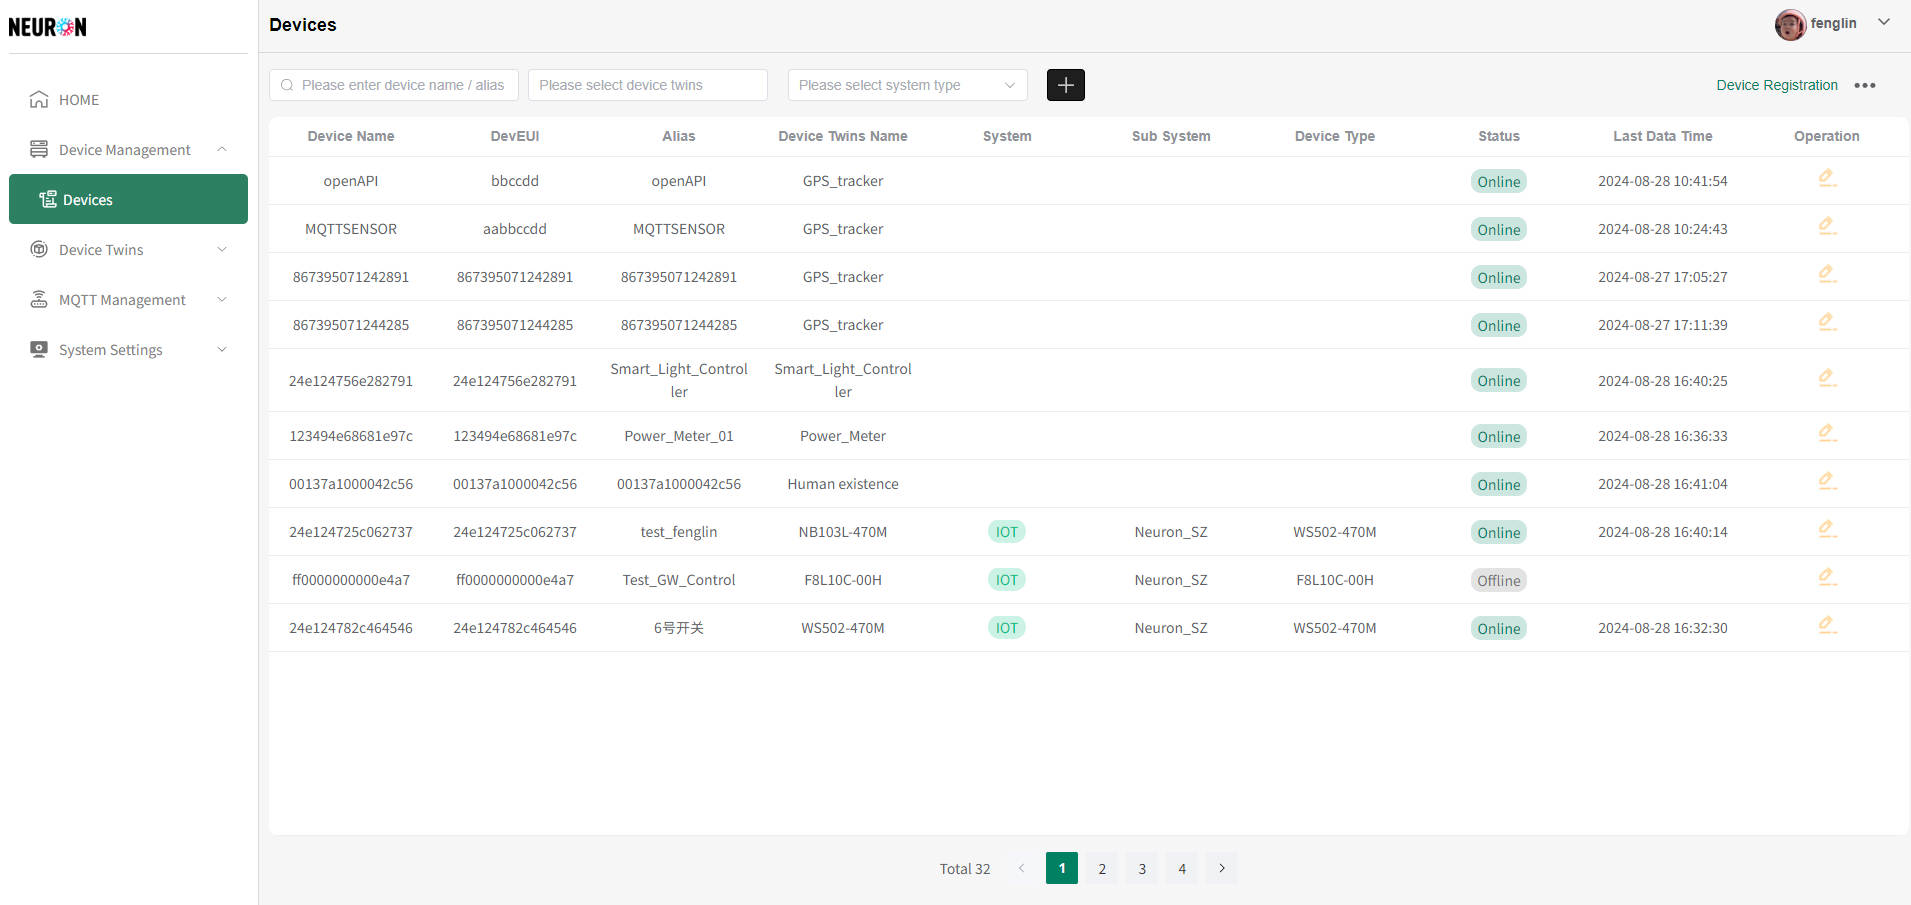
- Home Page
On the tenant version homepage, click on the "Total Device" module to enter the device management module, as shown below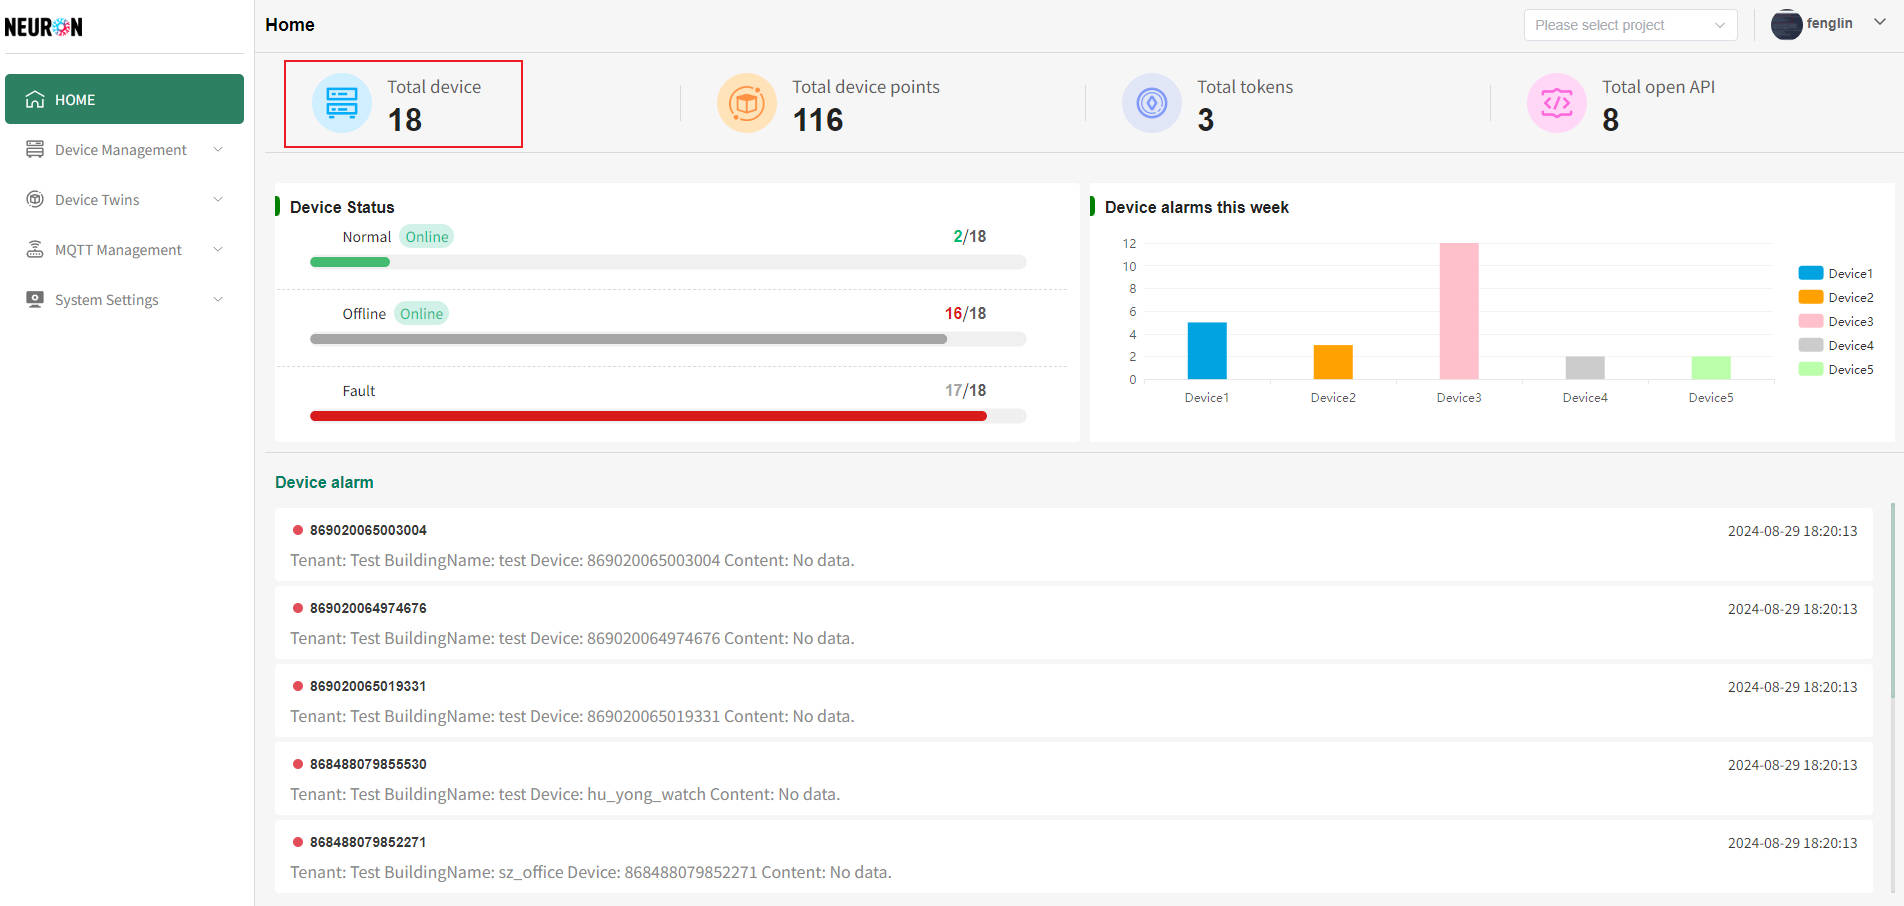
Device List
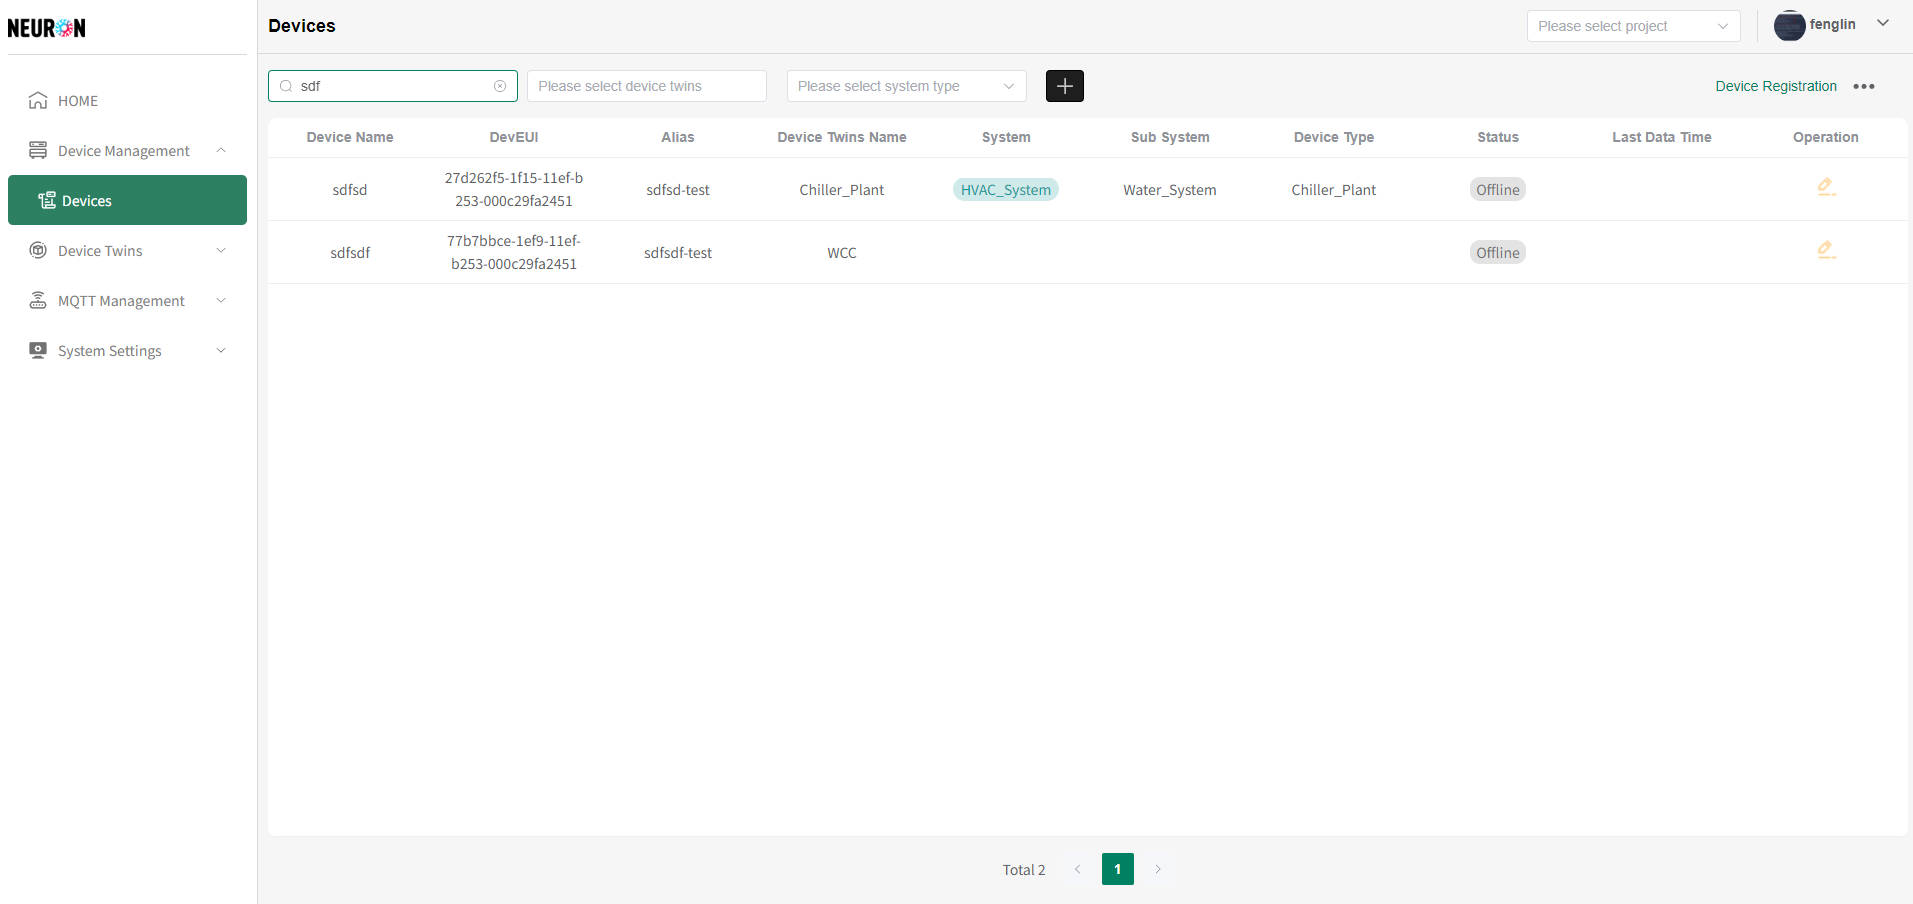
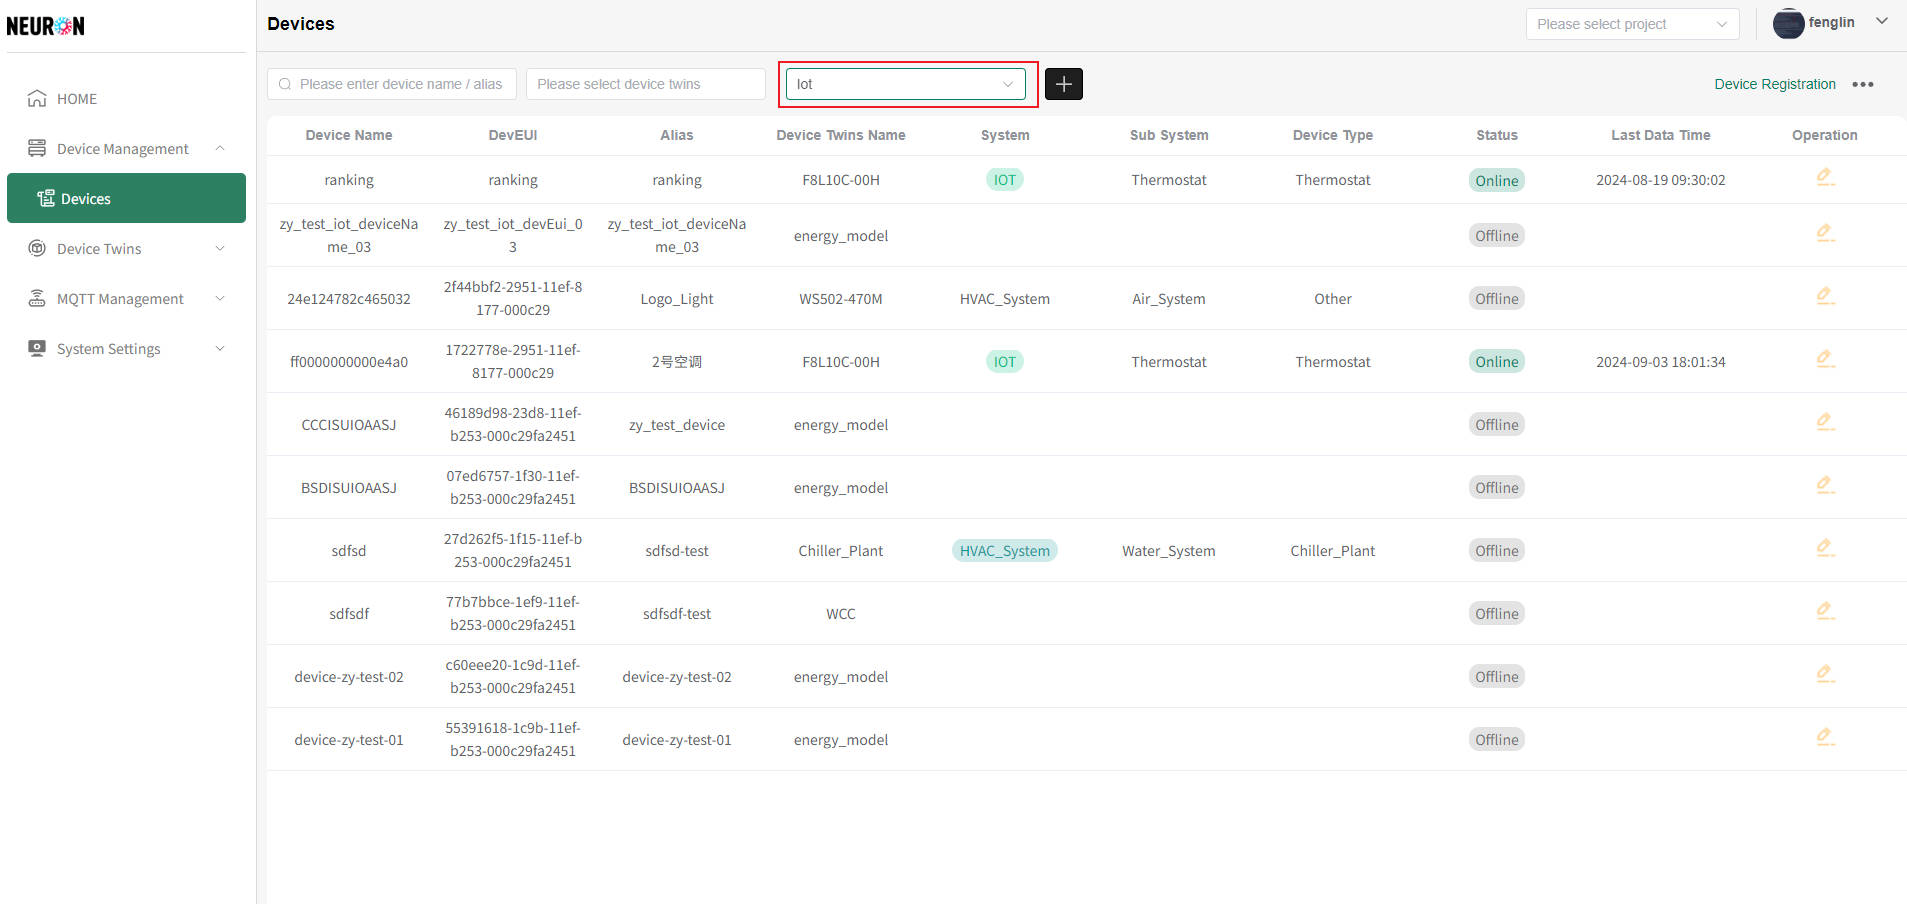
The devices displayed in the device list are all devices that have been successfully connected and can be viewed by the current login account. The system supports fuzzy matching of device names and aliases, as well as device queries based on object models and function type dimensions
As shown in the figure below, after entering information in the input box, press enter to refresh the device list
 As shown in the following figure, select the IoT device, and once the selection is complete, the device list will be refreshed
Add Device
The specific operation of adding a new device is detailed in Device Access Process
Device Details
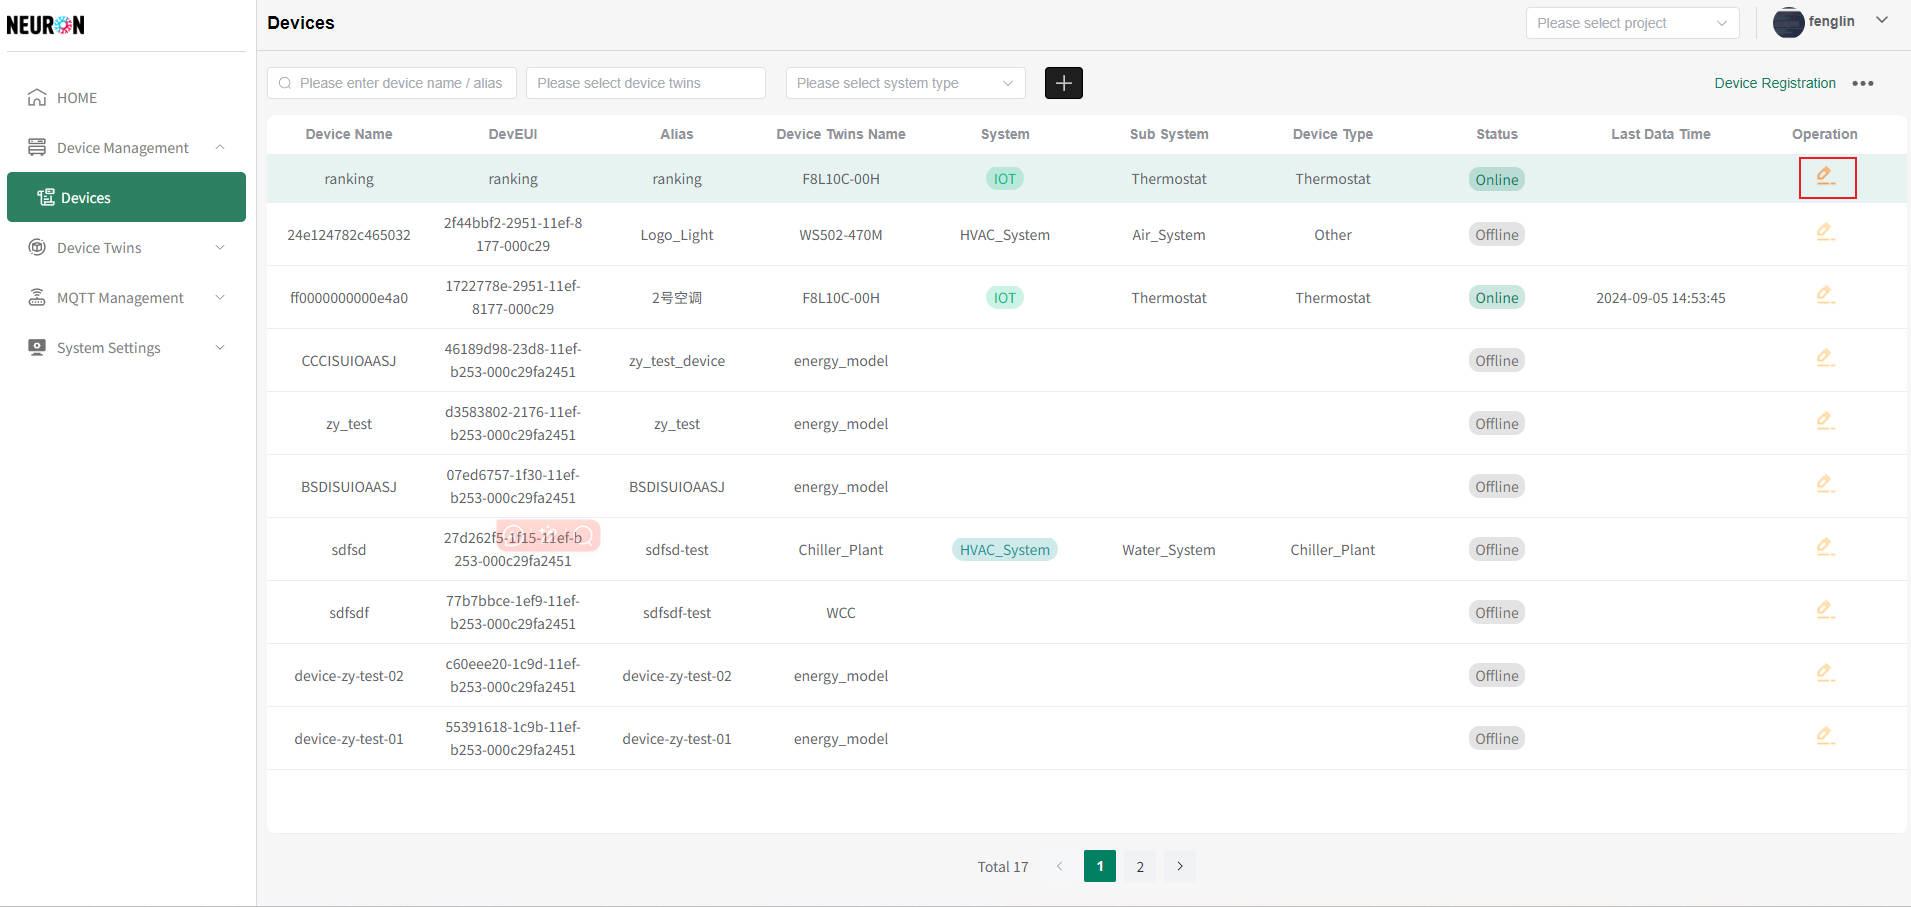
On the device list page, select the device that needs to be modified, click the "Modify" button on the right side of the device row, and enter the device details page, as shown in the following figure
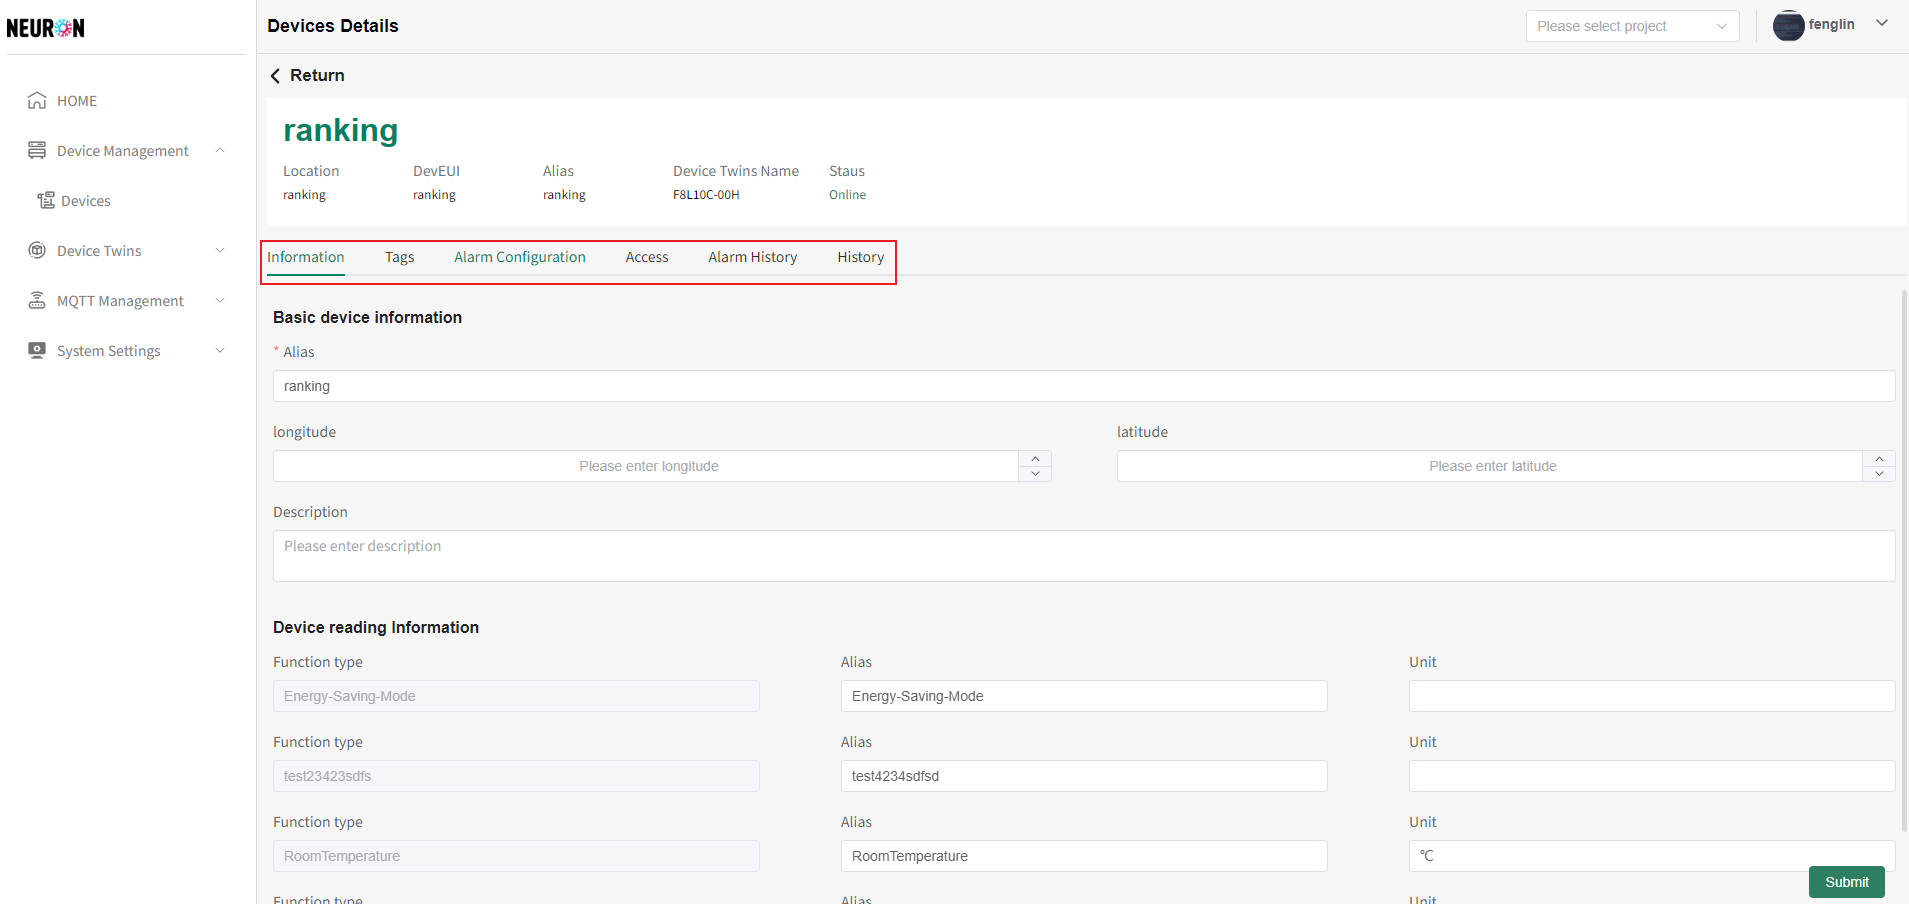
 The device details page can modify basic device information, add system and platform project tags, configure device alarm information, display device access information, query alarm history data and temporal history data, etc., as shown in the following figure
Modify device basic information
Enter the device details page, which defaults to displaying basic device information as shown in the following figure:
Basic information page of the device, which allows modification of device aliases, function point aliases under the device, etc
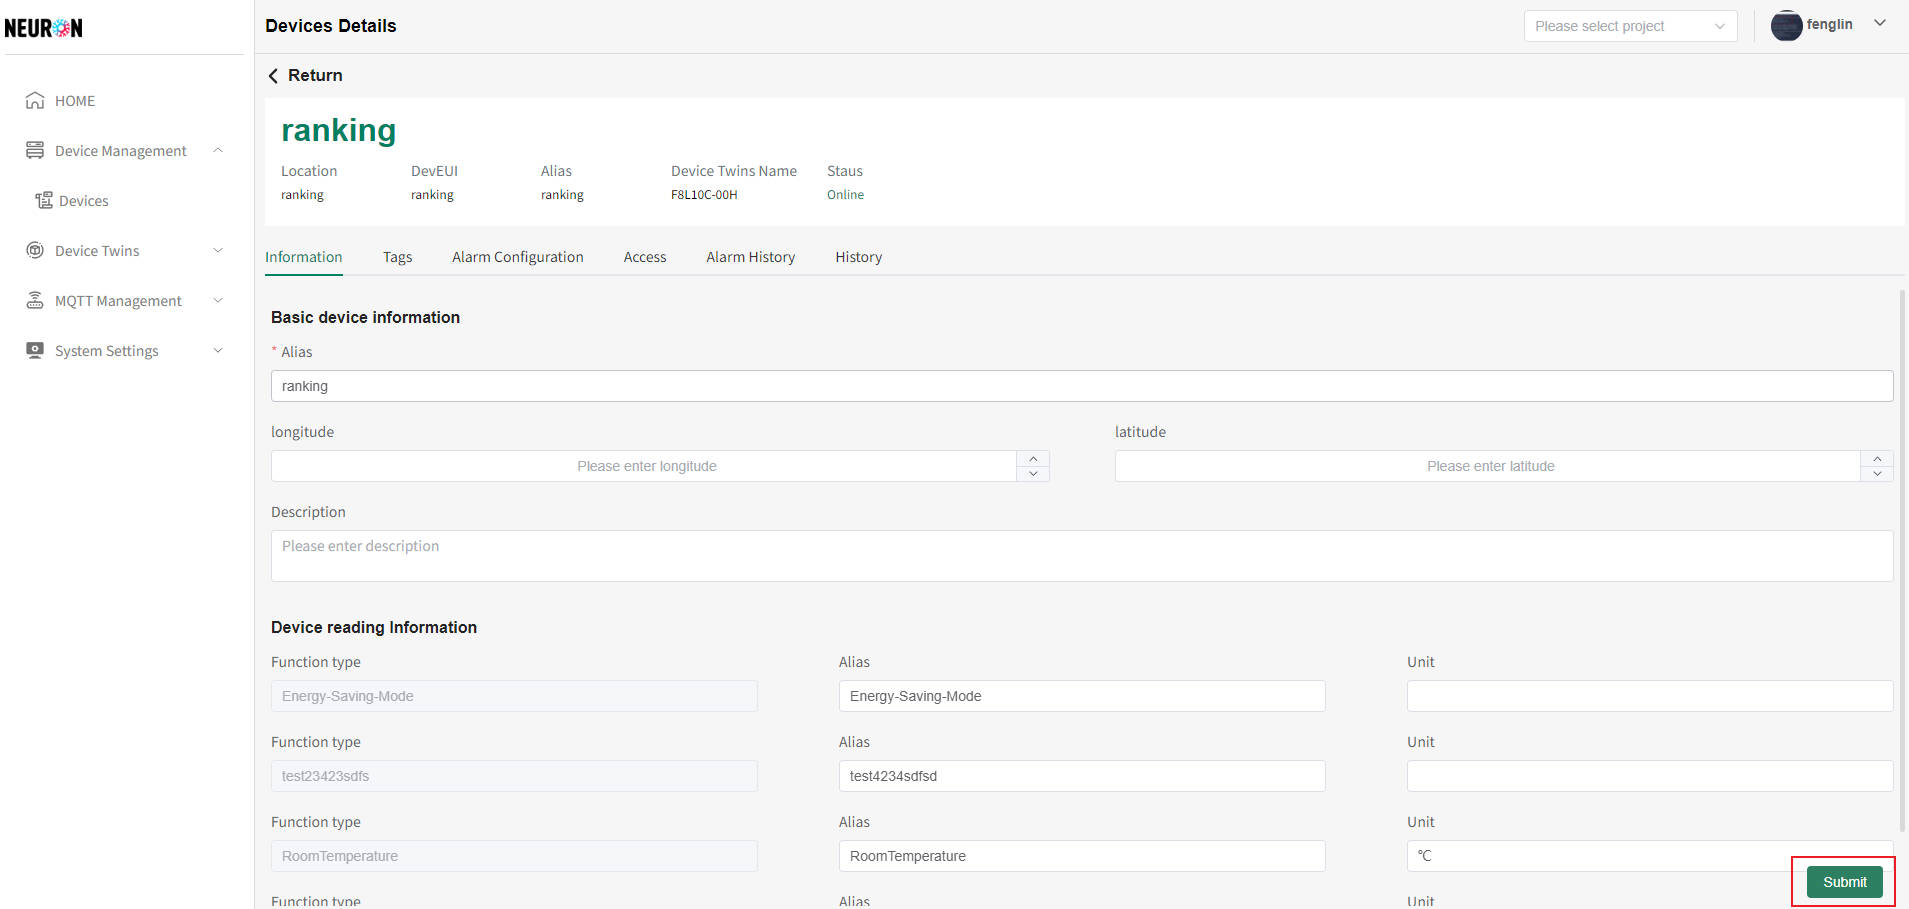 As shown in the above figure, enter the modified information and click on the page to submit to complete the modification of the device basic information
Device Tags
Device tags are divided into two types: platform project tags and device system tags
- Device Binding Platform Project
On the device details page, click on the "Tags" menu to enter the device tab page, as shown below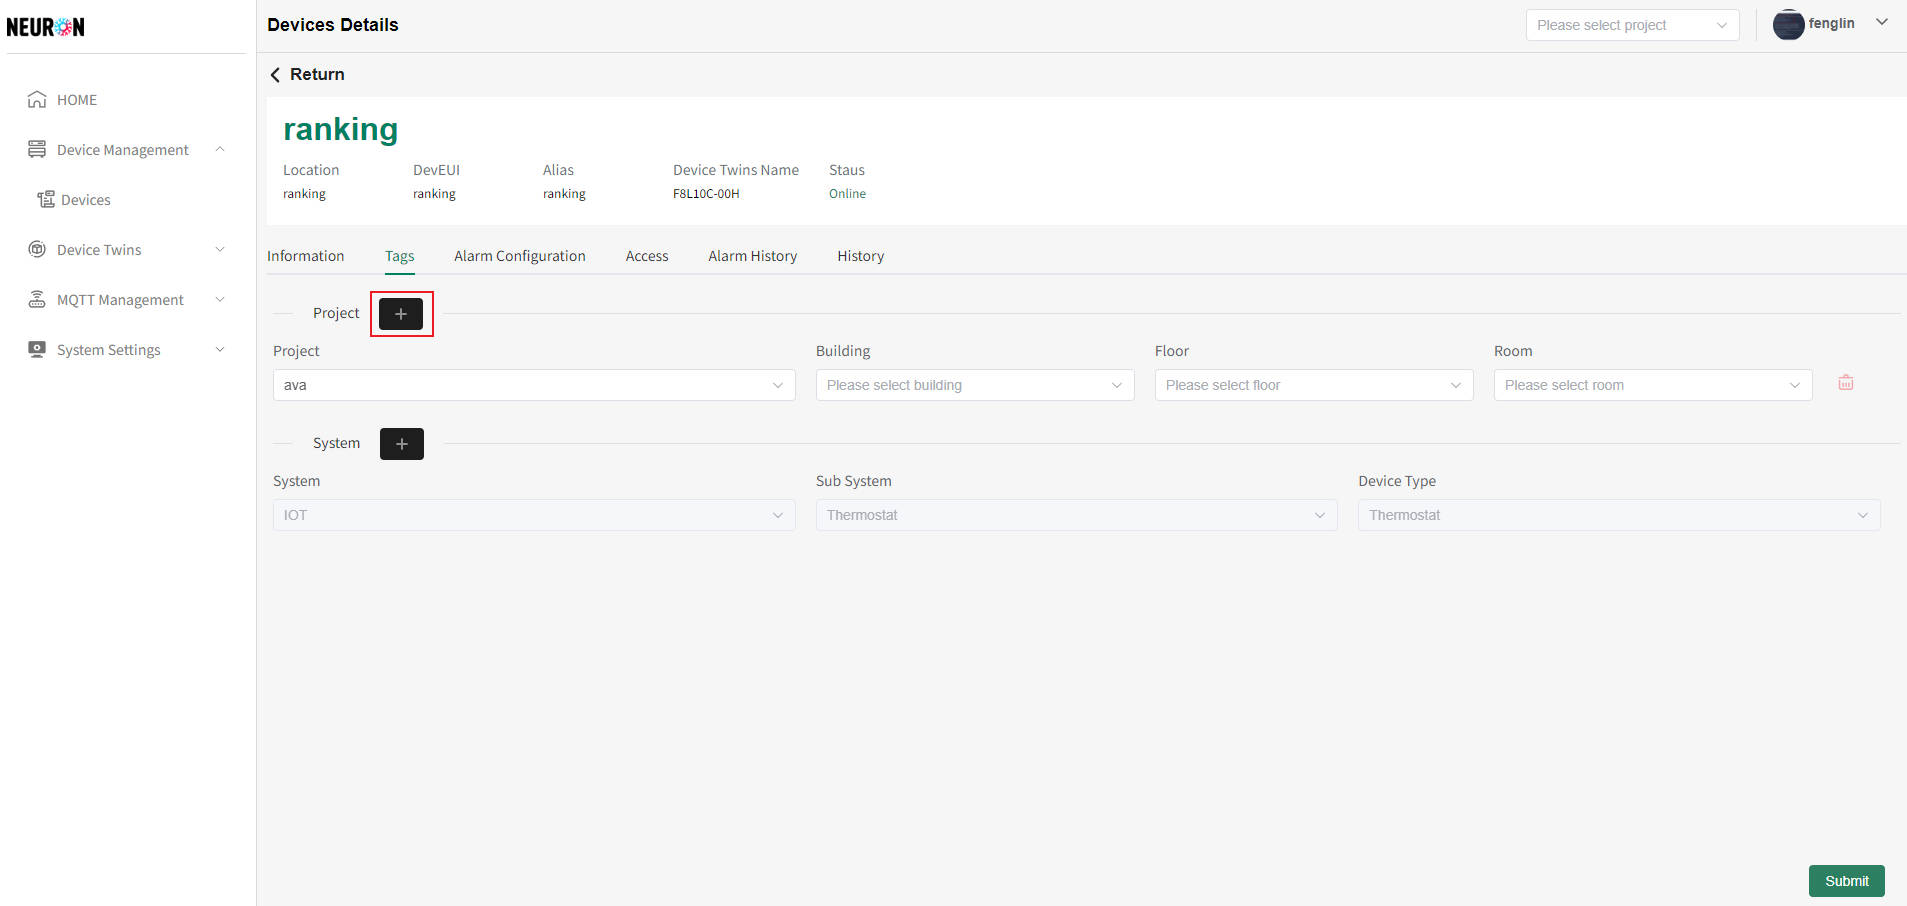
- Device Binding Platform Project
As shown in the above figure, click the "+" button next to the project, and the system will add a platform project operation line. Select the project and location information that needs to be bound, and click the submit button in the bottom right corner to complete the binding between the device and the platform project, as shown in the following figure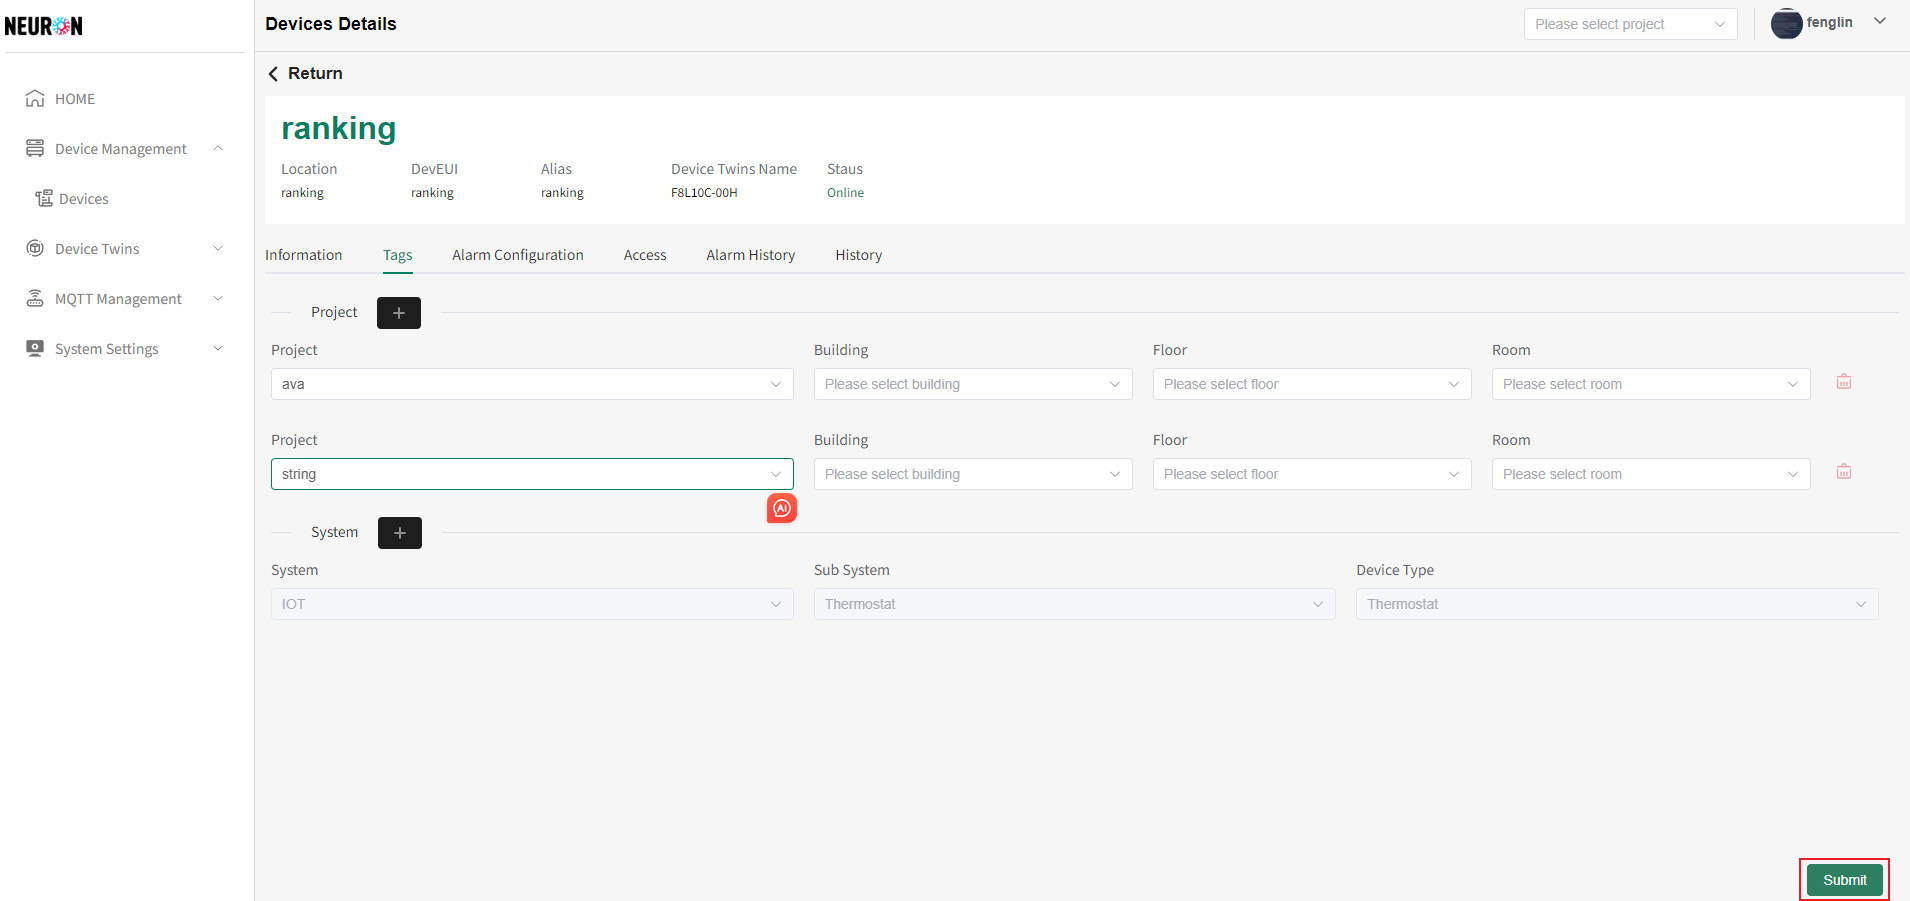
- Device unbinding platform project
On the device details tab, click the "Delete" button after the platform project line. After the user confirms, the device can be unbound from the current platform project, as shown in the following figure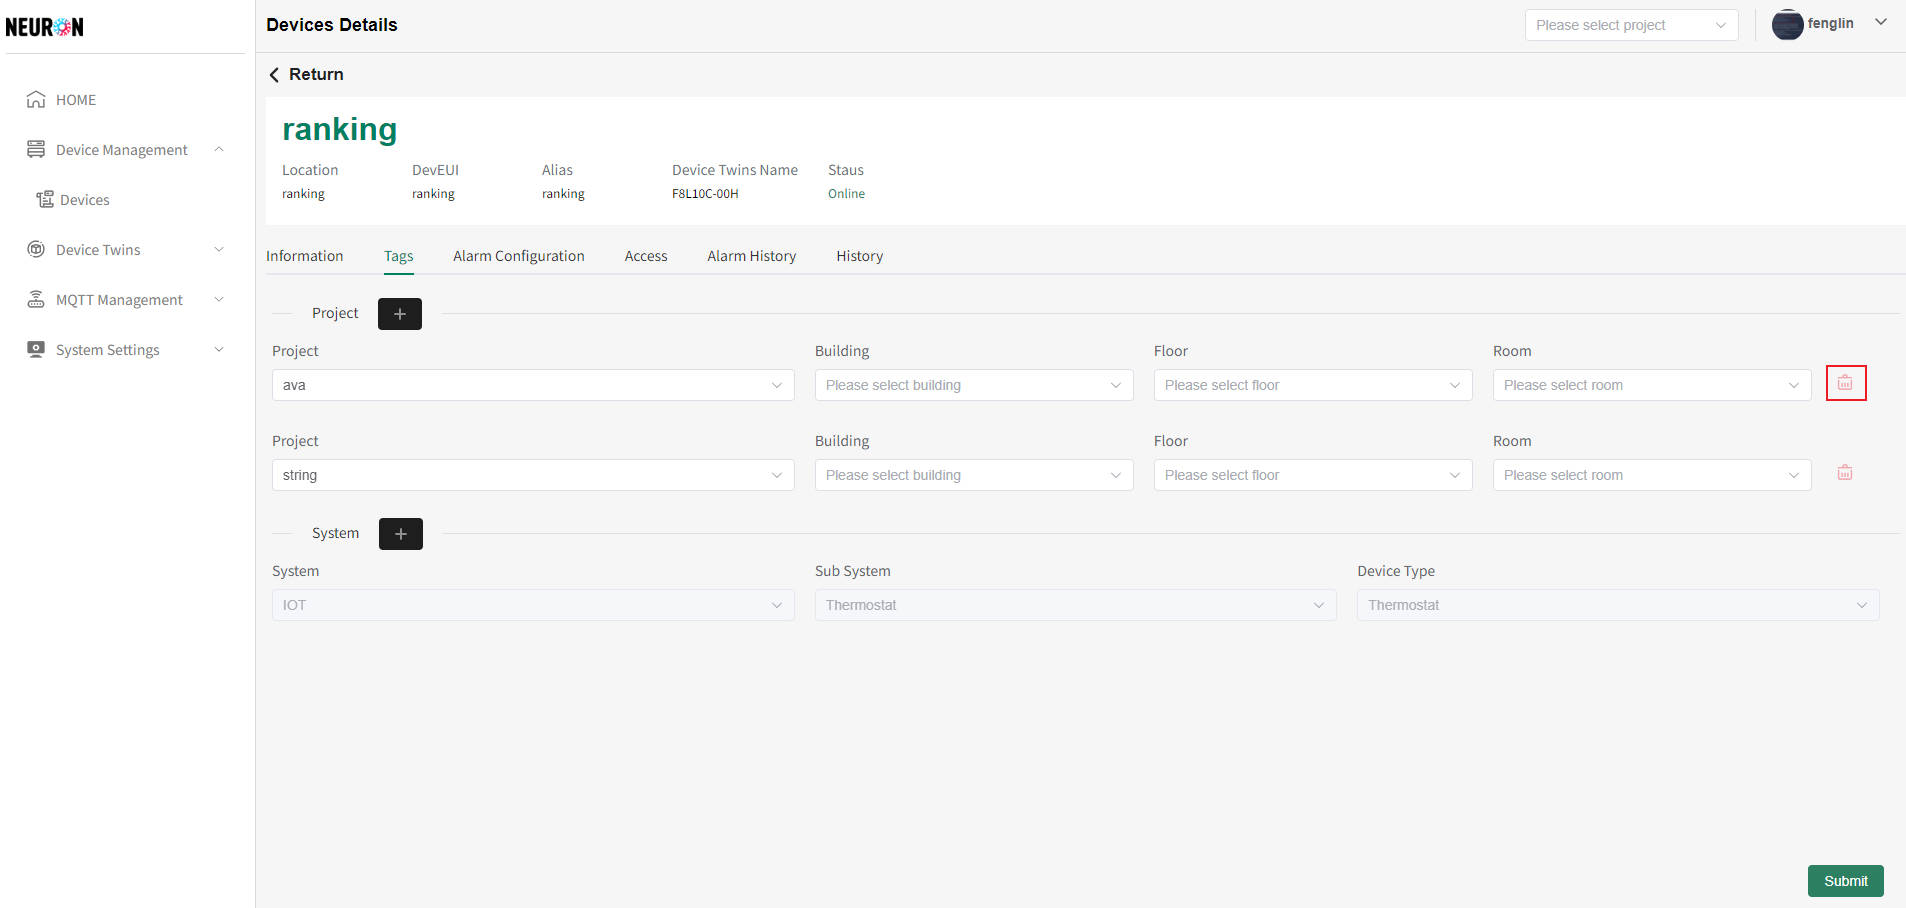
Offline Device Alarm
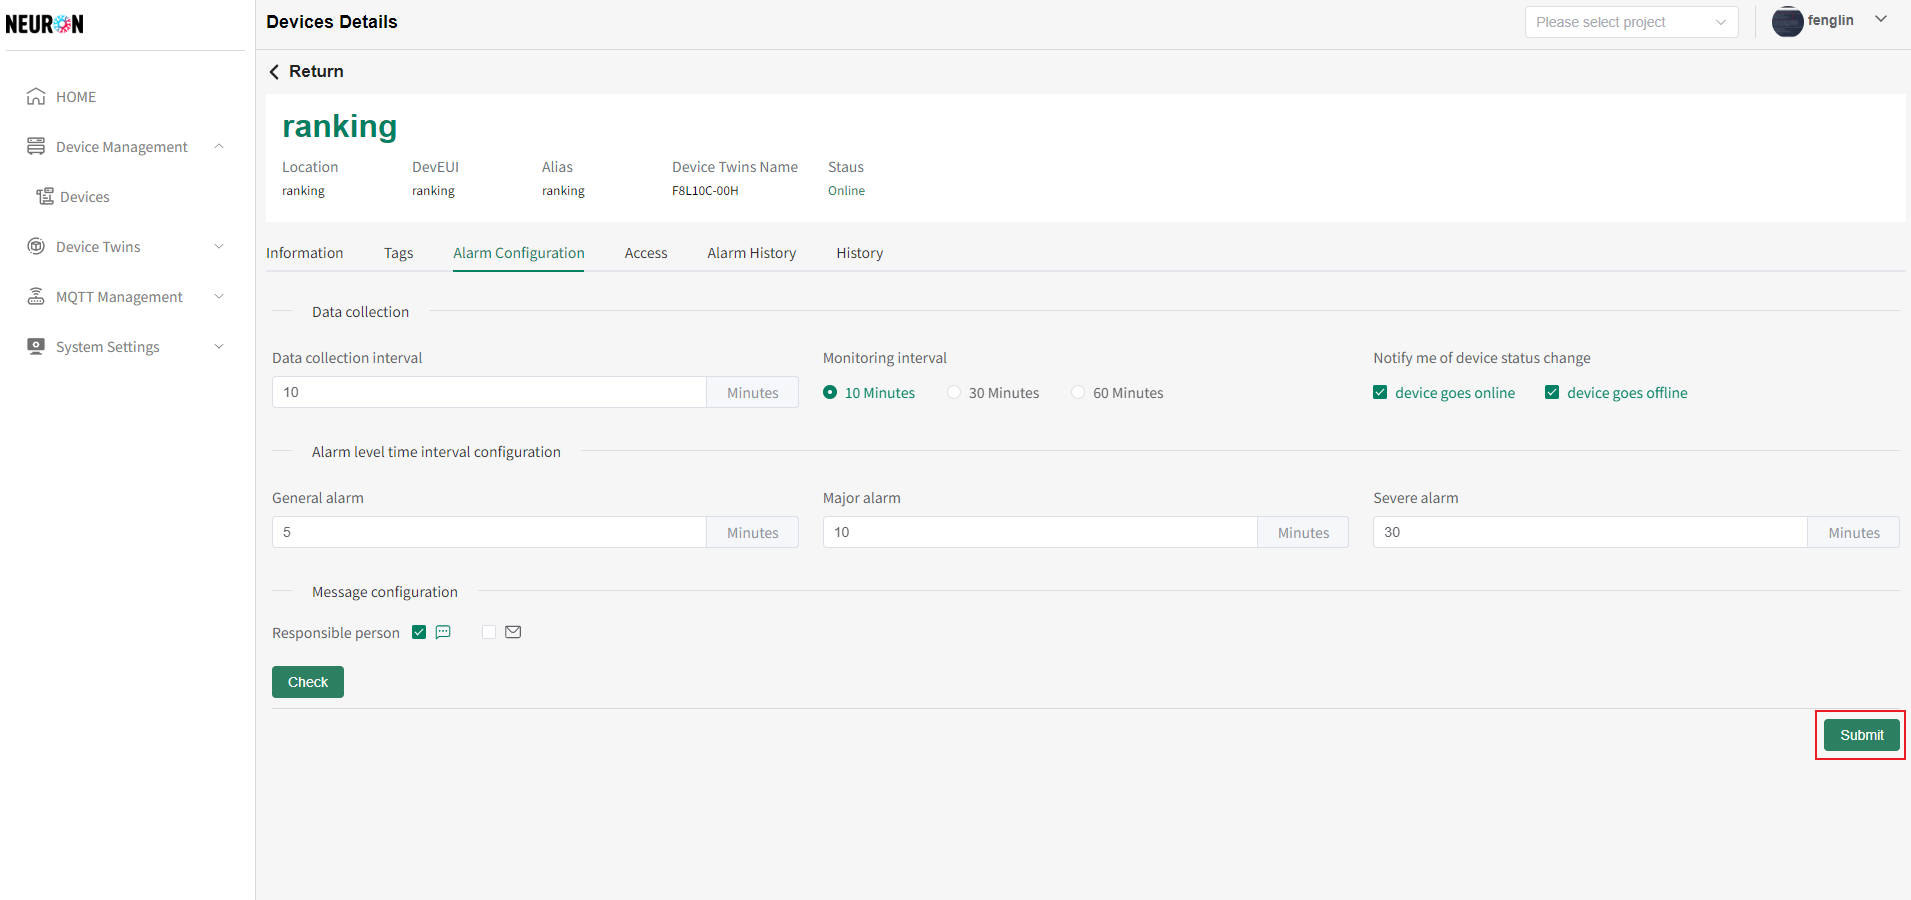
Offline device alarms can be configured with basic alarm configurations, including alarm notification methods such as email and SMS, as well as alarm recipients. After configuration, the corresponding personnel will receive device alarm messages when the current device alarm occurs
On the device details page, click on the "Alarm Configuration" menu to enter the device offline alarm configuration page, as shown below
- Configure alarm notification method
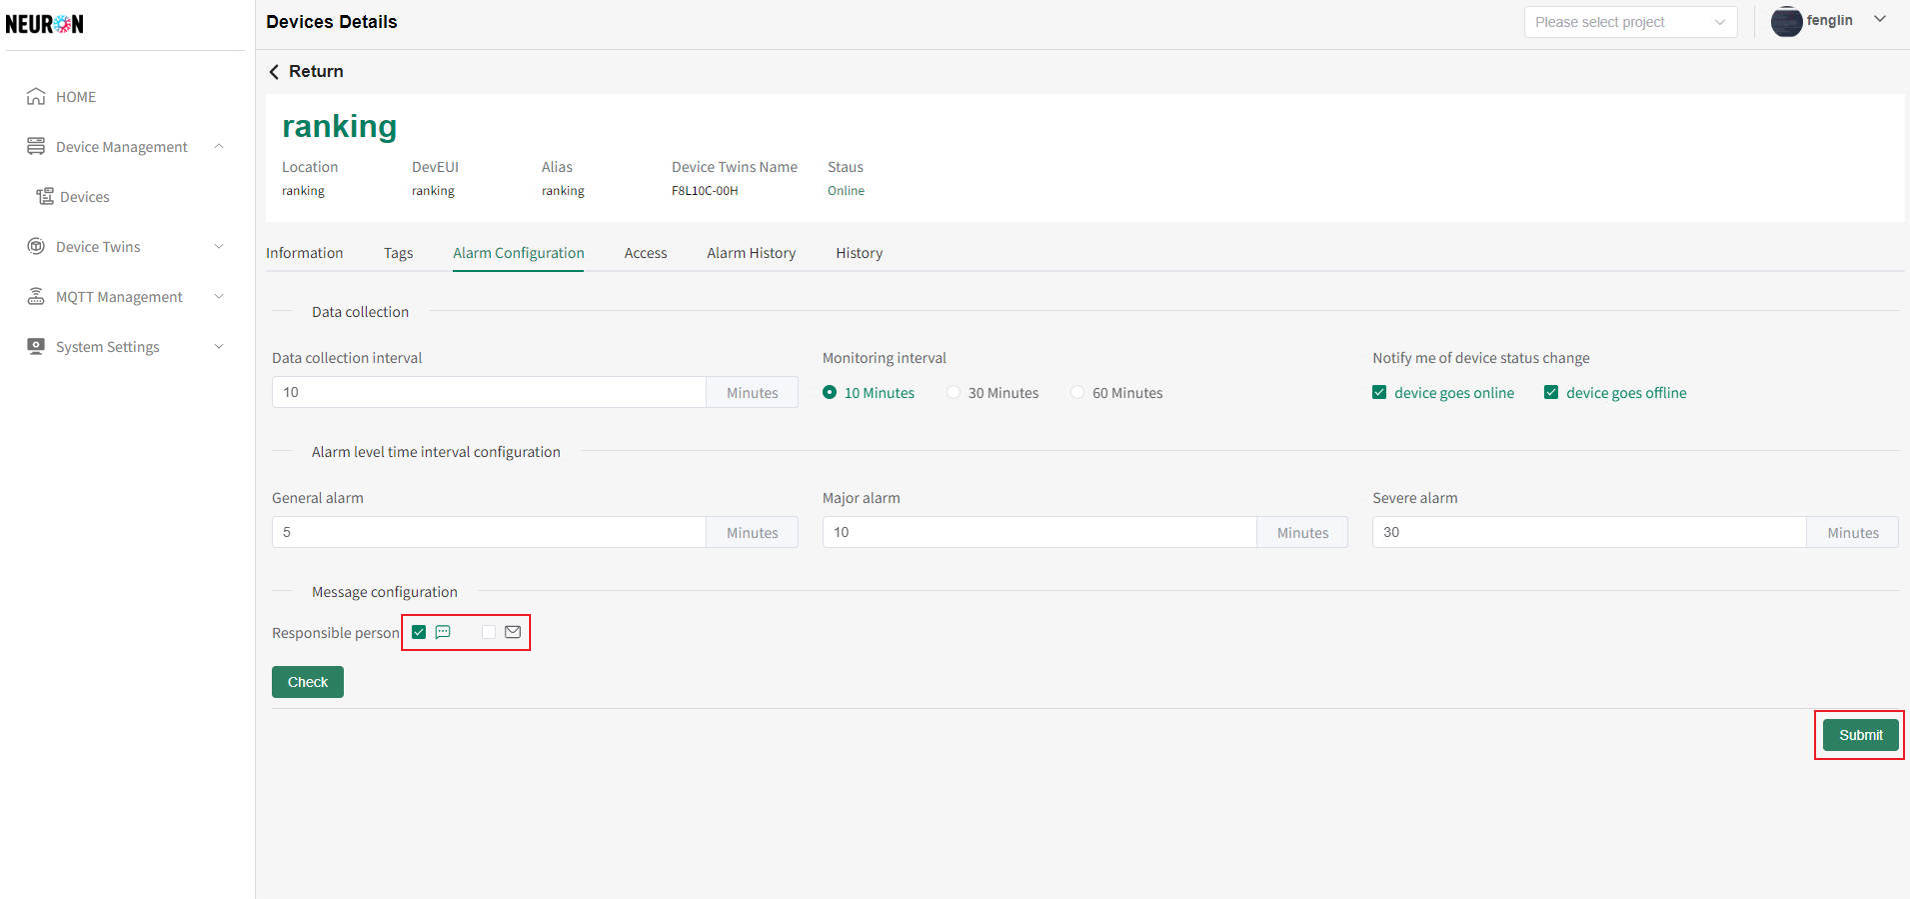
The default offline alarm notification method for devices is email notification, and two options can be selected: email and mobile phone. The current device alarm message will be notified to the configured personnel through both email and mobile phone
On the alarm page, select the desired notification method (you can choose one or two), as shown in the following figure
- Configure alarm recipient
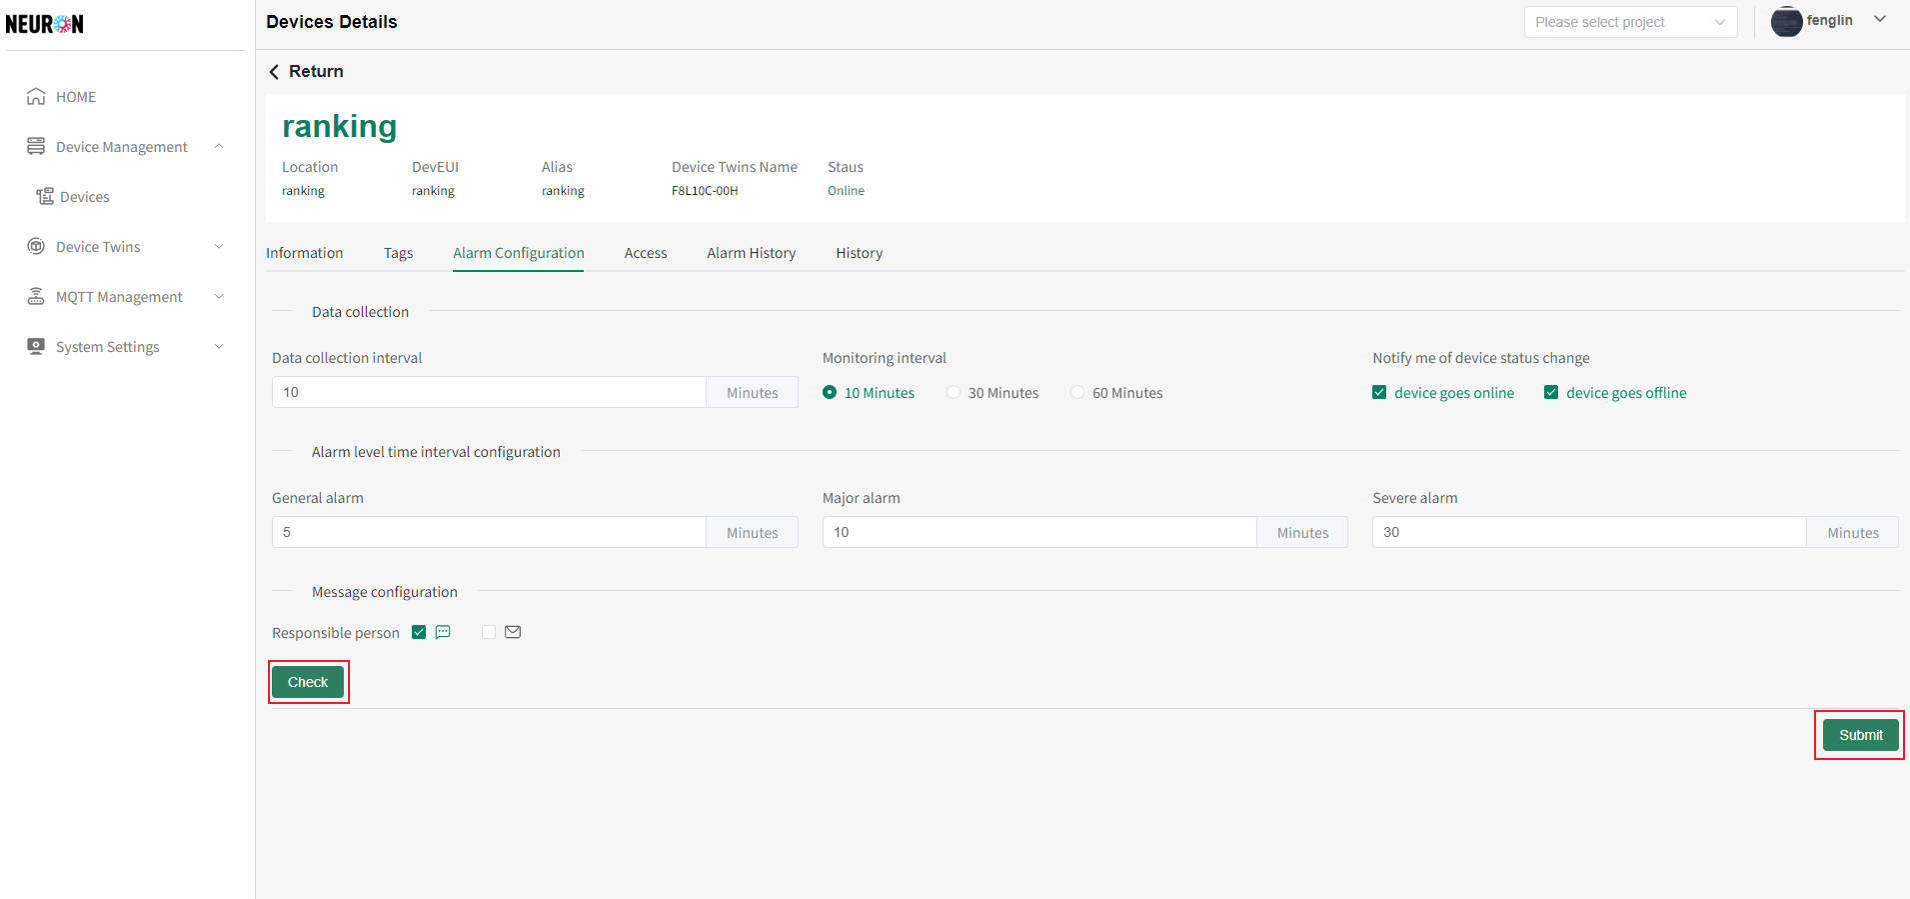
The offline alarm notification of the device is a registered account of the system, and one device can be configured with one or more personnel to receive the message
On the alarm page, click the "Check" button to open the personnel list page, as shown below
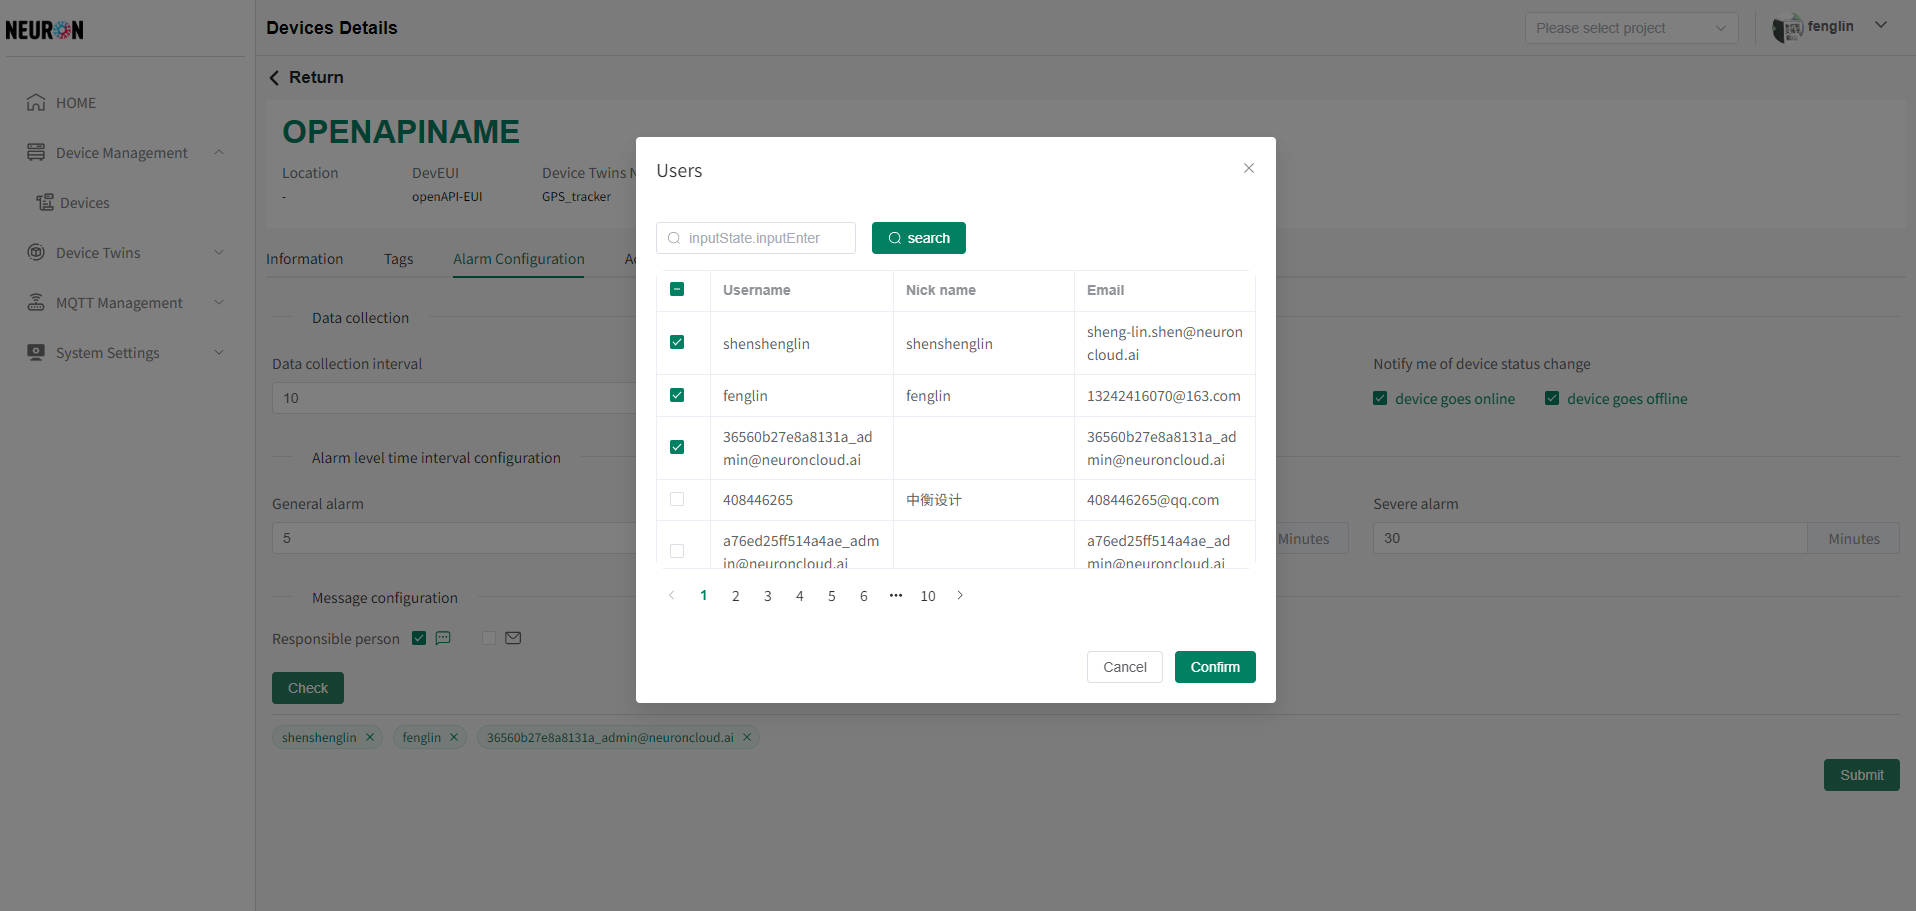
 As shown in the figure above, on the personnel list page, check the required personnel and click the "Confirm" button to complete the personnel configuration, as shown in the figure below
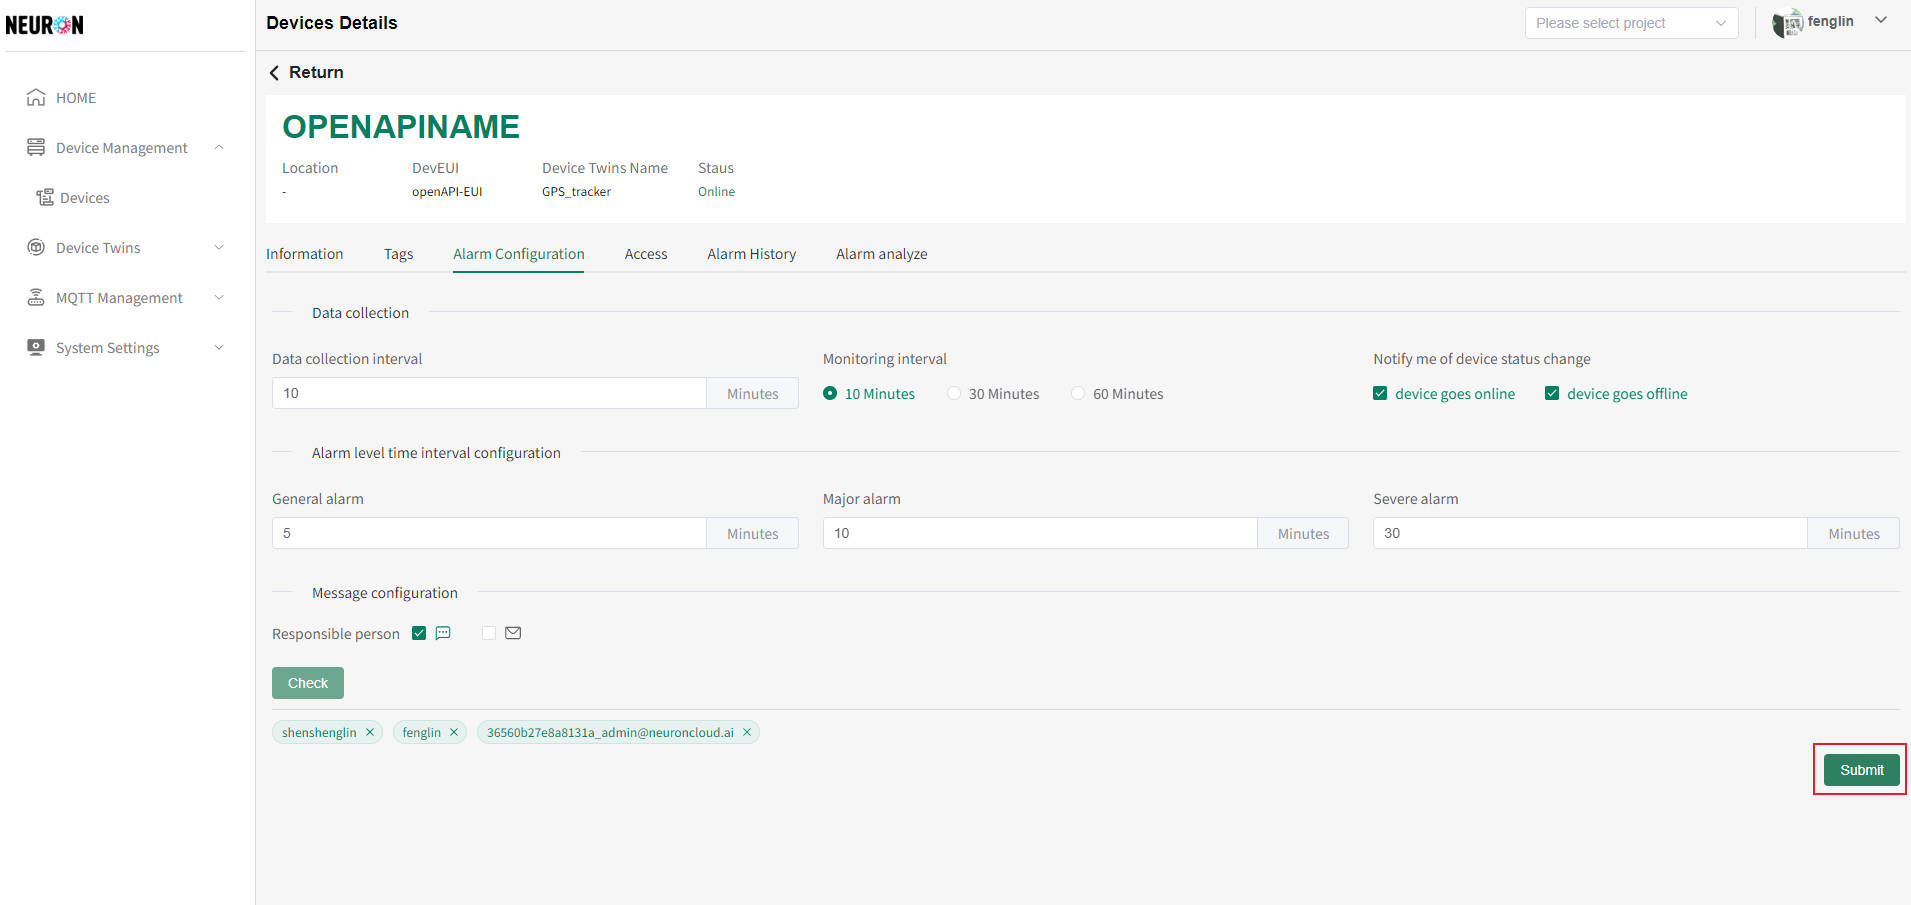
 As shown in the above figure, click on the interface to submit and complete the configuration of device alarms, as shown in the following figure
Device Access
The device access information displays the current method of device access to the system (the system supports LoRaWAN, MQTT, OpenAPI), which can be used to troubleshoot device issues in case of abnormal device situations
On the device details page, click on the "Access" menu to enter the device access page, as shown below
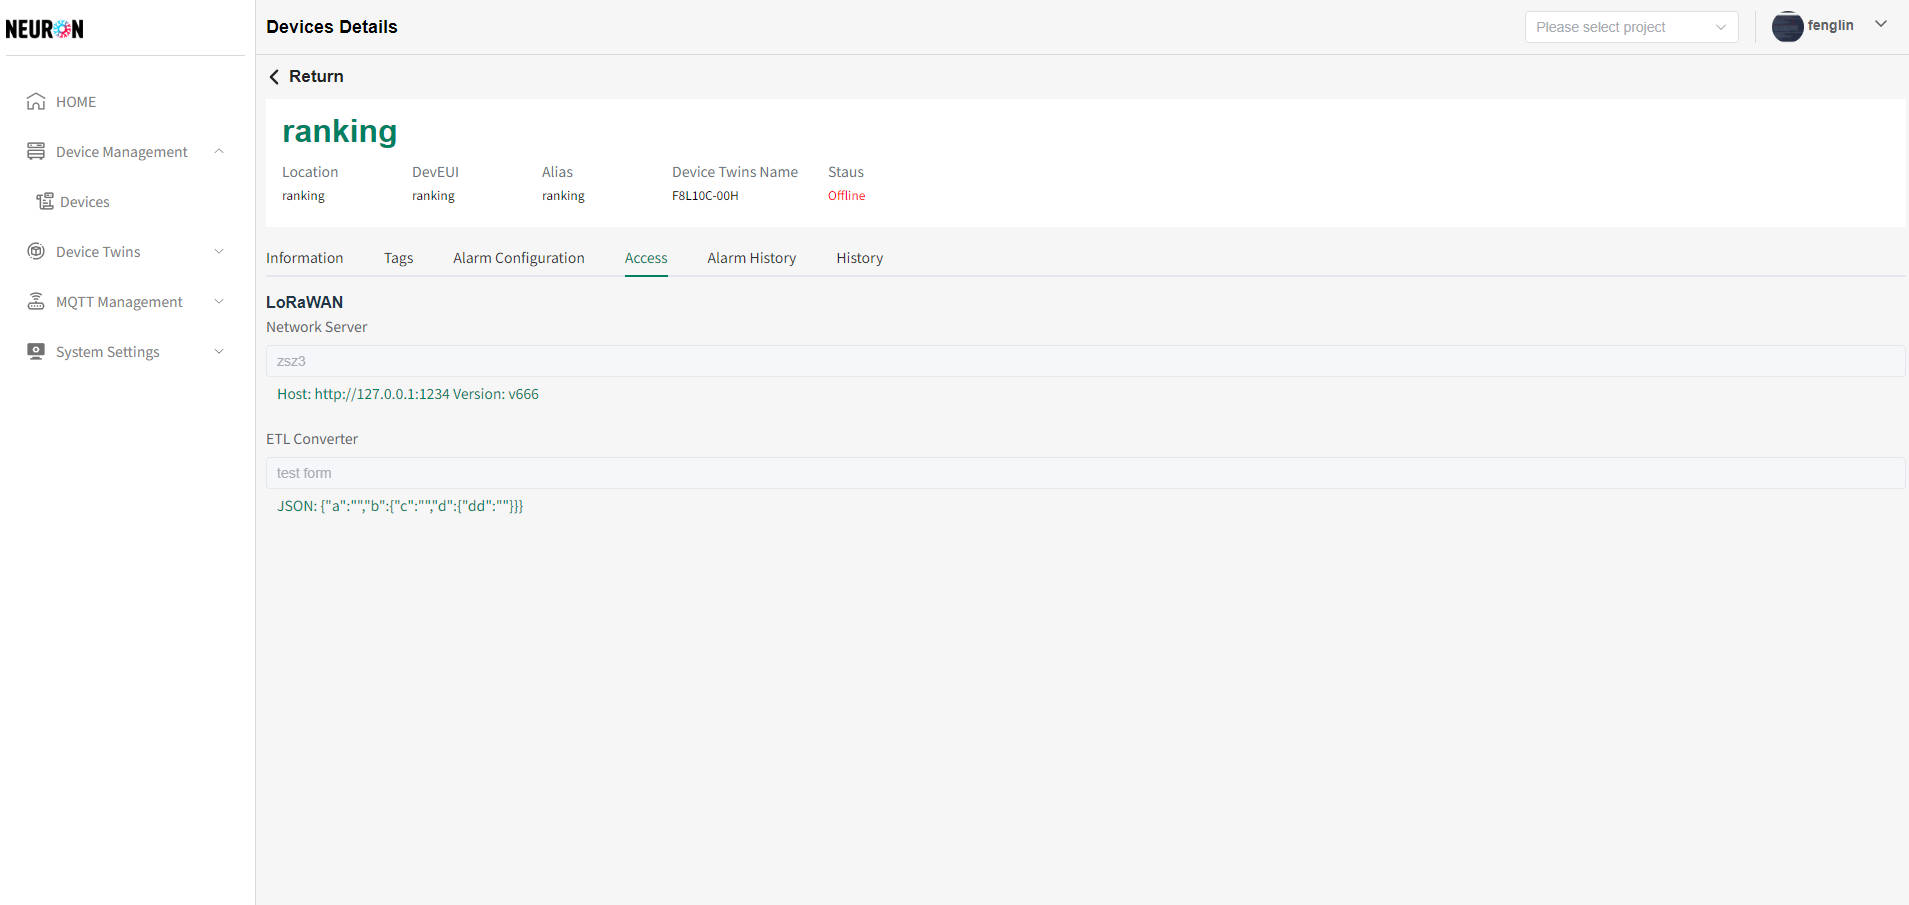
- LoRaWAN access
LoRaWAN is a commonly used access method for IoT devices. The system supports standard ChirpStackV3 or V4 formats, as well as custom data formats. On this page, you can view which MQTT server, topic, and data format the device is sending, and what data format it is using for push notifications

- MQTT access
The MQTT method can connect to both IoT and non IoT devices. On this page, you can view which MQTT server, topic, and data format the device is sending, as well as the data format used for push notifications
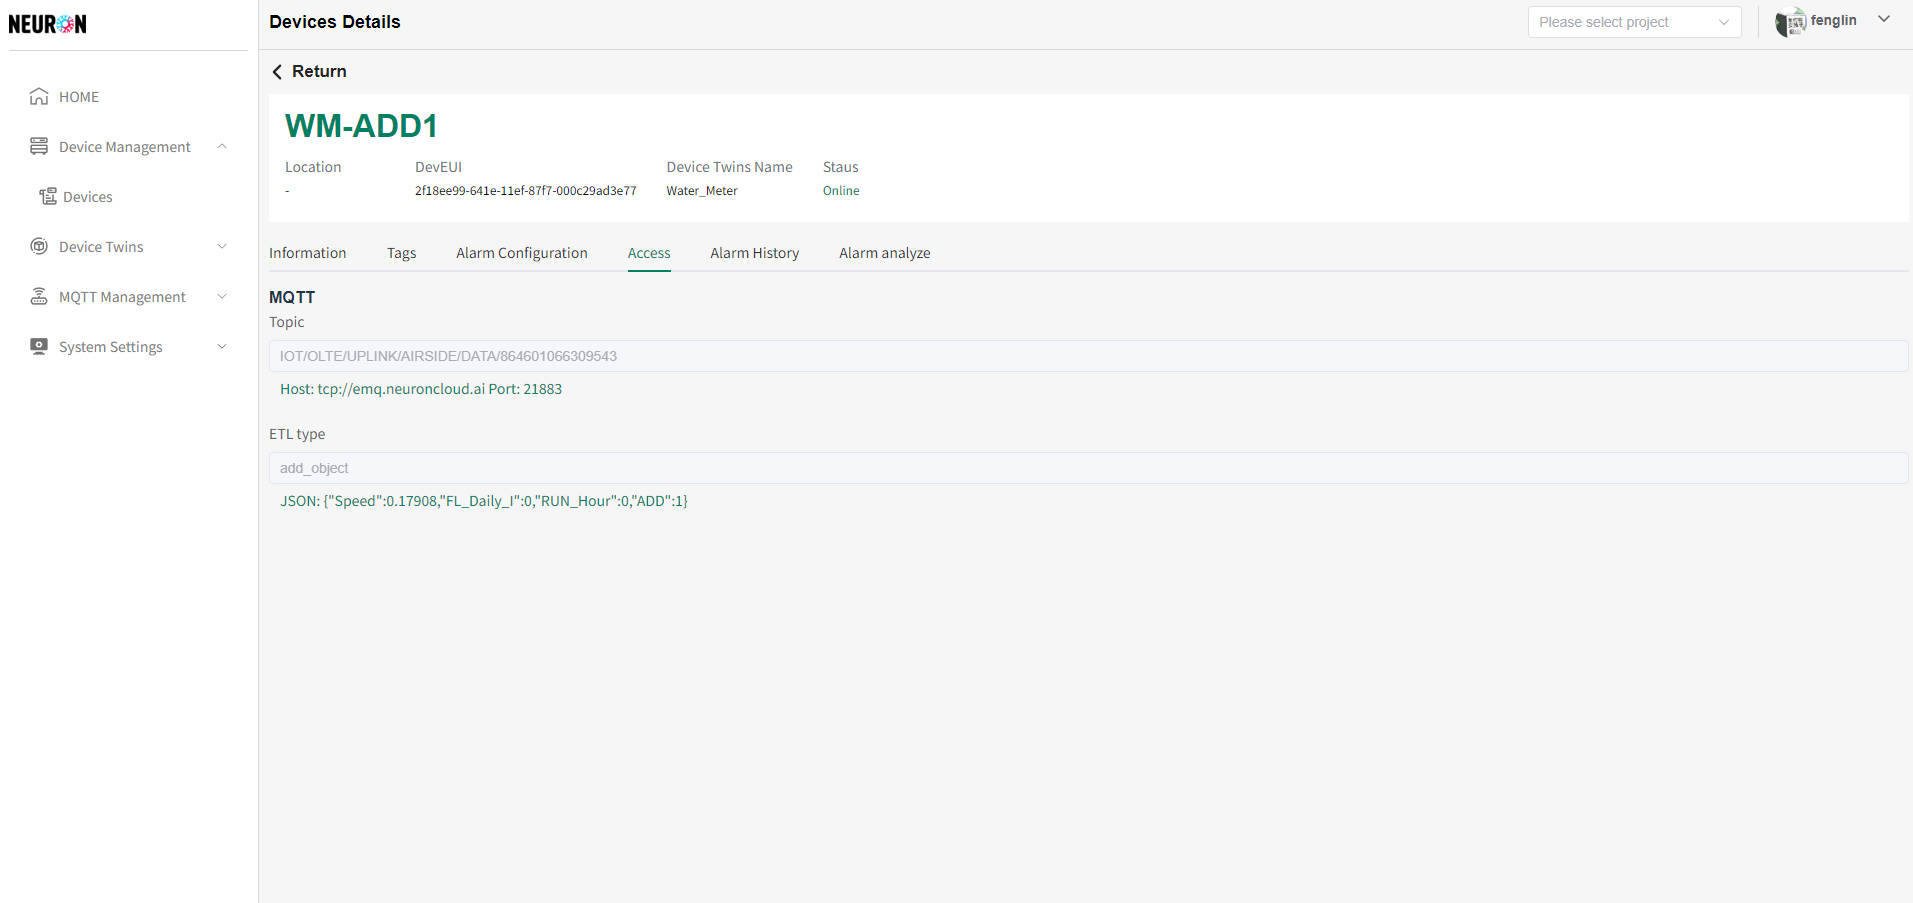
- OpenAPI access
The OpenAPI method can connect to both IoT and non IoT devices. On this page, you can view which token the device is using for pushing device data, etc
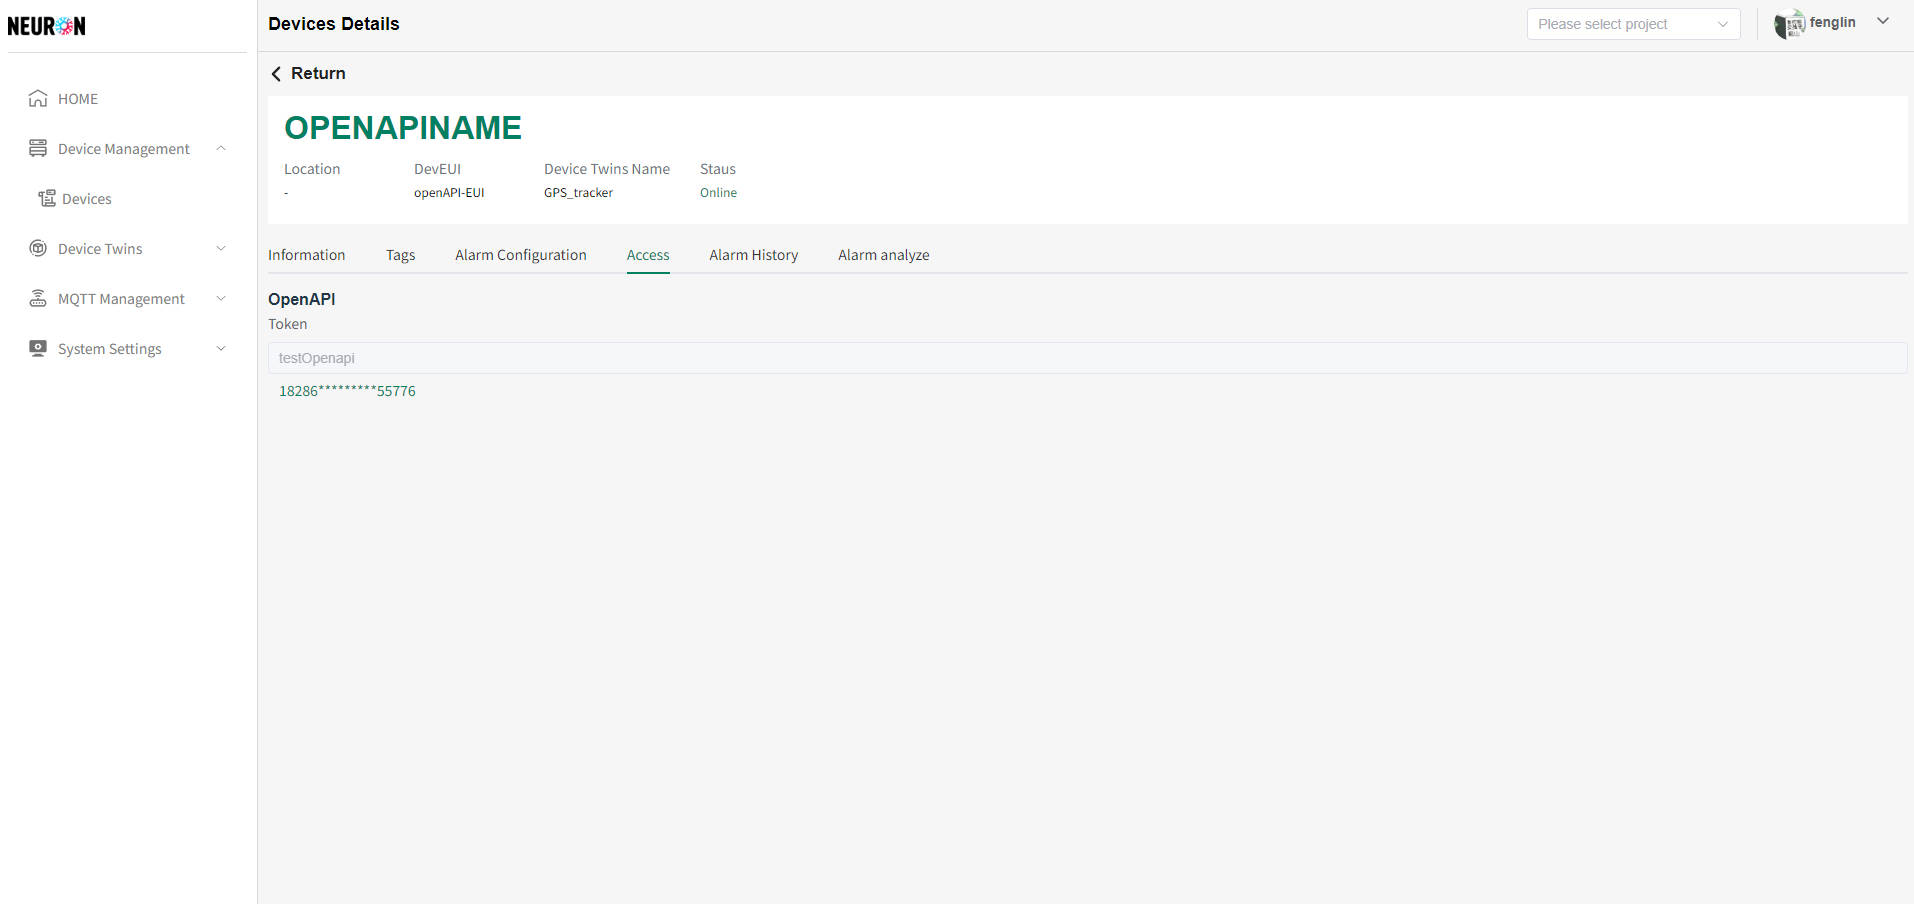
Device Alarm History
The device alarm history allows you to view all alarm messages of the device, as well as the status of message transmission
- View message list
On the device details page, click on the "Alarm History" menu in the menu bar to enter the device alarm history page, as shown below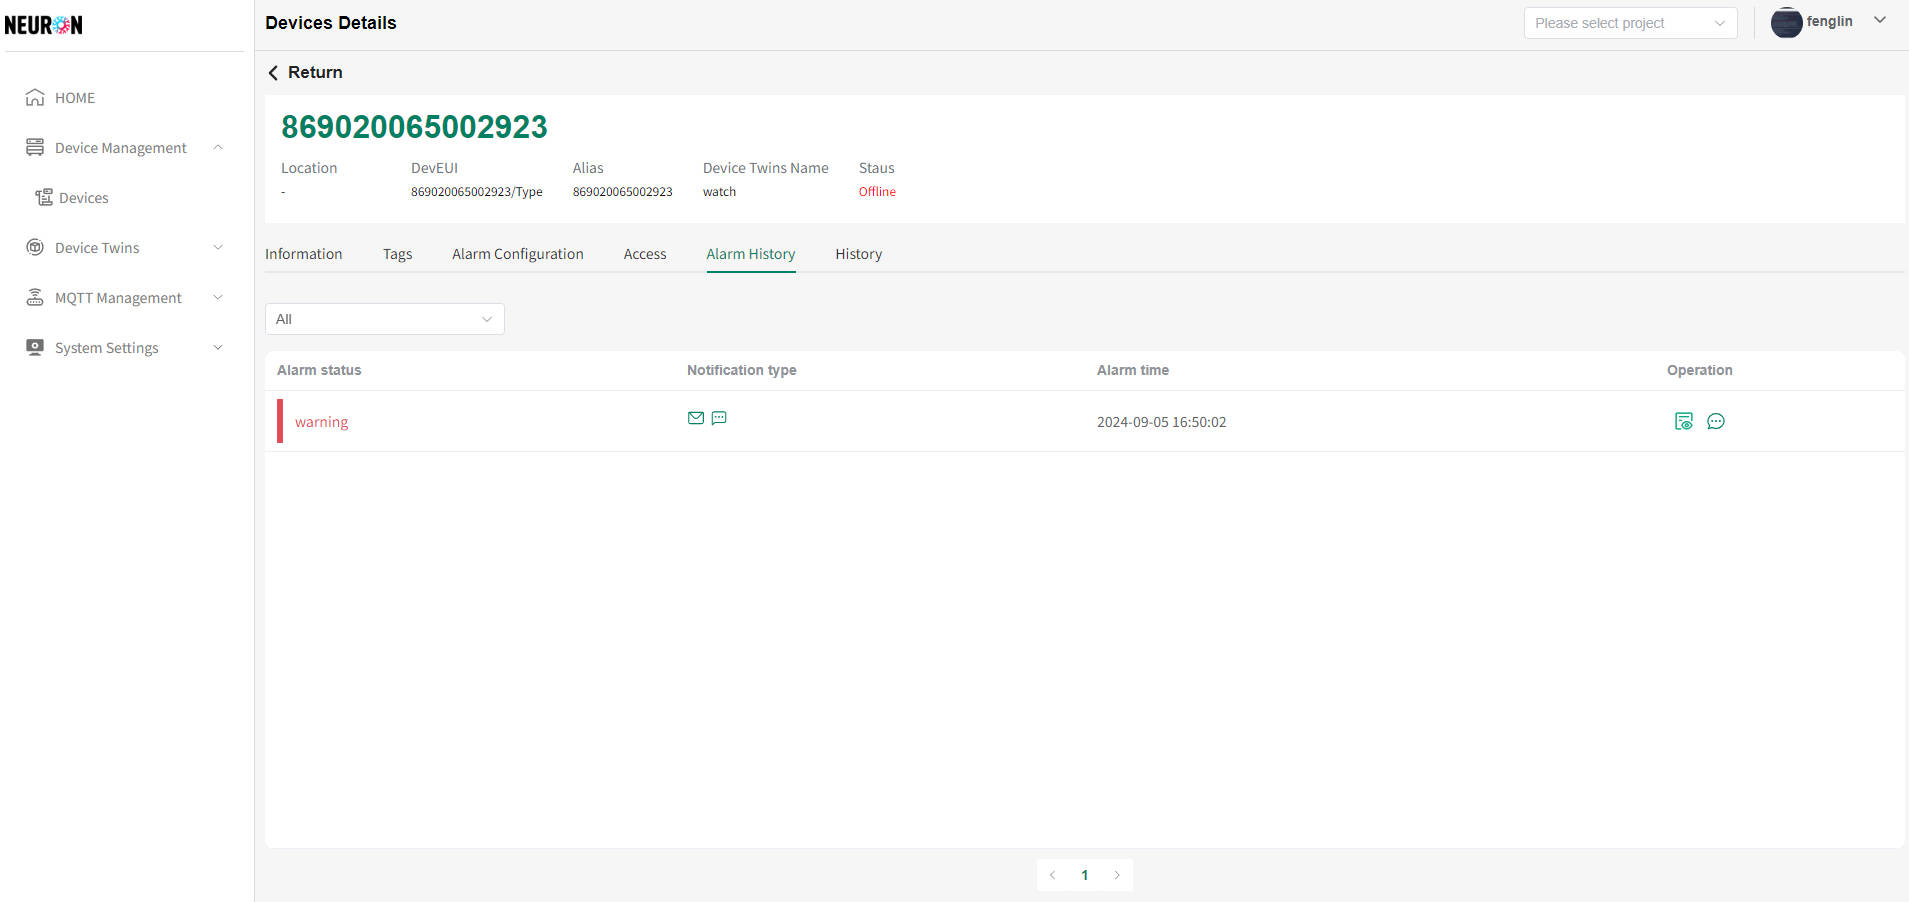
- View message sending details
On the device details alarm history page, click the "Details" button on the right side of the alarm line that needs to be viewed, as shown in the following figure ! [Image] (../../img/Device_detail_alarm_detail. jpg) On the device details alarm history page, move the mouse over the message icon to view the current alarm message content, as shown in the following figure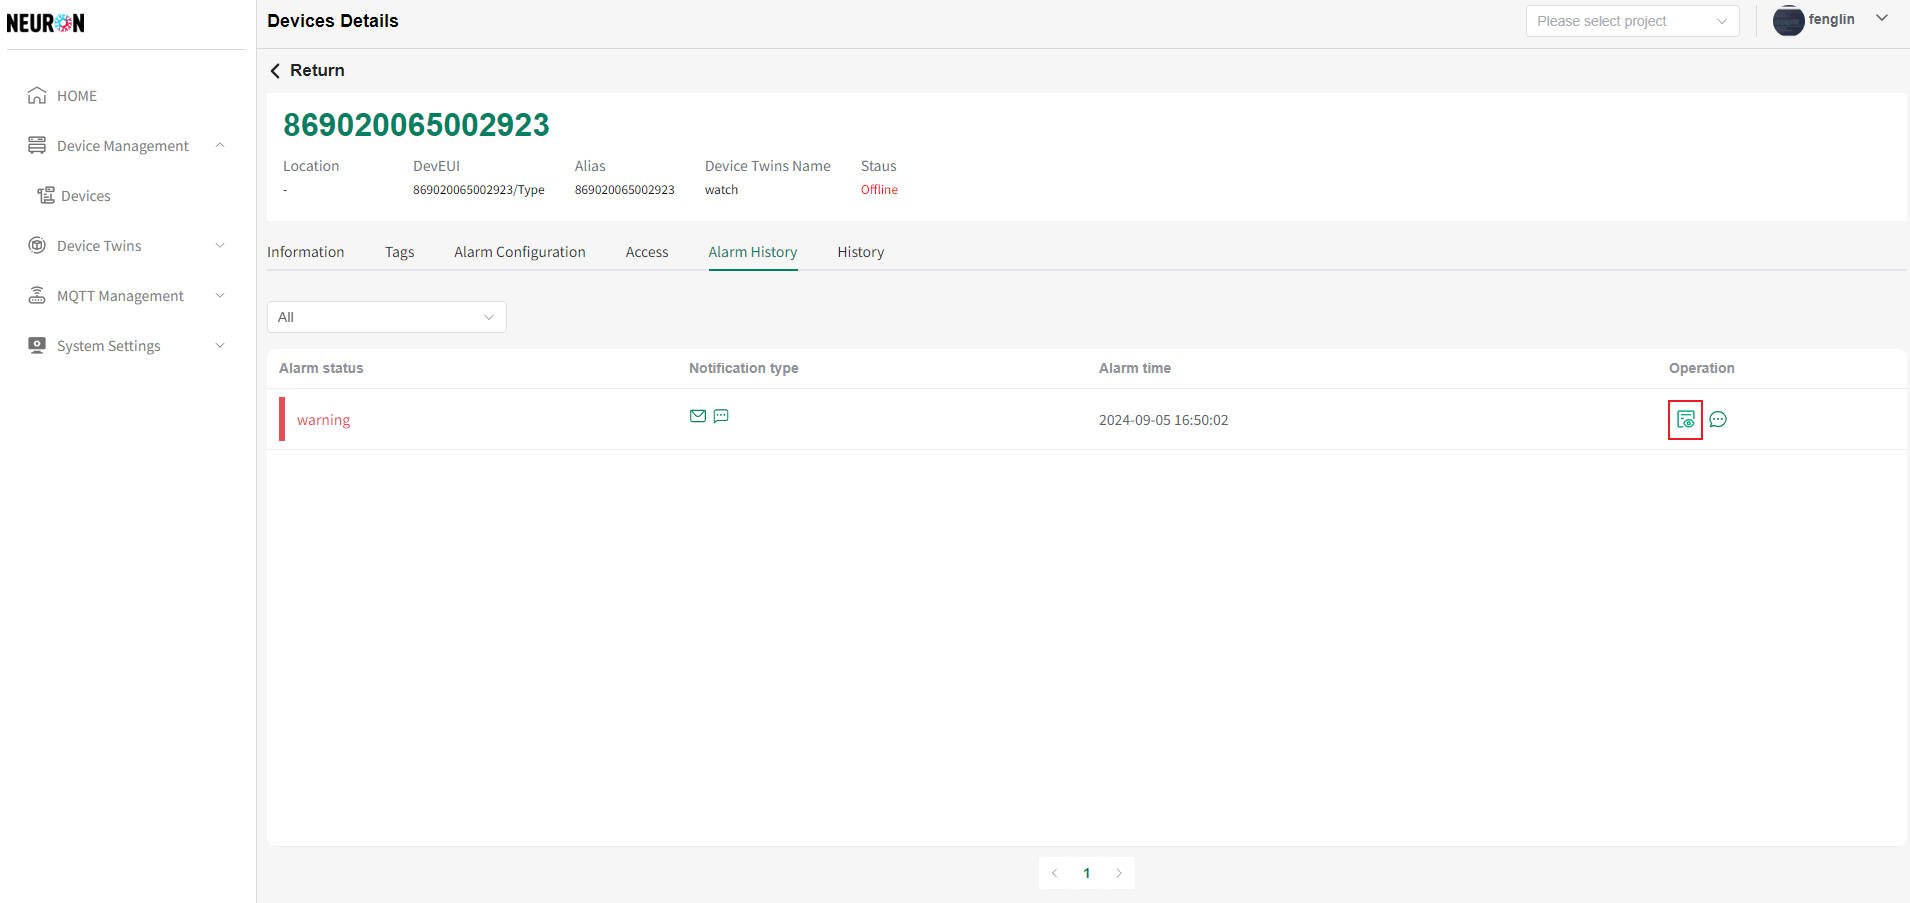 The device alarm history details are divided into two types: email sending details and mobile SMS sending details. The default is email sending details
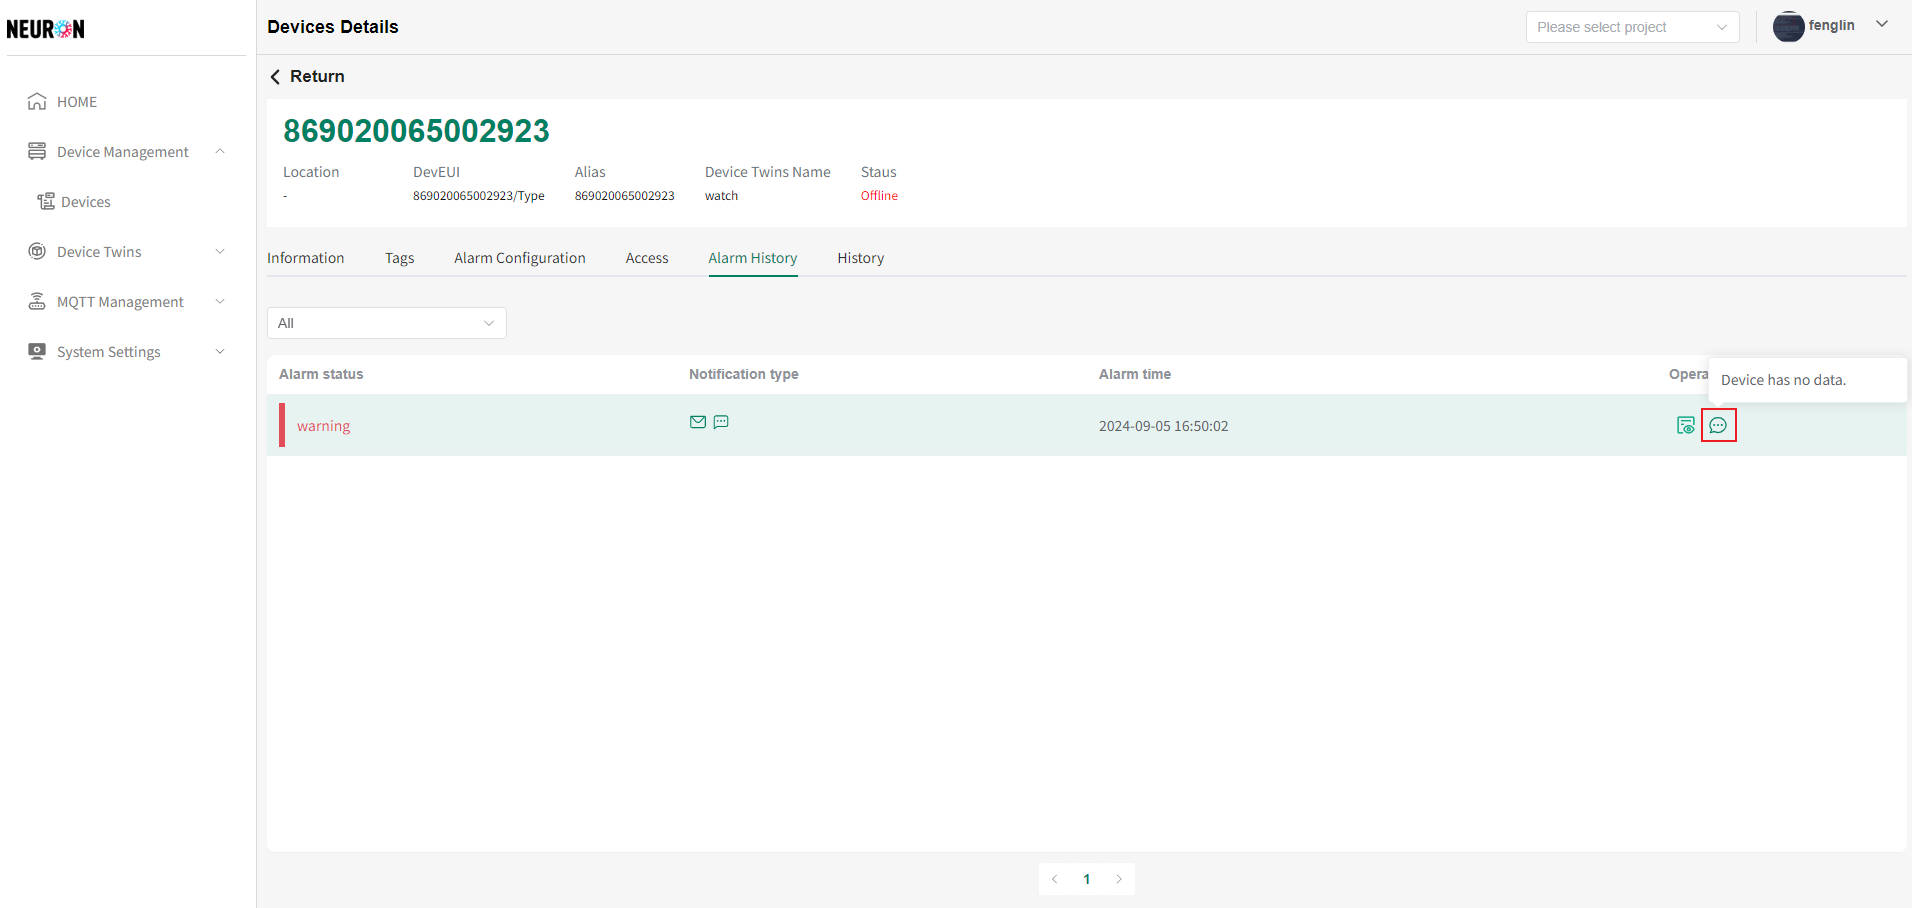
The device alarm history details are divided into two types: email sending details and mobile SMS sending details. The default is email sending details
- Email mailing list
The device alarm history details can be viewed by checking the personnel and time information sent when the device alarm was triggered, as shown in the following figure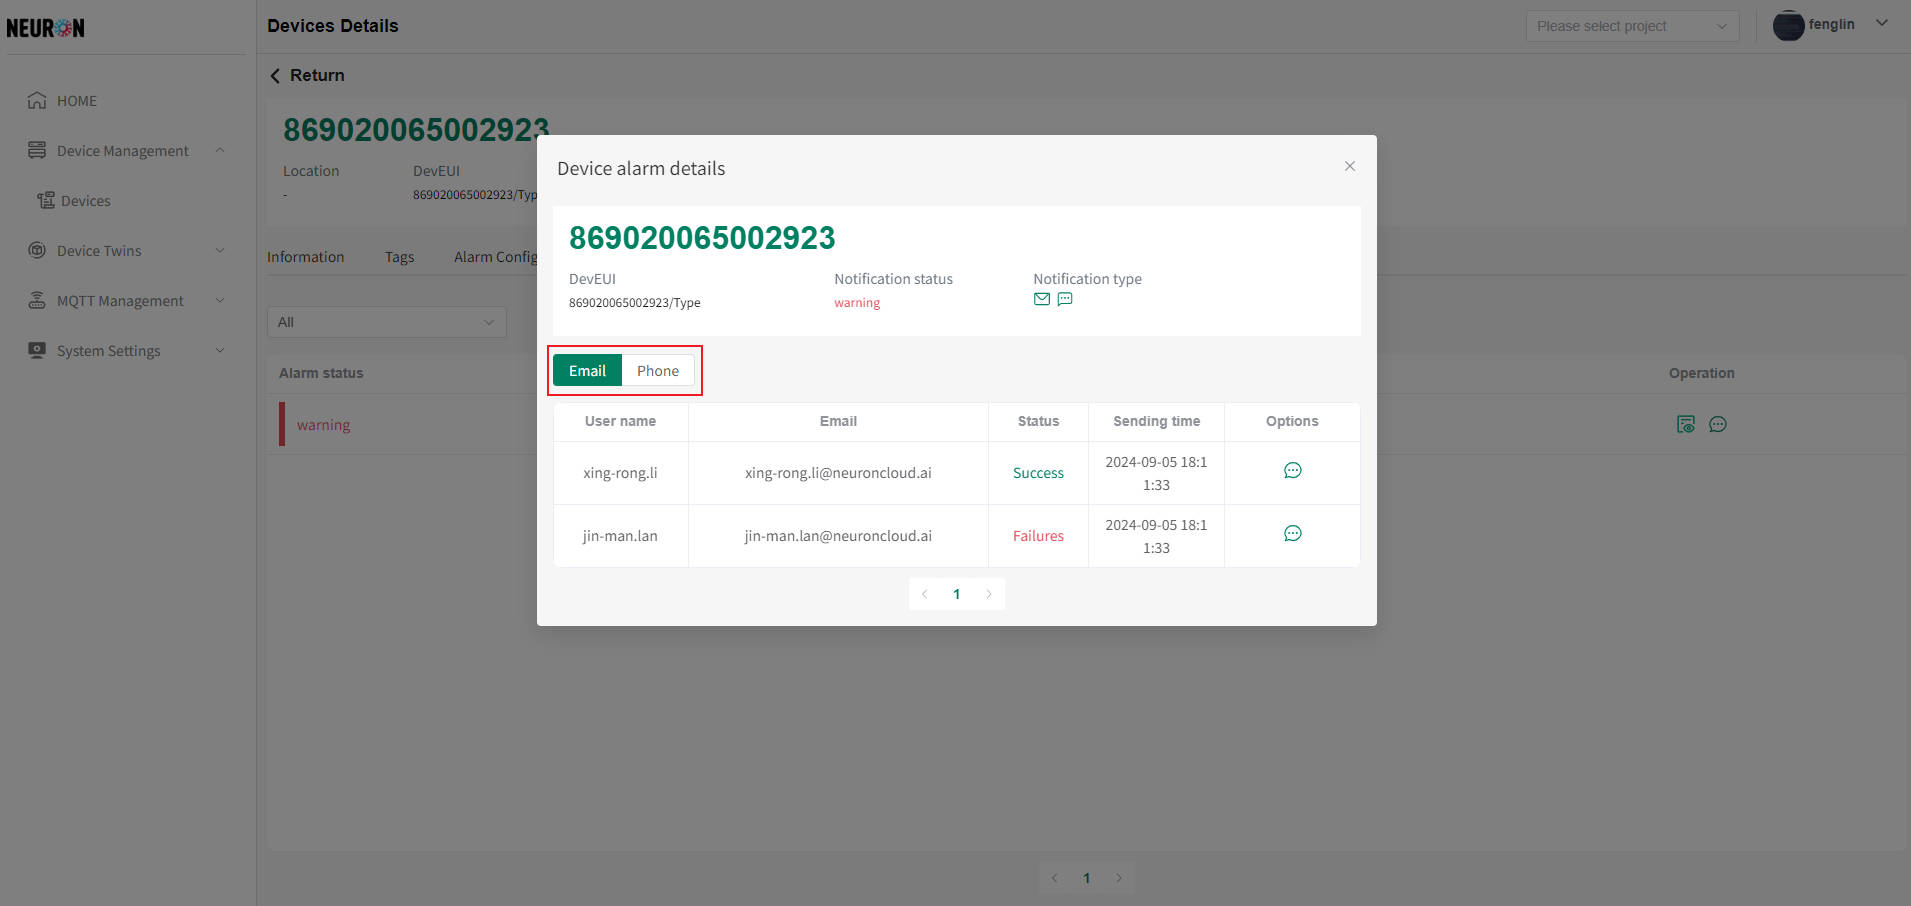 As shown in the above figure, hover the mouse over the message icon to view the sent information, as shown in the following figure
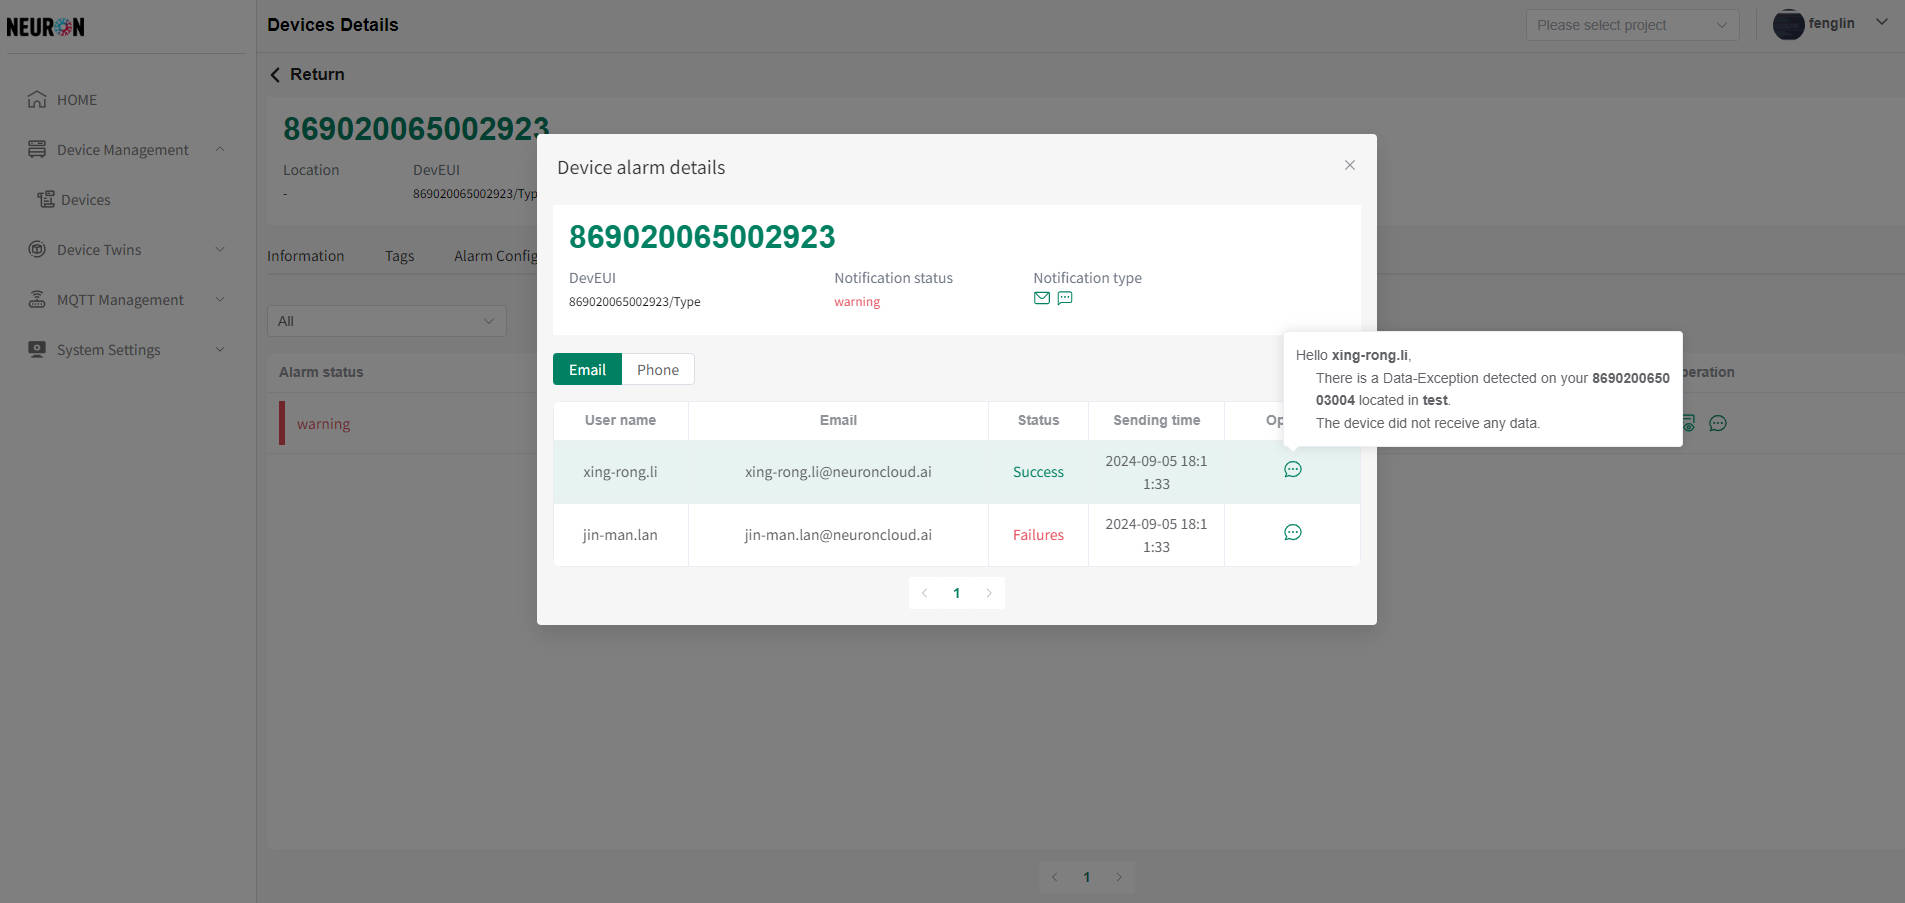
- Mobile SMS sending list
On the device alarm history detail page, click on the phone to switch to viewing SMS messages sent by the phone. Move the mouse over the message icon to view the sent messages, as shown in the following figure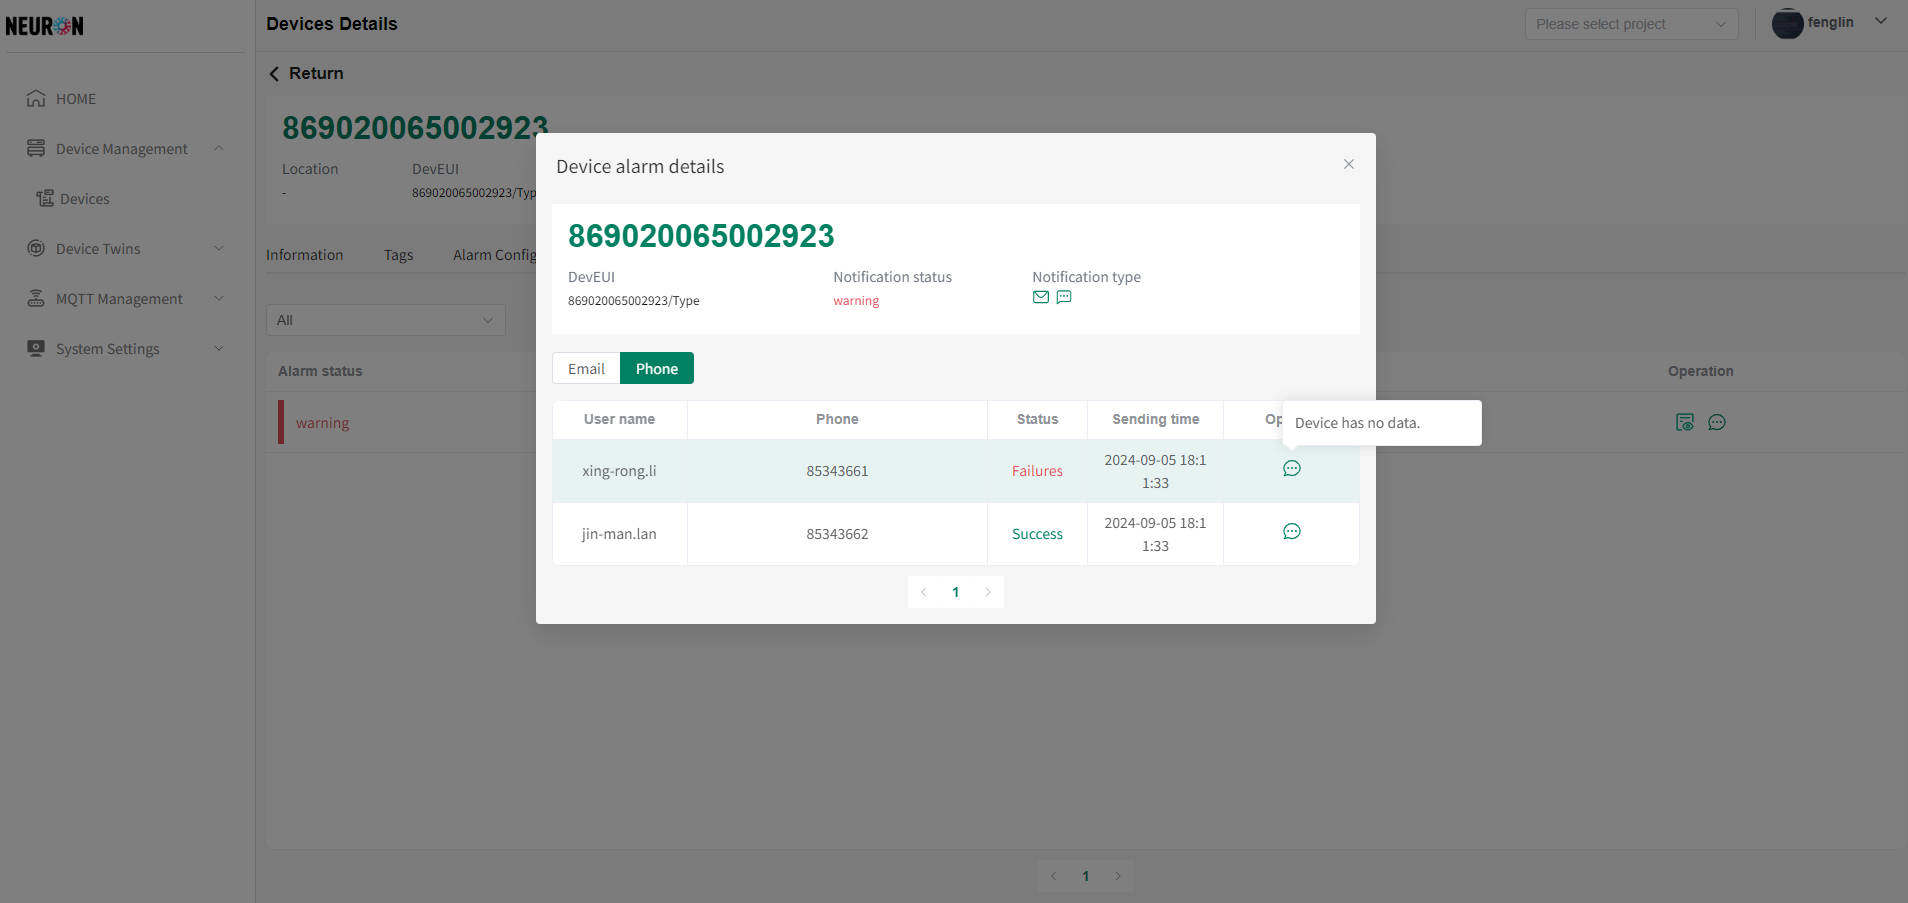
Device timing data
The timing data of the device can be viewed for all types of numbers and strings under the device
- Viewing digital time-series data
On the device details page, click on the "History" menu to enter the device timing data viewing page, as shown below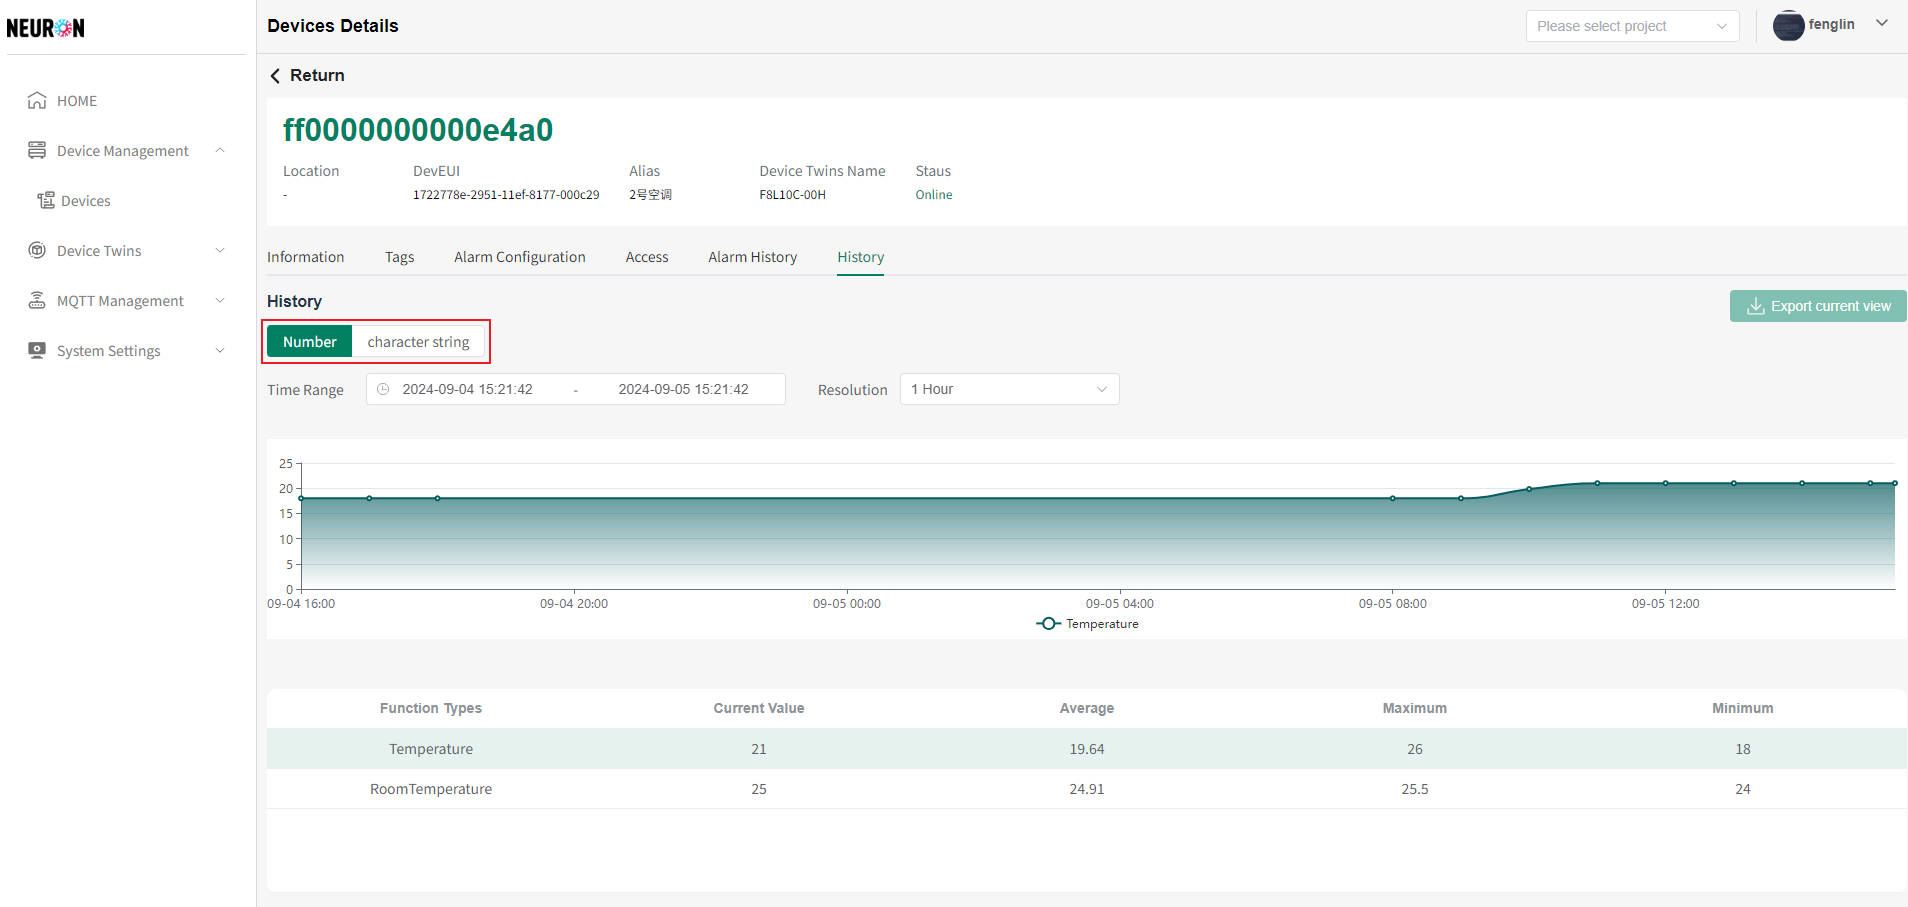
On the device timing digital query page, data queries for a single function point within a time range can be performed
As shown in the following figure, click on the single row of the "Function type" table for the device below, as shown below
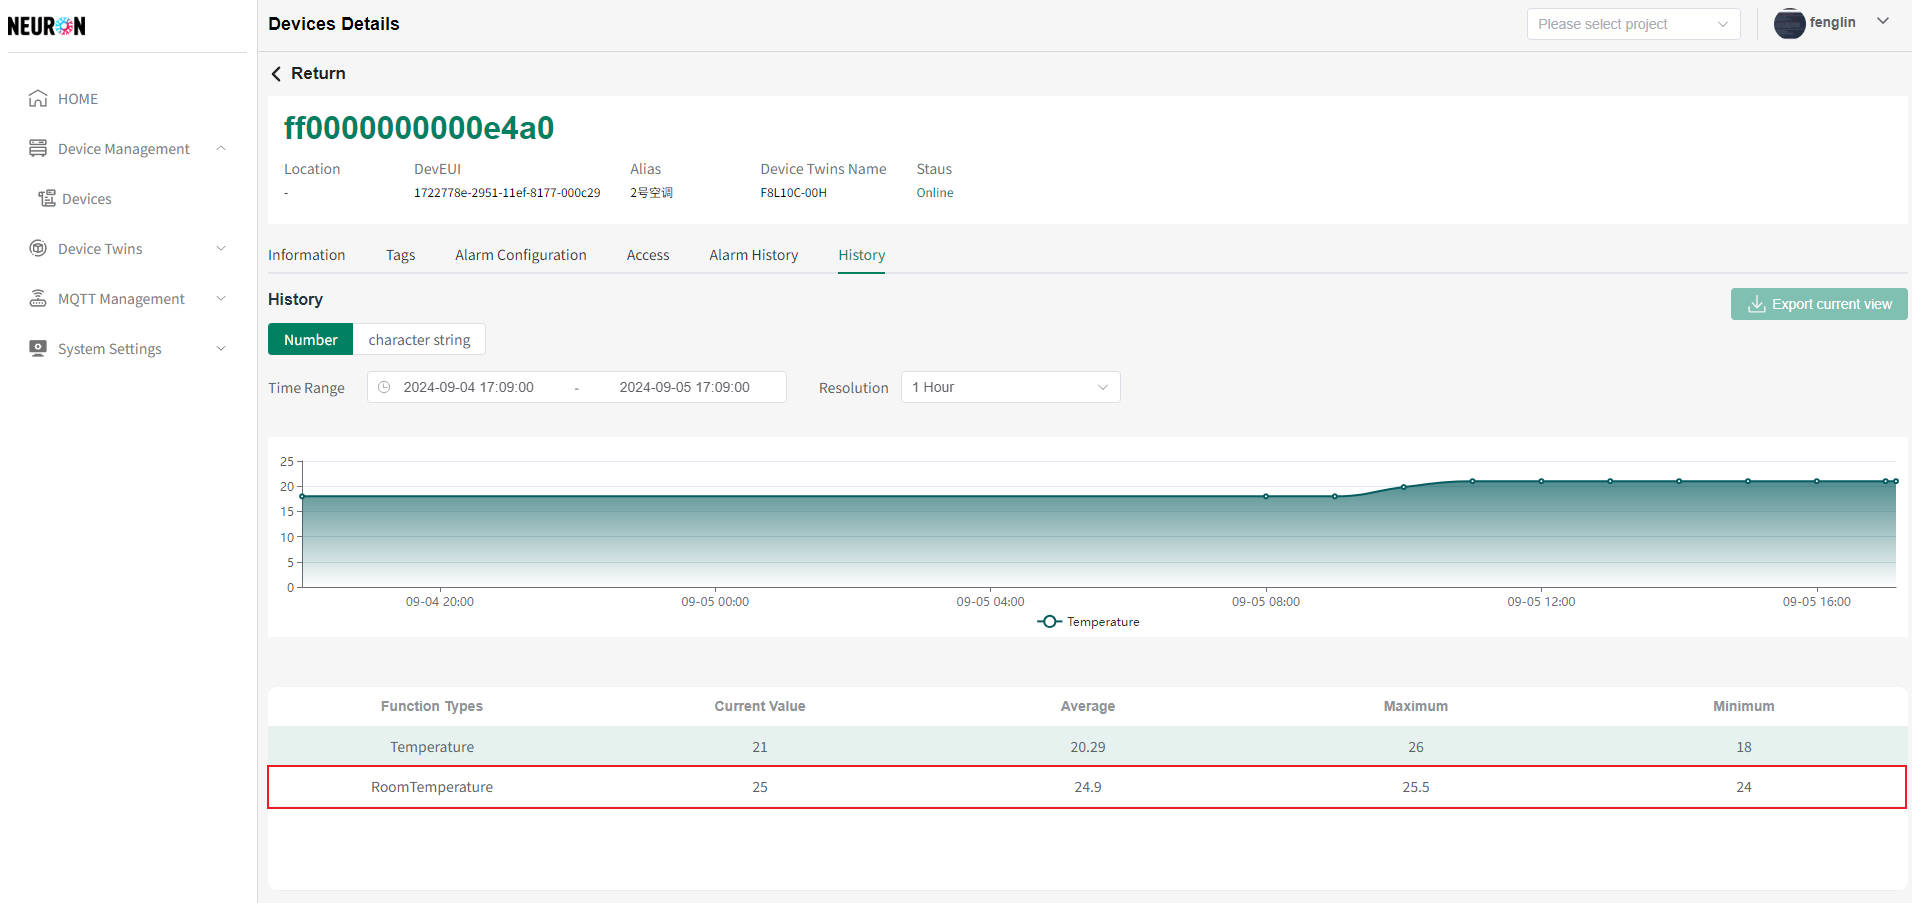 The system will switch to displaying the corresponding Function type data, as shown in the following figure
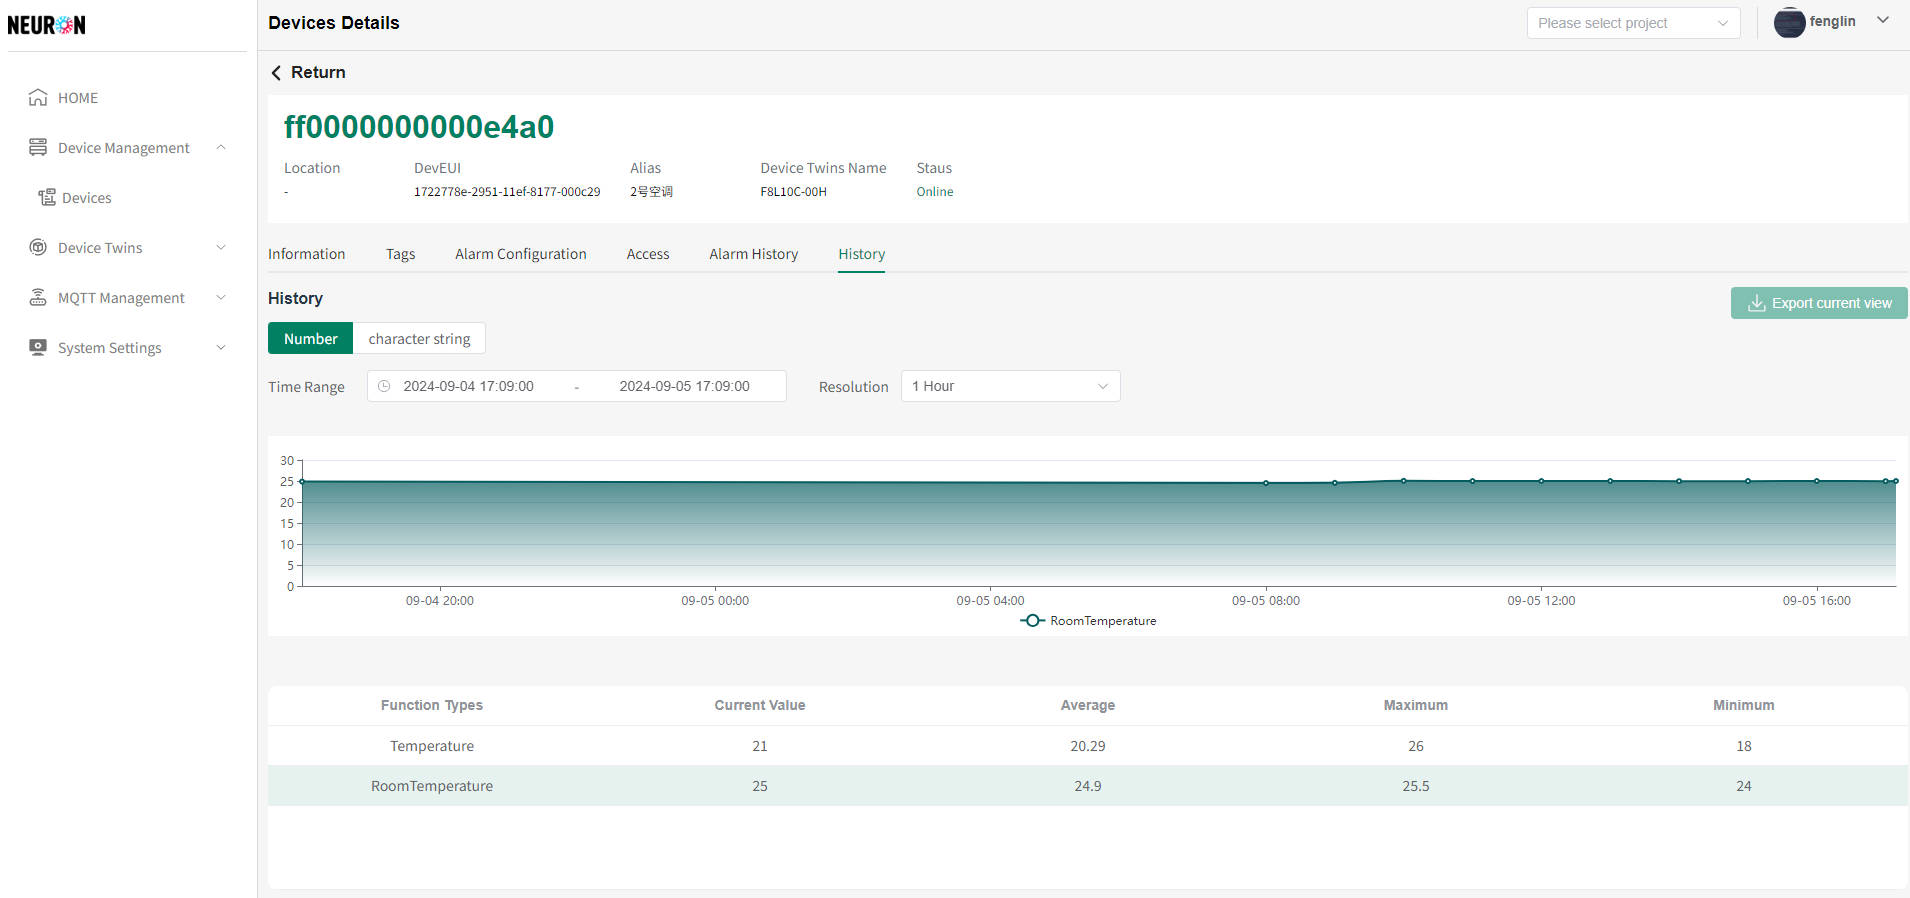
- Viewing Character Type Temporal Data
On the device details page, click on the "History" menu to enter the device timing data viewing page, as shown below As shown in the above figure, switching to character type allows for querying of all character type temporal data under the device, as shown in the following figure
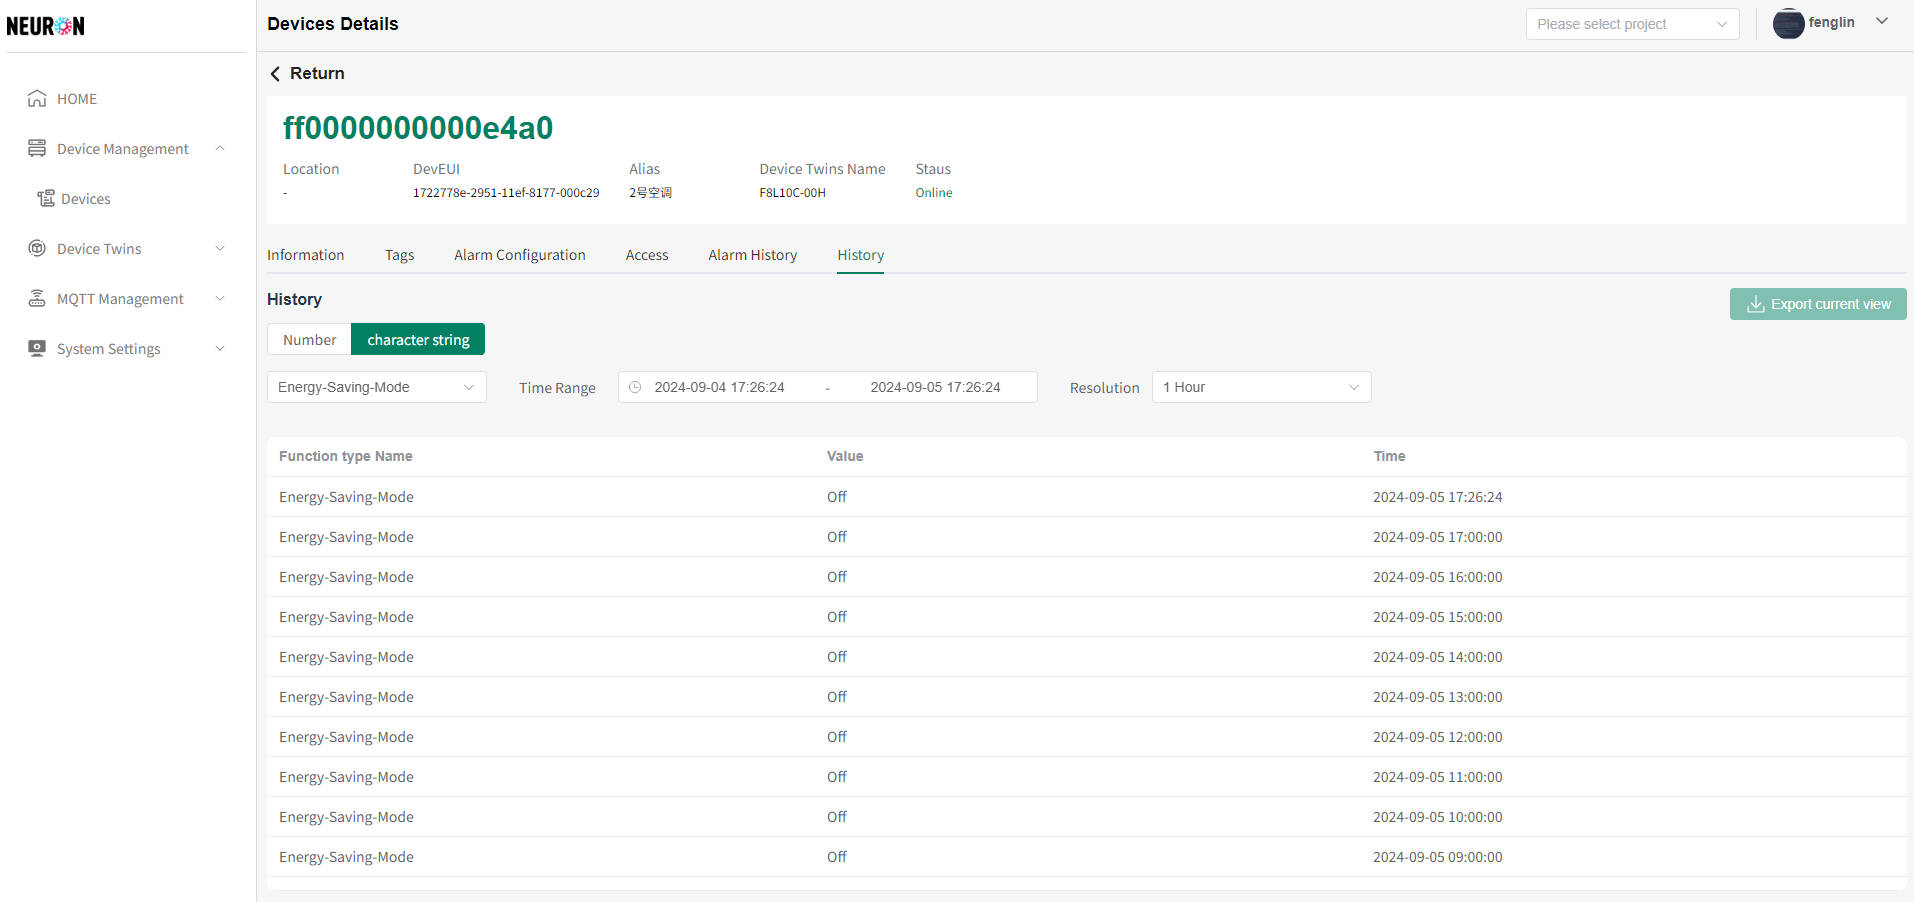
On the device timing string query page, data queries can be performed for a single functional point within a time range
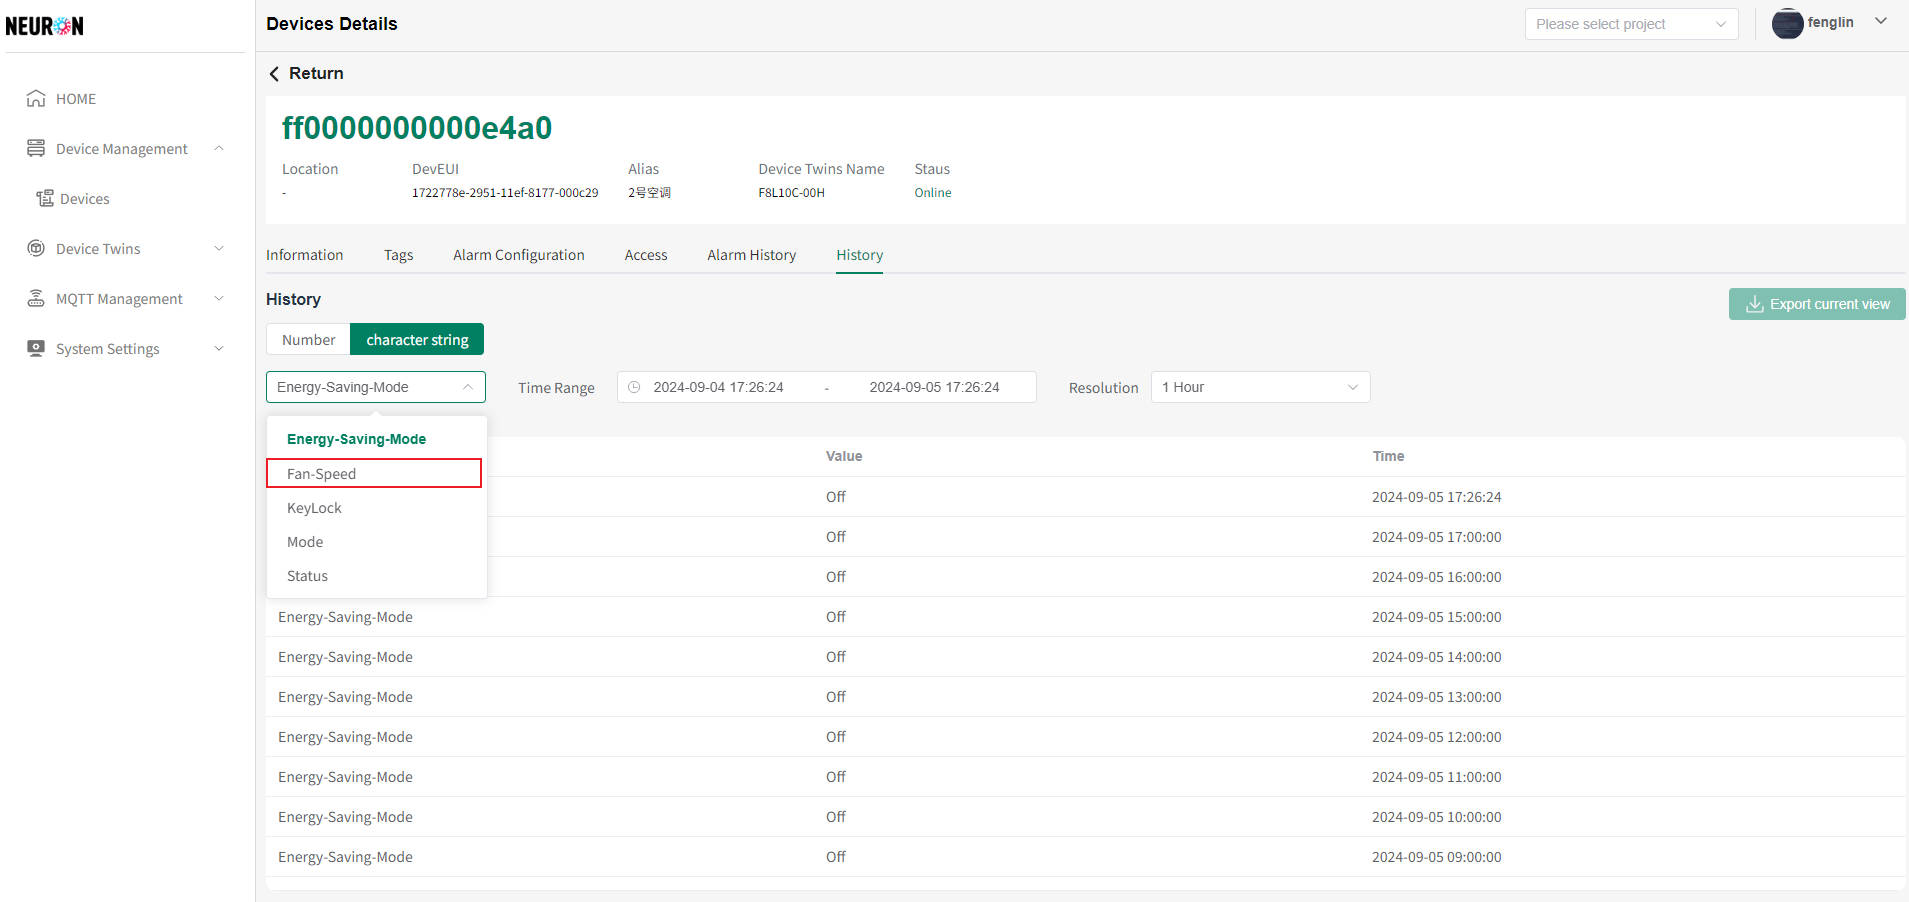
As shown in the following figure, by selecting the device Function type that needs to be viewed, multiple function point data can be viewed, as shown in the following figure
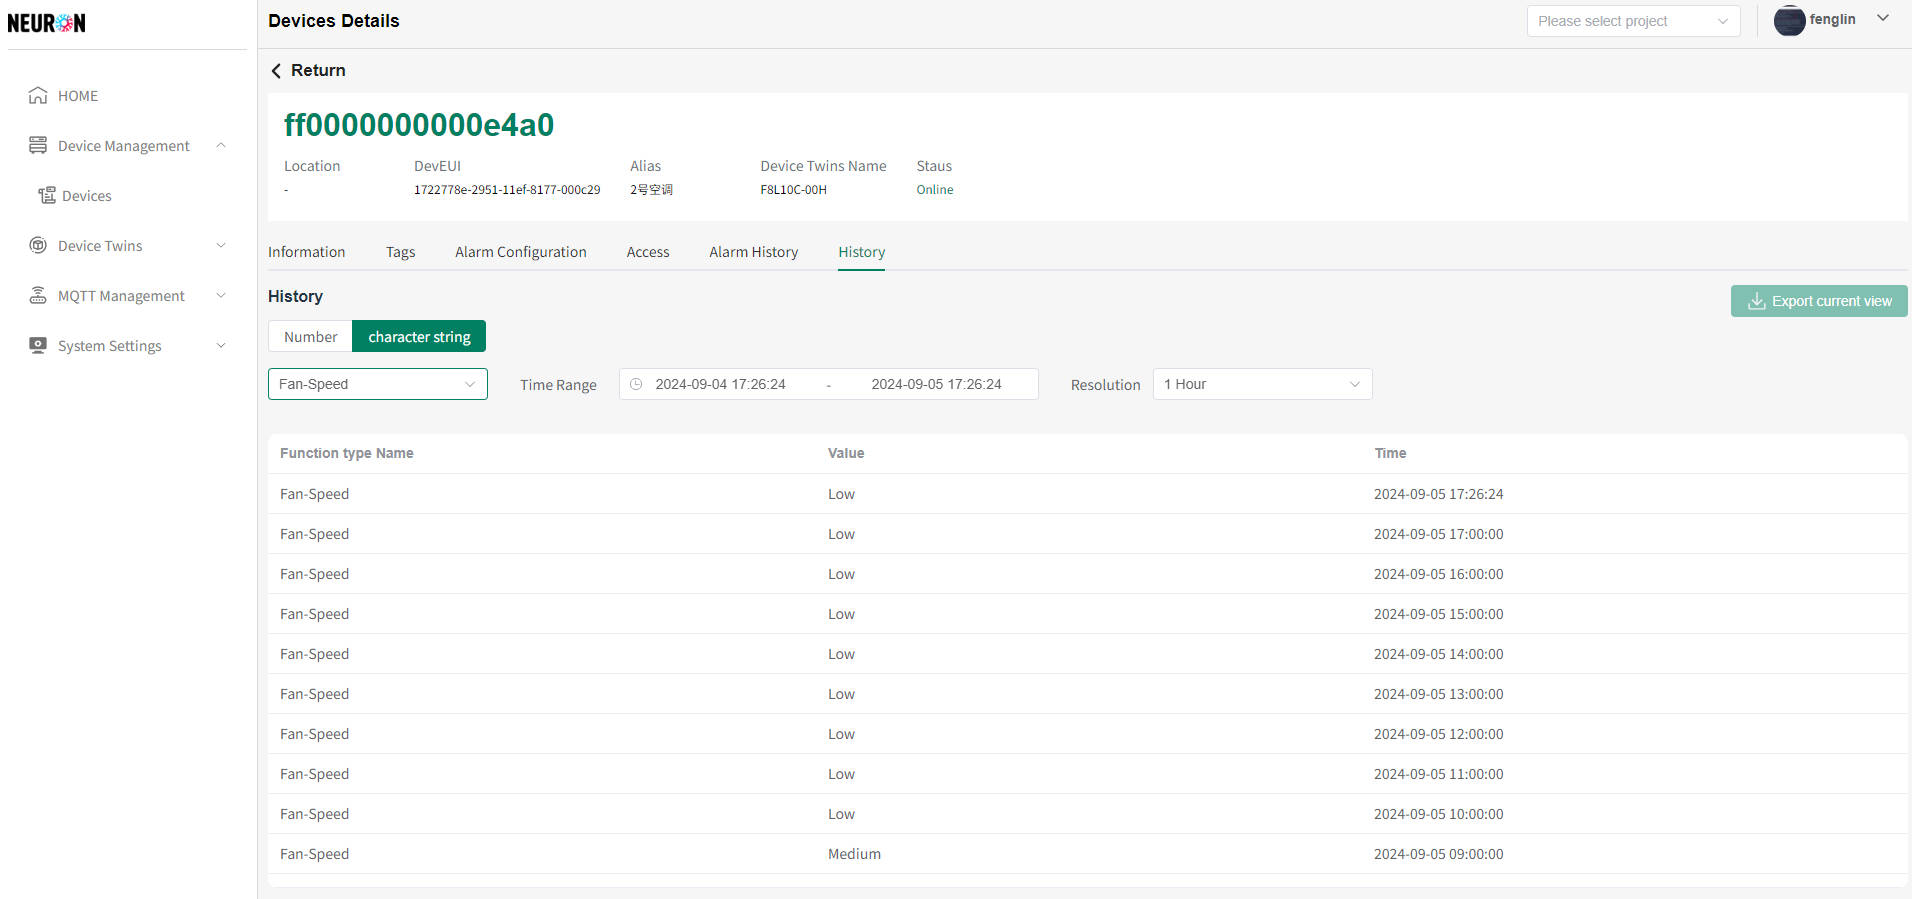
 As shown in the above figure, select different Function type values and switch the data displayed in the table below, as shown in the following figure
Delete Device
If the device has been successfully connected and the object model is marked incorrectly or the device name is entered incorrectly, the device can be deleted and reconnected. The system supports three ways of device deletion: IoT devices, non IoT devices, and API access devices. The device deletion operation is as follows
IoT Device Deletion
- Enter the device registration page
To access the device management page, please refer to Device Management
On the device management page, click the "Device Registration" button as shown in the following figure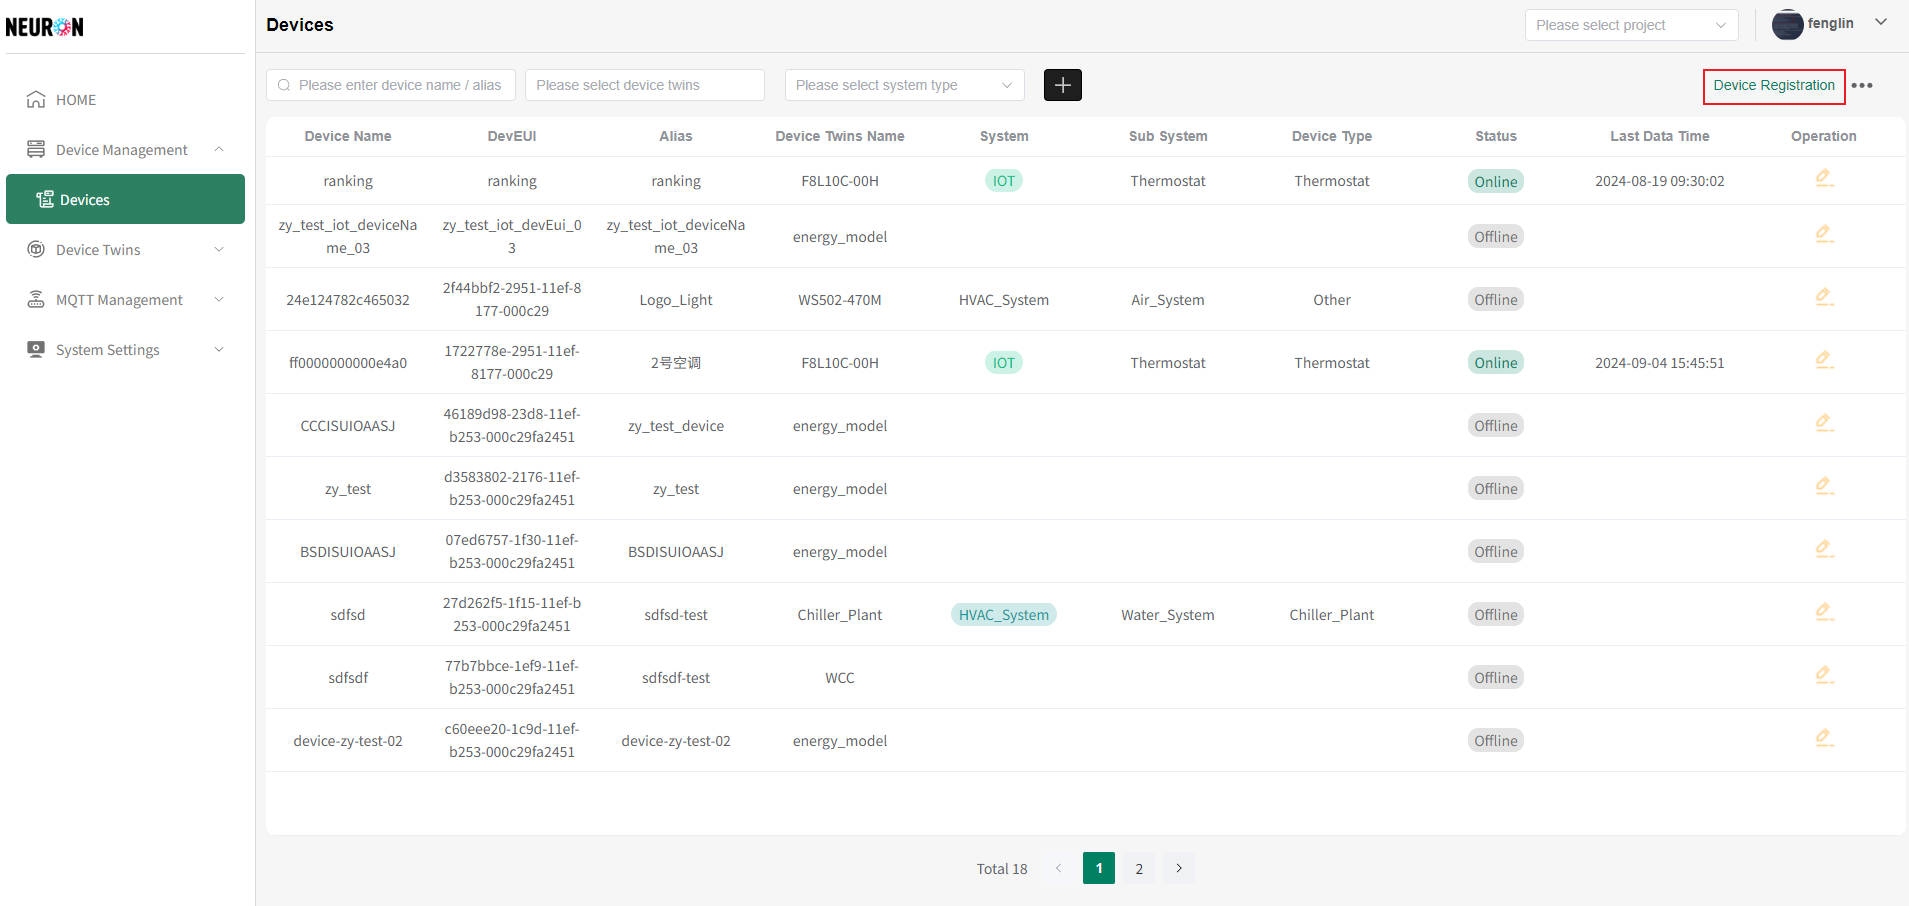 tip
tipThere are three types of registered devices on the device registration page, with IoT type devices being the default. IoT type devices support device name and device access status queries, as shown in the following figure
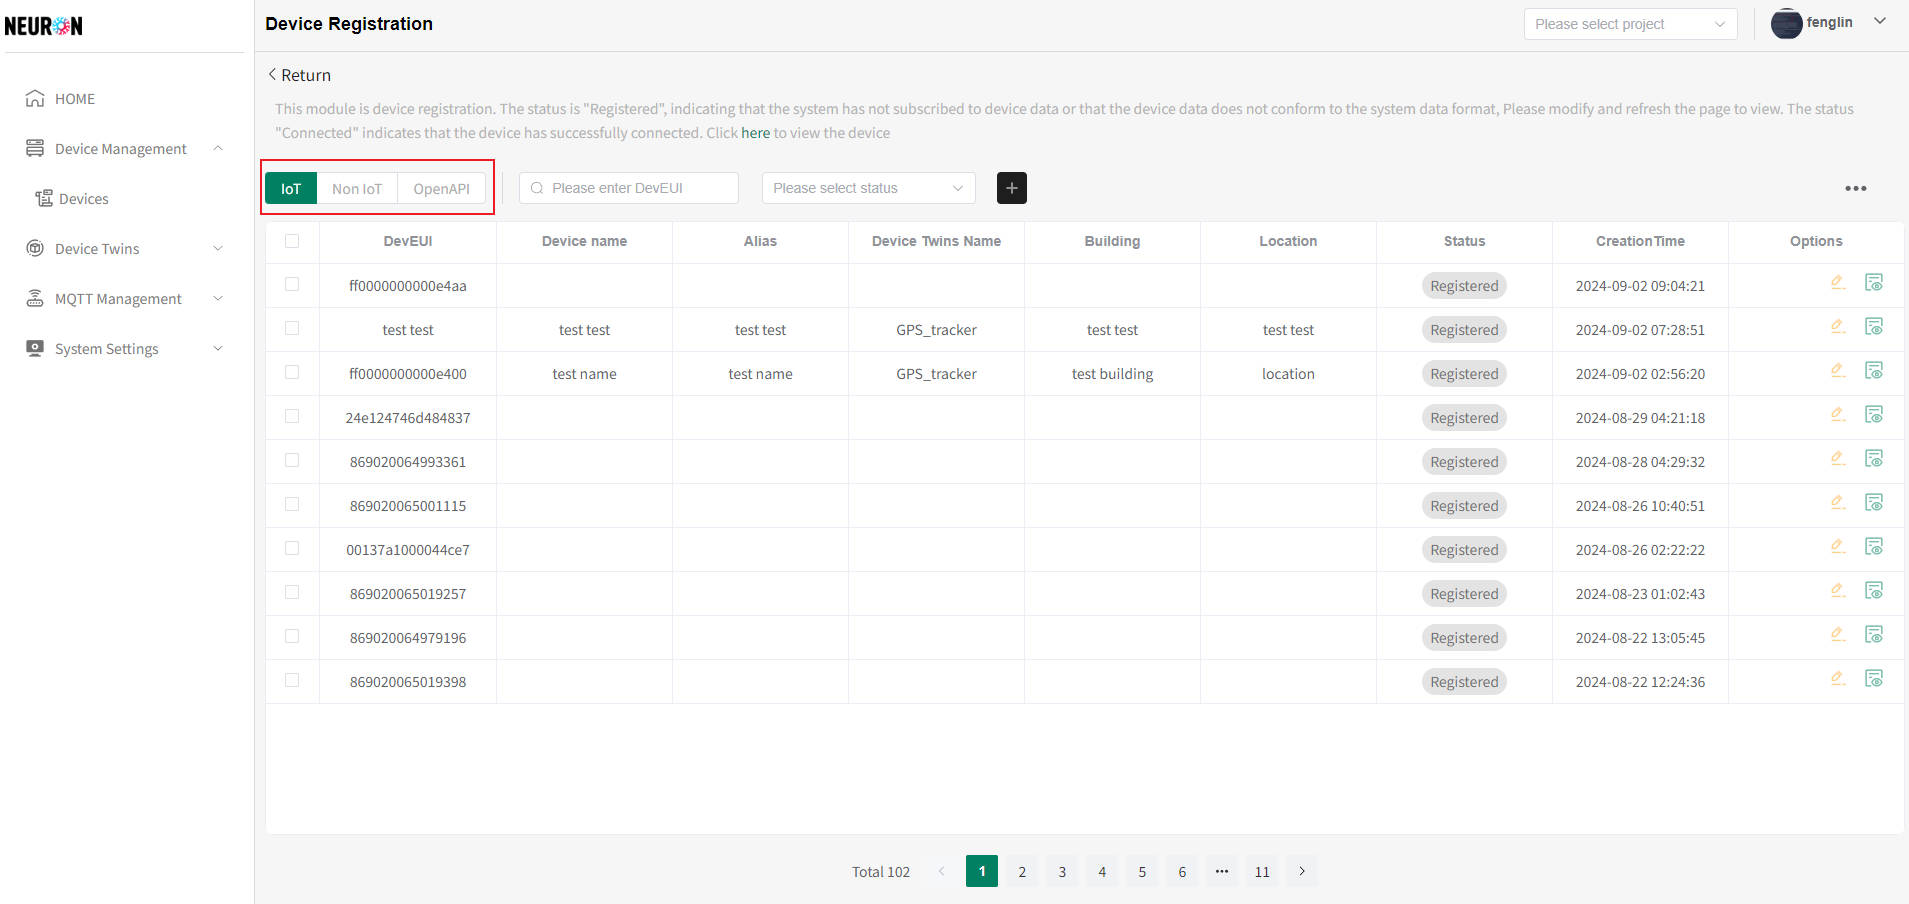
- Device deletion
tip
Device deletion supports both all device deletion and selecting device deletion
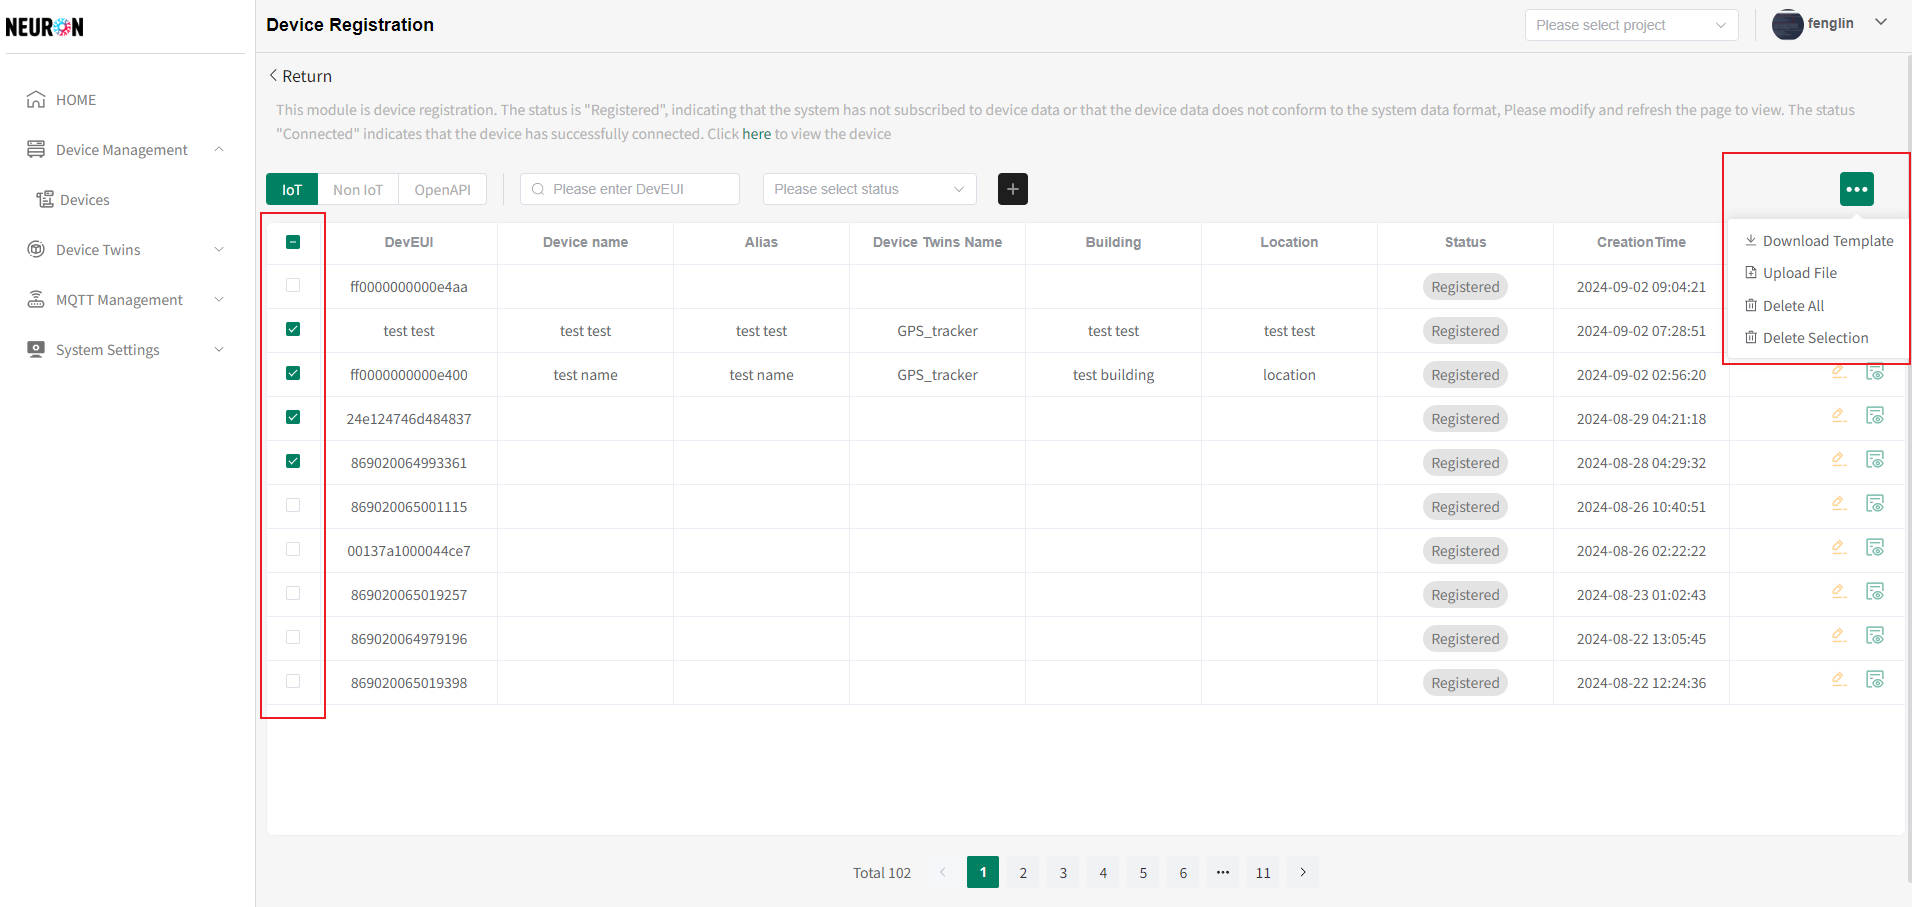
- Delete the selected device
As shown in the above figure, select the device that needs to be deleted, click on the menu bar on the right, choose "Delete Selection", and after the user confirms, the selected device can be deleted - Delete all devices As shown in the above figure, click on the menu bar on the right and select "Delete All". After the user confirms, all current IoT devices can be deleted
Delete Non IoT Devices
- Enter the device registration page
To access the device management page, please refer to Device Management
On the device management page, click the "Device Registration" button as shown in the following figure tip
tipThere are three types of registered devices on the device registration page, which are IoT devices by default. This module needs to switch to non IoT devices, as shown in the following figure
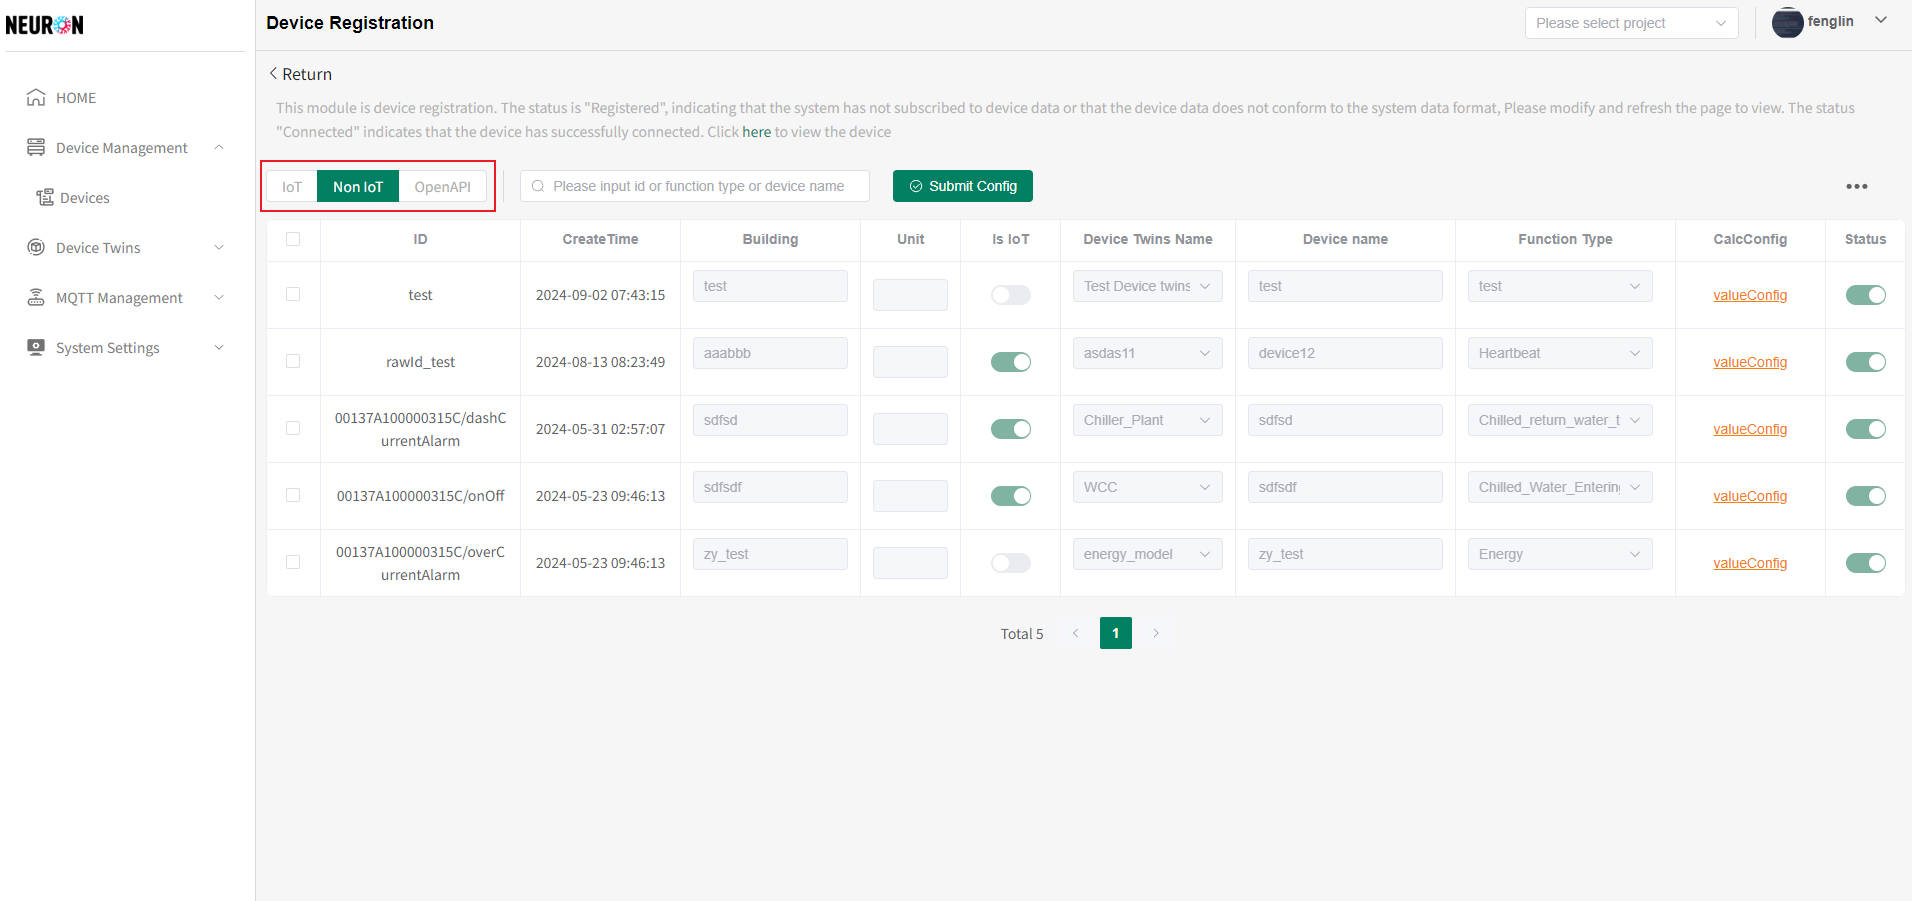
- Device deletion
tip
Device deletion supports both all device deletion and selecting device deletion
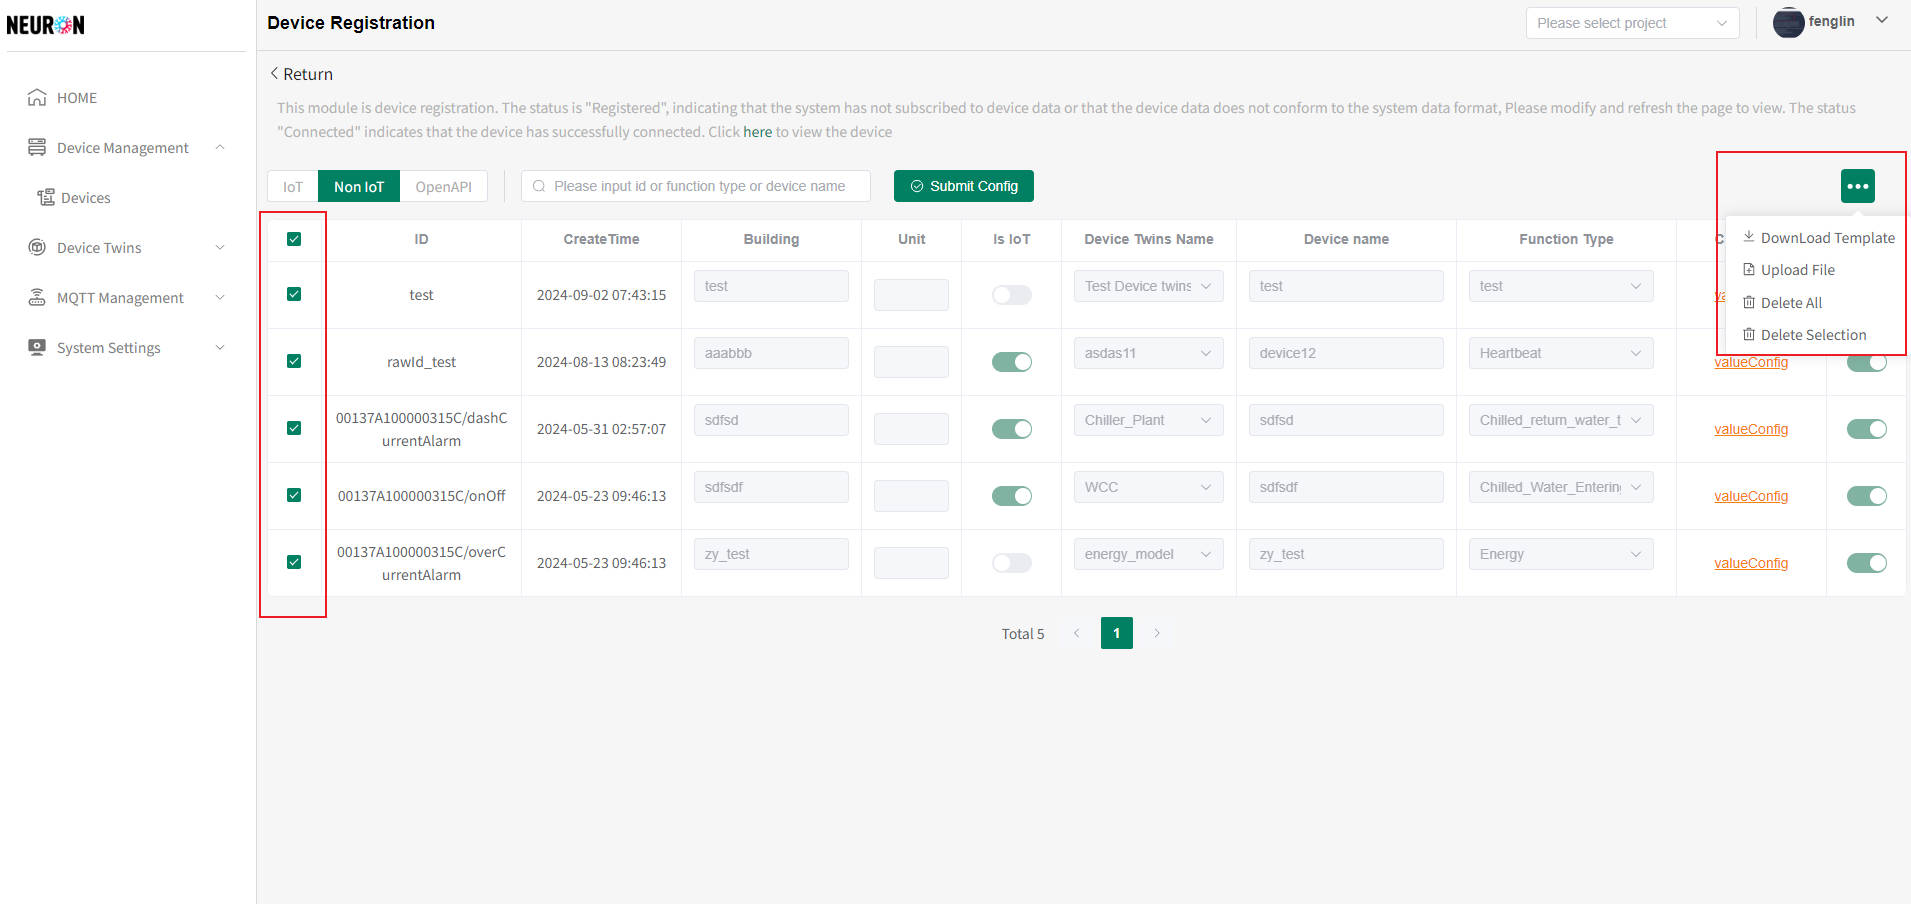
- Delete the selected device
As shown in the above figure, select the device that needs to be deleted, click on the menu bar on the right, choose "Delete Selection", and after the user confirms, the selected device can be deleted - Delete all devices As shown in the above figure, click on the menu bar on the right and select "Delete All". After the user confirms, all non IoT devices can be deleted
API access device deletion
- 进入设备注册页
To access the device management page, please refer to Device Management
On the device management page, click the "Device Registration" button as shown in the following figure tip
tipThere are three types of registered devices on the device registration page, which are IoT devices by default. This module needs to switch to OpenAPI type, as shown in the following figure
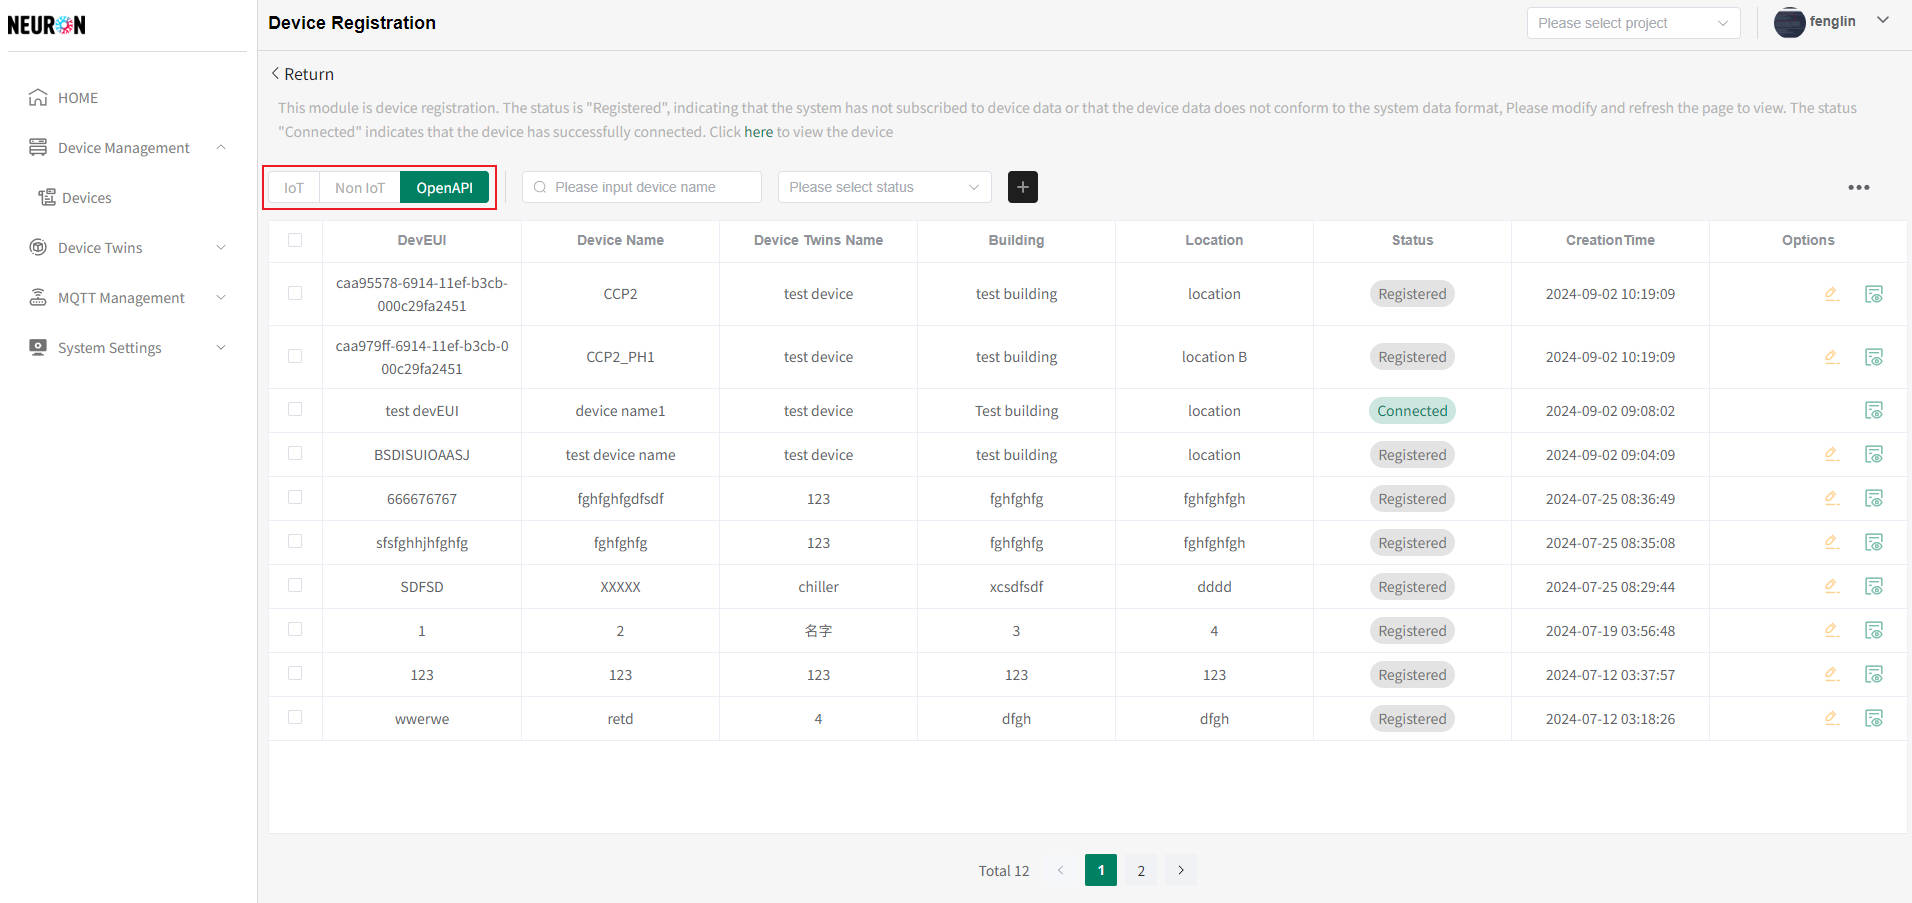
- Device deletion
Device deletion supports both all device deletion and selecting device deletion
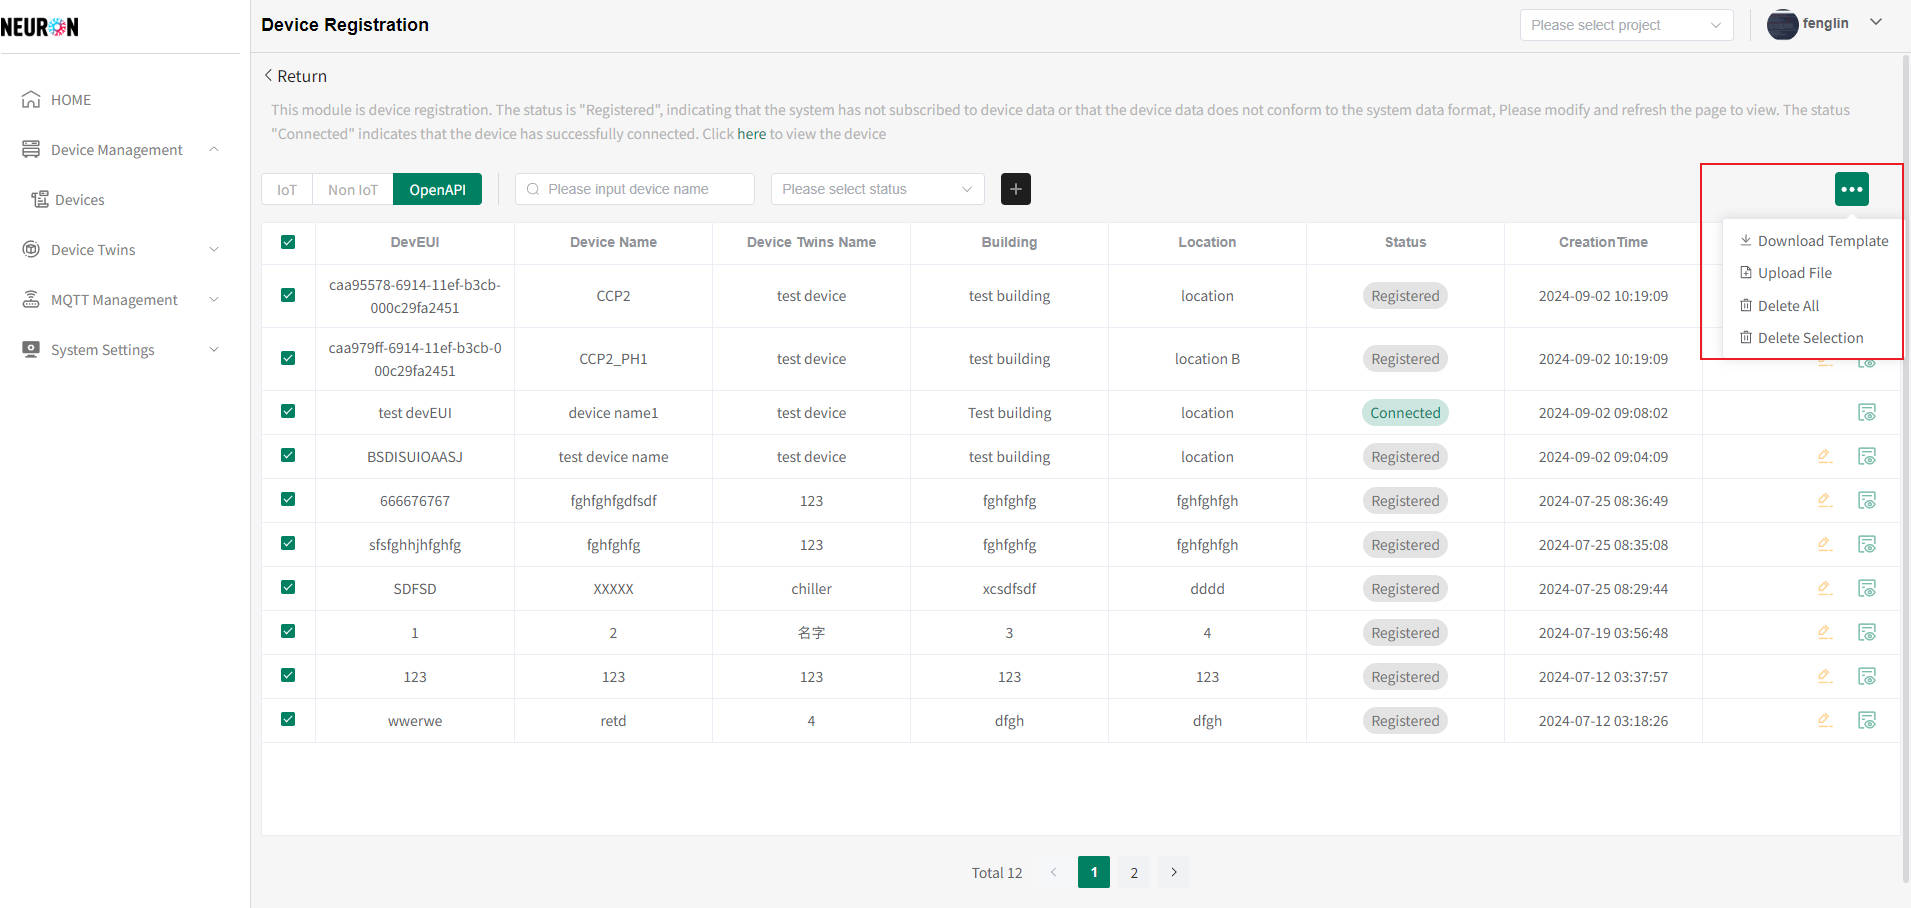
- Delete the selected device
As shown in the above figure, select the device that needs to be deleted, click on the menu bar on the right, choose "Delete Selection", and after the user confirms, the selected device can be deleted - Delete all devices As shown in the above figure, click on the menu bar on the right and select "Delete All". After the user confirms, all devices of API access type can be deleted
Device tags
The system supports two types of tags: device system tags and device project tags. The system defaults to system tags, and devices marked with system tags can be queried for their corresponding devices through their system, subsystem, device type, etc. Devices marked with platform projects and locations can be queried for their corresponding devices through platform projects and platform project locations, etc
System Tags
- Enter the device tab
Click on the "System Settings" menu bar, then click on the "Device Tag" button to enter the device tag module, as shown below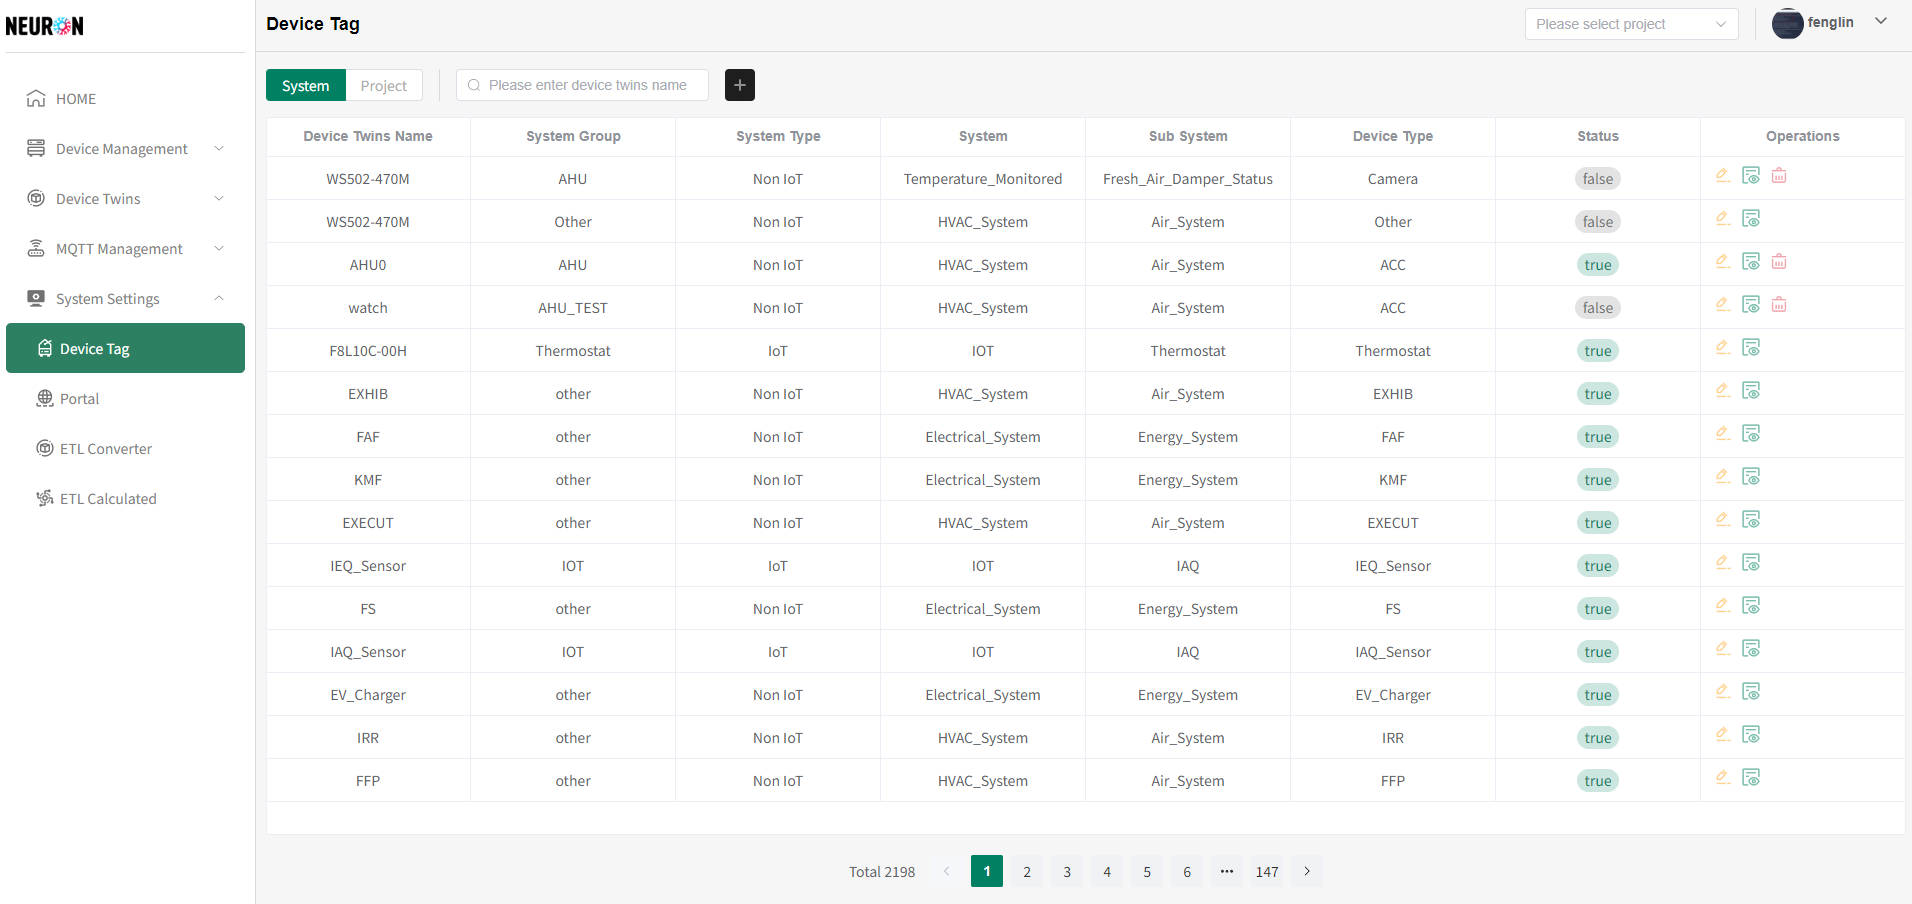
- System tag list
The system supports querying system label information for object models
Enter the object model to be queried, press enter to refresh the system tag list, as shown below
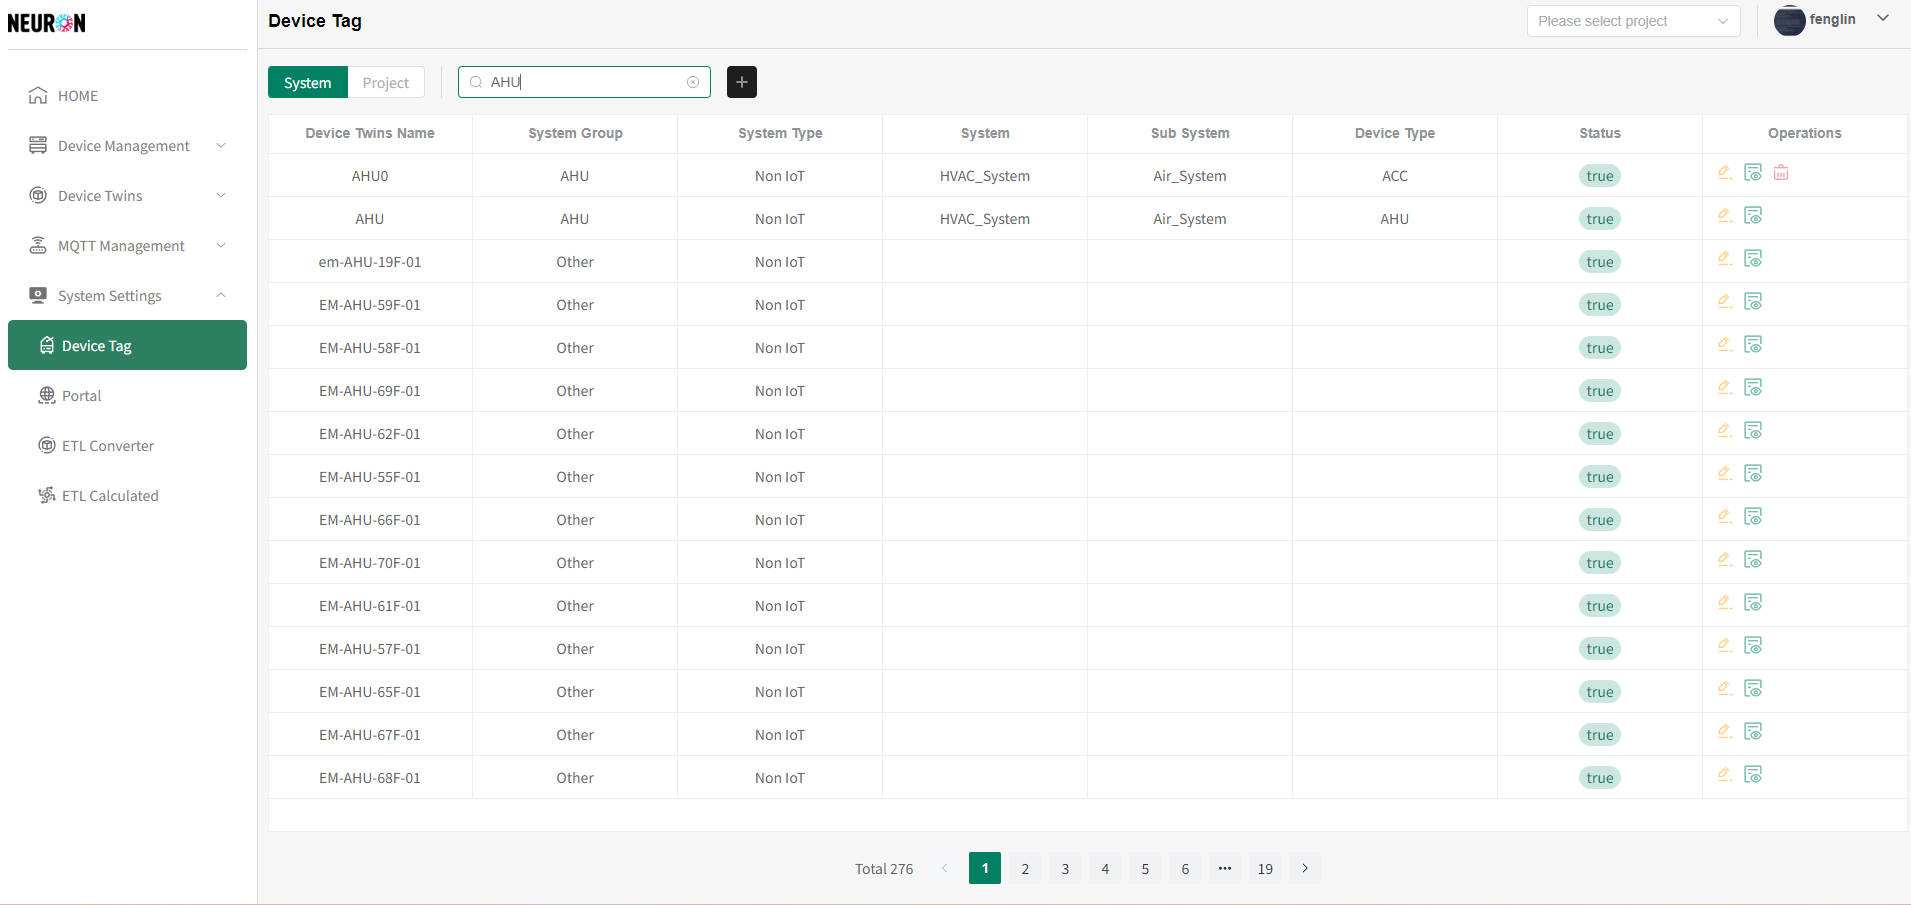
- Add a new system tag
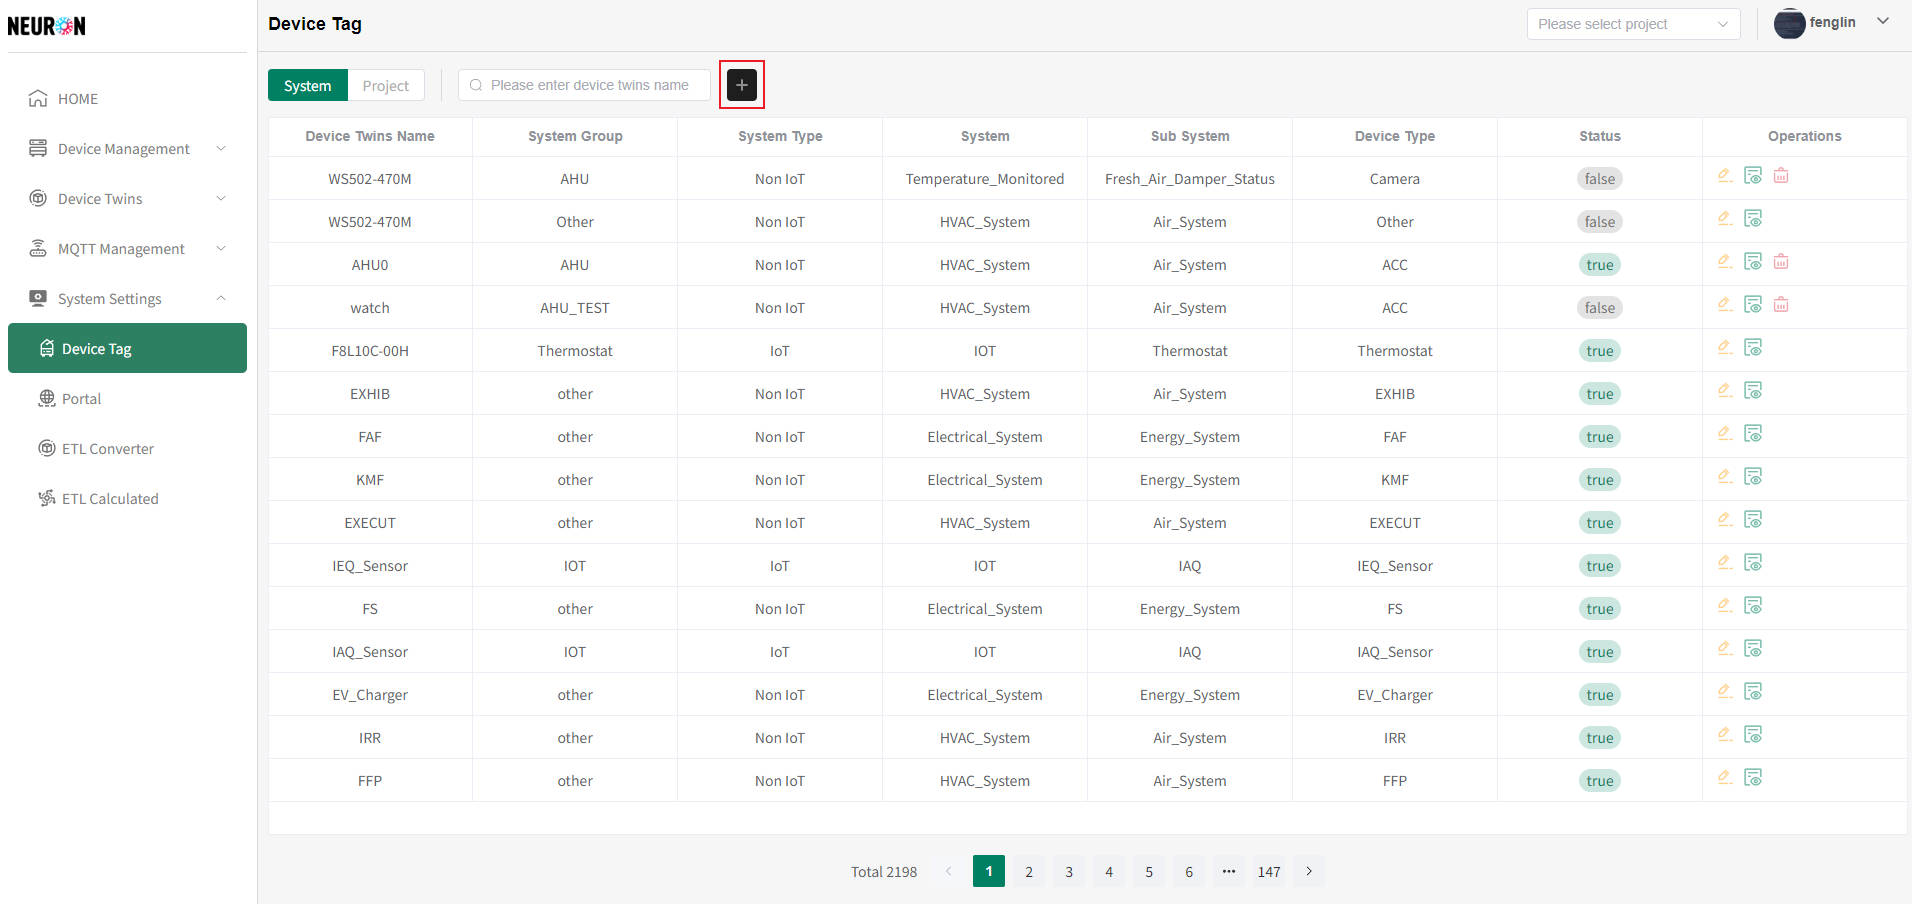 Click the "+" button in the following image to enter the system tab new page, as shown below
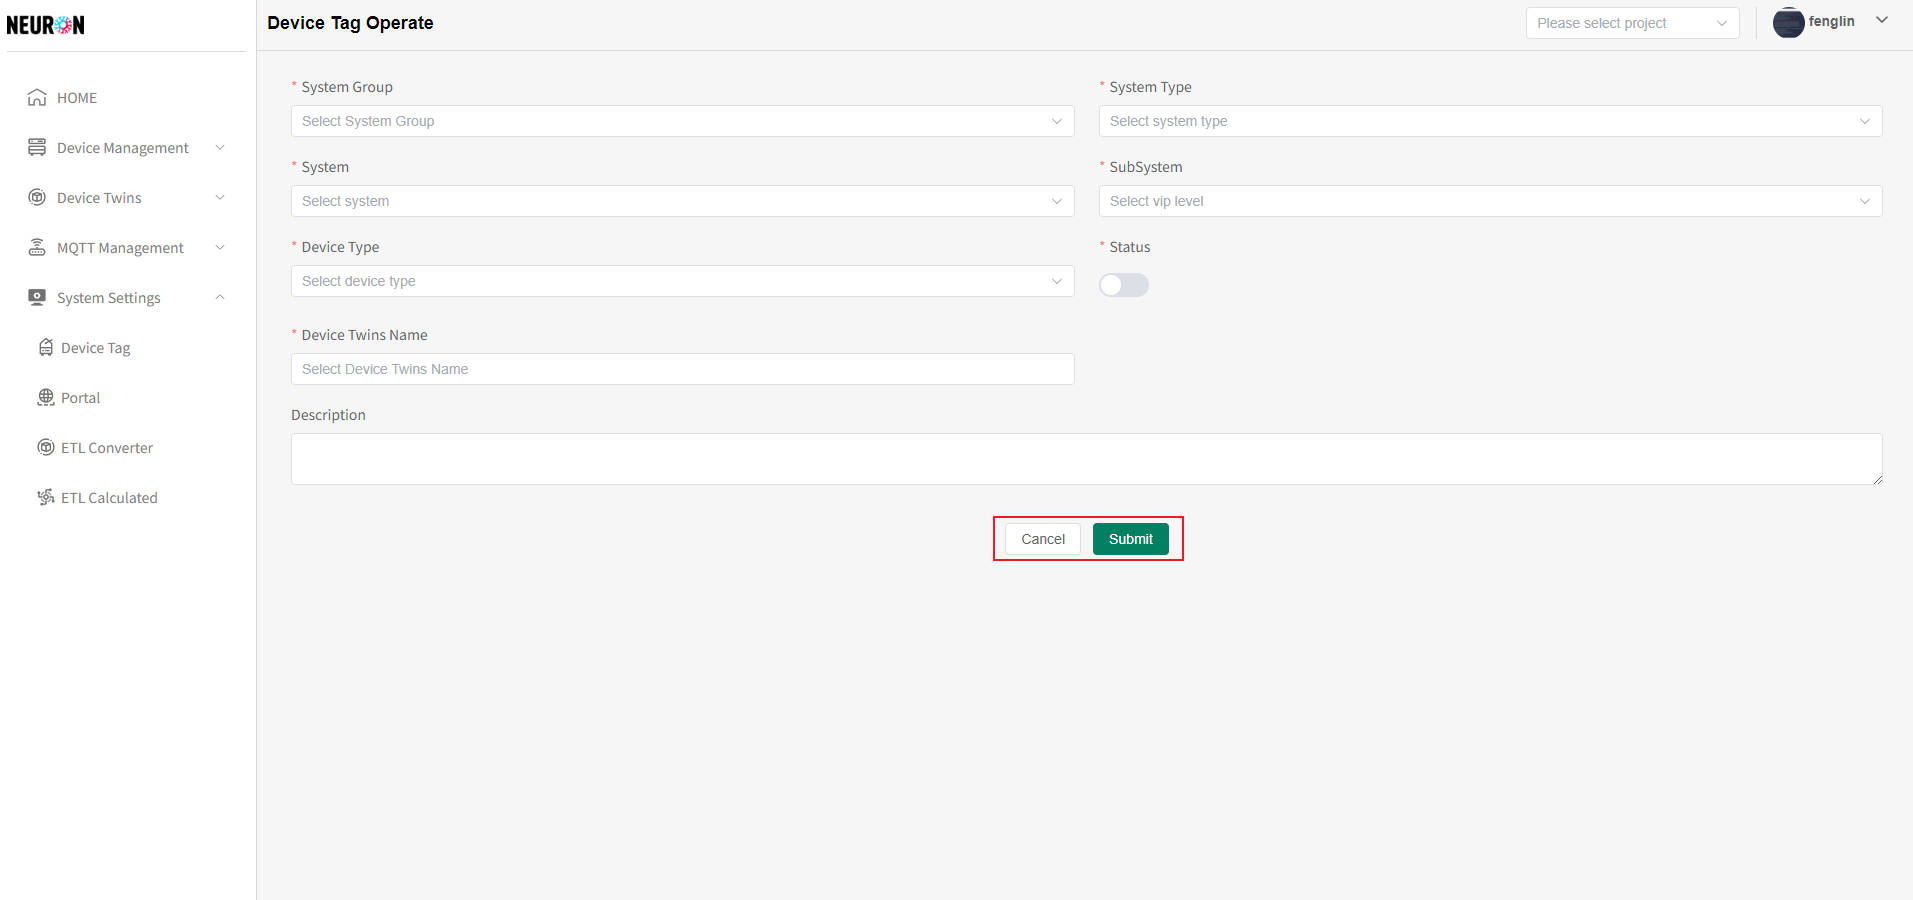
A physical model can be bound to multiple system labels, but if the data such as system, subsystem, system type, etc. has been marked (the system will verify), the addition will not be successful. You can modify it and try again
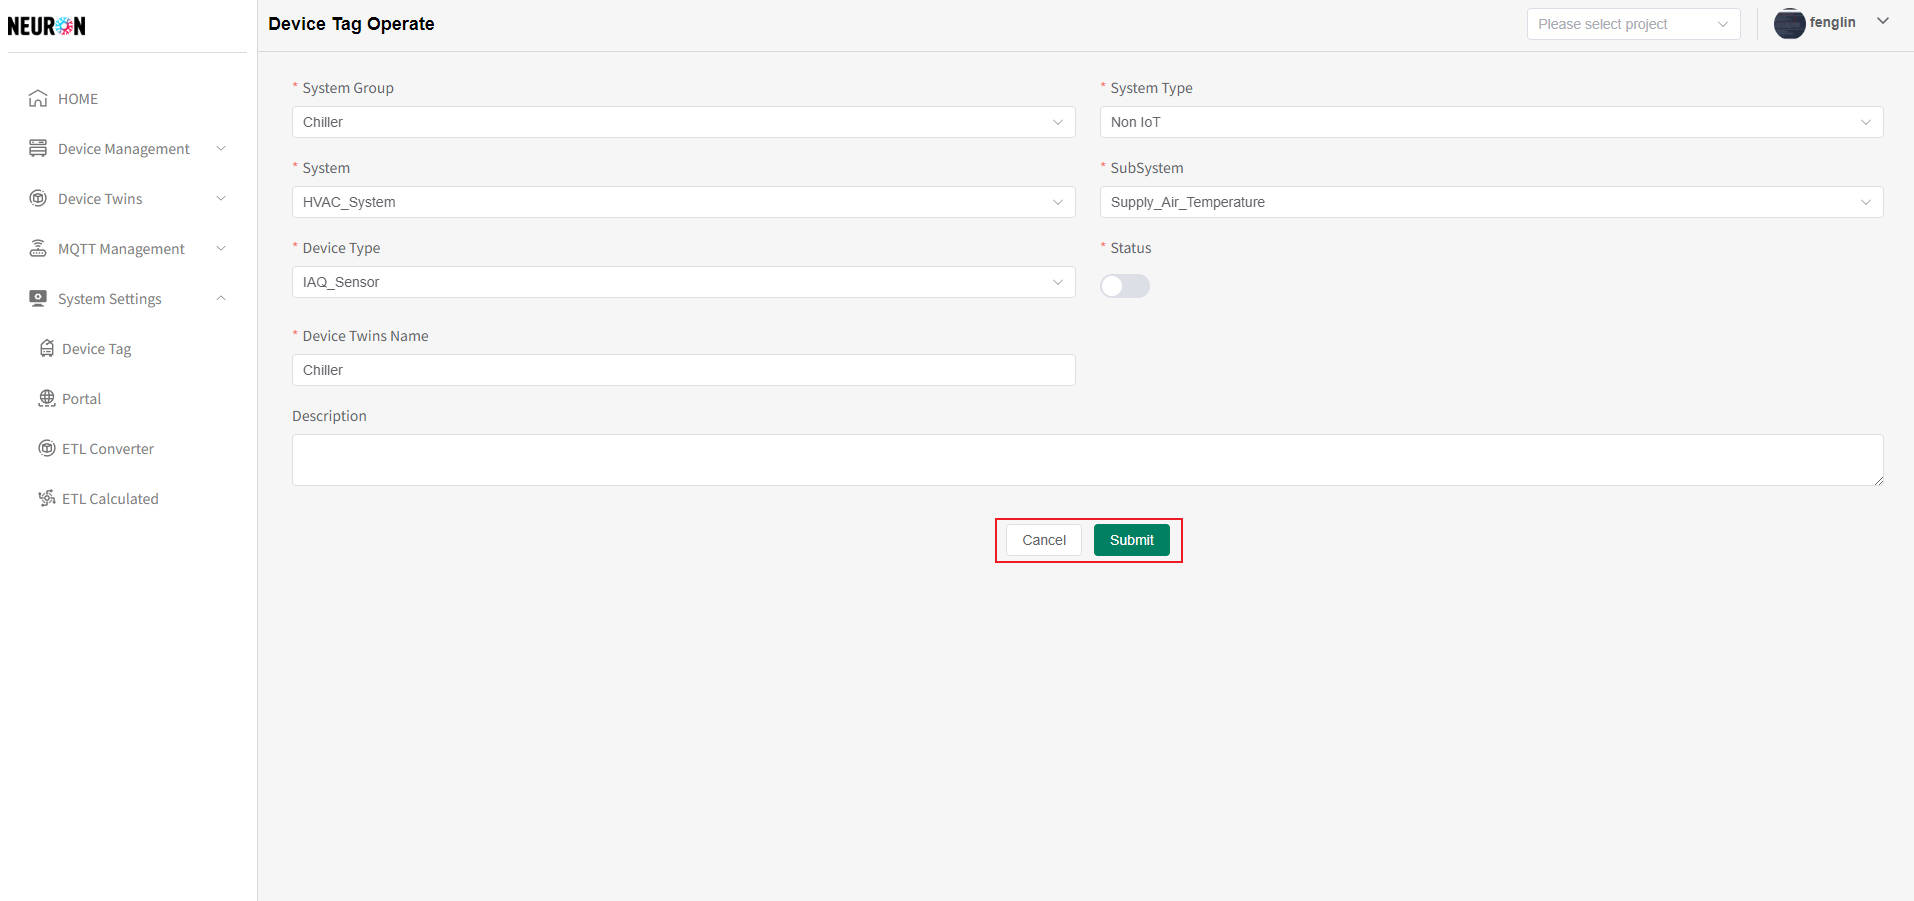 Fill in the required content and click submit to complete the addition of system tags
- Modification system tag
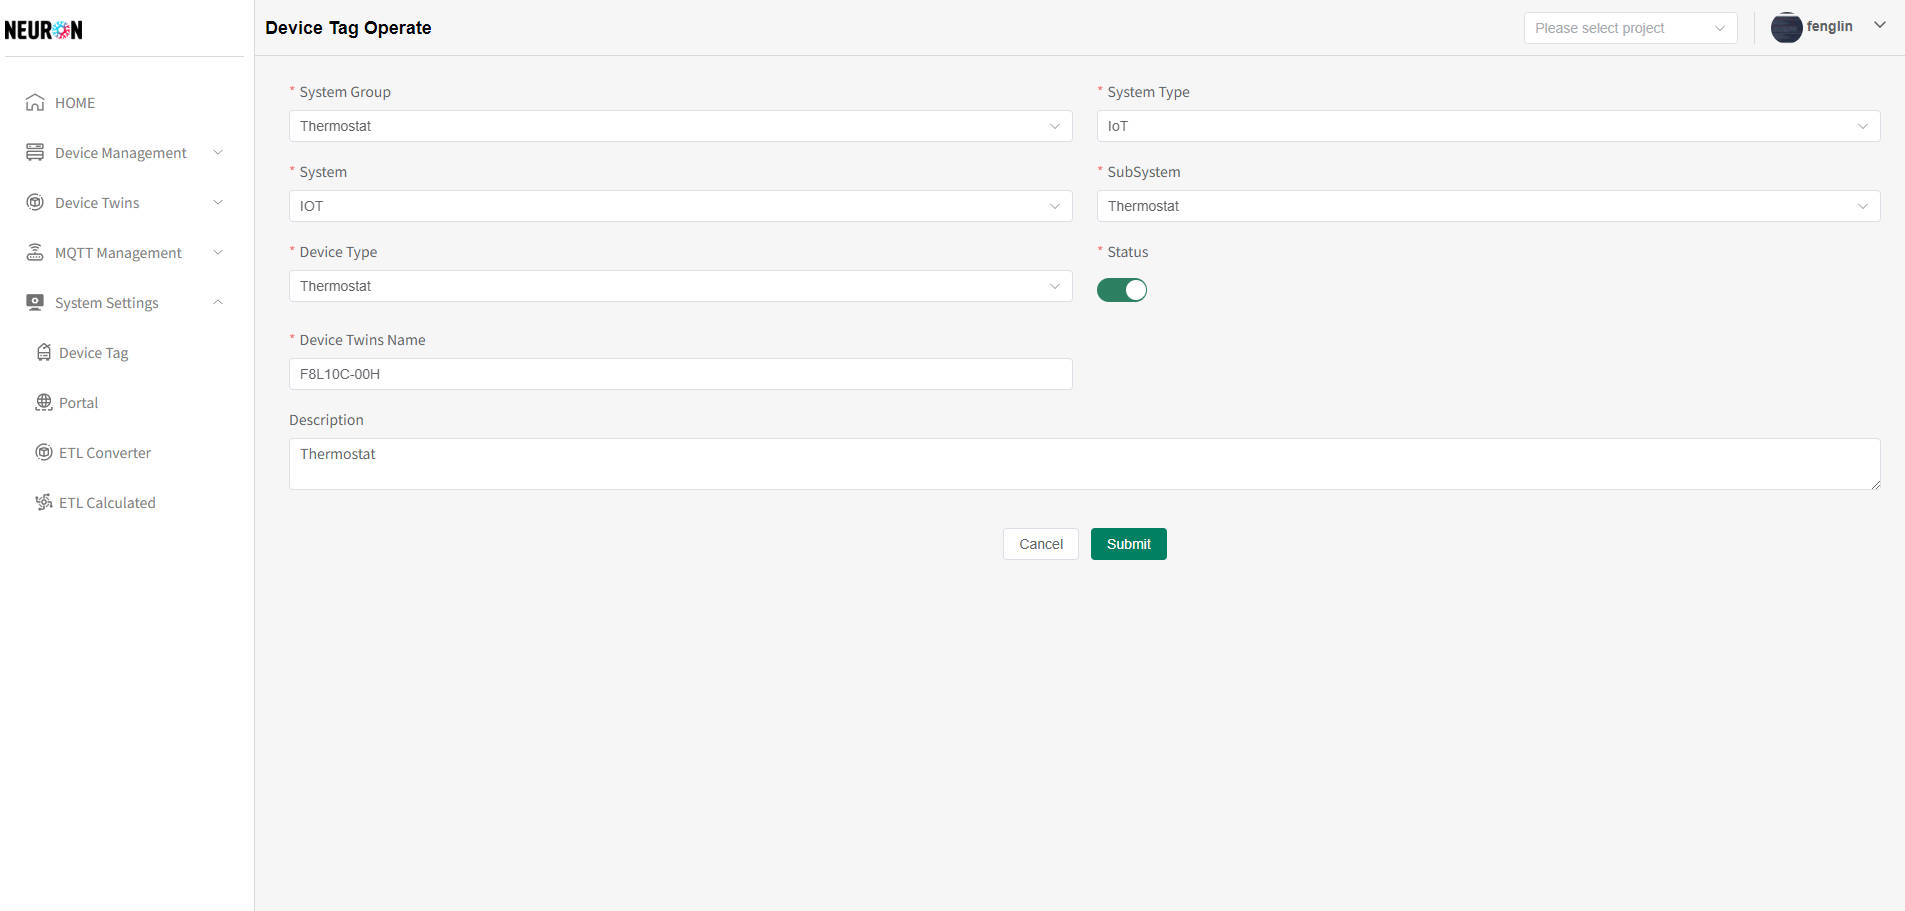
On the system label list page, click the "Edit" button to the right of the line number corresponding to the label to enter the system label modification page, as shown in the following figure
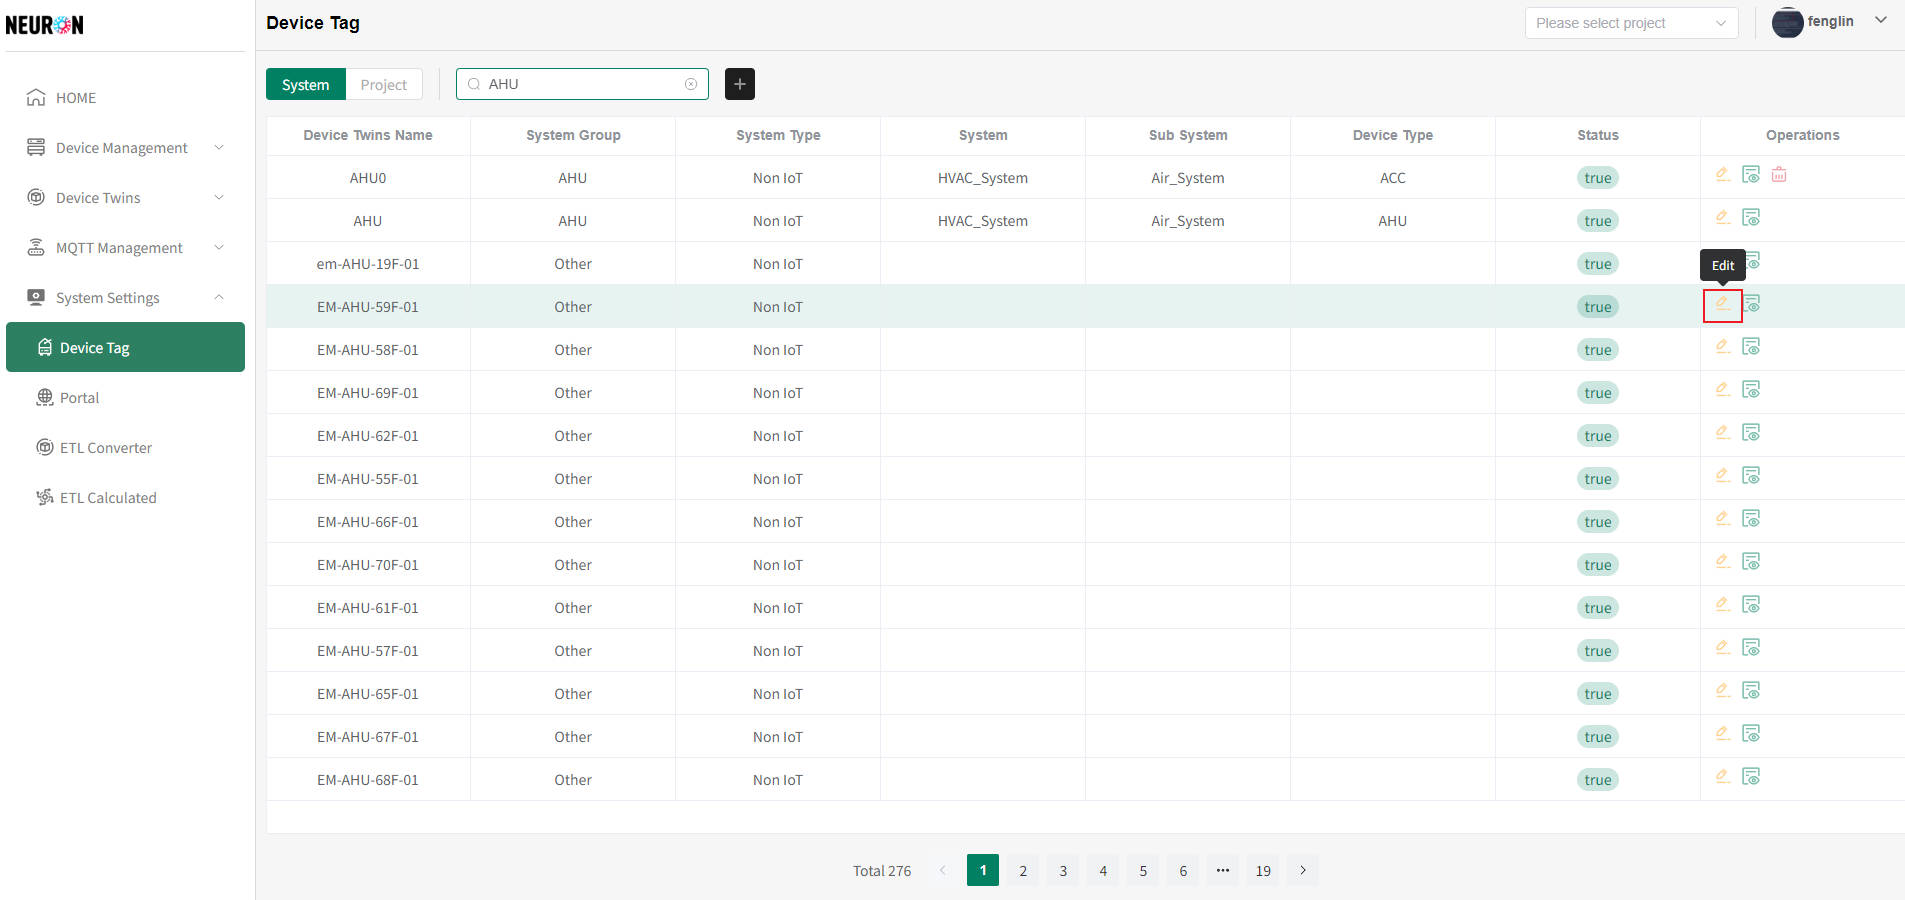 As shown in the following figure, modify the correct information and submit to complete the system label modification
- Deletion system tag
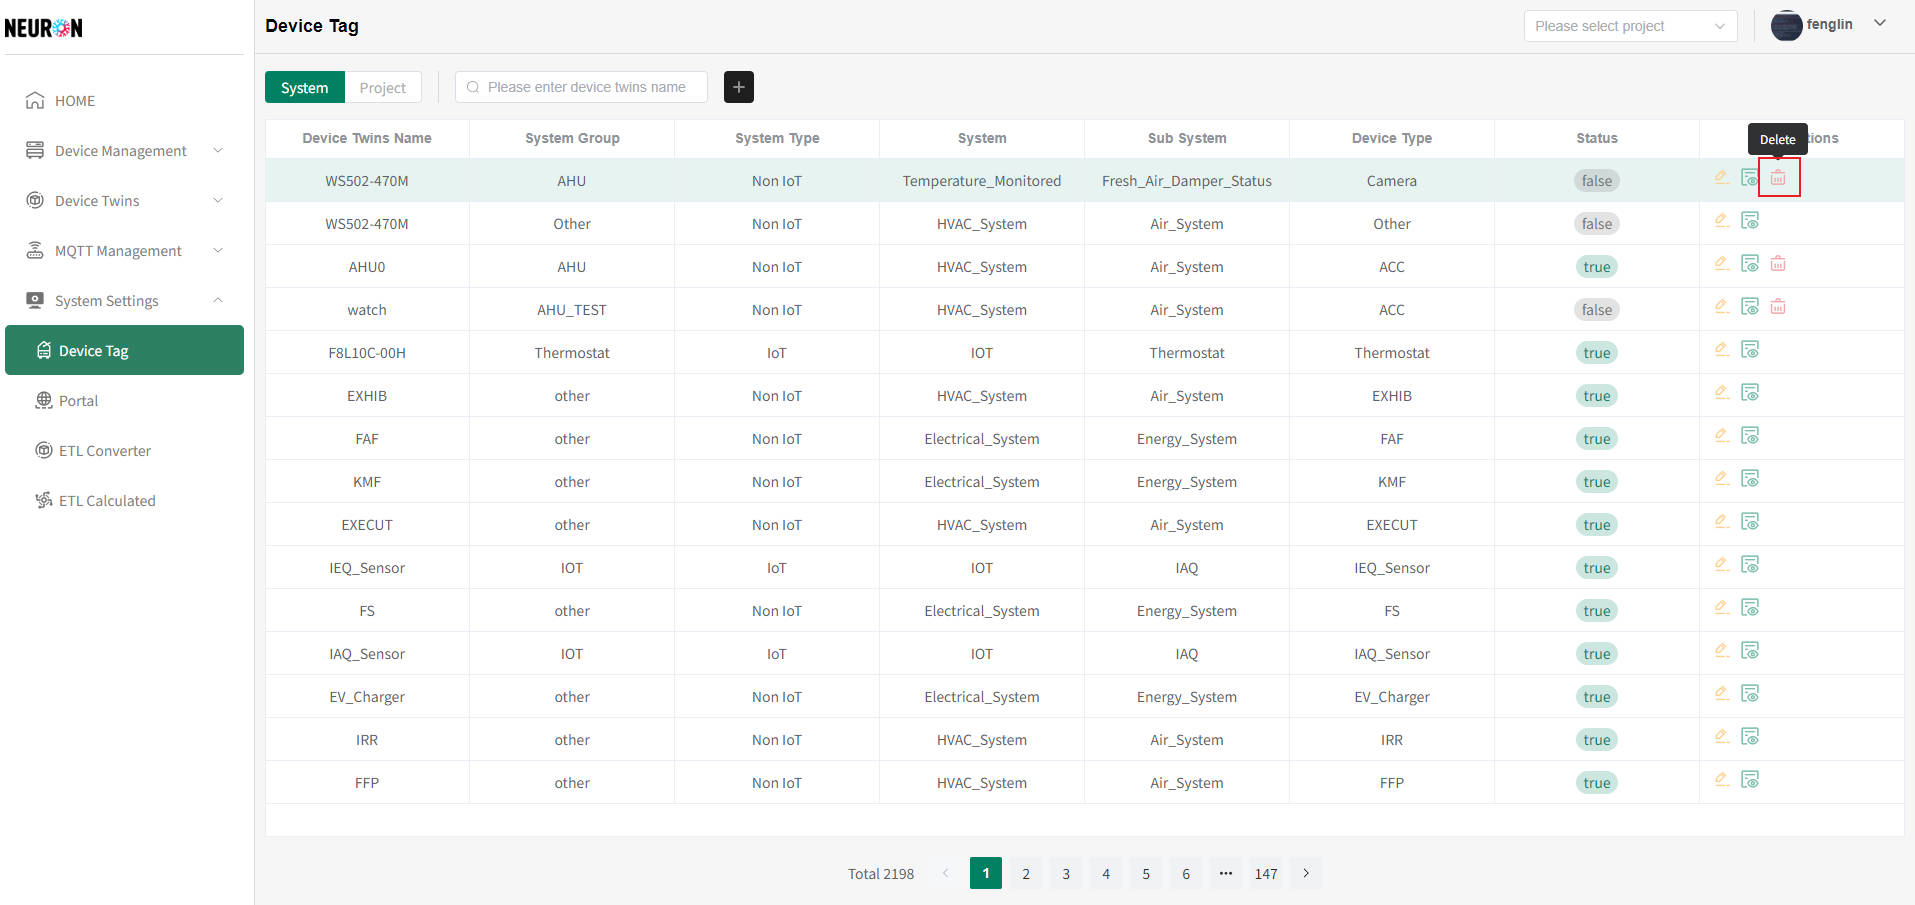
All system tags created by the tenant where the current user is located can be deleted
The "Delete" button on the right side of the line number corresponding to the label can be used to delete the system label after the user confirms, as shown in the following figure
Platform Project Tags
- Enter the device tab
Click on the "System Settings" menu bar, then click on the "Device Tag" button to enter the device tag module, as shown below
- List of platform project tags
Select the "Project" button to switch to the project tab, as shown below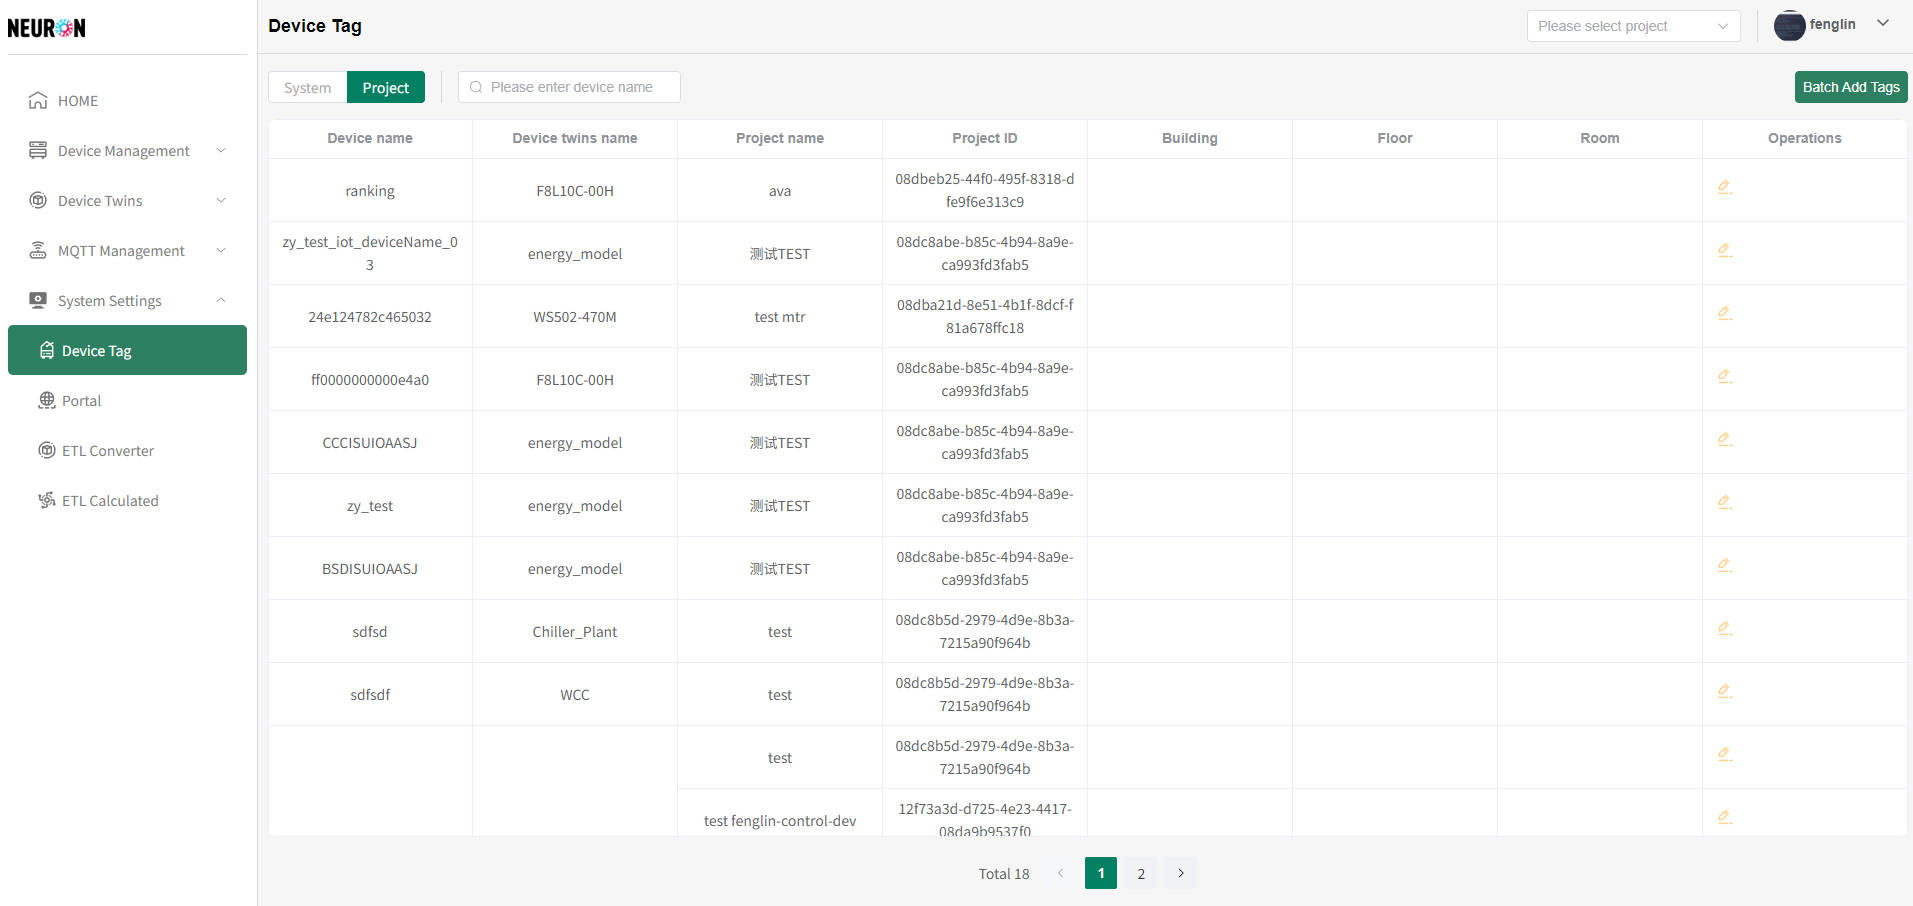
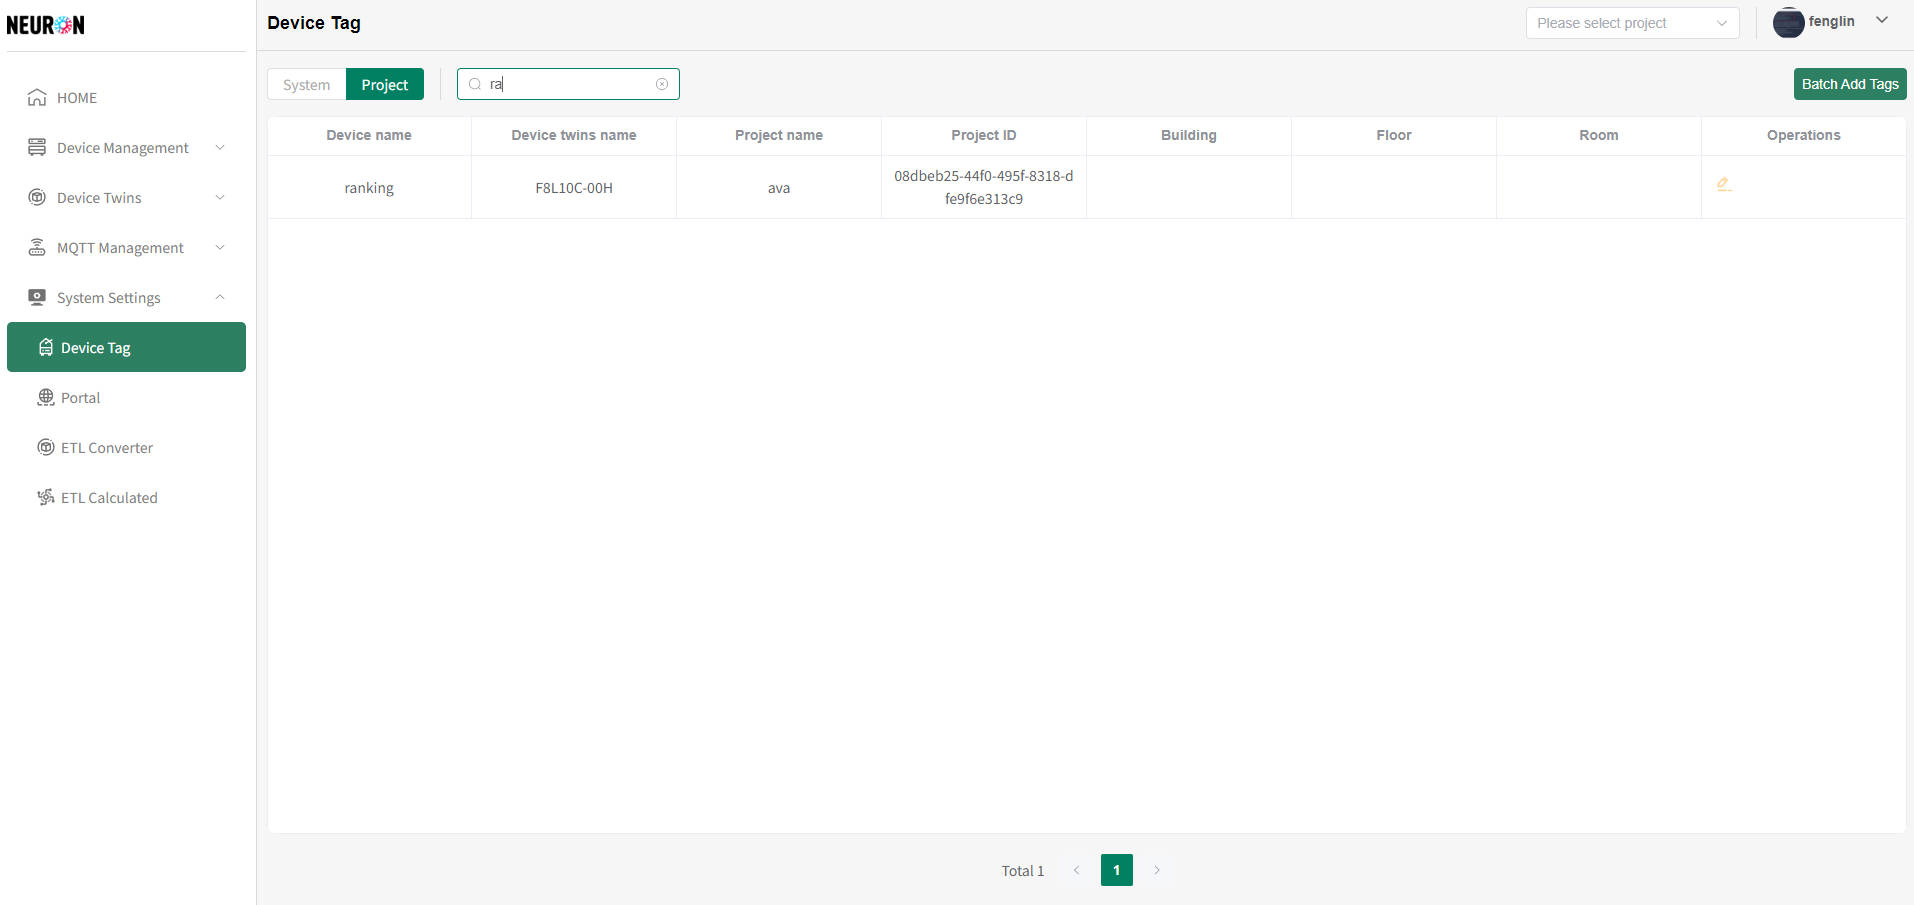
The platform project tag is the system project tag created by the bound Neuron platform user, which supports device name query
Enter the device name to be queried, press enter to refresh the project tag list, as shown in the following figure
The system supports two types of binding platform project tags: single device binding and multiple devices binding the same platform project tag
- Single device binding platform project tag
For the operation of binding platform project tags to a single device, please refer to Device Details/Device Tags - Multiple device binding platform project tags
On the platform project tab, click the "Batch Add Tags" button, as shown below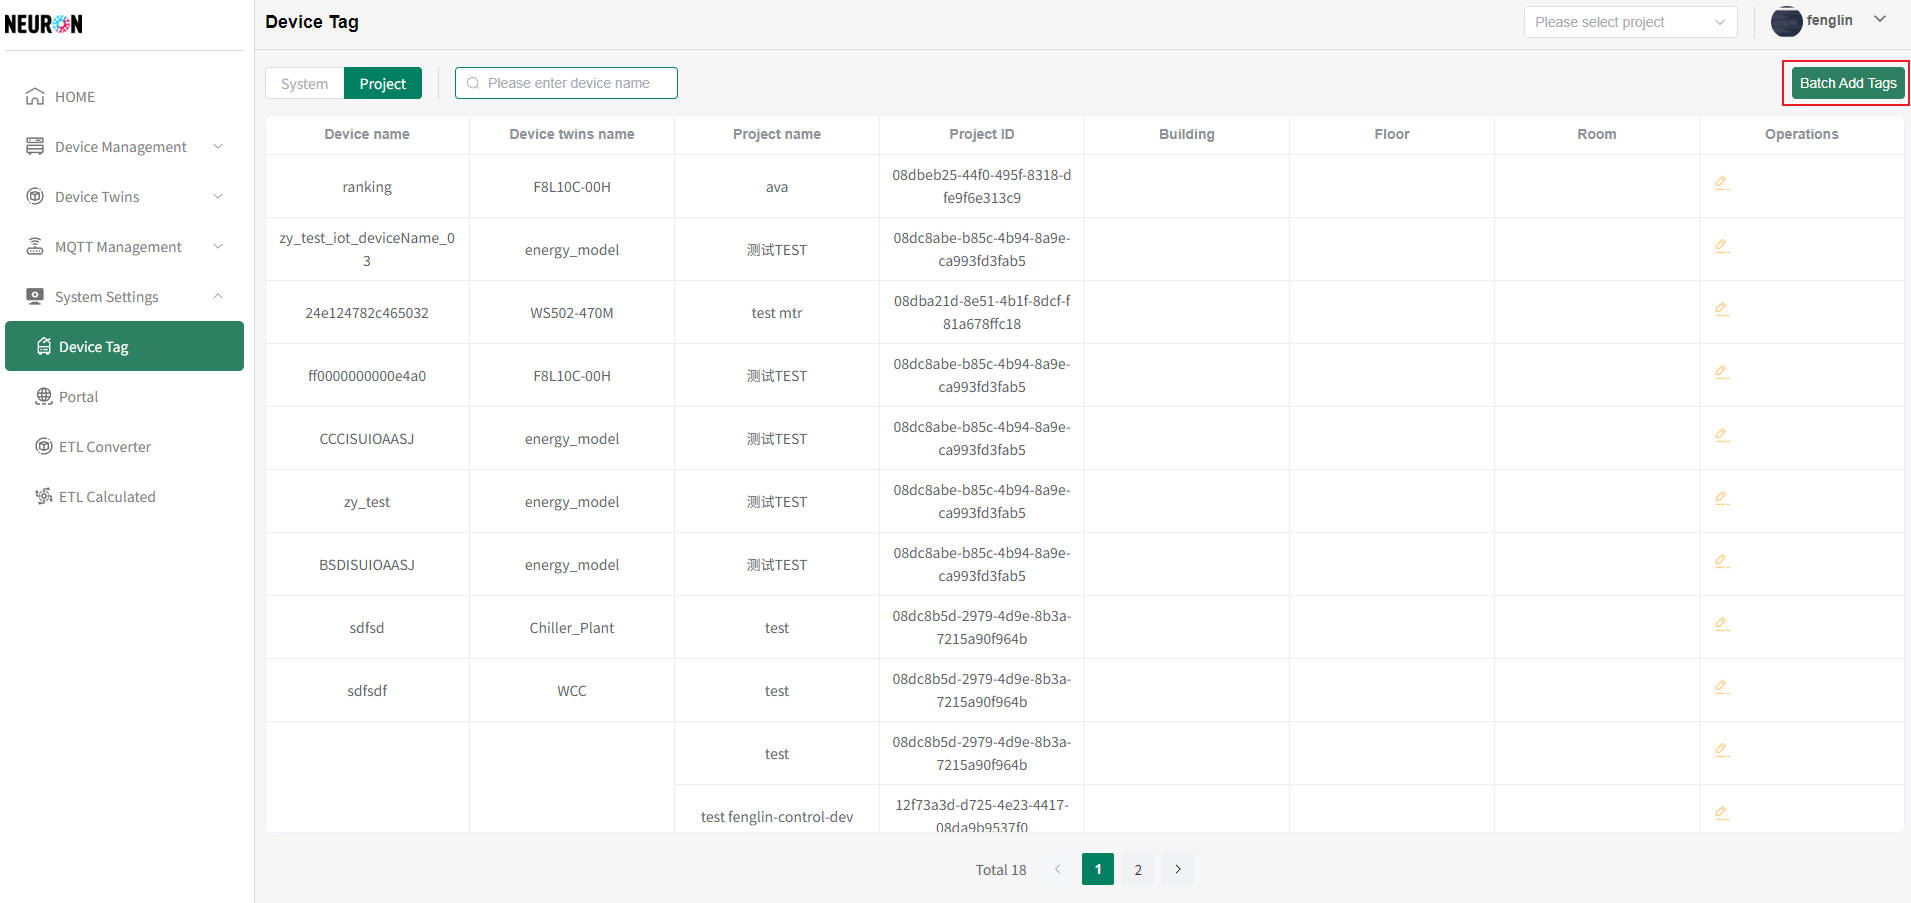 Enter the tag configuration page for multiple device binding platform projects, as shown in the following figure
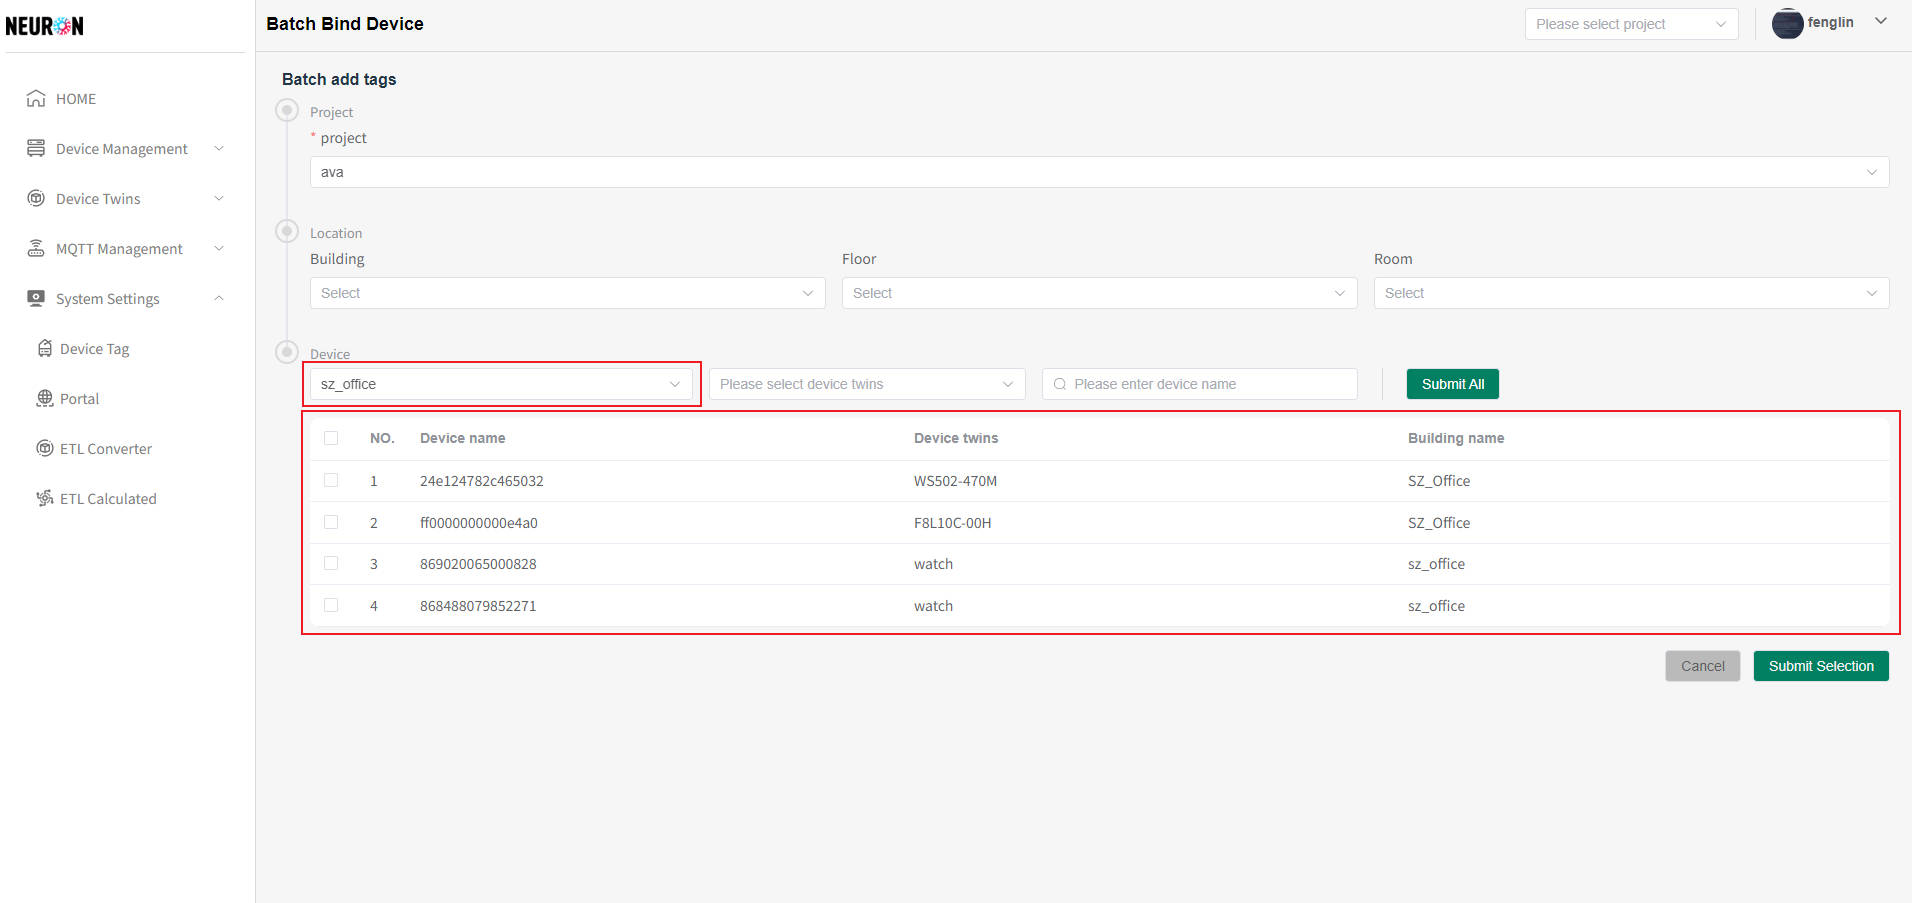
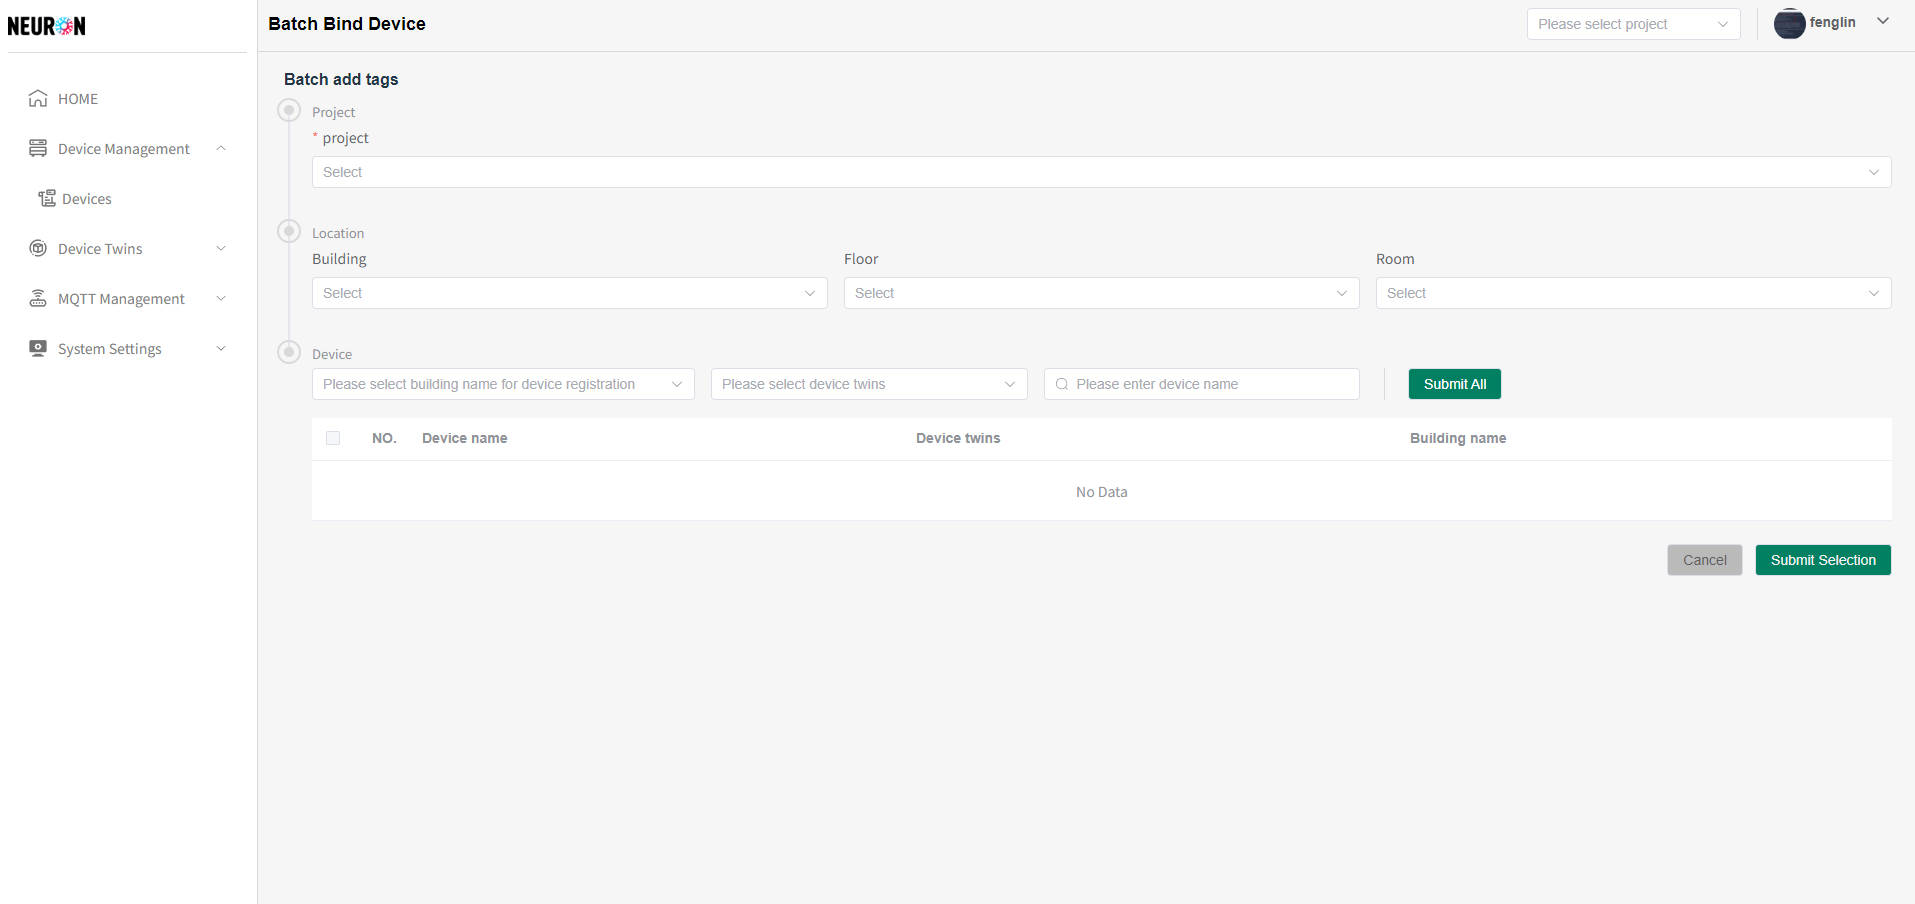 Select the platform project that needs to be bound, and the system will list all devices that have not been bound to the project, as shown in the following figure
 As shown in the above figure, you can search for the required equipment according to your needs
The system supports device data access to buildings, device object models, and device name dimensions for search
Taking device data access to buildings as an example, as shown in the following figure, selecting the building to be queried will refresh the device list
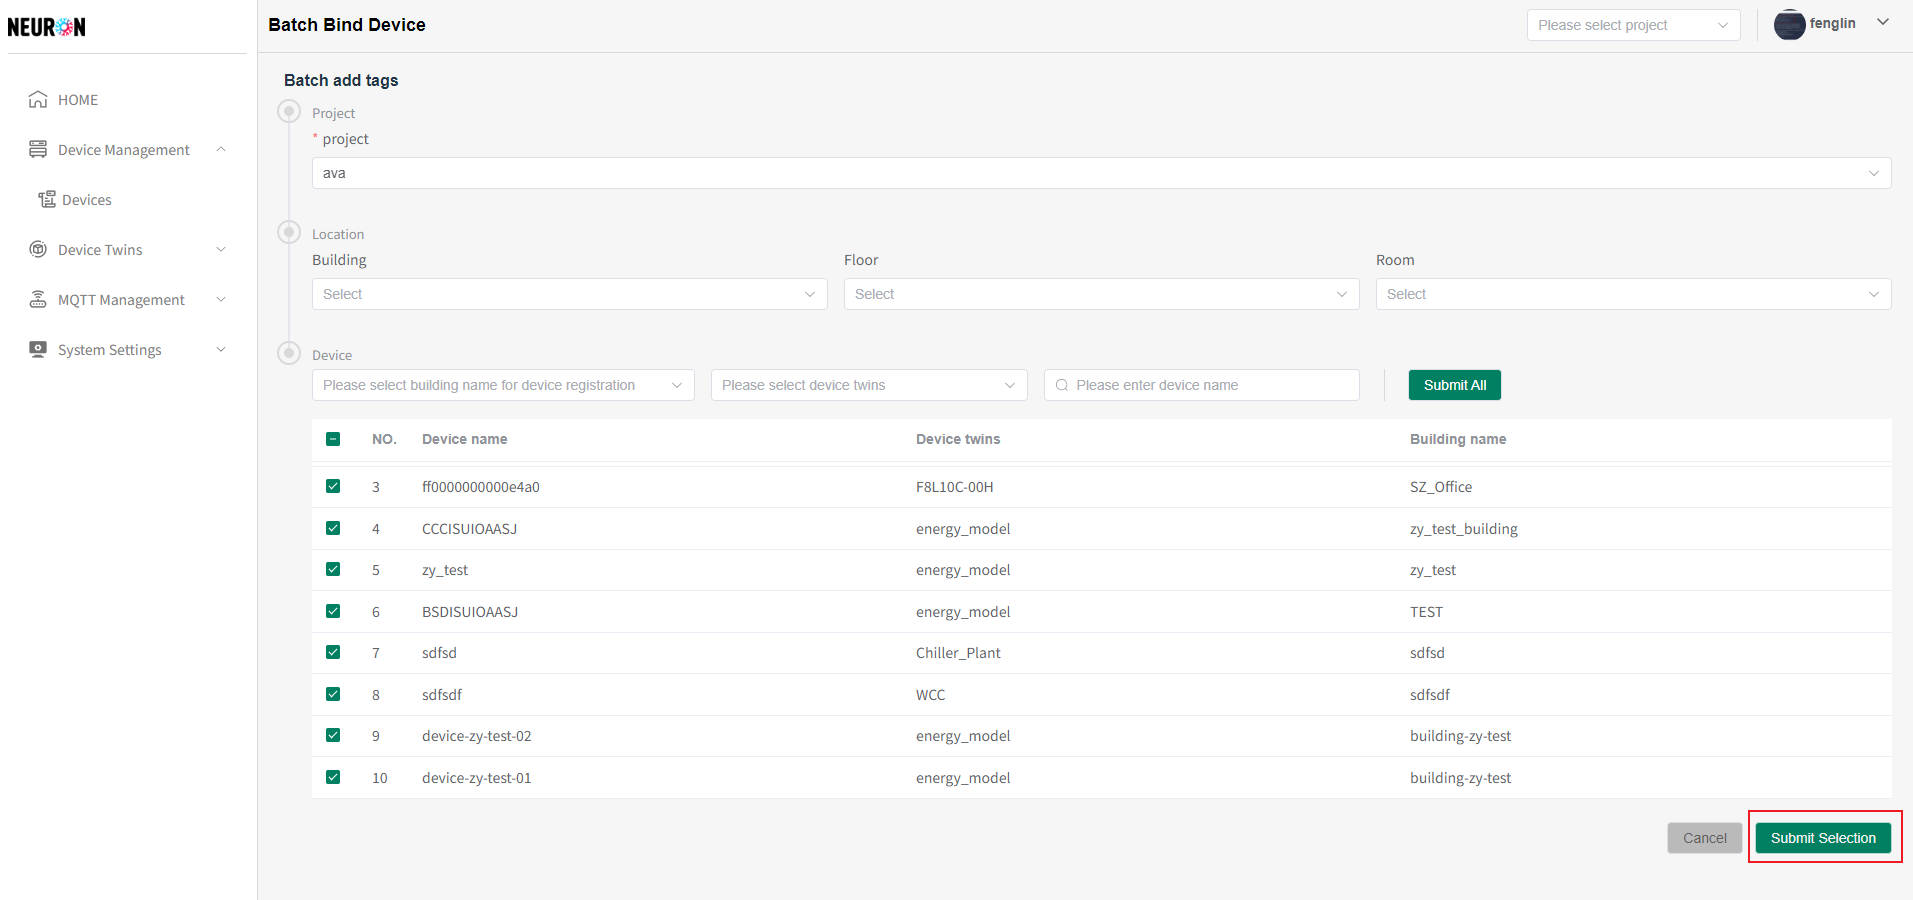
The system has two buttons for binding projects (Submit All, Submit Selection), After submission, all operated devices can be bound to the platform project selected by the user
Submit All:Refers to submitting all devices that meet the criteria and can be operated according to the requirements
Submit Selection:Refers to submitting all the devices selected by the user, which can be operated according to the requirements
When binding a project, you can also bind location information under the platform (this operation will affect multiple devices, please be cautious)
If the binding is incorrect, you can delete the information on the list page or modify the information on the device details page
- Bind platform project information based on the selected device
Device selection supports cross page selection
Users can search for the required devices according to their own needs, check the corresponding devices, and click "Submit Selection" to assign the selected devices to the platform project selected by the user, as shown in the following figure
- According to the selected device binding platform project information
Users can search for the required devices according to their own needs, click "Submit All" to bind all eligible devices to the platform project, as shown in the following figure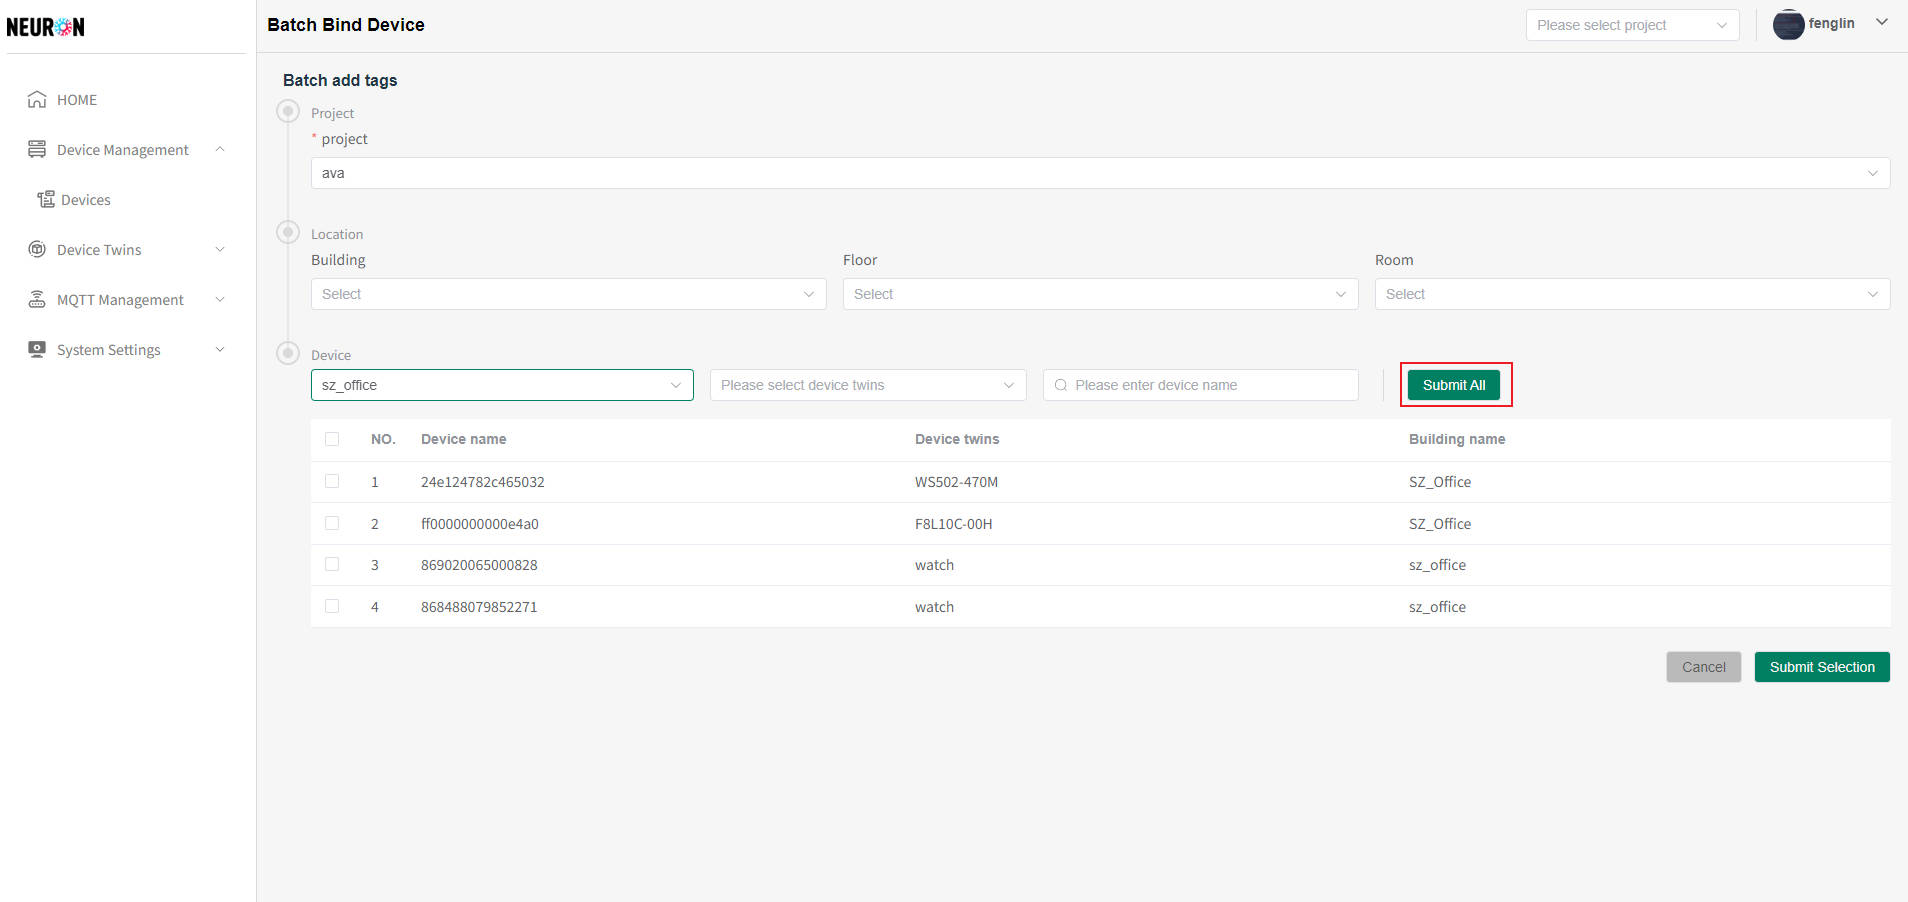
- Delete device platform project tag
Only project administrators and super administrators can unbind the project
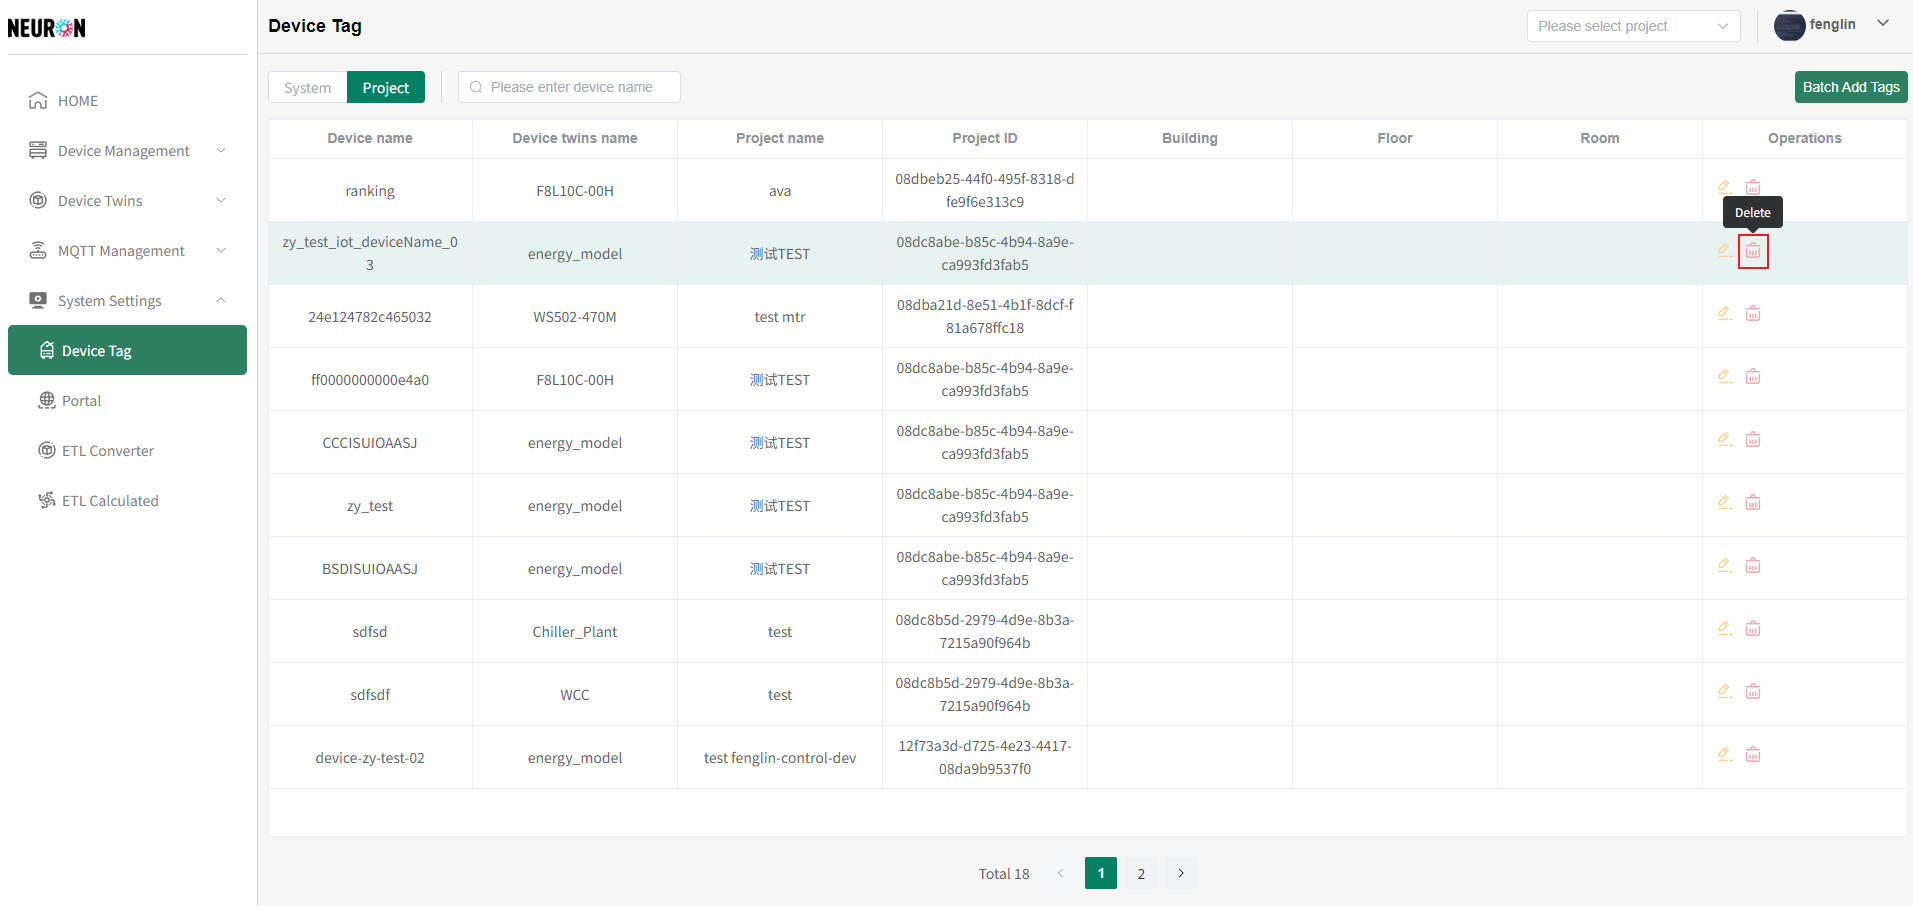
On the device tag list page, click on the right side of the row where the device that needs to unbind the project is located, click the "Delete" button, and after the user confirms, the binding between the device and the platform project can be deleted, as shown in the following figure
